How to Bulk Update Shopify Product SKUs

Having multiple products on your online storefront is often associated with extended e-commerce opportunities and, at the same time, headaches. Especially when you need to update Shopify product SKUs.
By default, the system doesn’t let you apply changes to your catalog items in bulk. You need to do that manually on a per-product basis. The more products you have in Shopify, the more time and effort you need to spend. With the , however, you can easily bulk update your product SKUs. So, let’s take a look at how to update your Shopify product SKUs in bulk.

Table of contents
How to Get Product SKUs in Shopify
First of all, you need to get your product SKUs in a single table. Although Shopify lets you export them, the default transfer procedure is quite limited. First of all, it lets you transfer only CSV files, which is not very convenient. Secondly, you are bound to standard file downloads. The Import & Export Tool, on the other hand, lets you export products along with their SKUs as XML or XLS files. Alternatively, you can transfer this data straight to a Google Sheets spreadsheet.
Furthermore, the selection of your file destinations is a little bit more flexible than the one Shopify offers. You can transfer your product data over FTP, move it to Google Drive, or, as we’ve just mentioned, export it straight to Google Sheets.
Let’s see how to get product SKUs in Shopify with the Import & Export Tool.
Step 1: Create a New Export Profile
You can create a new export profile under your Shopify Admin -> Apps -> Firebear Import & Export Tool -> Export by clicking the New Profile button.

Step 2: Choose File Format & Export Source for Your Product SKUs
The Configure export screen lets you configure some basic parameters of your Shopify product SKU export, such as file format and file source:
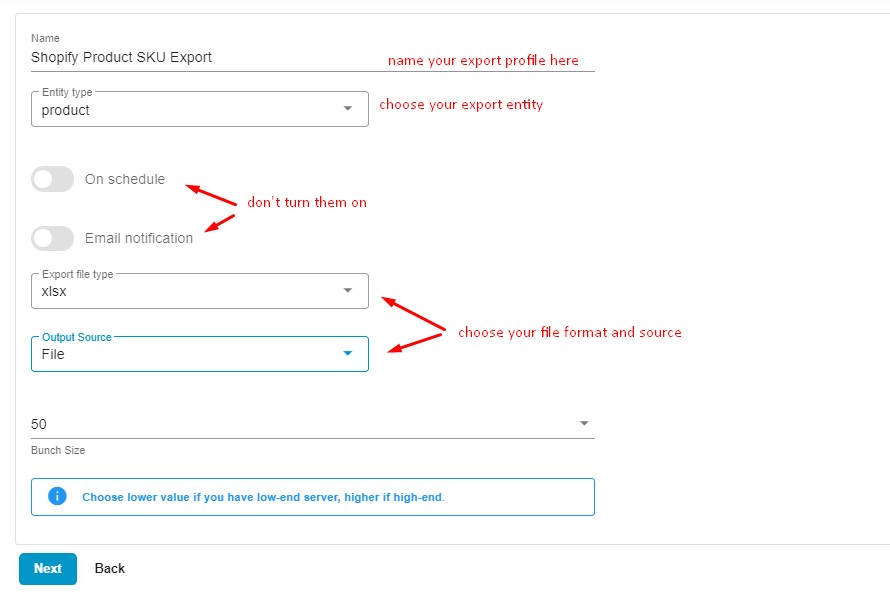
- Specify a name for your profile, for instance, Shopify Product SKU Export.
- Choose an export entity – Products.
- Keep the On Schedule toggle off. You don’t need to automate your SKU export because it is not a regular procedure.
- There is also no need to configure email notifications.
- Now, select your preferred file format. Let’s choose XLSX due to its convenience and flexibility.
- Now, choose File as your export source. Alternatively, you can transfer the exported file over FTP or get your product SKUs straight on Google Drive.
- If your server has limited resources, choose a lower bunch size to reduce the load.
- Click Continue to proceed to the mapping screen.
Step 3: Reduce The Number of Columns
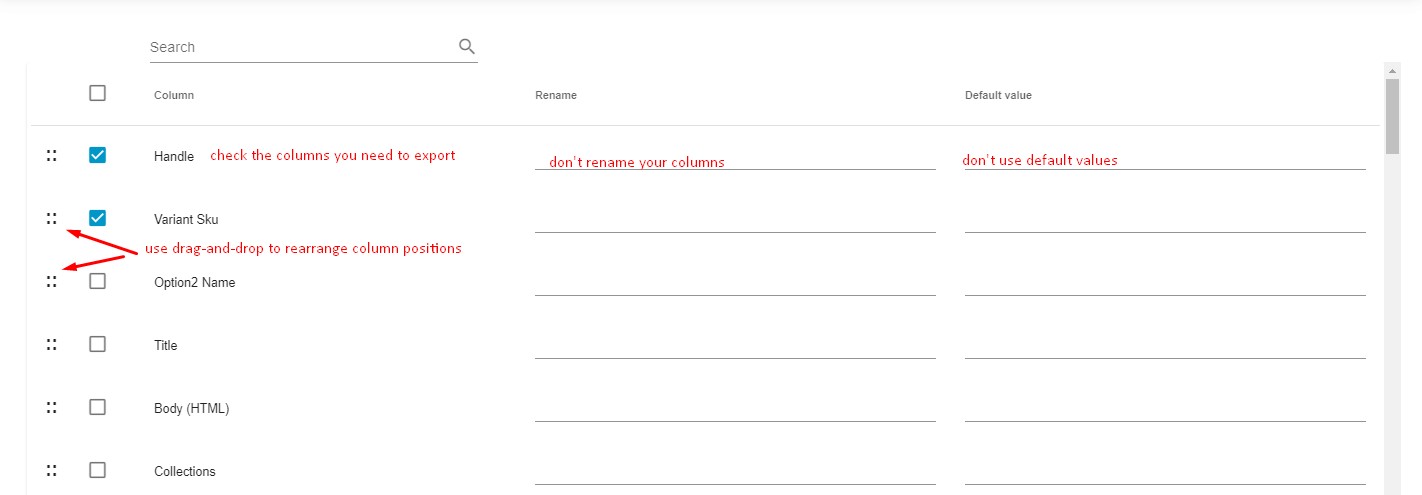
Exclude the columns that you don’t need. On the mapping screen, you can reduce the selection of the exported columns to the following minimum necessary for your Shopify product SKU bulk update:
- ID;
- Handle;
- Variant ID;
- Variant SKU.
You can use the drag-and-drop functionality to combine these columns.
Step 4: Filter Out The SKUs You Need
You can use filters to narrow down the selection of exported products. For instance, you may need to export items associated with a particular vendor. In this case, click the + icon, choose Vendor as your filtering parameter, and type a vendor’s name.

Step 5: Get Product SKUs
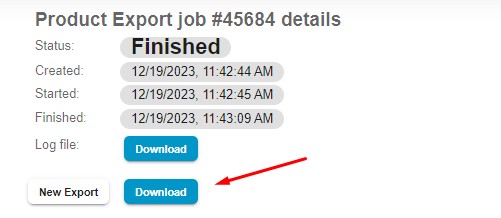
Now, you only need to click the Export button to initiate your Shopify product SKU export. You will be able to download your data file when the export procedure is complete.
How to Edit Shopify Product SKUs in Bulk
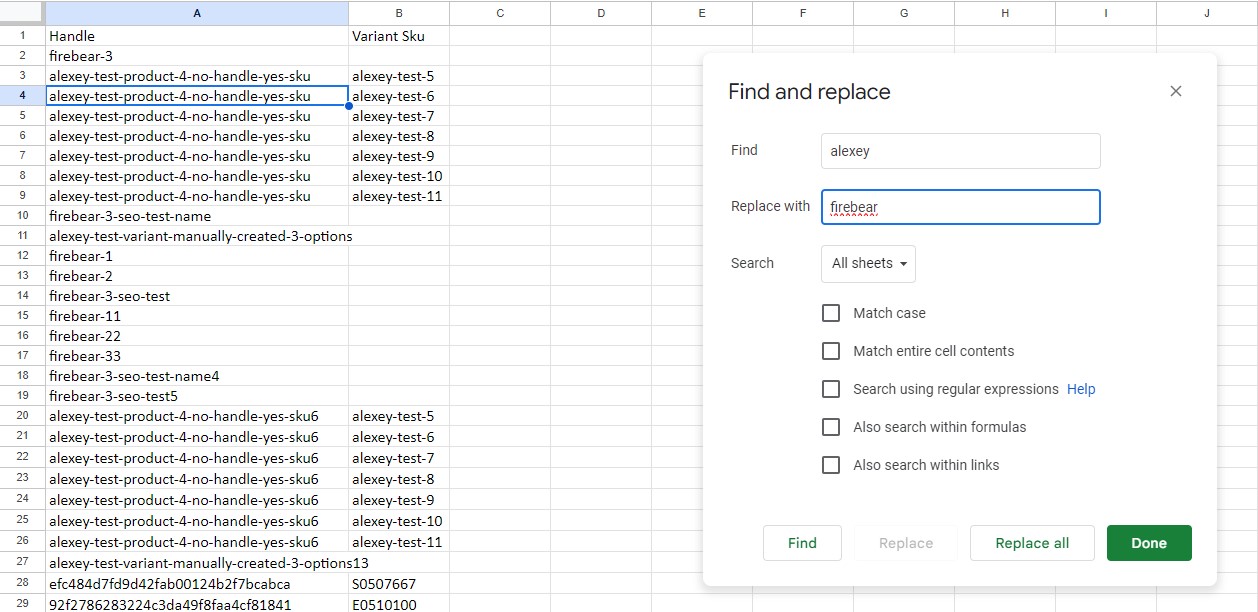
At this stage, you need to open the exported file in a spreadsheet editor, apply changes to product SKUs, and save the table.
How to Bulk Update Shopify Product SKUs
Now, let’s see how to update your product SKUs in bulk. In a nutshell, you need to re-import the file you’ve just edited back to Shopify. Follow these steps to do so:
Step 1: Create a New Import Profile
Start by creating a new import profile. Go to Apps -> Firebear Import & Export Tool -> Import and hit the New Profile button.

Step 2: Configure Basic Import Settings
On the Select File screen, you need to configure basic export settings to bulk update product SKUs on your Shopify storefront:
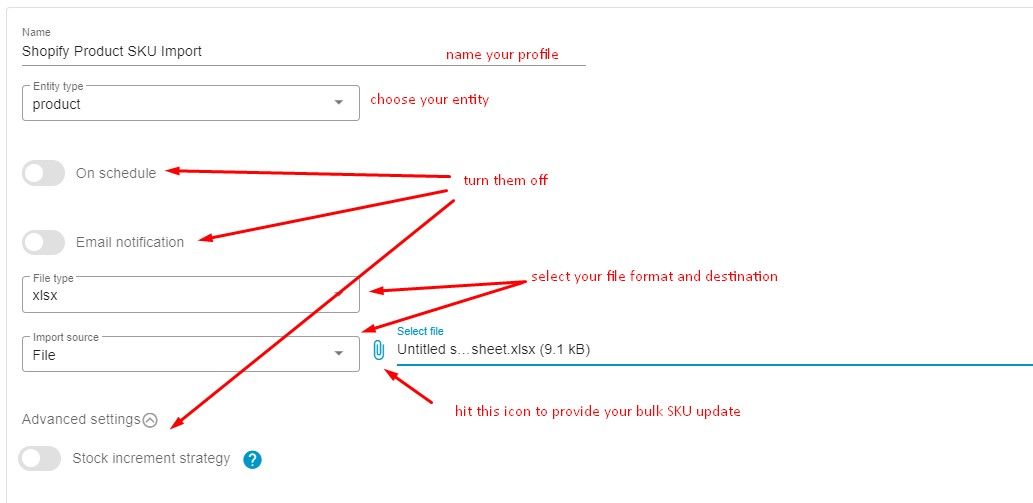
- Name your new import profile, for instance, Shopify Product SKU Import.
- Choose the entity to import – Products.
- Keep Shopify import automation disabled because it is a one-time update.
- Skip Shopify import notifications, too.
- Choose your file format – XLSX.
- Choose your import source – File.
- Skip the advanced settings section: keep the Stock Increment Strategy toggle disabled.
Step 3: Skip Mapping
Since you import a table that originates in Shopify, you don’t need to do anything. Proceed to the next step.
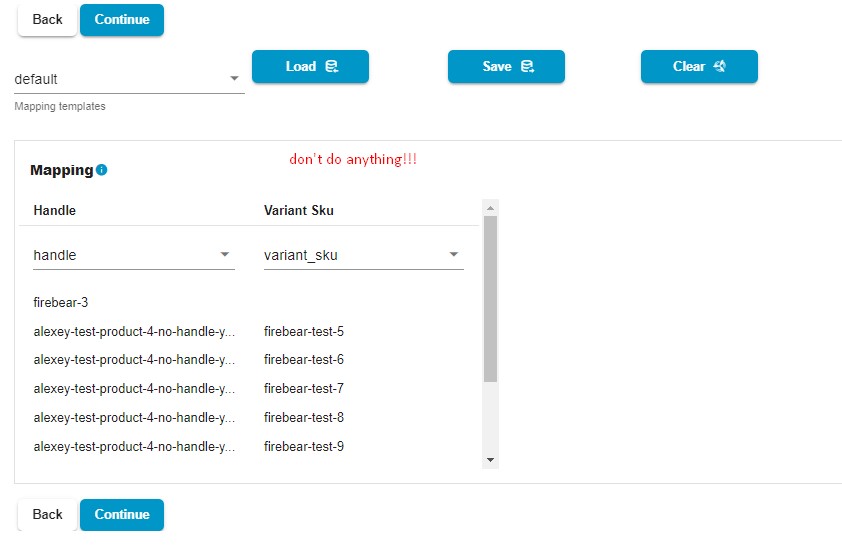
Step 4: Preview Results of Your Product SKU Update
With the Import & Export Tool, you can preview how your bulk update will look on your Shopify website after you import it. Thus, you can spot mistakes, return to the previous steps, and fix them.

Step 5: Import New Product SKUs to Shopify
Click the Save button to save your import profile. Next, click the Import button to bulk update Shopify product SKUs.

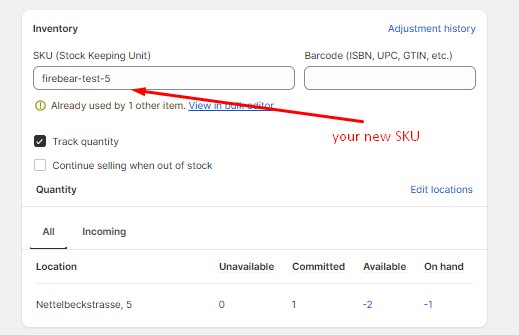
Step 6: Inspect The Results
Go to your Admin -> Products, choose a product to inspect, and open its variant to see whether your bulk update went well.
Final Words
As you can see, Shopify Product SKU update is not rocket science. You only need a reliable instrument to be installed on your e-commerce website to turn a boring and time-consuming routine into fun. With the help of the Improved Import & Export Tool, you can easily bulk update Shopify product SKUs. In addition to that, the app offers lots of other revolutionary features, such as flexible mapping, automation, support for numerous file formats and sources, filters, etc. Contact us to find out more about our tool or go straight to its manual.

