
Magento 2 Thank You Page Extension by Mageplaza

The truth is that than the expenses you pay to retain existing ones. And keeping in touch with your customers after their purchases is the first step you need to take for business’ sustainable growth.
Mageplaza Thank You Page for Magento 2 can optimize your Thank you page to generate more sales. This module also allows you to enhance your customer experience once their purchases finish. Hence, you can turn your thank you page into a powerful marketing tool for customer retention.

Table of contents
- 1 Why choose Magento 2 Thank You Page for eCommerce stores?
- 1.1 Success Page Customization
- 1.2 Display Order Details on Order Success Page
- 1.3 Order Sharing from Thank-you Page
- 1.4 Allow Newsletter Subscription on Checkout Success Page
- 1.5 Cross-sell on Thank-you page
- 1.6 Automatically Generate Coupons on Success Page
- 1.7 Display FAOs for a better shopping experience
- 2 Extra features
- 3 Backend
- 4 Frontend
- 5 Wrap up!
Why choose Magento 2 Thank You Page for eCommerce stores?
Success Page Customization

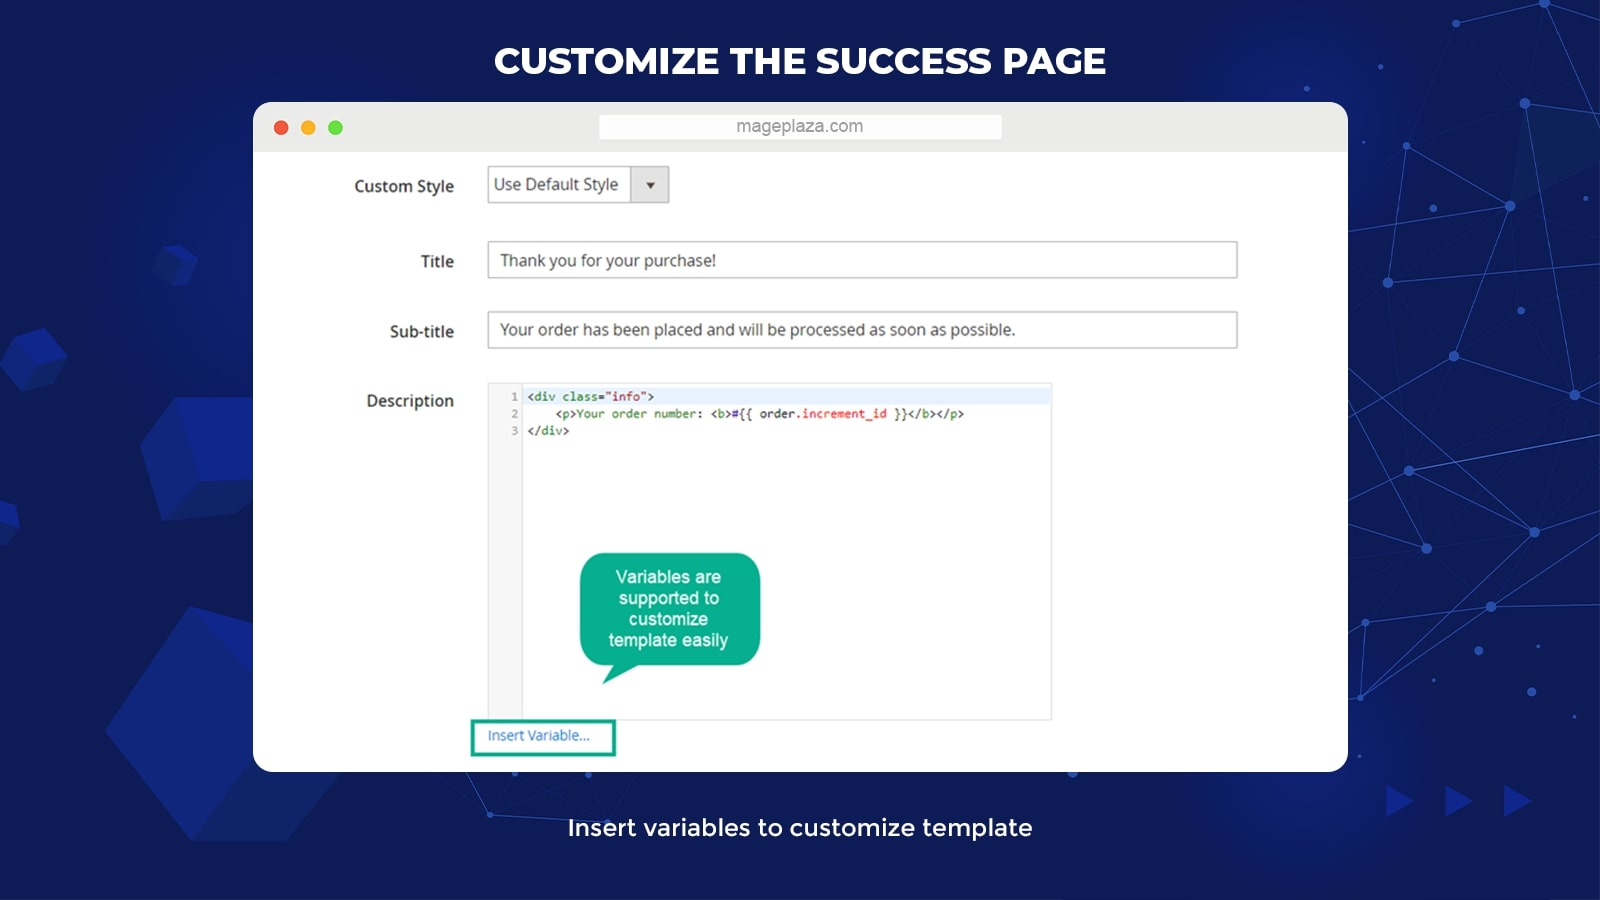
The greatest thing about Magento 2 Thank You Page extension is that it allows admins to customize the success pages via simple commands from the backend.
This extension offers 2 types of the page for customization, they are:
- The Order Success Pages
- The Newsletter Success Page
You can easily customize the content of both pages, including:
- Page title
- Page sub-title
- Page description
Most importantly, the module also enables its users to create stunningly beautiful thank-you pages with professional designs. What’s unique about it is that you can add extra blocks into the thank-you pages like Order Details or Social Sharing for marketing purposes.
For those of you who don’t know, the Thank You Page extension is optimized to support custom CSS so that developers can freely customize the page to what they like.
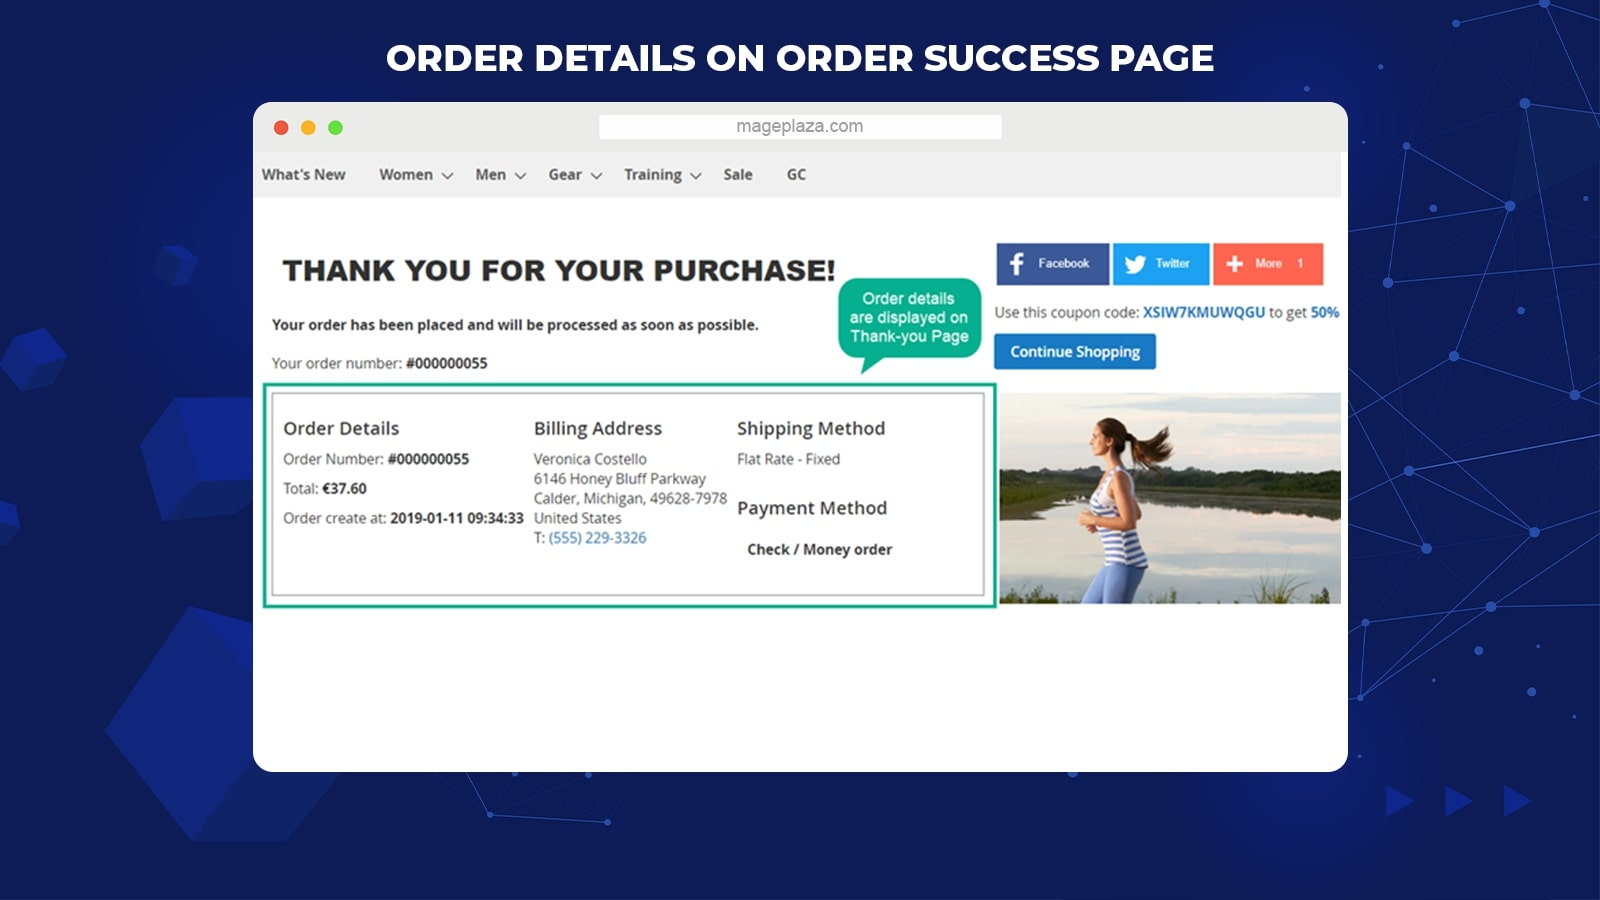
Display Order Details on Order Success Page

Most merchants don’t realize the important role of the success page in creating great opportunities to increase customers’ lifetime value.
Mageplaza Thank You Page allows customers to overview the order again via the extra block of Order Details once they accomplish their checkout process.
Furthermore, you can also view all the checkout details clearly on one page, including:
- Total amount
- Billing address
- Shipping and payment methods
- Products come with link and images
By providing the buyers with full information about the order, they can double-check and feel more confident when waiting for the parcel to be delivered.
Order Sharing from Thank-you Page

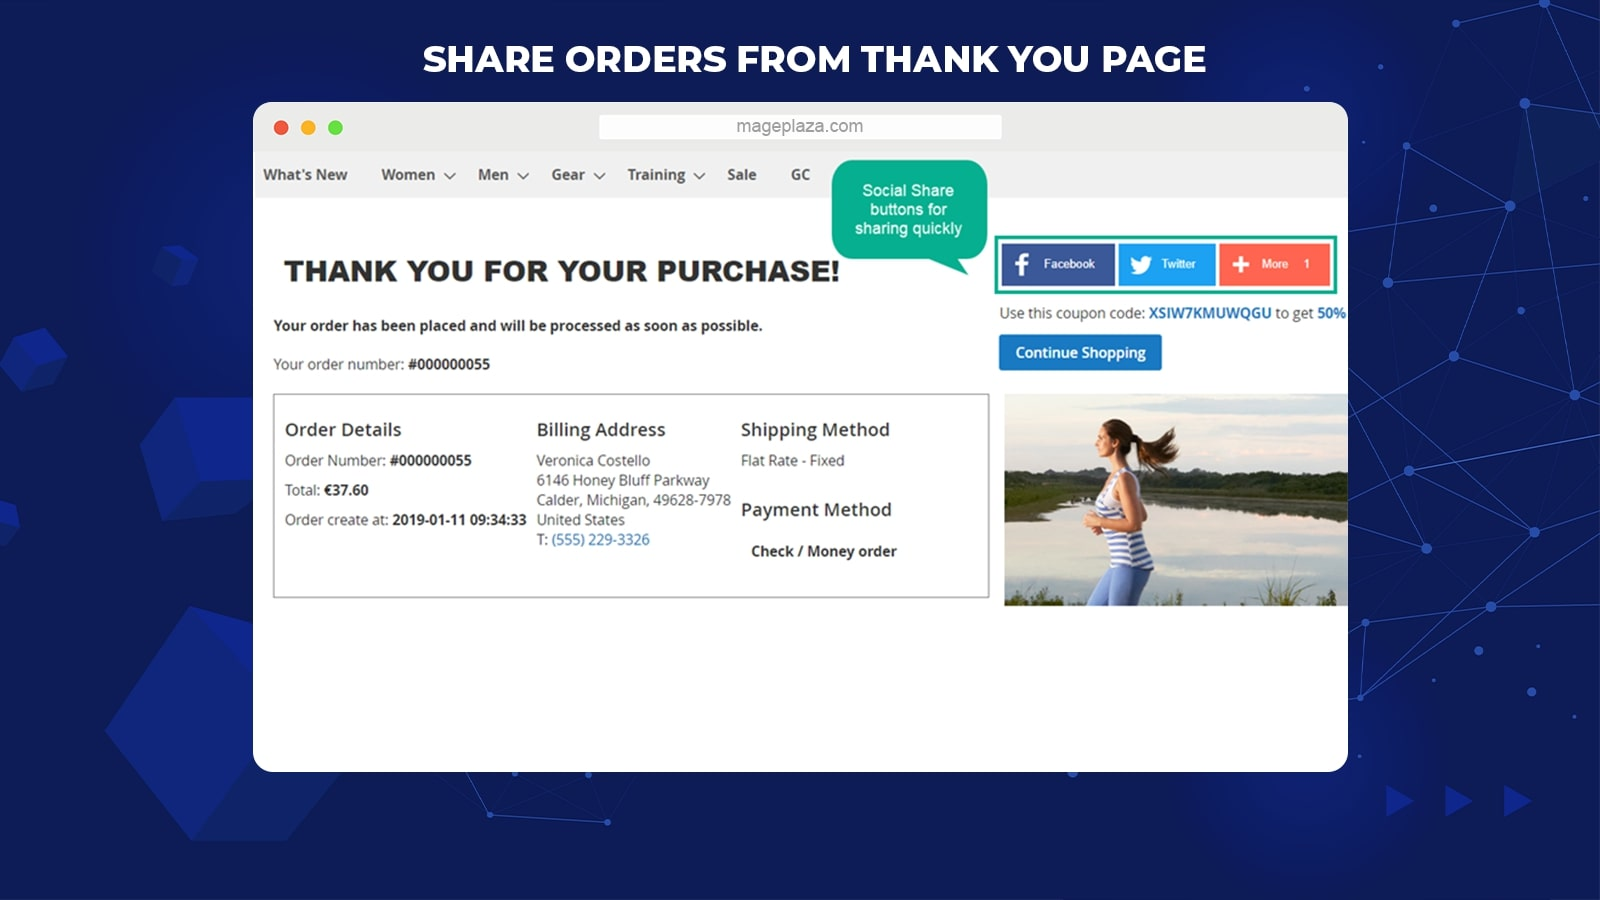
Mageplaza Thank You Page extension offers merchants the order sharing function, enabling them to add social buttons like Facebook, Twitter, Google+ to the thank-you page.
By doing this, online buyers can share their satisfied orders with friends and family on several popular social networks with just a click. Apart from that, these social sharing buttons will make your thank-you page more lively and interactive.
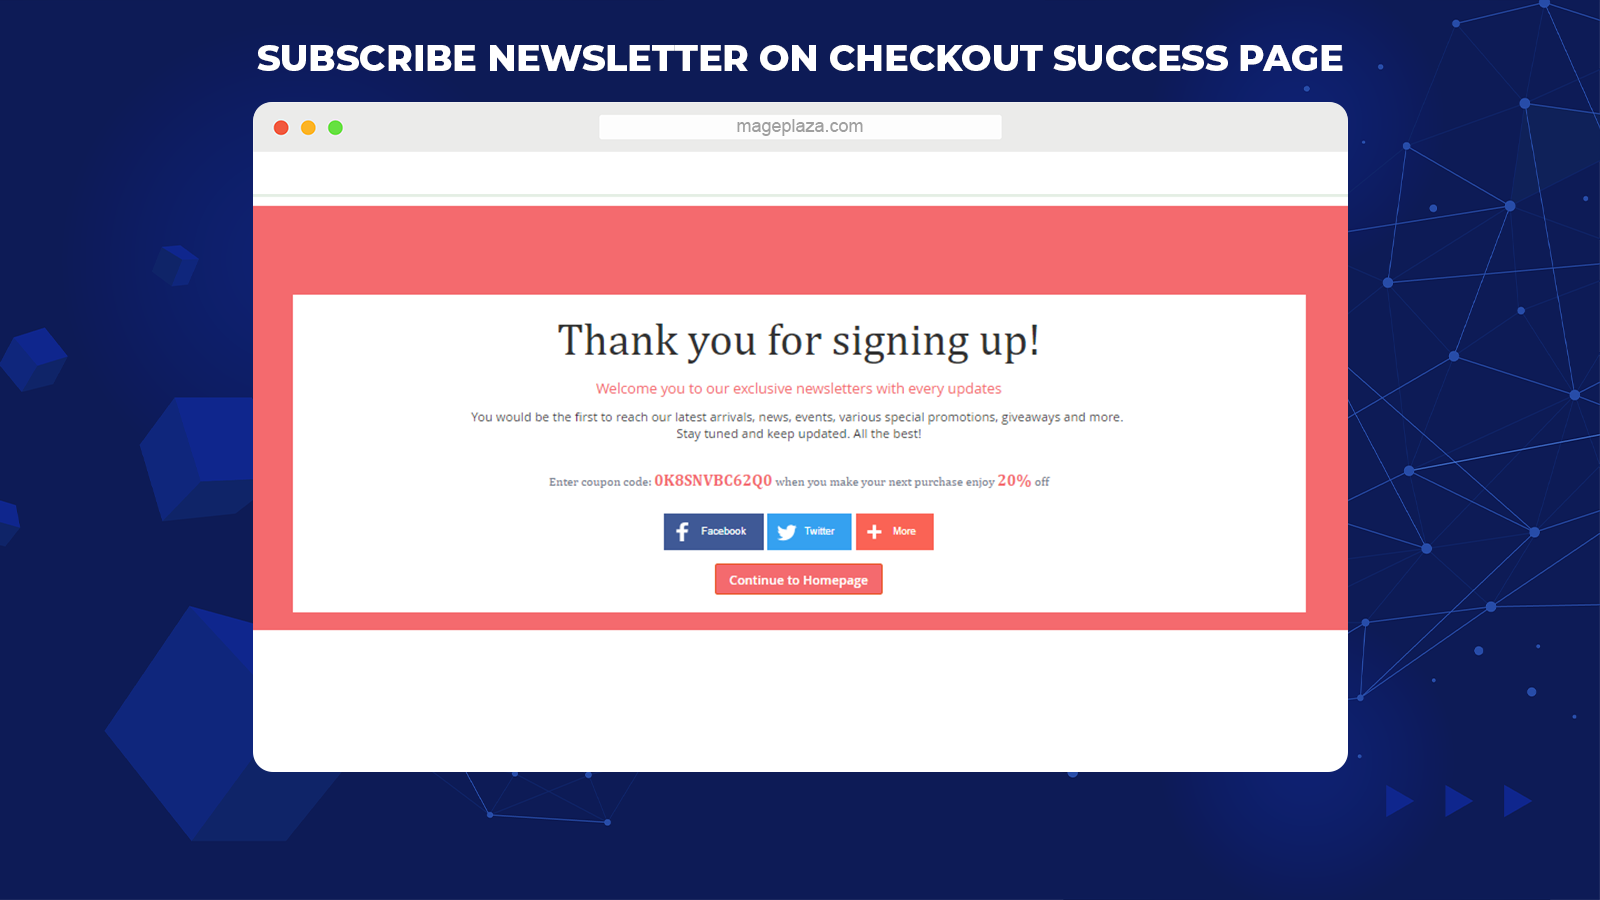
Allow Newsletter Subscription on Checkout Success Page

Checkout Success Page is where you could take advantage of and try to build the first connection between your business and the customers.
Thank You Page by Mageplaza goes with the subscribe function that is added to the thank-you page. Here, the Newsletter subscription box will automatically collect the customers’ email addresses.
Hence, customers will always receive all the new updated promotions, events, or loyalty programs in the soonest time.
Cross-sell on Thank-you page


The power of Magento 2 Thank You Page doesn’t stop at order sharing or subscribing newsletter. It also supports cross-selling, one of the sales tactics that e-commerce businesses should never be left out.
Its primary function is to suggest the related or supplement products on the thank-you page. Therefore, merchants can increase their sales revenue, customer lifetime value (CLV) and enhance customer satisfaction.
To do cross-selling on the thank-you page, the admin can use the Product Slider block to display the “Products you may also like” list with ease.
Automatically Generate Coupons on Success Page

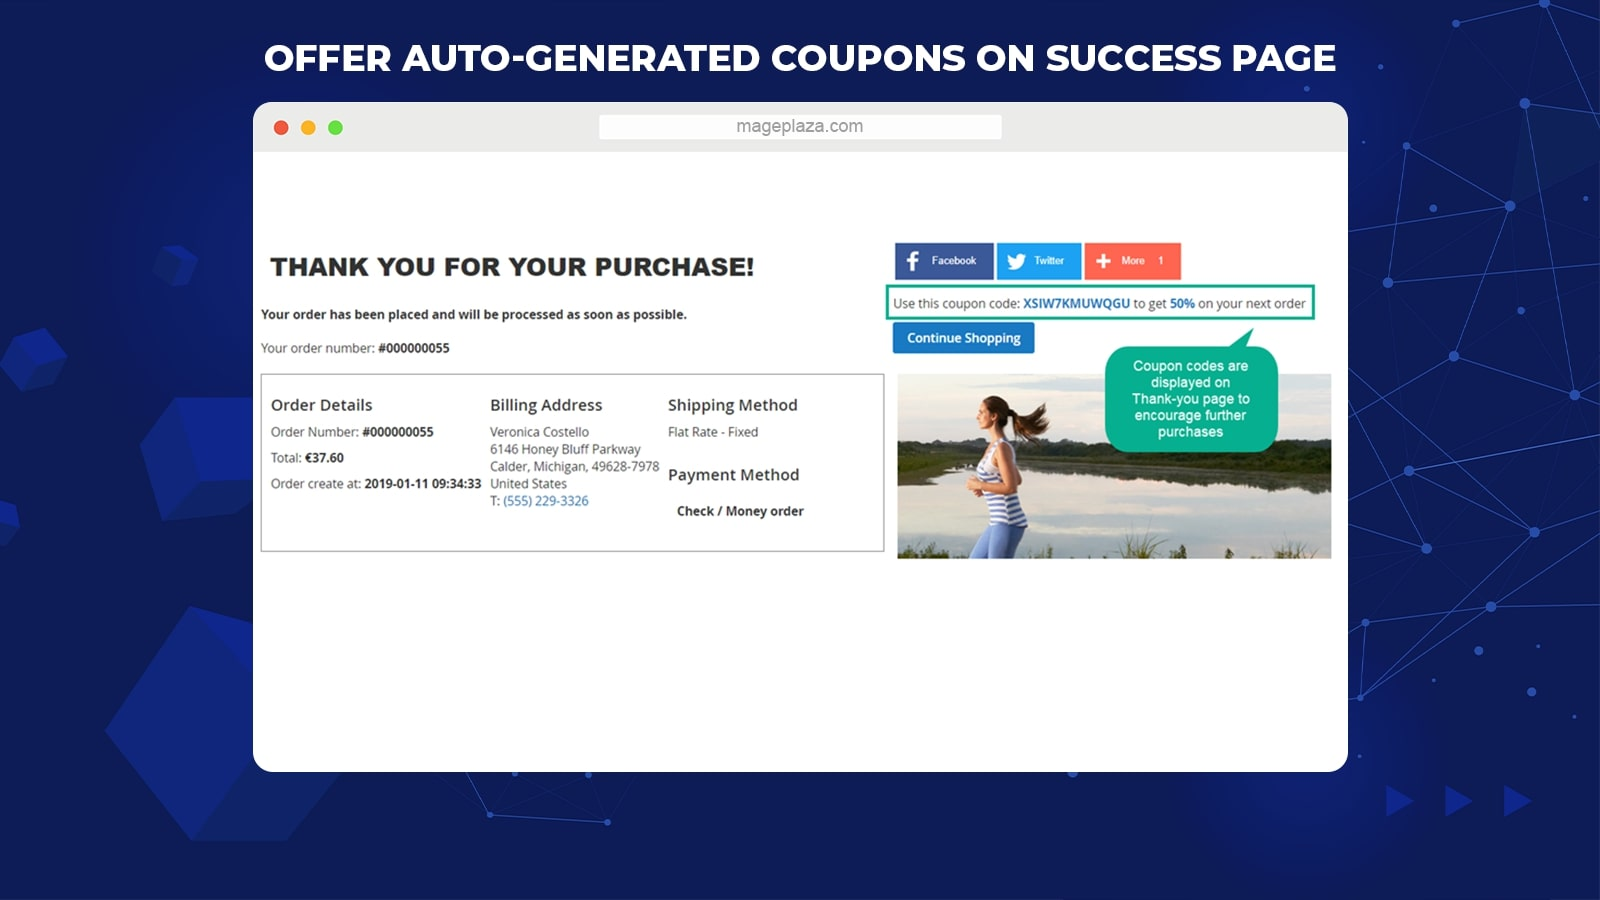
If you think these features are everything, then you will be amazed by how multiple-functional the Thank You Page module can be.
Besides the social sharing button on the thank-you page, admins can give customers a compelling incentive for the next purchases via a small suggestion line of coupons. It’s like a motivation for the customers to rebuy. Hence store owners can gain more sales.
Display FAOs for a better shopping experience

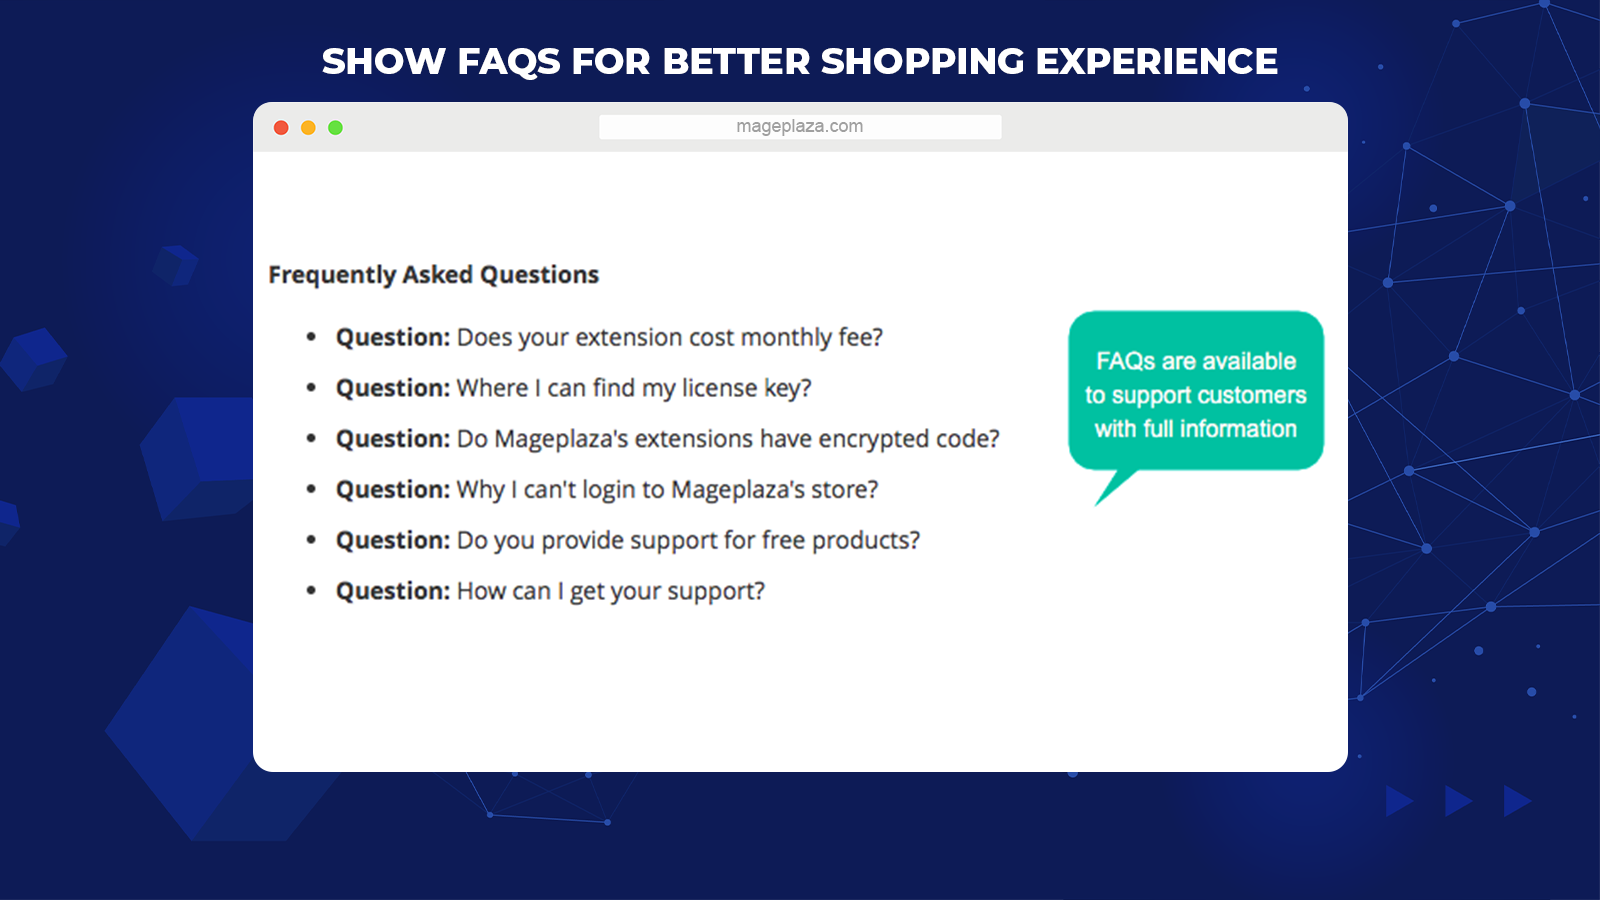
Last but not least, Mageplaza Thank You Page can even add FAQ blocks to support customers with most of their concerns, going with related already-answered questions.
Customers are not necessarily back to the live chat to ask the sellers. Now, online shoppers are already supported with all the information they need right on the Order Success page.
This can bring back a better shopping experience for the customers in their last purchasing step as well as increase your chances of having more loyal customers in the future.
Extra features
Apart from 7 main features, there are more things you can look forwards to in this extension, like:
- Extension compatibility: Well compatible with lots of Mageplaza extensions, including Auto Related Products, Who Bought This Also Bought, Product Slider, FAQ Module
- Multi-styles: You can choose from multiple designs of Thank-You and Checkout Success Page for customization
- Coupon rules: The auto-generated coupons displayed on success pages are made from Cart Price Rule
- Static Block: Enable static block (for example, the home page or contact us) to represent on success pages
- Custom CSS: Offer custom CSS for freely block designing
- Insert Variables: Admins can add attributes to page description via variable insertion
Backend
Configuration
First’s thing first!
To activate the Mageplaza Thank You Page extension, you have to:
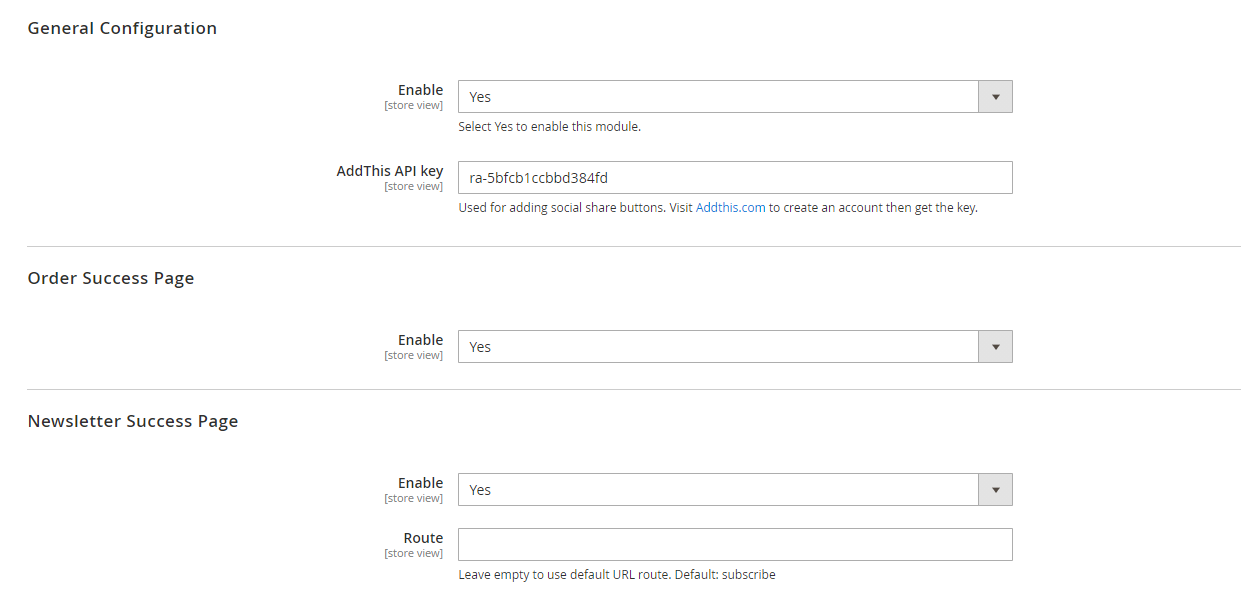
- Go to the Admin Panel, choose Marketing > Thank You Page > Configuration
- Then in the General Configuration, select Yes to enable the module
- For the “AddThis API key,” enter the key of AddThis to refer to the friends via AddThis


Other general configuration you could consider:
- Order Success Page: Choose Yes to display the Thank You page once customers finished their orders
- Newsletter Success Page: Select Yes to display the Thank You page after buyers click the subscribe button. You can add the route to your Thank You page by filling in the “Route” field or leave it blank. If you do that, the default route is “subscribe”

Template management
These instructions can be applied to both Newsletters Success Page and Order Success Page.
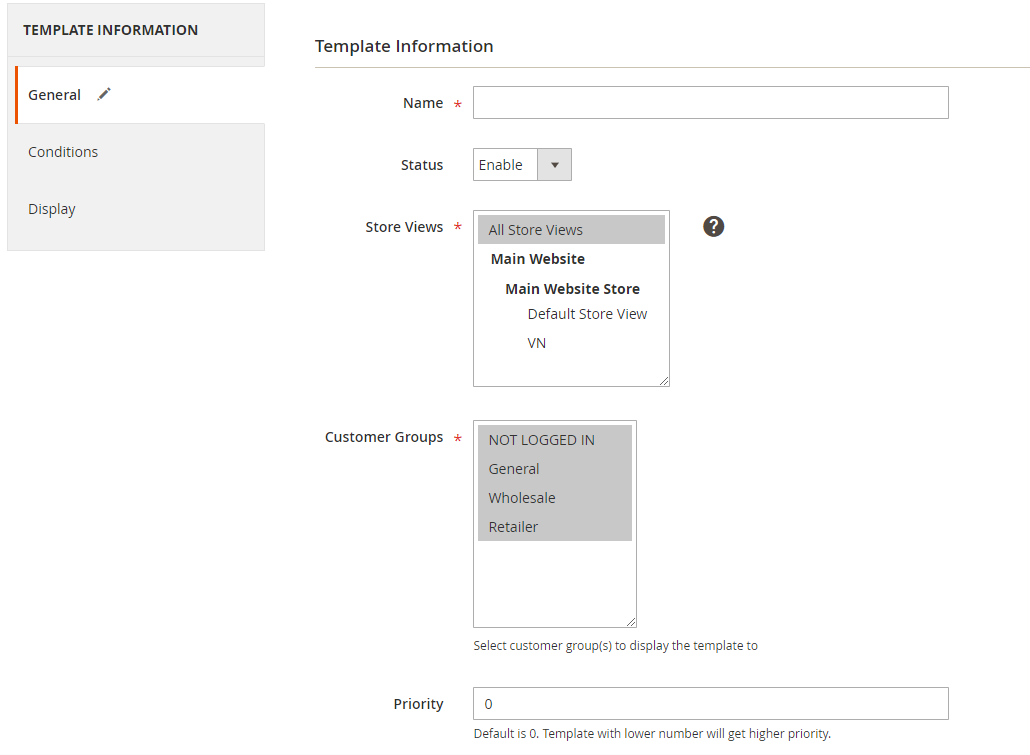
General
- Name: Enter your template name (required field)
- Status: Choose Enable to starting using the template
- Store Views: Here, choose the storeview you want to apply a new template (Allow multiple-option)
- Customer Group(s): Only the chosen customer group can see the product that has been applied to the rule (Allow multiple-option)
- Priority: Enter the priority order for template application (Template with smaller number has higher priority. In the situation that several templates have the same number, the priority will be considered by ID)

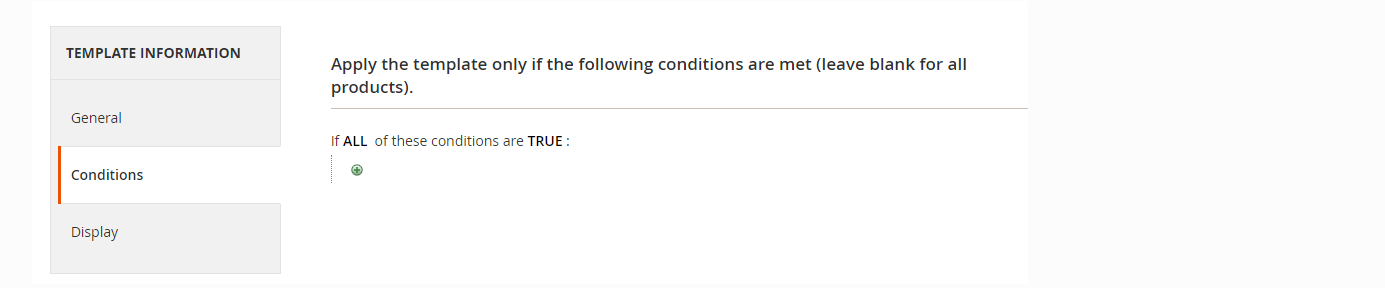
Condition
- Decide the condition to apply the rule
- For example, you can set the conditions for the Product section to be: Subtotal greater than 50, Total Items Quantity less than 5, etc.

Display
Select Style: Here, you choose the style for your Thank You Page (The default style is Simple Style for the Order Success Page)
Custom Style: In this section, you will be able to specify the style to which you want
With the Order Success Page, you will have following options:
When you choose Custom Style = Use Default Style
- Page Title: Fill in the title for your Thank You Page
- Page Sub-title: Fill in the sub-title you want for you Thank You Page
- Page Description – Support HTML: Enter the information you want to display on the Thank You Page. Moreover, you can use available variables using the Insert Variable link
- Show Continue Shopping Button: Click Yes to display the Continue Shopping button
- Enable Block(s): You can decide the block to display on Thank You Page, including Order Details, Social Sharing, Coupon, Register Account Form, Subscribe Email Form
When you choose Custom Style = Edit Default Style
- Load Template button: Once you click on this button, the Page HTML field will display the selected style’s code. At the same time, the CSS of the chosen style is also loaded and displayed on the Custom CSS field
- Page HTML: Where you can edit the code of style chosen (Able to use the available variables that Mageplaza supported using Insert Variable link)
- Custom CSS: Where you can edit the color, font text, many more of the style selected
- Static Block 1: Pick the Static Block to display on the Thank You Page (When Static Block 1 = No display: No block is displayed on Thank You Page)
- Static Block 2: Pick the Static Block to display on the Thank You Page (When Static Block 2 = No display: No block is displayed on Thank You Page)
With the Newsletter Success Page, you will have the following options:
- Page Title: Enter the title for your Thank You Page
- Page Sub-title: Enter the sub-title you want for you Thank You Page
- Page Description – Support HTML: Enter the information you want to display on the Thank You Page.
- Static Block: Pick the Static Block you want to appear on the Thank You Page (Static Block = No display means no block will be displayed)
- Enable Block(s): You can decide the block to display on Thank You Page, including Order Details, Social Sharing, Coupon, Register Account Form, Subscribe Email Form
- Mageplaza Product Slider: Enable to display the block of Product Slider module on Thank You Page (Mageplaza Product Slider = No display means no block will be displayed)
Coupon Block
In the Select Rule field:
- Here, you can decide your rule for your Thank You Page. To create the rule, go to Marketing > Promotions > Cart Price Rules
- You can only display the rules that have Coupon = Specific Coupon and Use Auto Generation
In the Coupon Pattern filed:
- Choose the pattern for the coupon
- Once the coupon code is automatically created, it will adhere to the pattern
- In the situation you leave this field blank, the default pattern will be [12AN]
- To create the Pattern, enter: [4A] – 4 alpha, [4N] – 4 numeric, [4AN] – 4 alphanumeric
Coupon Label:
- Enter the label for the coupon codes you have created
- If you leave it blank, the default label is: Use this coupon code: {{ coupon.code }} to get {{ coupon.discount_amount }} on your next order or Enter coupon code: {{ coupon.code }} when you make your next purchase enjoy {{ coupon.discount_amount }} off
- Use multiple variables that are available and supported via the Insert Variable link
- Support HTML
Product Slider Block: (Only available to the Order Success Page)

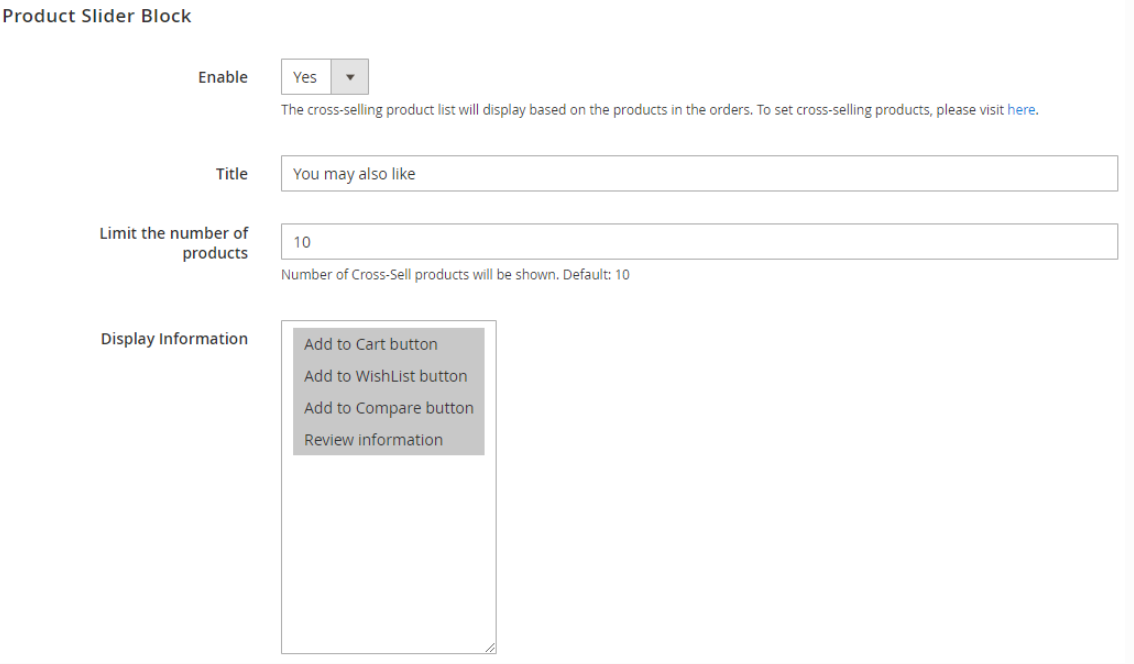
- Choose Enable = Yes to activate the Product Slider Block function on Thank You Page
- Title: Where you enter the title for Product Slider Block (The default is: You may also like)
- Limit the number of products: Fill in the number of the product you want to display in the slider (The default is 10)
- Display Information: Enter the information that will be displayed in the Product Slider Block
- Allow multiple-choice option
Mageplaza FAQ block:

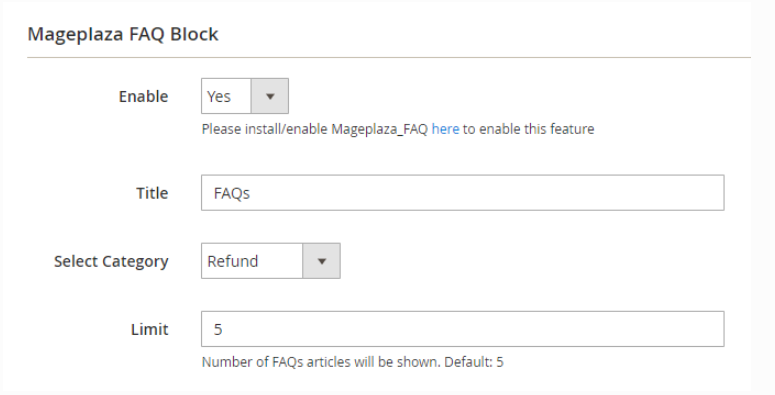
- Choose Enable = Yes to activate FAQ block on Thank You Page
- Title: Fill in the title for FAQ
- Select Category: Choose the Category to place FAQ
- Limit: Enter the number of FAQ to be displayed (The default number of display is 5)
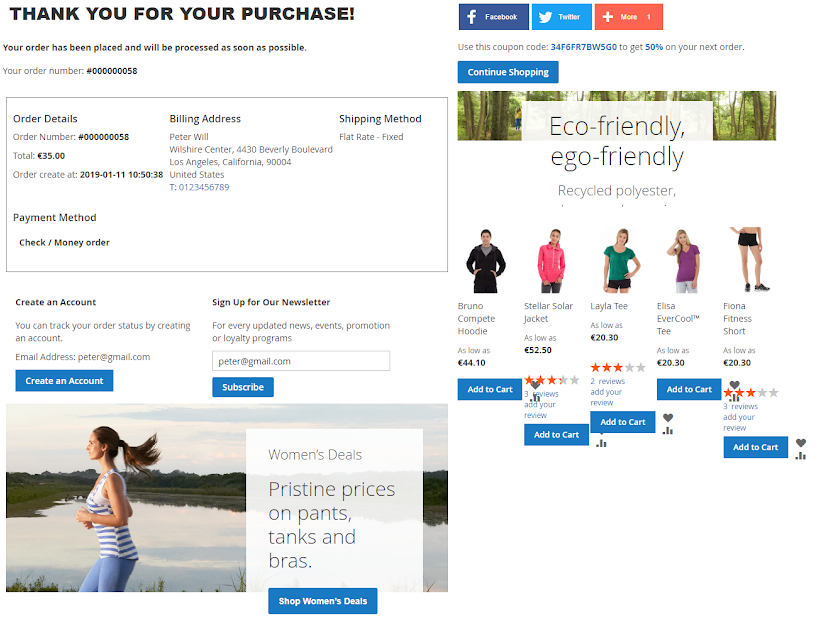
Frontend
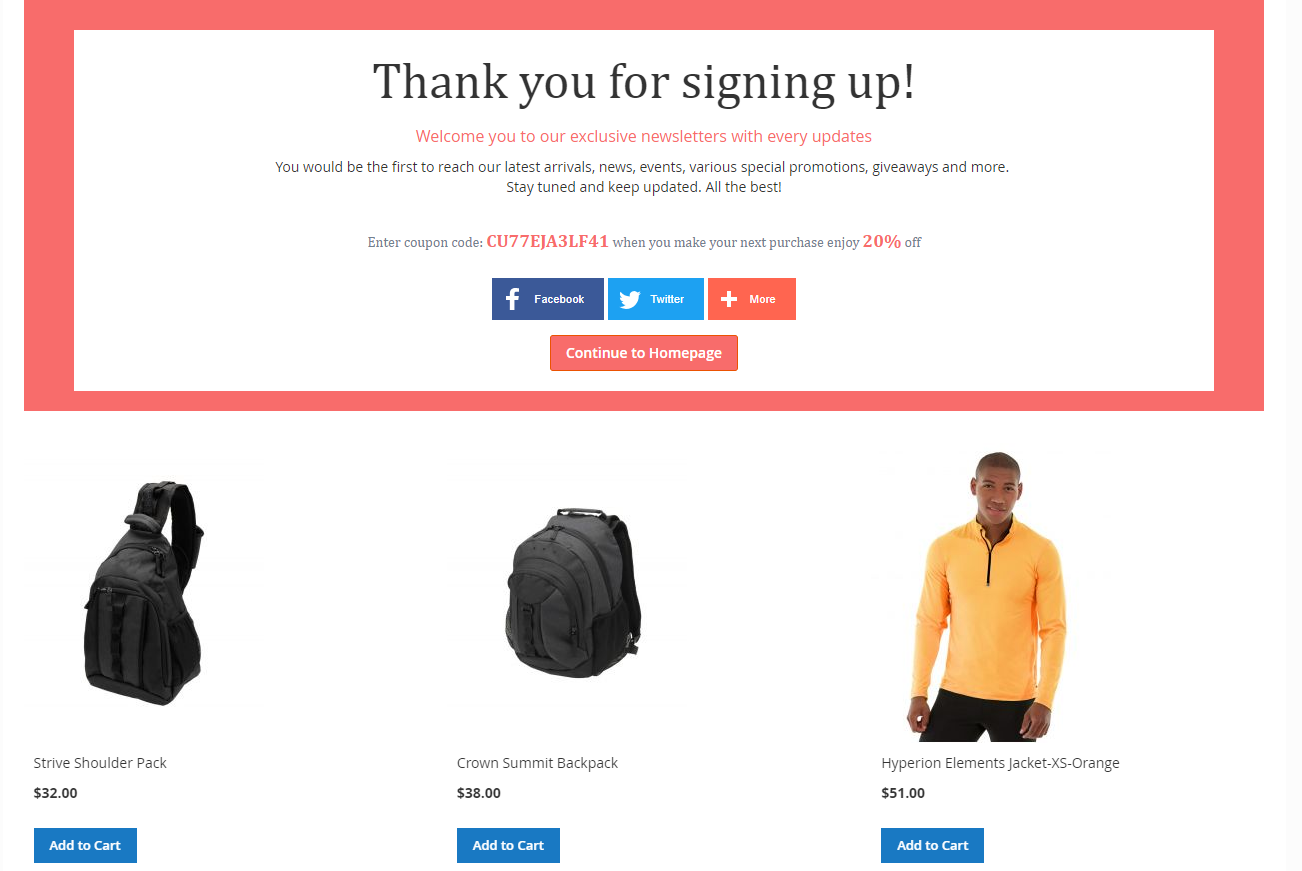
This is how the Thank You Page looks like after the module is activated. The page will show up once customers complete their orders.

The Thank You Page for a new subscription after being customized.

Wrap up!
Simply put, the Thank You Page is an incredible marketing tool that will contribute significantly to the increase in your sales as well as building customer loyalty.
The complete flexibility and convenience of the customization capabilities will definitely support you along the way.
DISCOUNT: Use coupon code FIREBEAR to receive a 10% discount when purchasing.
Related posts
 Amasty ChatGPT AI Content Generator for Magento 2
 CopyAI Review 2023
 How to Import Customers & Customer Addresses to Magento 2
 Adobe (Magento 2) Commerce and Cloud (Enterprise Edition) Specific Features
 Magento 2 B2B Company Guide: Revealing Company Structure & Import
 Magento 2 Release Notes
 Reputon Amazon Importer Review: How to Connect Shopify to Amazon in a Few Clicks
 Shopware 6 Advanced Pricing Guide + Import Tutorial