
How to import data from Amazon Redshift to Magento 2
The following article compares two different approaches to importing data from Amazon to Magento 2. First of all, we describe a community-proven way of moving a remote table from one system to another. As you might have already guessed, it still has a room for improvement. Next, we provide a more efficient solution. Let’s see how most of us import data from Amazon Redshift to Magento 2.

Table of contents
- 1 The Common Way of Moving Amazon Redshift Tables into Magento 2
- 2 The Easy Way of Moving Amazon Redshift Bases into Magento 2
- 3 Amazon Redshift Facts
- 4 Improved Import & Export Magento 2 Extension
- 5 Final Words
The Common Way of Moving Amazon Redshift Tables into Magento 2
The common way of moving Amazon Redshift bases to Magento 2 is based on the three following pillars. Firstly, you need to create a CSV output. Then, edit the generated file. Finally, the table can be imported into Magento 2. Below, we explore each step in more detail.
CSV Export from Amazon Redshift Database
You may be familiar with the command which is the most common and recommended way for loading data into Amazon Redshift. If not, you can discover more data on the internet. Similarly, Amazon Redshift offers the command, which can be used to transfer a query result to one or more files on Amazon S3.
Note that the data is unloaded in CSV format by default. You can use the following parameters to control the procedure:
- Manifest generates a Manifest file in JSON format which lists all the files produced by the UNLOAD command;
- Delimiter allows specifying a delimiter used in a CSV file;
- Encrypted enables the AMAZON S3 server-side encryption;
- BZIP2 or GZIP enable file compression;
- NULL indicates a character which represents NULL values.
After a successful invocation of the UNLOAD command, all the necessary data is transferred to S3 via CSV. To export the command output as uncompressed CSV files, specify DELIMITER AS ‘,’ and leave off the GZIP option in your UNLOAD statement, like shown below:
|
1 |
UNLOAD ('SELECT * FROM venue') TO 's3://mybucket/venue_tab_' CREDENTIALS 'aws_access_key_id=<access-key-id>;aws_secret_access_key=<secret-access-key>' DELIMITER AS ',' ; |
Now, when you get a CSV output out of the Amazon Redshift database, it is possible to proceed to the next step.
Map Third-Party Attributes to Magento 2 Attributes
The data file probably contains some third-party attributes unless you are importing data that has been previously generated in Magento 2. Thus, the output should be reviewed and edited to avoid errors during the import procedure.
The more attributes you file include, the more work should be done. Note that you can also review and edit attribute values since your database may consist of entirely different designations. Alternatively, it is possible to skip this step, but you will need to replace third-party values from the admin section after the import which is a more time-consuming routine. Luckily, there is a solution that can help you with both attributes and their values, but let’s return to our mutton. One more step is left that separates you from the completion of the data import from Amazon Redshift to Magento 2.
Import Amazon Redshift Table into Magento 2
Now, you should use the standard Magento 2 import tools to transfer data from a CSV file to Magento 2. You cannot automate this process. Furthermore, it is necessary to repeat all the three steps every time a new update is provided. If you still want to do everything manually, check the following Magento 2 import guide to discover proper attributes and other nuances of the successful data migration: The Complete Guide to Magento 2 Product Import / Export.

Pros & Cons
Let’s see what pros and cons the traditional approach to data import offers.
Pros
- Magento 2 Amazon Redshift data import.
The only positive aspect here is the completion of our final goal: you establish the connection between Amazon Redshift and Magento 2. Unfortunately, the default procedure is far from being efficient, intuitive, and user-friendly due to the following drawbacks:
Cons
- The necessity to work in the three different environments;
- Limited CSV export capabilities;
- The necessity to master new commands;
- Time-consuming editing of attributes and their values;
- Limited import capabilities;
- Inability to automate further data transfers.
These reasons were enough for us to create a better way of importing data from Amazon Redshift to Magento 2 which is described below.
The Easy Way of Moving Amazon Redshift Bases into Magento 2

Meet the Improved Import & Export extension – our tool that simplifies every Magento 2 integration. The module is designed to reduce the complexity of the aforementioned approach to data import to the minimum. And below, we explain how the solution works saving your time and effort.
Amazon Redshift Database Connection
It is no longer necessary to perform the three steps above. Instead, you only need to install the Improved Import & Export extension and then create, configure, and launch a new import profile. Our module provides the ability to connect to the database directly so that you eliminate the first two steps of the default Magento 2 Amazon Redshift integration.
Yes, you don’t need to figure out what is wrong with your UNLOAD command and why it doesn’t create the output suitable for Magento 2. The data is transferred directly preventing various headaches. But this kind of transfer doesn’t solve the problem of different attribute standards, you will argue.
Luckily our module offers at least two ways to fix everything. You can either use mapping presets or match attributes manually in a convenient interface. Both features are described further in this post. Furthermore, the Improved Import & Export Magento 2 extension lets you modify attribute values using one or several tools simultaneously. No manual data file editing or time-consuming work in the admin interface is required!
How to import data from Amazon Redshift to Magento 2
The data import process from Amazon Redshift to Magento 2 with the help of Improved Import & Export is very straightforward and intuitive. It consists of the following three steps:
- In your Magento admin, go to the Improved Import & Export extension and create a new import job in its import section.
- Specify parameters required for the connection to the Amazon Redshift database, map attributes, create a schedule, and configure other settings if needed;
- Save and launch the profile.
As you can see, the Improved Import & Export extension dramatically decreases the time and effort necessary to connect your Magento 2 website to a remote Amazon Redshift database. More good news: because the process is fully automated, you prevent further time expenditures as well!
Pros & Cons
Now, we’d like to draw your attention to the pros and cons the Improved Import & Export module offers when it comes to the Magento 2 Amazon Redshift integration:
Pros
- User-friendly Magento 2 Amazon Redshift integration;
- The direct connection between the two systems;
- No file export/import processes;
- No file editing;
- Fast attributes matching via presets;
- Attribute values matching and editing;
- Fully automated data transfers.
Cons
It is tough to figure out any drawbacks, but there is one – the necessity to install a third-party module. But with our friendly support, it is more of a positive aspect than a negative one. Contact us, and the Firebear team will help you solve any difficulties related to the installation. And don’t forget that we can discuss your particular customizations to the module’s functionality and their further implementation!
Below, we shed light on the features of the Improved Import & Export Magento 2 extension already mentioned in this guide, but let’s take a look at Amazon Redshift’s features first.
Get Improved Import & Export Magento 2 Extension
Amazon Redshift Facts

Being a relational DBMS and a key-value store, Amazon Redshift is often compared with Snowflake, Amazon DynamoDB, and Google BigQuery. The database is considered a large scale data warehouse service for use with business intelligence tools. Its core features are listed below:
- Redshift is developed by Amazon on the basis of PostgreSQL;
- The database operates under the commercial model;
- Cloud-based options are provided;
- Its implementation language is C;
- The server operating system is hosted;
- Data scheme and typing are supported;
- There is no XML support;
- Secondary indexes are restricted;
- SQL is supported;
- APIs and other access methods include JDBC and ODBC;
- Supported programming languages are all languages that in their turn support JDBC/ODBC;
- Server-side scripts are represented by user-defined functions;
- No triggers are available;
- Partitioning methods are represented by sharding; replication methods are supported;
- There is no MapReduce;
- Consistency concepts are represented by Immediate Consistency;
- Foreign keys are supported;
- Transaction concepts are represented by ACID;
- Concurrency, durability, and in-memory capabilities are supported;
- User concepts are represented by fine-grained access rights according to the SQL-standard.
Improved Import & Export Magento 2 Extension
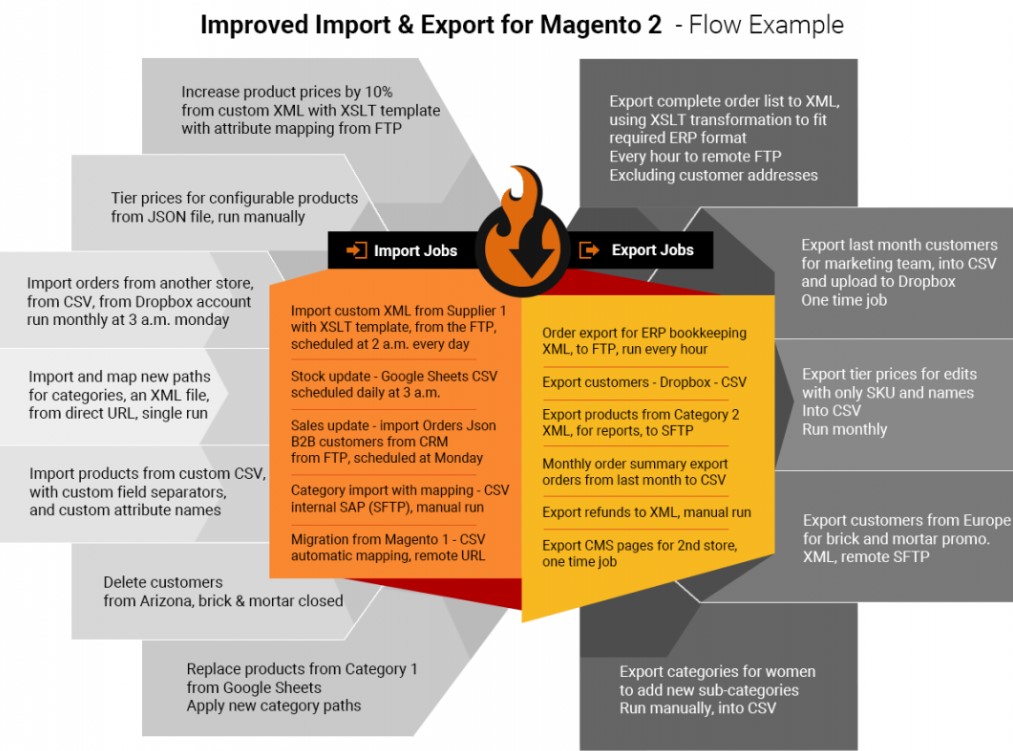
Now, let’s explore the Improved Import & Export extension and the way it simplifies the Magento 2 Redshift integration and other external connections. First of all, we’d like to draw your attention to several opportunities related to the automation of transfers.
Automated Import & Export Processes
Our module provides two way of the automation. You can either create update schedules or specify events that are considered triggers.
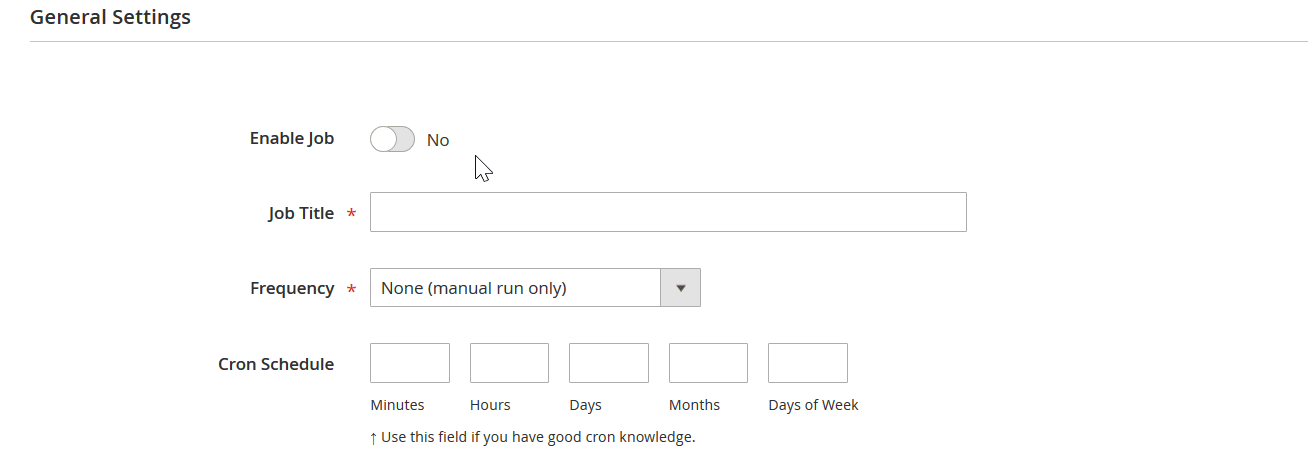
Schedules
Since the Improved Import & Export Magento 2 extension supports cron, you can create any custom schedule of updates. It is only necessary to apply the default cron syntax. If you don’t want to do that, select one of the predefined intervals. Note that they are fully customizable as well.
Alternatively, our module allows creating profiles that have no schedule. Use this feature to simplify one-time data migrations or asynchronous updates. And don’t forget that every profile can be launched manually whenever you want.
Below, you can see how to configure the appropriate section of the extension:
Events
As for events, the Improved Import & Export plugin supports both system and custom processes. Select a trigger and create conditions to make its work more efficient. For further information about this feature, follow this link: How to Run Magento 2 Import or Export After Specific System Event or Process.
Advanced Mapping Features
Now, it is necessary to describe the core mapping features of our module. Let’s start with the easiest way to match attributes.
Mapping Presets
The problem of different attribute standards can be solved in a few clicks with our extension. You only need to select and apply a preset suitable for your integration. Next, the Improved Import & Export plugin will analyze the input data matching all third-party attributes to the corresponding ones used internally.
The feature is illustrated with by the following gif image which shows the migration from Magento 1 to Magento 2:
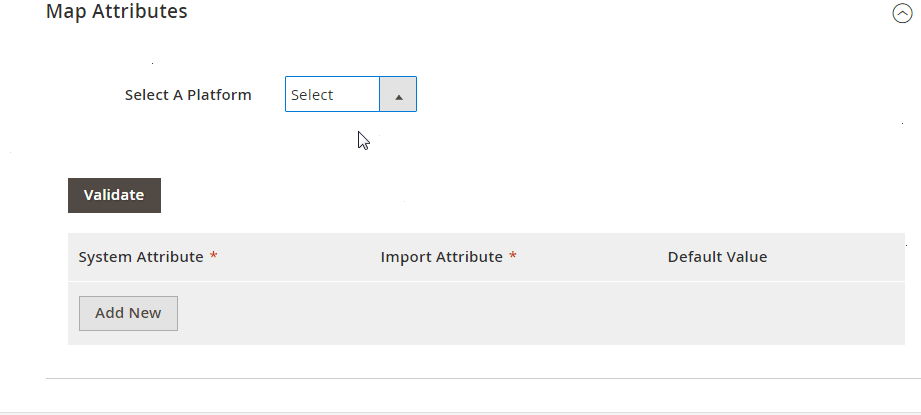
Matching Interface
If there is no preset for your particular integration (contact us and ask for help), you can map attributes manually within a convenient interface. Select a third-party designation and specify the corresponding internal one in front of it. That’s all! Check the following illustration of the process:
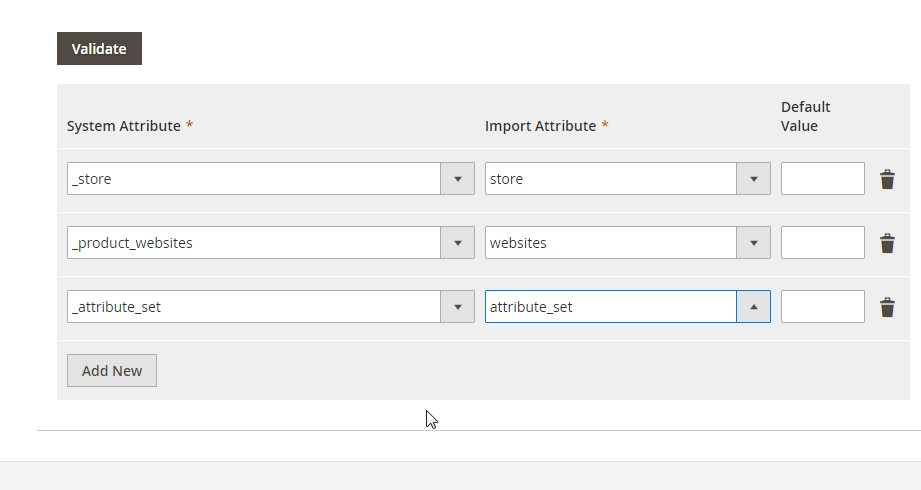
And don’t miss the opportunity to determine hardcoded attribute values. The third column from the example above allows you to set it so that all items related to the attribute will get the specified designation.
Attribute Values Mapping
And we’ve been talking a lot about attribute values mapping. With the Improved Import & Export Magento 2 extension, it is no longer a problem. The process is based on the same logic as the attributes matching described above: you select a third-party designation and specify the internal one in front of it. Everything is effortless. For further information about the feature, follow this link: Attribute Values Mapping.
Attribute Values Editing
To increase the efficiency of your routine related to attribute values, we’ve also introduced the ability to edit them in bulk. First of all, you can add a prefix to multiple attribute values. At the same time, you can edit them by specifying a suffix. Both rules can be applied simultaneously.
When multiple attribute values are stored merged, you can split them within a few clicks. The opposite process is possible as well, so there is no need to panic when the data file contains information related to one value split between different sections. The following article explains attribute values editing in more detail: How to Modify Attribute Values During Import and Export in Magento 2.
Category Mapping
While moving product data from external systems, you may face lots of different catalogs and categories unrelated to yours. Usually, such import leads to hours of time spent on editing the occasionally modified catalog. Luckily, our module offers a reliable solution: you can match external categories to the ones used internally right during the import process. The following gif image illustrates the procedure:
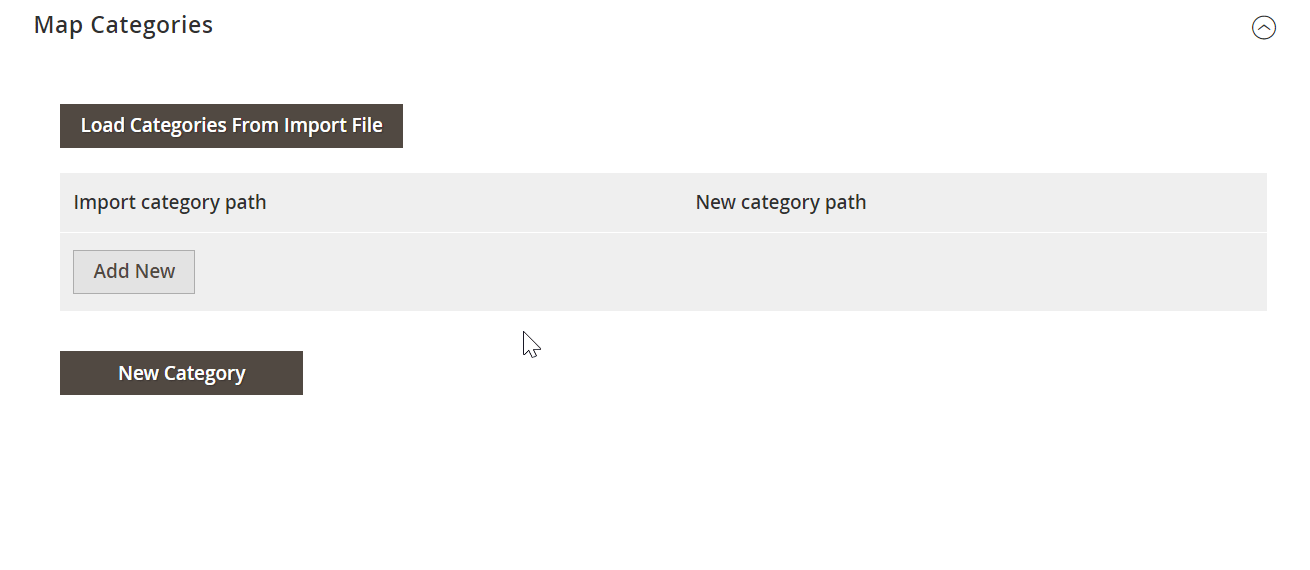
At the same time, it is possible to create new categories on the fly. The process is as simple as selecting a parent category and specifying a name of a new one. Both features are described here: Category Mapping.
Attributes On The Fly
If your data file lacks any data, you can create attributes on the fly. The Improved Import & Export Magento 2 extension enables you to specify parameters necessary to do that via the following general form:
Attribute|attribute_property_name:attribute_property_value|…
The full process of attributes on the fly creation is described in this article: Product attributes import.
Extended Connectivity Options
Although the Magento 2 Amazon Redshift integration is based on the direct connection between the two systems, we should also say a few words about the extended connectivity options of our module.
Multiple File Standards
First of all, the Improved Import & Export Magento 2 extension essentially increases the number of supported file formats. At the beginning of this article, we’ve already mentioned that you should create a CSV file out of Redshift since the Magento platform supports CSV only. In its turn, our tool adds support for XML, JSON, ODS, and Excel. You can freely import and export data in these formats applying all the extension’s features.
Multiple File Sources
Since we are already talking about file transfers, it is necessary to draw your attention to the fact that the Improved Import & Export Magento 2 module supports numerous sources that can be utilized as a point of data exchanges. You can rely on the FTP/SFTP connection (read “a local or remote server”) as a point of transfers. The same functionality is possible with a Dropbox account.
When it comes to import processes only, our module enables the ability to import files via a direct URL. It is also worth mentioning that Improved Import & Export unpacks compressed data automatically. Thus, you no longer have to do that manually before every update.
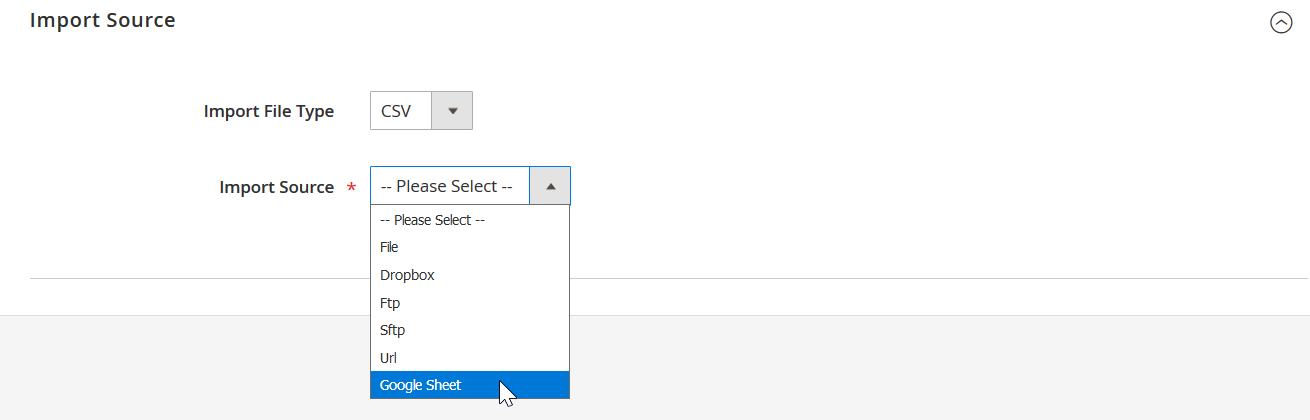
Alternative Ways of Import & Export
But the Magento 2 Amazon Redshift integration is based on an alternative way of data transfers. And the Improved Import & Export extension provides several options in this area. Firstly, you can use various online sheets to create a bridge between your Magento 2 website and external systems. Google Sheets, Office 365 Excel, and Zoho Sheet are currently supported. The Google Sheets integration looks as follows:

Secondly, the module lets you establish a direct API connection. Use REST, SOAP, and GraphQL integrations to synchronize your website with any third-party platform using the built-in functionality of the Improved Import & Export Magento 2 extension.
Watch the following video to see the extension in action:
Final Words
The Improved Import & Export extension dramatically improved the Magento 2 Amazon Redshift integration. It provides the ability to eliminate all time-consuming work reducing it to an intuitive configuration. Furthermore, you should apply changes only once since further transfers are fully automated. Regarding any questions about our module and the Magento 2 Redshift data import, follow the link below and contact the support:
Get Improved Import & Export Magento 2 Extension