Plumrocket Popup Login Magento 2 Extension

Do you remember our digest of AJAX extensions for Magento 2? If no, check it here: Magento 2 AJAX Extensions. But before going to the list of modules, we’d like to introduce you to the Popup Login Magento 2 extension by Plumrocket. It is designed to increase the number registrations and in combination with Social Login Pro the module works wonders.

Plumrocket Popup Login is cool because it doesn’t force visitors to login or register. It just constantly reminds them of the ability to pass the registration or login procedure. And since the module is based on the AJAX technology, the process becomes flawless and can be performed literally everywhere on a website. Add the ability to login or register with the help of social network accounts, and you will get a perfect solution that is totally user-oriented. Let’s take a look at the extension’s core features.
First of all, it supports 4 different ways to display the popup. The window can appear on page load. t is the most obvious method for popup display. Next, it is possible to show your login or registration form on a page click. You customer already wants to do something on a page, so you can remind him or her about the ability to create account or login in the most unobtrusive manner. To leave your store visitors even more involved into shopping, the Plumrocket Popup Login Magento 2 module allows to display the popup window only when a customer clicks a link on a page. And if this is not enough, you can create your own manual display method choosing any page element that will launch the popup login after someone clicks on it.
Also note that it is possible to customize the appearance of the popup window. Login, registration, and forgot password forms can be enabled/disabled from the backend. And you can disable customers to close the popup. Although it is not the best idea, but the feature is available in the Plumrocket Popup Login Magento 2 extension. If you enable this functionality, the popup will reappear each time a visitor triggers the specified display method.
To make the welcome message more attractive, you can fully customize it with the help of the HTML editor. Besides, Plumrocket Popup Login Magento 2 Extension allows to select the default form displayed to customers: login or registration. And if you don’t need the popup on certain pages at all, just add the page to the list of disabled pages (the feature is described in the backend section of this post).
For those merchants who need additional information about their customers, Plumrocket allows to add more field to the default form. Note that all user clicks can be tracked and viewed in Google Analytics. Thus, you can customize the appearance of the login popup and easily find out its effectiveness. Various affiliate tracking software solutions are supported as well!
All these features look intriguing, so now we should explore how they are implemented in the backend.
Backend
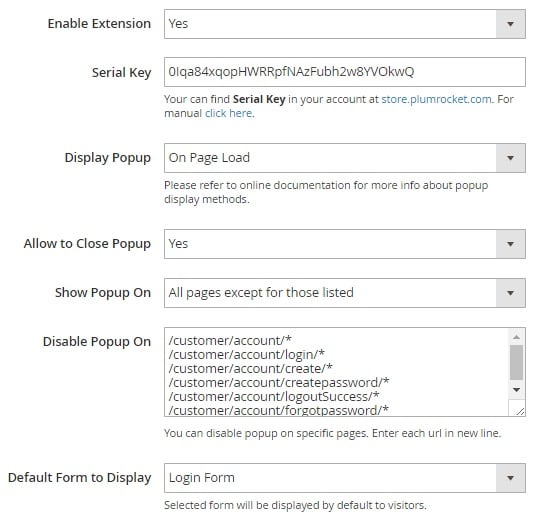
Go to Stores -> Settings -> Configuration -> Plumrocket -> Popup Login. There are 6 sections of settings here: General, Registration Form, Login Form, Forgot Password Form, Popup Design and Effects, and Event Tracking.
The first one allows you to enable/disable the extension and enter its serial key. Next, you select popup display method: On Page Load, On PAge Click, On Page Links Click, or Manually. The feature that allows customers to close the popup is also available here. Besides, you can specify where to show the popup: All Pages, Specific pages (necessary to specify pages), or All pages except for those listed (necessary to specify pages). The last option here provides the ability to set the default form to be displayed. You can choose between login and registration forms.
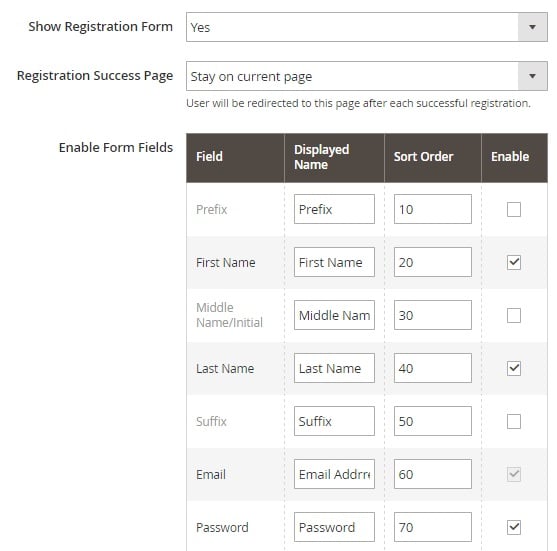
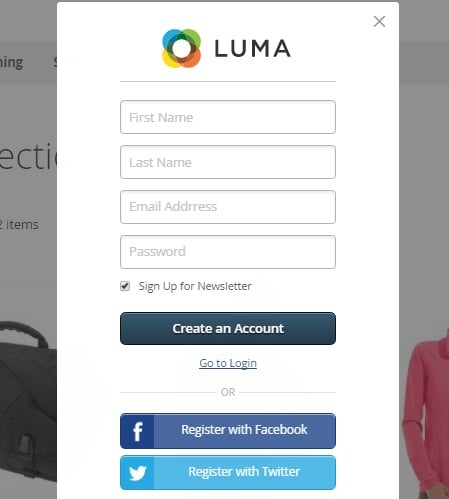
In Registration Form settings, you can enable/disable the form. Next, choose the registration success action. It is possible to: do nothing, so a customer will stay on the current page; complete the click action; or redirect customer to a custom URL or a specified store page. Then, you can enable/disable various additional fields to get more information about customers after registration. It is possible to specify sort order and add custom names to display on the frontend.
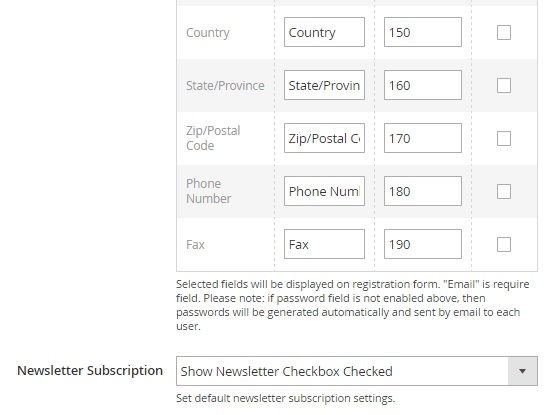
The last parameter that can be configured in this section is related to newsletter subscription. There are 4 ways you can configure it. First of all, the newsletter checkbox can be checked by default. Alternatively, its default state can be unchecked. At the same time, it is possible to hide this field and subscribe store visitors to your newsletter automatically. Besides, you can disable newsletter subscription during the registration procedure.
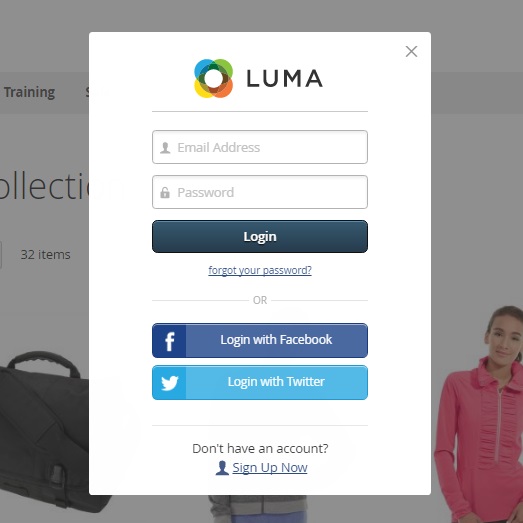
In Login Form, there are just two parameters: Show Login Form (enable/disable it in the popup) and Login Success Page (the same as one we’ve just described).

As for the Forgotten Password Form section, it can be either enabled or disabled. No extra parameters are available.
![]()
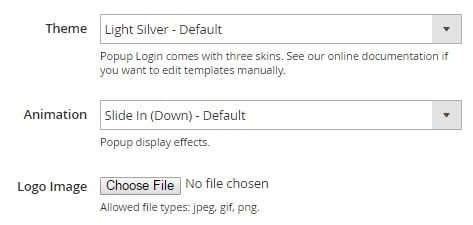
In Popup Design and Effects, select popup theme and animation as well as upload a custom logo image.
The last section allows to enable popup event tracking and upload a tracking code for it.
![]()
Frontend
Below, you can see the example of the login and registration forms.
Login Form
Registration Form
Final Words
Both registration and login procedures becomes as easy as possible if you use the Plumrocket Popup Login Magento 2 module. We strongly recommend you to combine it with the Social Login Pro Magento 2 extension. As for the price of the popup module, it is $149 for Magento 2 and $99 for Magento 1.


