
Magento 2 Store Pickup Extension by Mageplaza
When shopping online, the shipping fee is considered one of the key factors making customers hesitant to make purchases. They do not expect that the product price increases because of the extra fee from delivery. Or they live near the sales point, so they want to buy the product in-store.
How can online store owners serve their customers?
Understanding this, Mageplaza has released a Store Pickup extension for Magento 2. It enables shoppers to select the nearest store location with the most convenient date and time. The module also offers a lot of potent functions. Let’s explore now!

Table of contents
What makes it worth buying the Mageplaza Store Pickup for Magento 2 stores?
Enable customers to pick up products from the nearest physical store
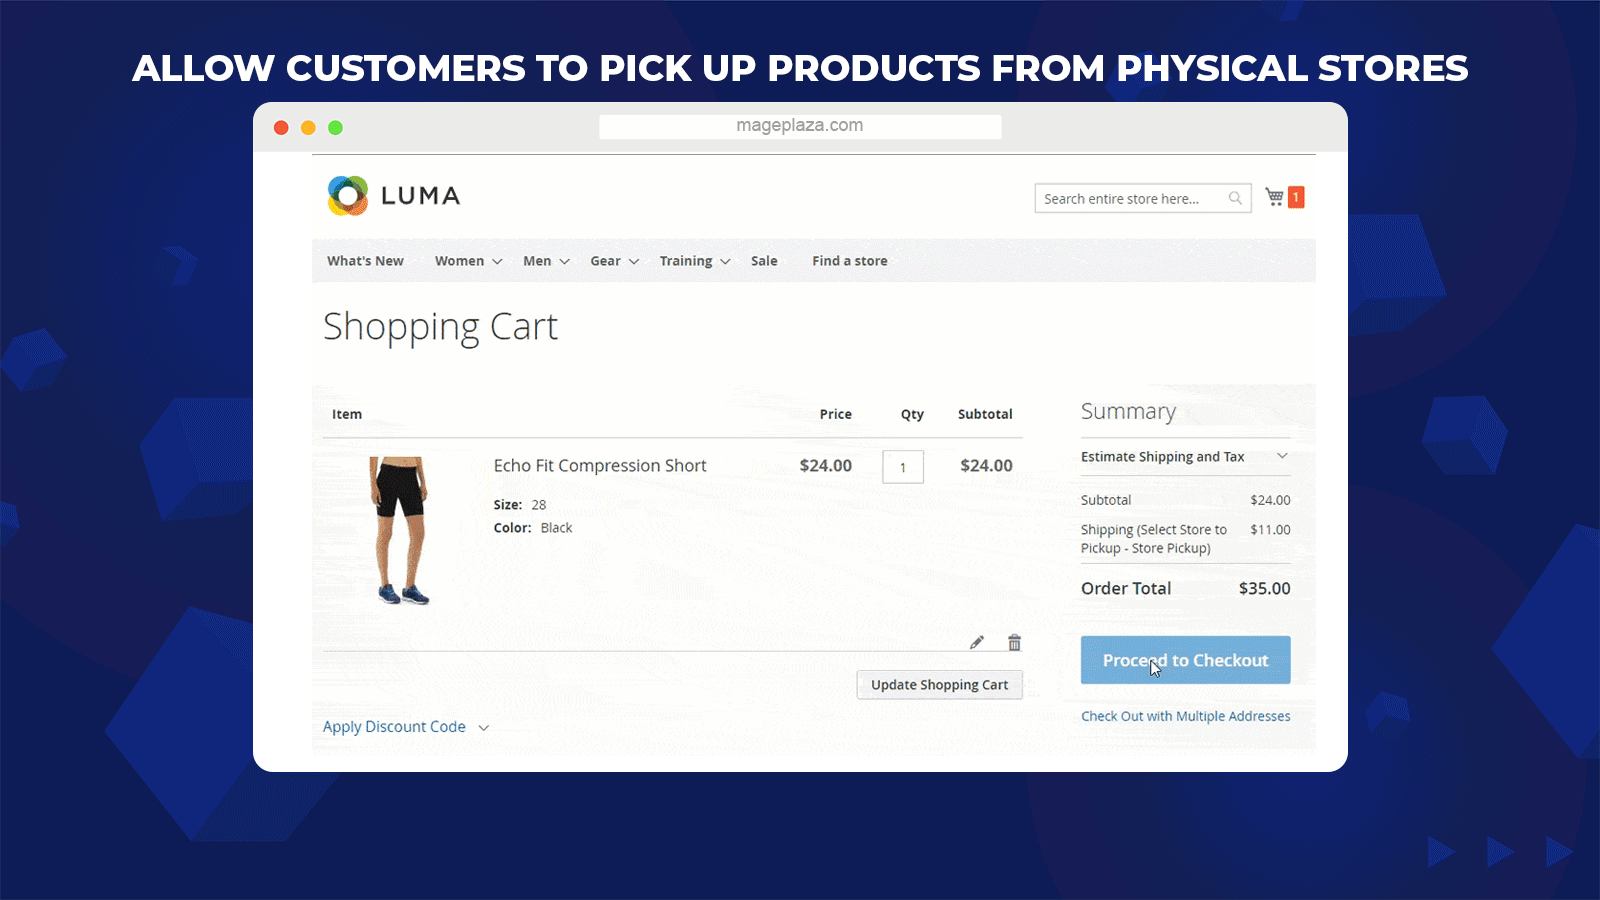
The extension helps store owners to allow shoppers to pick up the product conveniently. They can determine when and where to pick up and lower a specific amount of shipping fee.
Admins can add the store pickup option as a shipping method at the checkout page. When shoppers go to the checkout page, they can easily choose Store Pickup at the Shipping Method section.
With only one click, a pop-up shows up and gets ready to obtain pick-up information from the shoppers. Then a drop-list of pick-up stores appears and shoppers need to choose their preferred ones.
Store Pickup as a shipping method is also presented in the My Orders section (of My Account Page) of logged-in shoppers.
Set pickup time for both sides
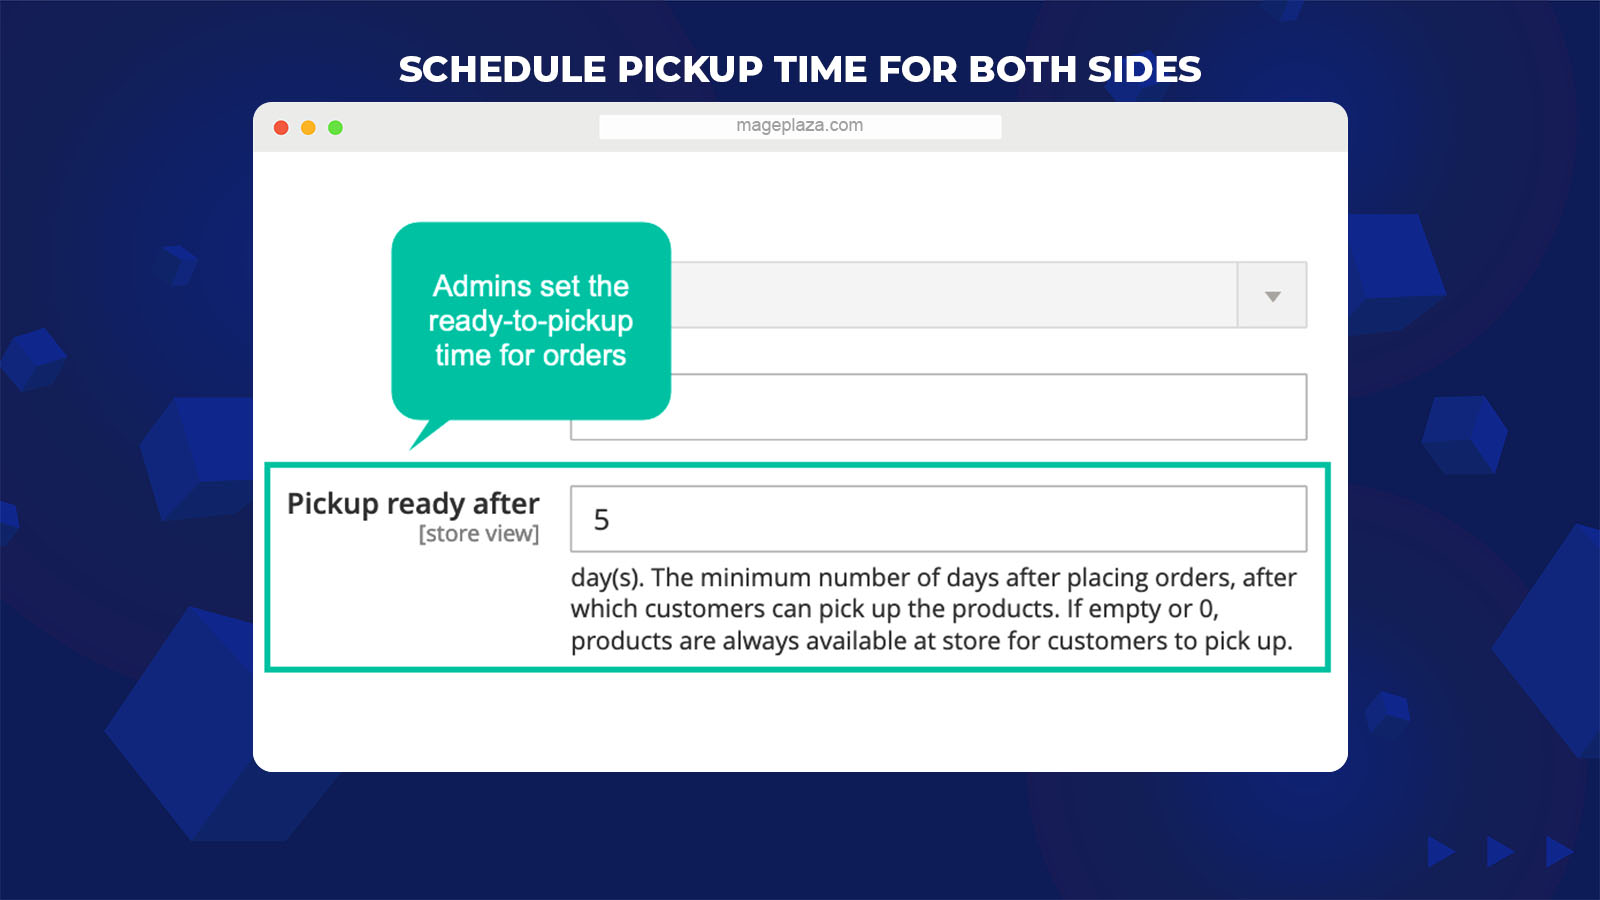
For shoppers, after they choose the suitable locations to collect their ordered products, the next step is to decide the pickup time. At the pop-up, Shoppers can enter their free date and hour in detail. For instance, the pickup time is set for 20th November 2020, at 9h30 pm.
For admins, to ensure the products are ready when shoppers arrive, they can set a certain number of days after the orders have been placed. For example, every product can be picked up after 4 days shoppers have ordered.
The schedule function brings convenience for both sellers and buyers, making sure the products will get to customers perfectly.
Configure the availability of stores for each product
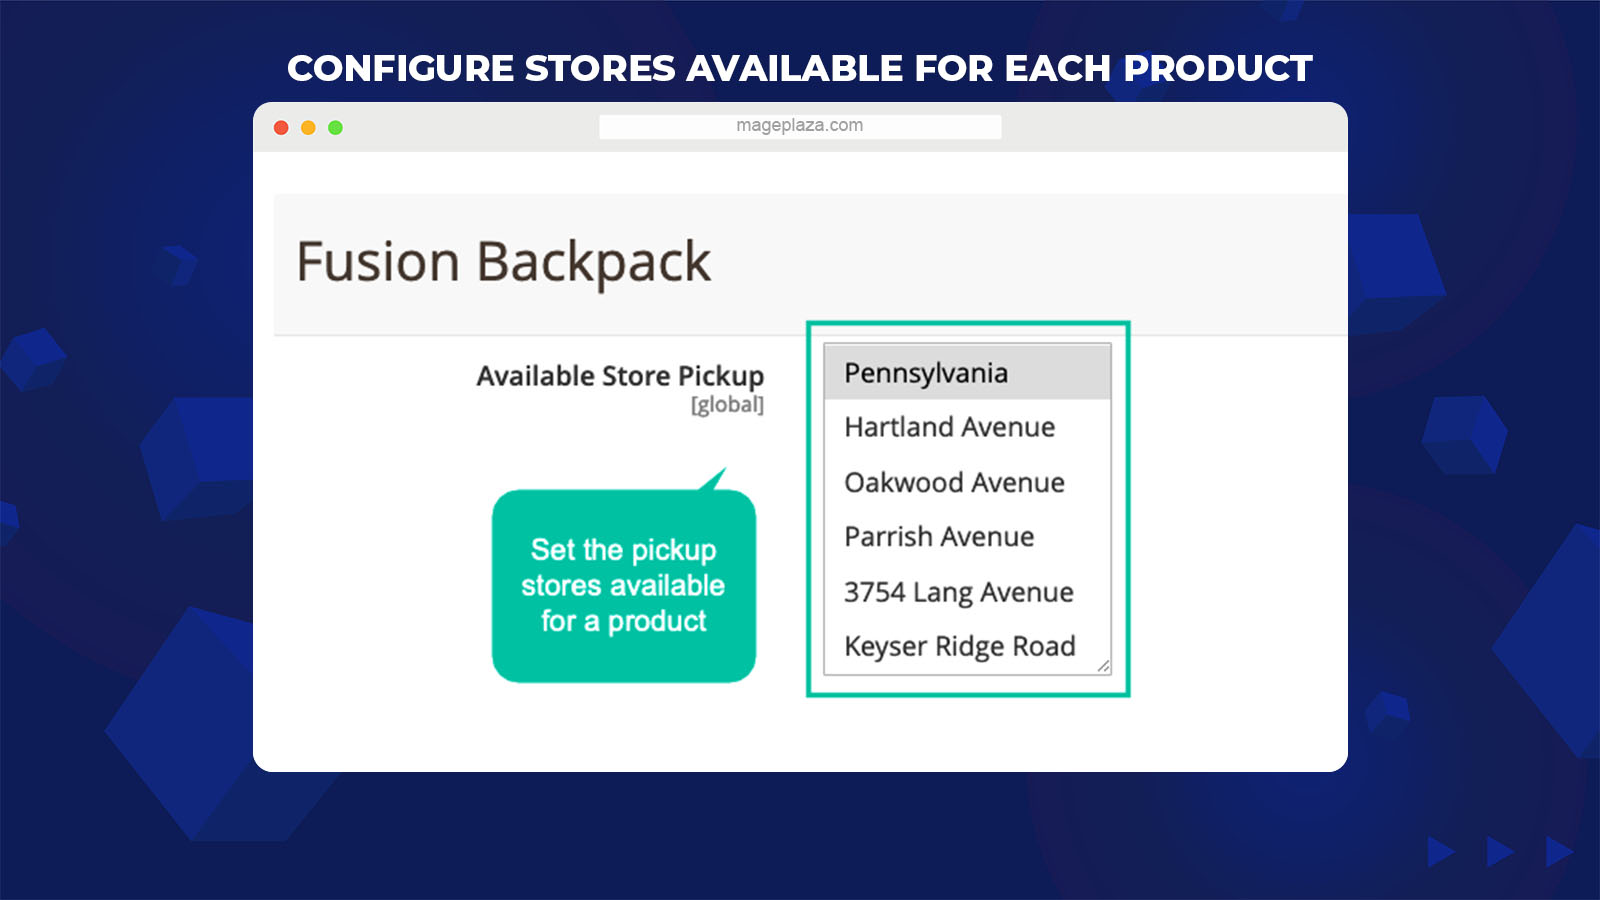
If products are only available at particular store branches, store owners can configure to set these products pickable according to those branches.
This is essential for the real inventory situation of each store branch. As the stock of an item is small, the store admin can assign this item to only some certain branches. Moreover, special discount items are only available at new branches, aiming at drawing shoppers to visit.
Display pickup stores right on the product page
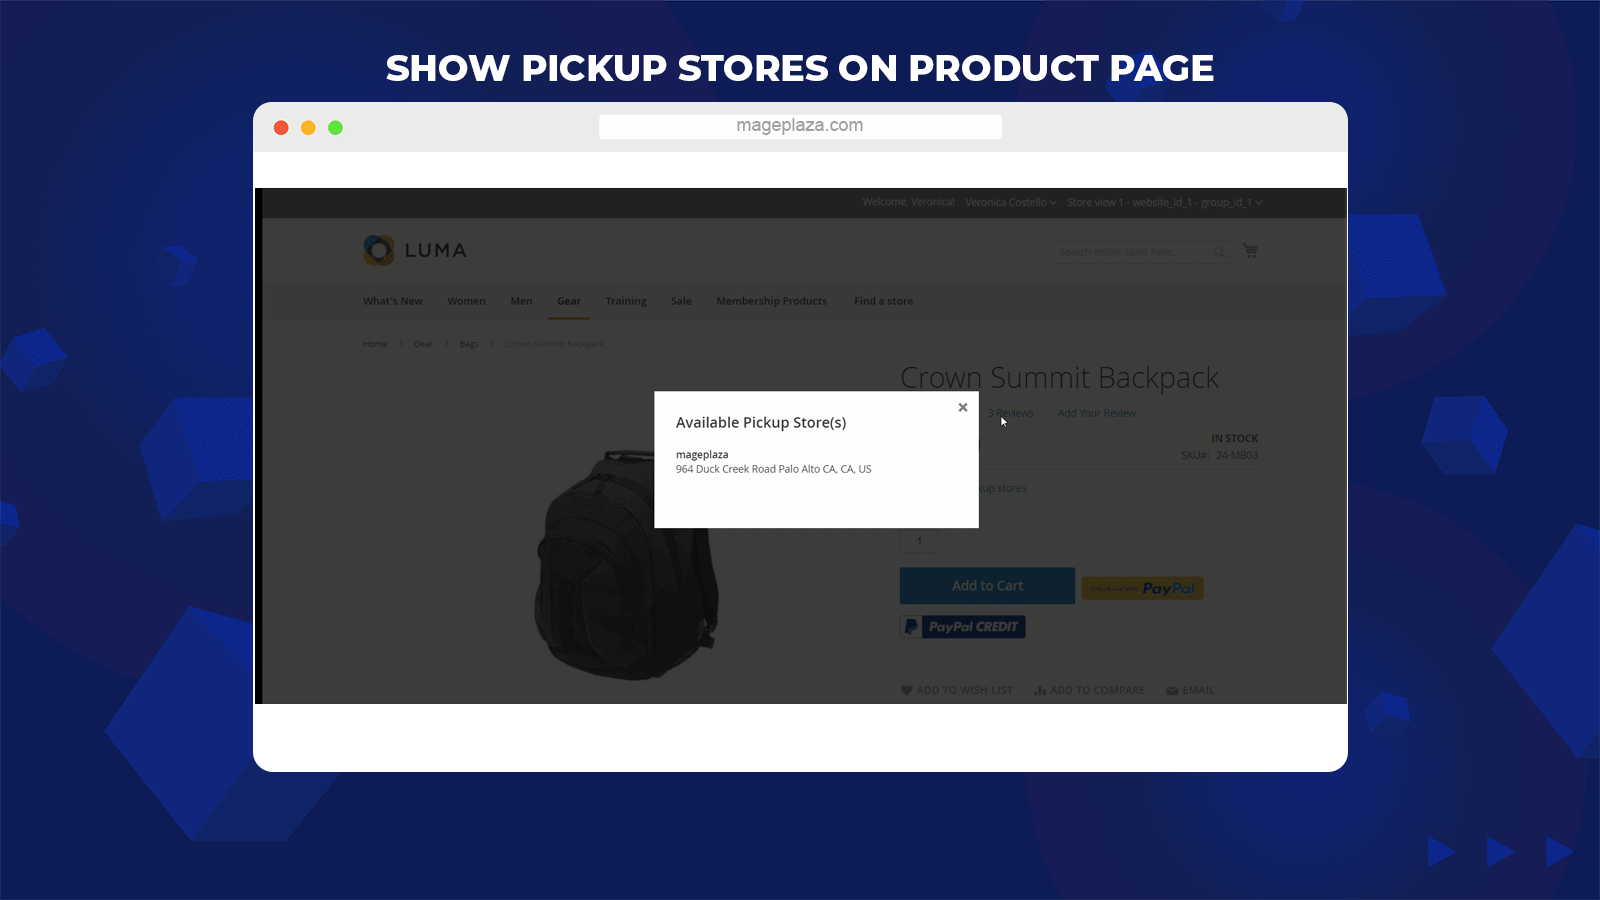
Shoppers can view the store branches enabling pickup from the product page. As customers are viewing an item, they can figure out where they can visit to take this item.
A pop-up will be displayed after one click, recommending the list of suitable pickup locations for the buyers.
More features
Display pickup information in both the backend and frontend
Store owners are allowed to display pickup stores at the Frontend Order View and Backend View.
Support popups
Popups will show up when shoppers choose the Store Pickup method and when store admins change the labels.
Determine handling fee for store pickup
The extension enables admins to set handling fees for the store pickup method.
Extension compatibility
Magento 2 Store Pickup is well compatible with One Step Checkout, Shipping Restrictions, Shipping Rules, Extra Fees, and Delivery Time from Mageplaza.
Backend
General configuration
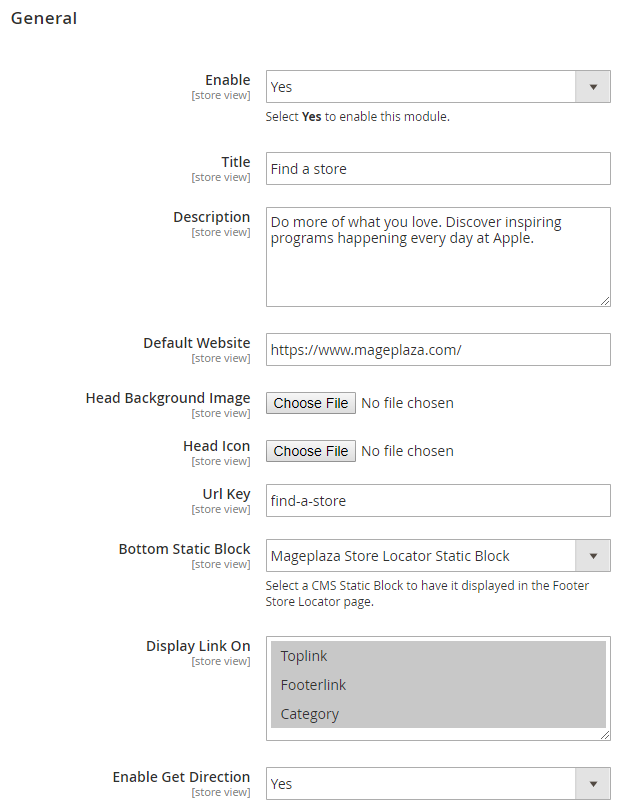
- Enable: Select Yes to turn on this extension
- Title:
- Create the title for the page
- The title works as a label of the link that directs to the page
- If this field is left blank, the default is Find a store.
- Description: Write the description for the page
- Default website: Insert the default website for the store. With stores that have different branches, admins can sync the website with this product
- Head Background Image: Upload the background image for the head block
- Head Icon: Upload an icon for the head block
- URL Key:
- Insert the link to access the page
- If this field is left blank, the default is Find a store
- Display Link On: Choose where the link can be shown on the frontend.
- Enable Get Direction: Choose Yes to allow the directions to the store when customers want
Filter store

- Enable: Choose Yes to activate the search feature
- Auto-Filter by current position: Choose Yes so that shoppers can move the maps back to their position with just one click in the search box.
Map settings
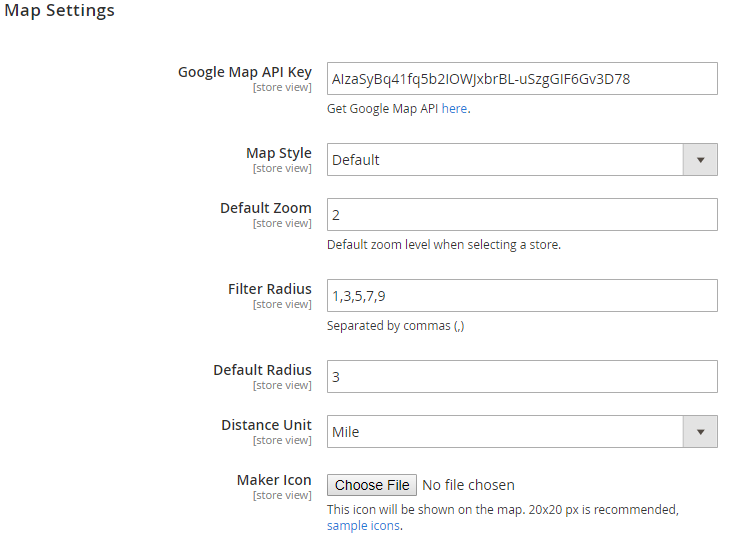
- Google Map API Key: If you want Google Map to get the coordinates of the locations that admins have included, admins have to insert the Google Map API Key into this section.
- Map Style:
- The extension offers 4 most widely-used style maps for admins to select.
- Admins can only choose one style at once.
- Admins can customize the maps as they want.
- Admins can assign Map Style as the guide in the last section of this page.
- Zoom Default:
- Set map zoom factor (count by %)
- A zoom factor of 12% is recommended
- Filter Radius:
- Install the search radius store from the customer location that they can utilize
- Radiuses are separated by commas.
- For instance: 10, 20, 40, 80
- Default Radius:
- Set the default search radius store from the customer location. When the customer visits the page, the map will filter the stores close to them in this radius.
- This number may differ from the number inserted in the Filter Radius field.
- If the field is left blank, the default radius is 6731 miles (similar to the radius of the Earth)
- Distance Unit: Admins can select the unit distance as Mile or Kilometer based on the location.
- Marker Icon:
- Choose the icon showing the address of the store on the map.
- Since it doesn’t resize itself, admins have to adjust the size of the icon to 20×20 px before uploading.
Store Time Default
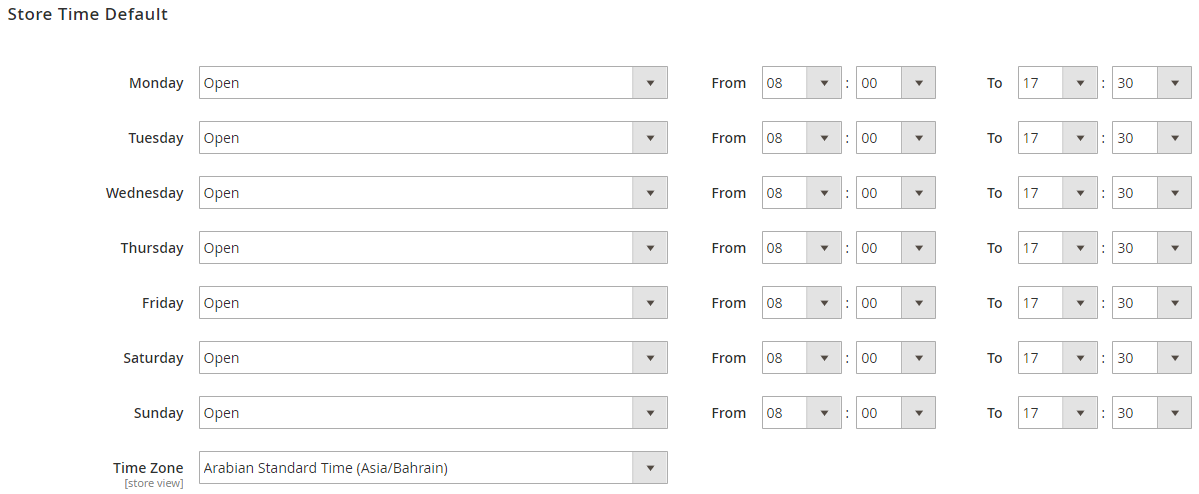
- Admins can decide the timezone and opening time for each product of the week for all stores. These values are only default values and only applied if admins click on the Use Config button when they Add New Location.
SEO
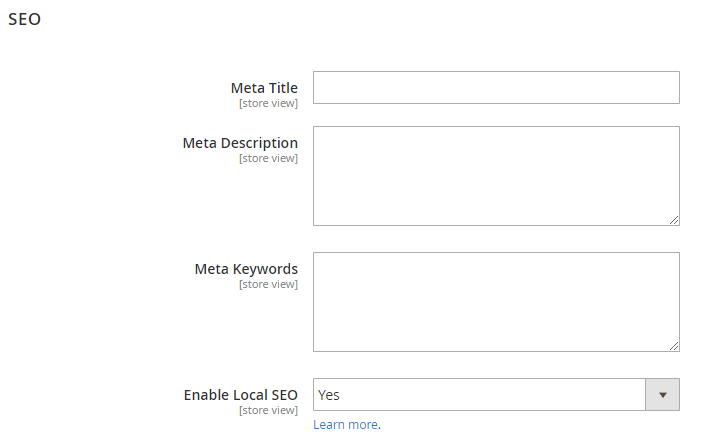
You can configure the meta that is beneficial for your SEO.
- Meta Title: Create the Meta Title for the blog page
- Meta Description: Create the Meta Description for the blog page
- Meta Keyword: Create the Meta keywords for the blog page
- Enable Local SEO: Choose Yes to allow local SEO
Locations
Grid
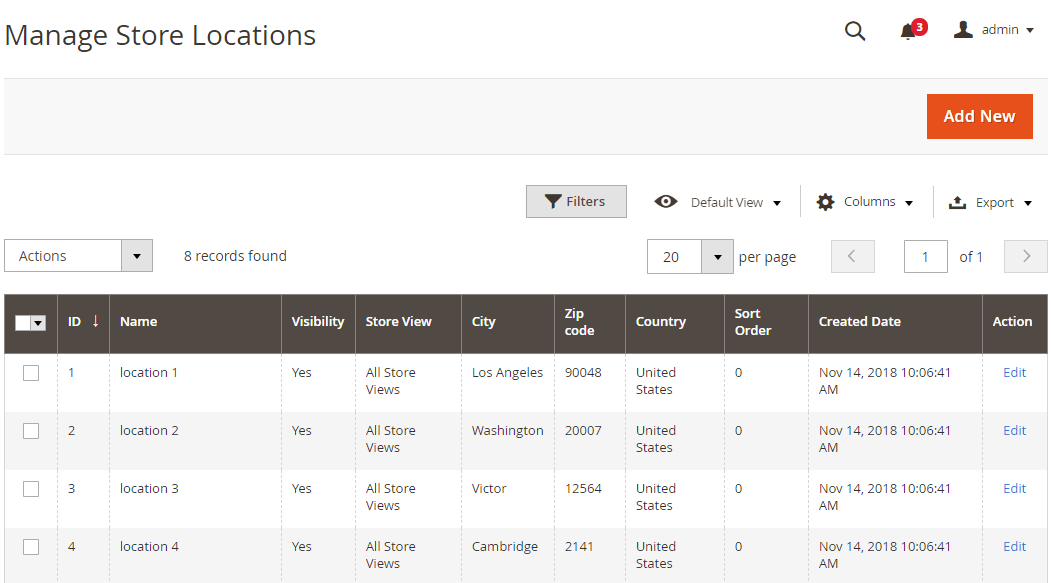
- This is a place to save all store locations that are generated.
- From the Gird, admins can get the fundamentals of store locations such as ID, Name, Visibility, Zip Code, City, Country, Store View, Sort Order, Create Date, and Action.
- In the Actions dialog, admins can implement the actions below:
- Delete: Admins have to tick Store Location to remove, then choose Delete in the Actions (in the upper left of the Grid) to delete. A confirmation dialog will pop up, choose OK to continue deleting.
- Change Visibility: Admins have to tick Store Location to modify the status, then choose Change Visibility > Yes/No in the Actions dialog (in the top left of the Grid) to change. A confirmation dialog will show up; choose OK to confirm the change.
- In the Action column, admins can choose Edit to change the store location.
- Besides, admins can Filter, Change Store View, show/hide Columns, Export Grid, or edit inline.
Add New/Edit Store Locator Order form
General
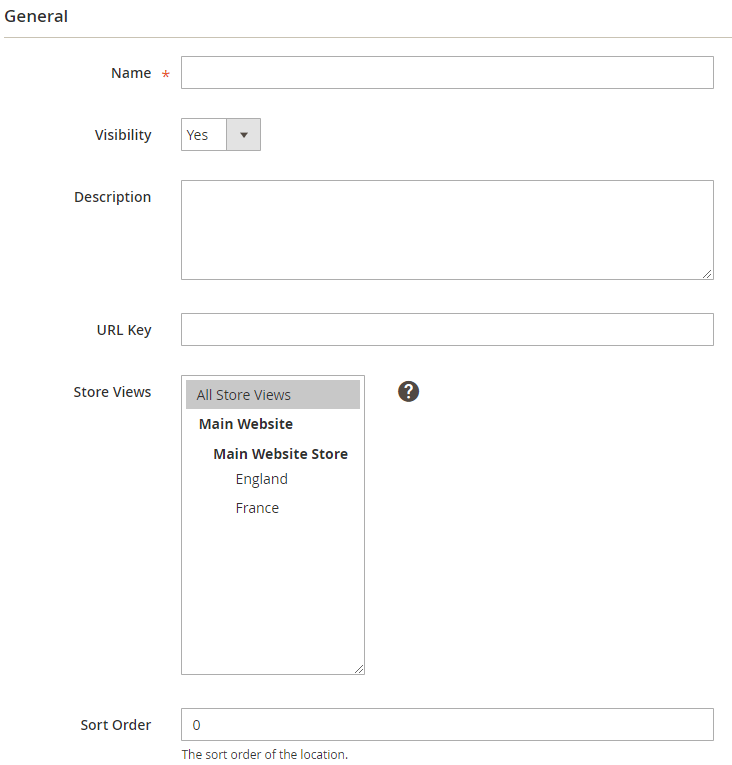
- Name: The name inserted here is shown in both the frontend and backend.
- Visibility: Choose Yes so that the store locator is shown on the frontend
- Description: Record a brief description for the store
- URL Key:
- Insert the link to reach the location
- If the field is left blank, after you save, according to the Name field, URL Key will automatically be created (unless the name is a hieroglyphic as Korean, Chinese, Russian, Japanese, etc.)
- Store View: Store Location is only available in the selected store views
- Sort Order:
- Decide the display order of the Store Location on the frontend
- 0 is the highest position
Location
Address Information
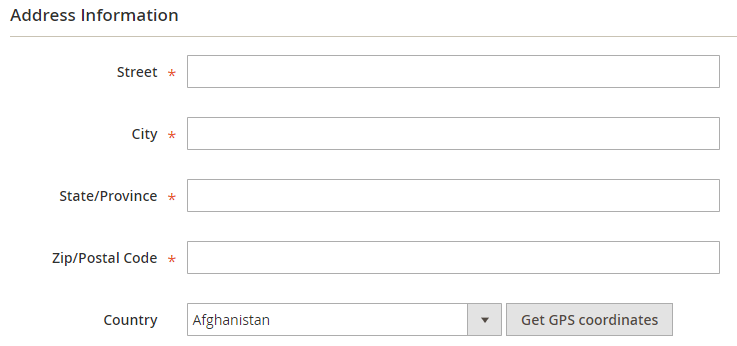
- Enter the store location’s address information in these fields
- After filling in the accurate address, admins can choose Get GPS Coordinates to automatically obtain coordinates and display on maps.
Review Map
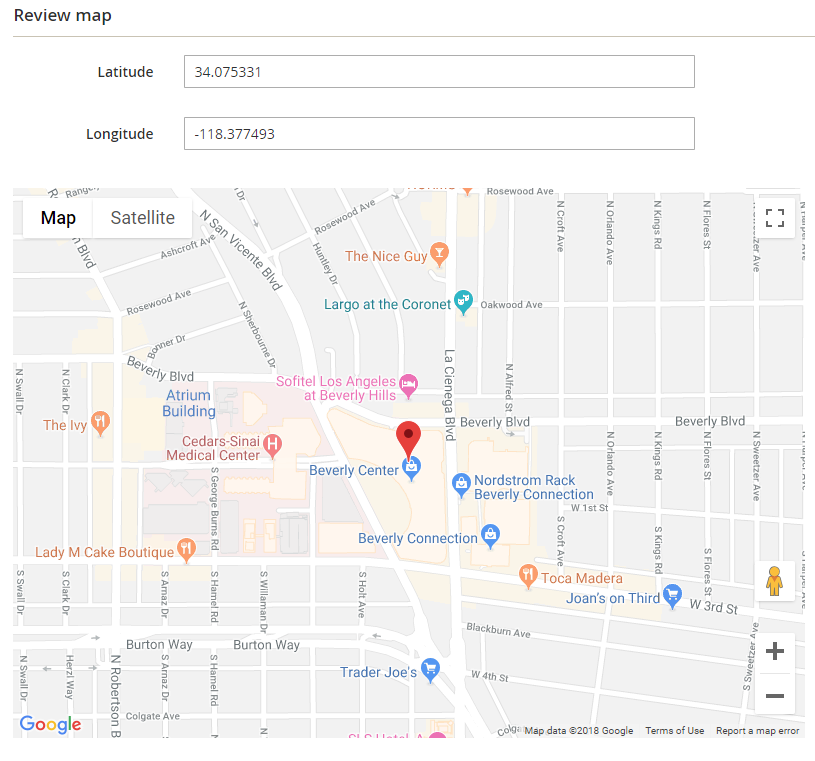
- The coordinates of the store location are displayed here.
- They can be acquired automatically when admins Get GPS Coordinates. Besides, admins also can enter manually.
- The coordinates change based on the marker icon when it moves to another location; meanwhile the information on the address (street, city, etc.) will remain the same.
Time
Open Hours
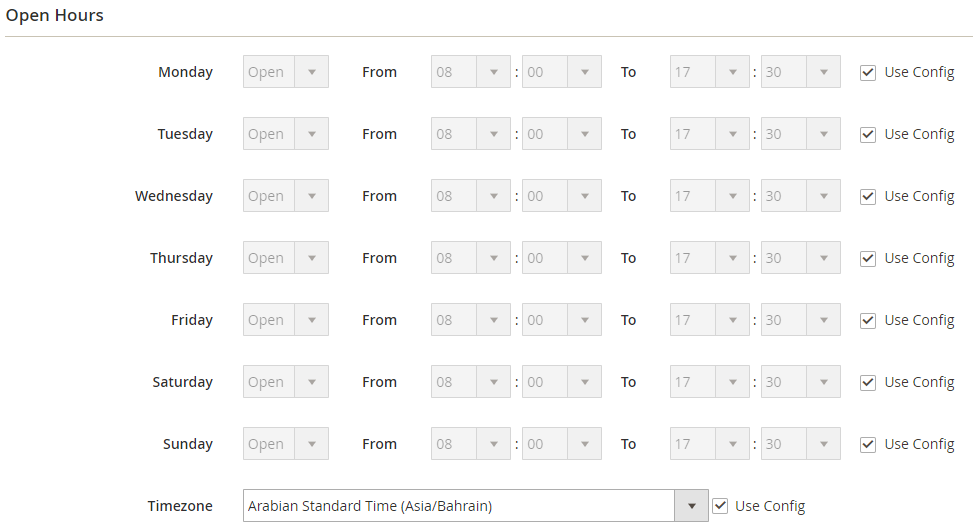
Holiday

- Holidays generated under Content > Store Locator > Holidays will be shown in this section.
- The created holidays will be applied to the store. Opening times on the frontend will turn Open into Close on holidays.
Contact
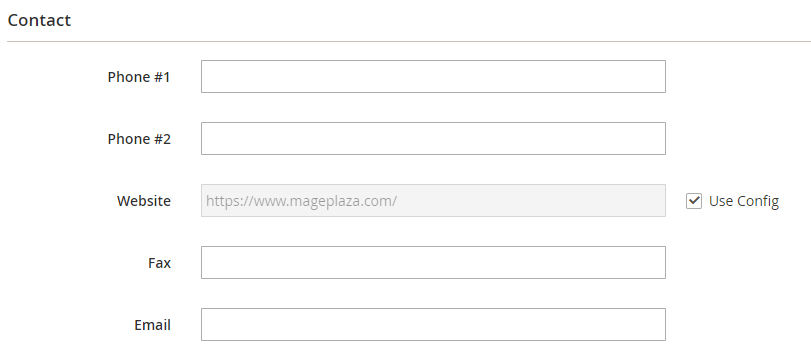
- Admins can fill in their contact details to show on the frontend.
- Basic details can include phone number, website address, email address, and fax number.
Images
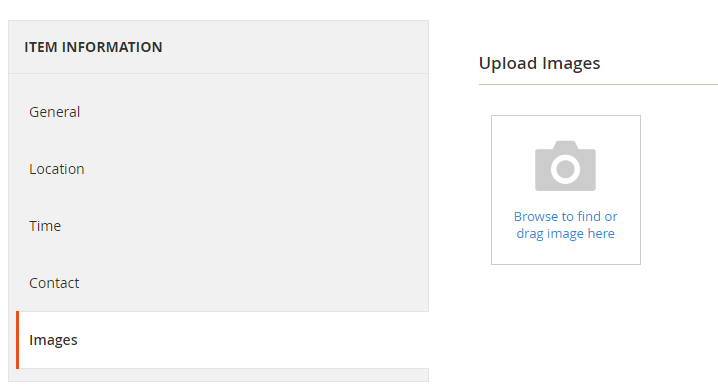
- Admins can upload the typical photos of the store to show on the frontend.
- The uploaded first image is shown on the store locator page; the remains are shown in a slider when the shopper clicks the location detail.
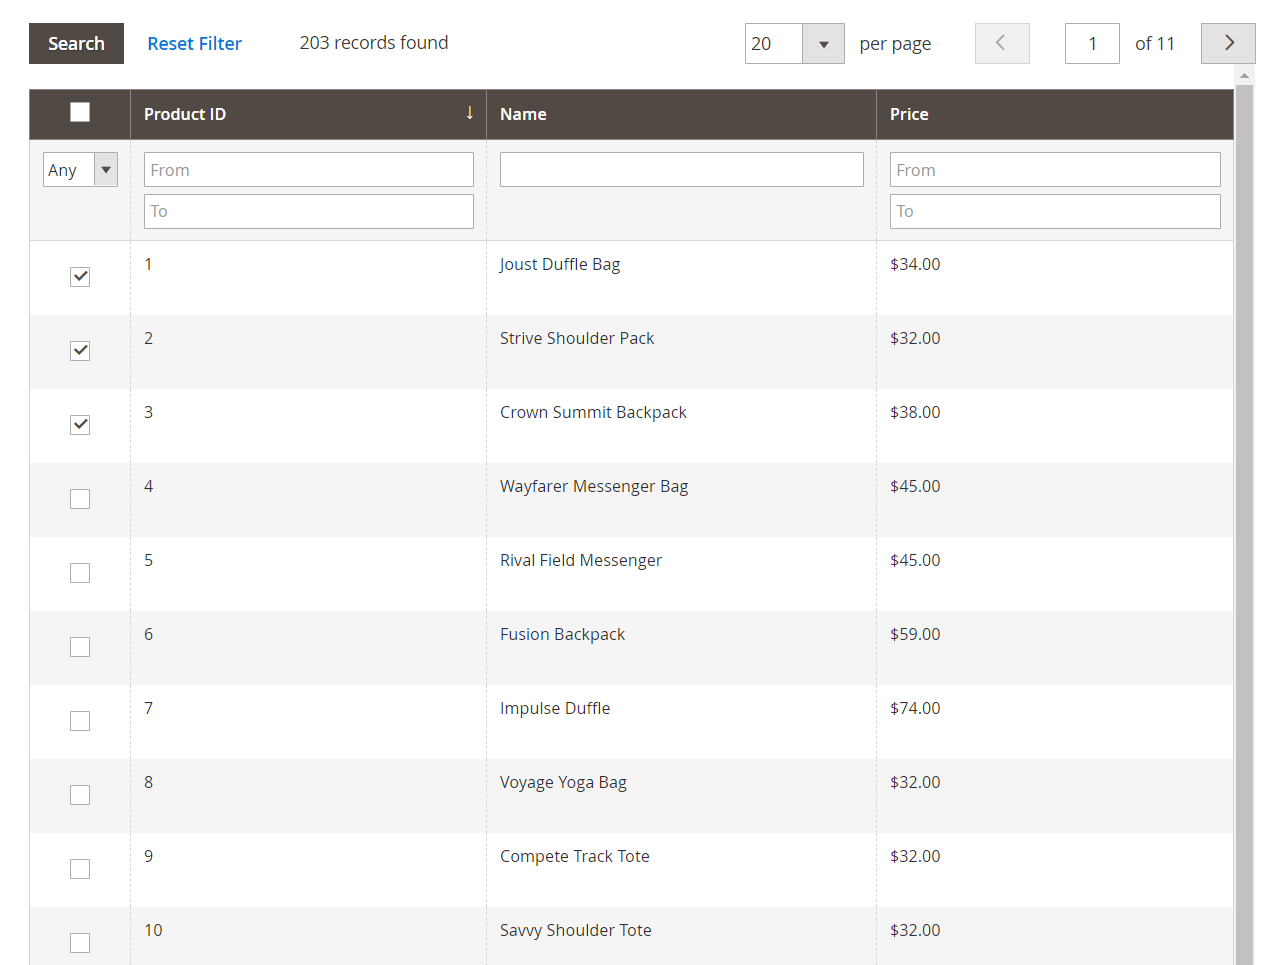
Available Products
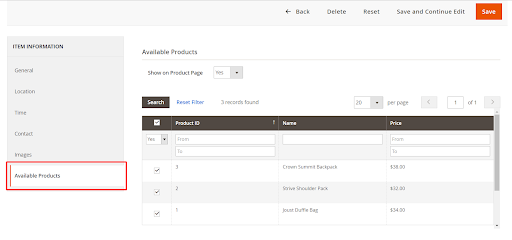
- Show on Product Page: Choose Yes to enable displaying specific stores pickable on the product page. For each product page, customers can click on the See available pickup stores to check in which stores currently have the product.

- Selected Product: This section records the details of products within related stores. Admins can find, filter product ID, SKU, and Price in the Grid. Admins also can put products to each store locator.
Manage Holidays Grid
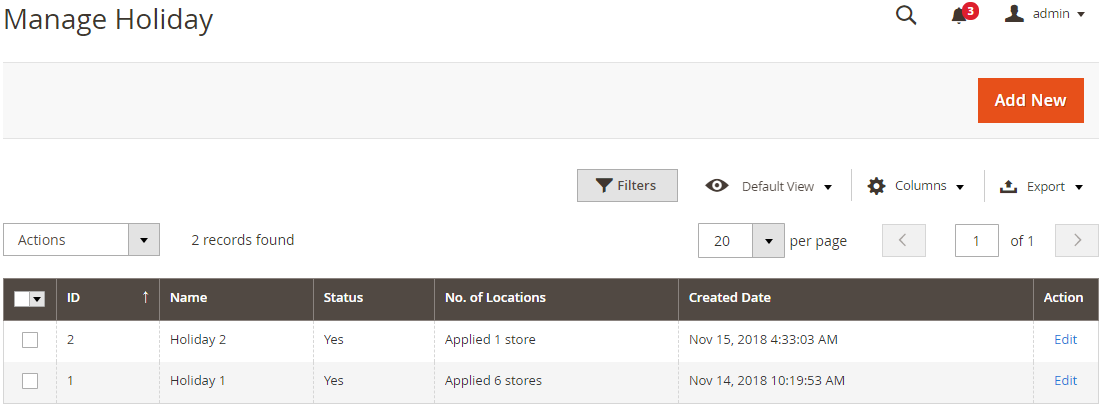
- This is a place to save all the holidays that admins created for the store.
- From the Grid, admins can know the fundamental information such as ID, Name, Status, No. of Locations, Create Date, and Action.
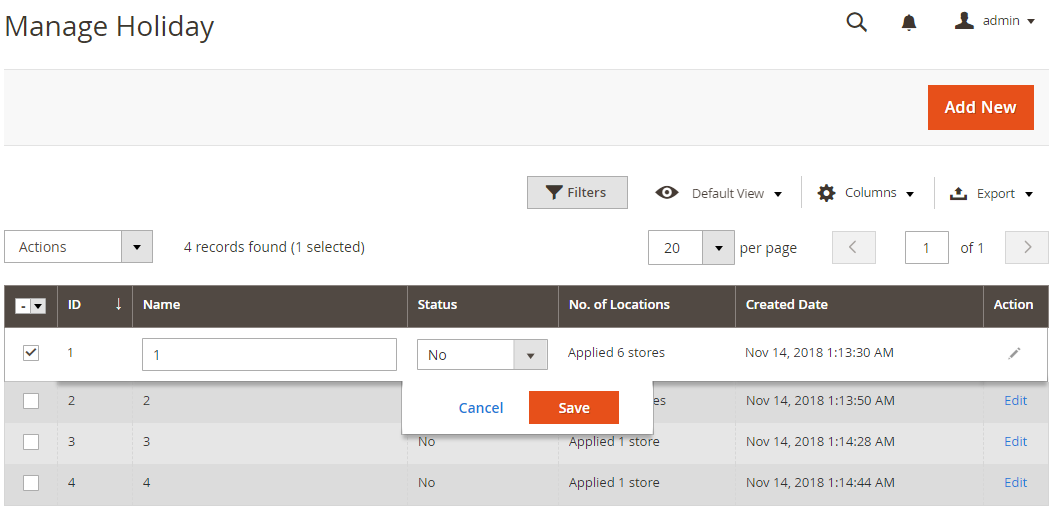
- In the Actions dialog, admins can implement the actions below:
- Delete: Admins have to tick Store Location to remove, then choose Delete in the Actions (in the upper left of the Grid) to delete. A confirmation dialog will pop up, choose OK to continue deleting.
- Change Visibility: Admins have to tick Store Location to modify the status, then choose Change Visibility > Yes/No in the Actions dialog (in the top left of the Grid) to change. A confirmation dialog will show up; choose OK to confirm the change.
- In the Action column, admins can choose Edit to change the store location.
- Besides, admins can Filter, Change Store View, show/hide Columns, Export Grid, or edit inline.
How to add Map Style
- Step 1: Select Map Style = Custom
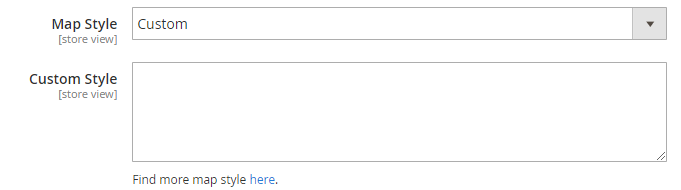
- Step 2: Click here in the comment. The link will be directed to
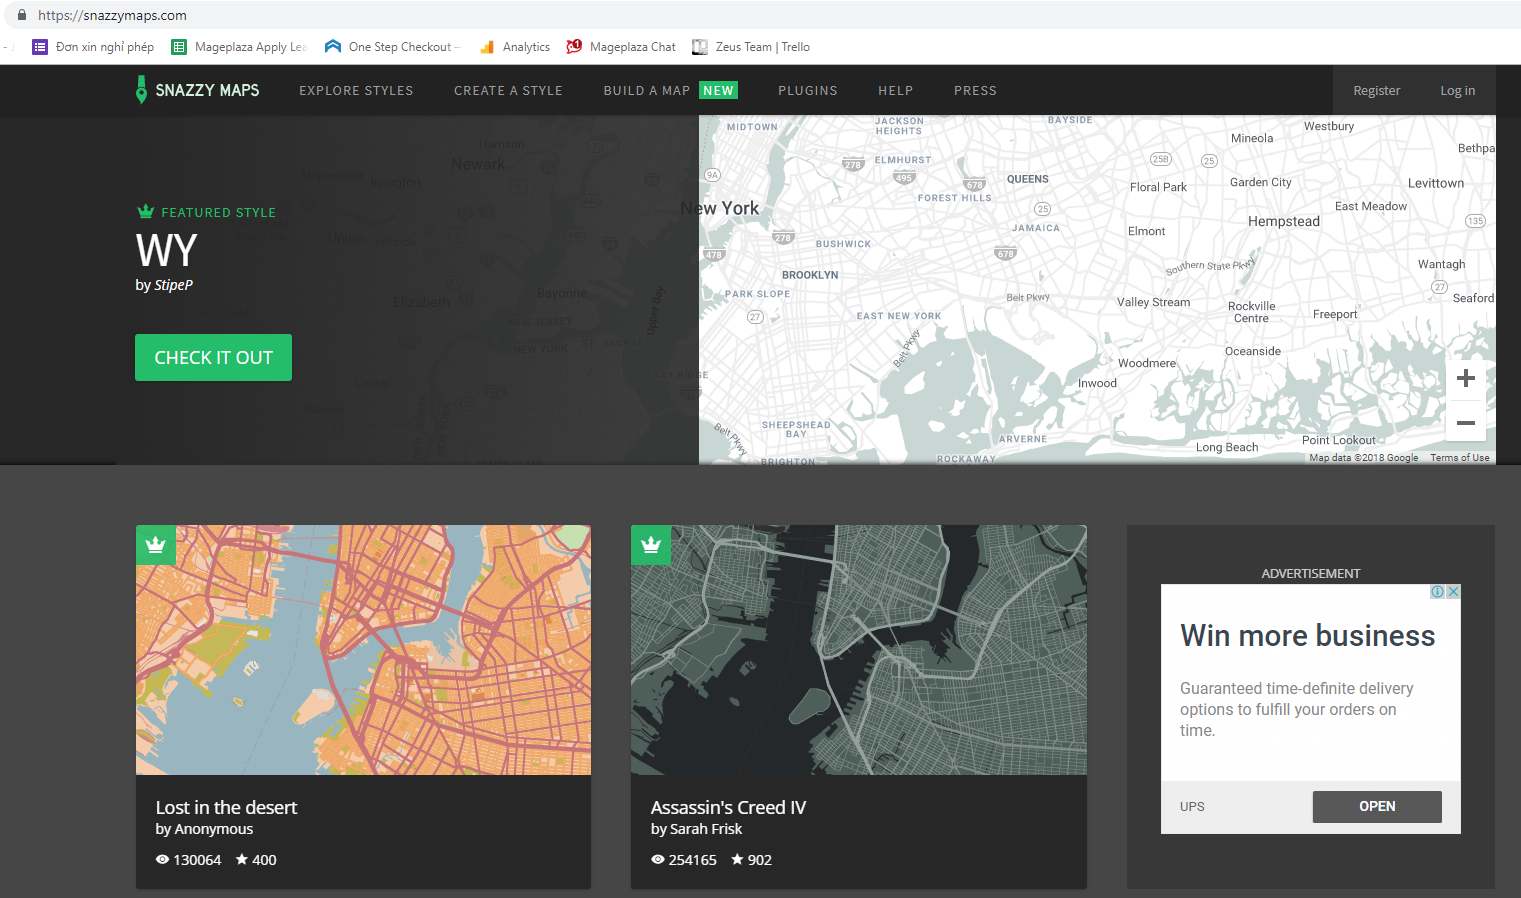
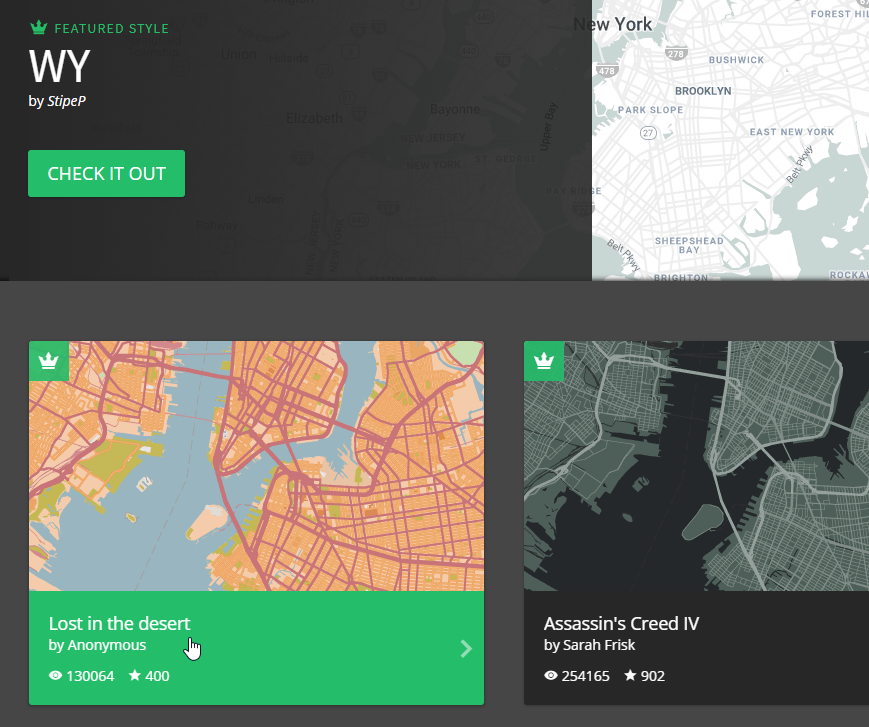
- Step 3: Choose the Map Style that you want. For instance: Lost in the desert
- Step 4: Expand Code and copy JAVASCRIPT STYLE ARRAY into the custom checkout in the configuration

- Step 5: Save and have a check on the frontend
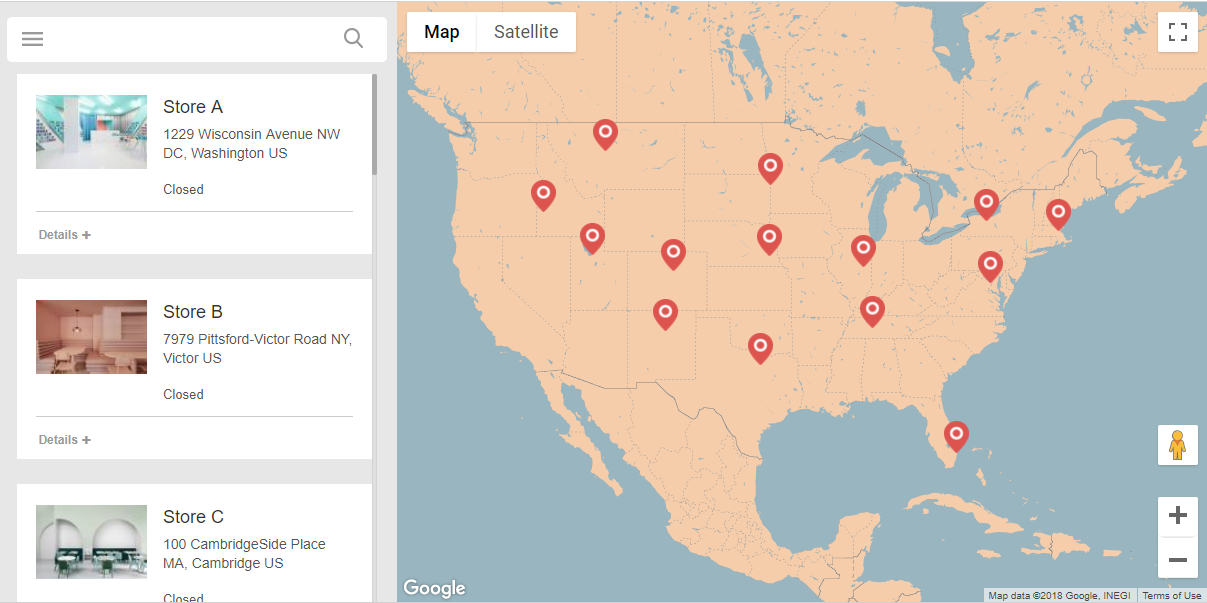
Frontend
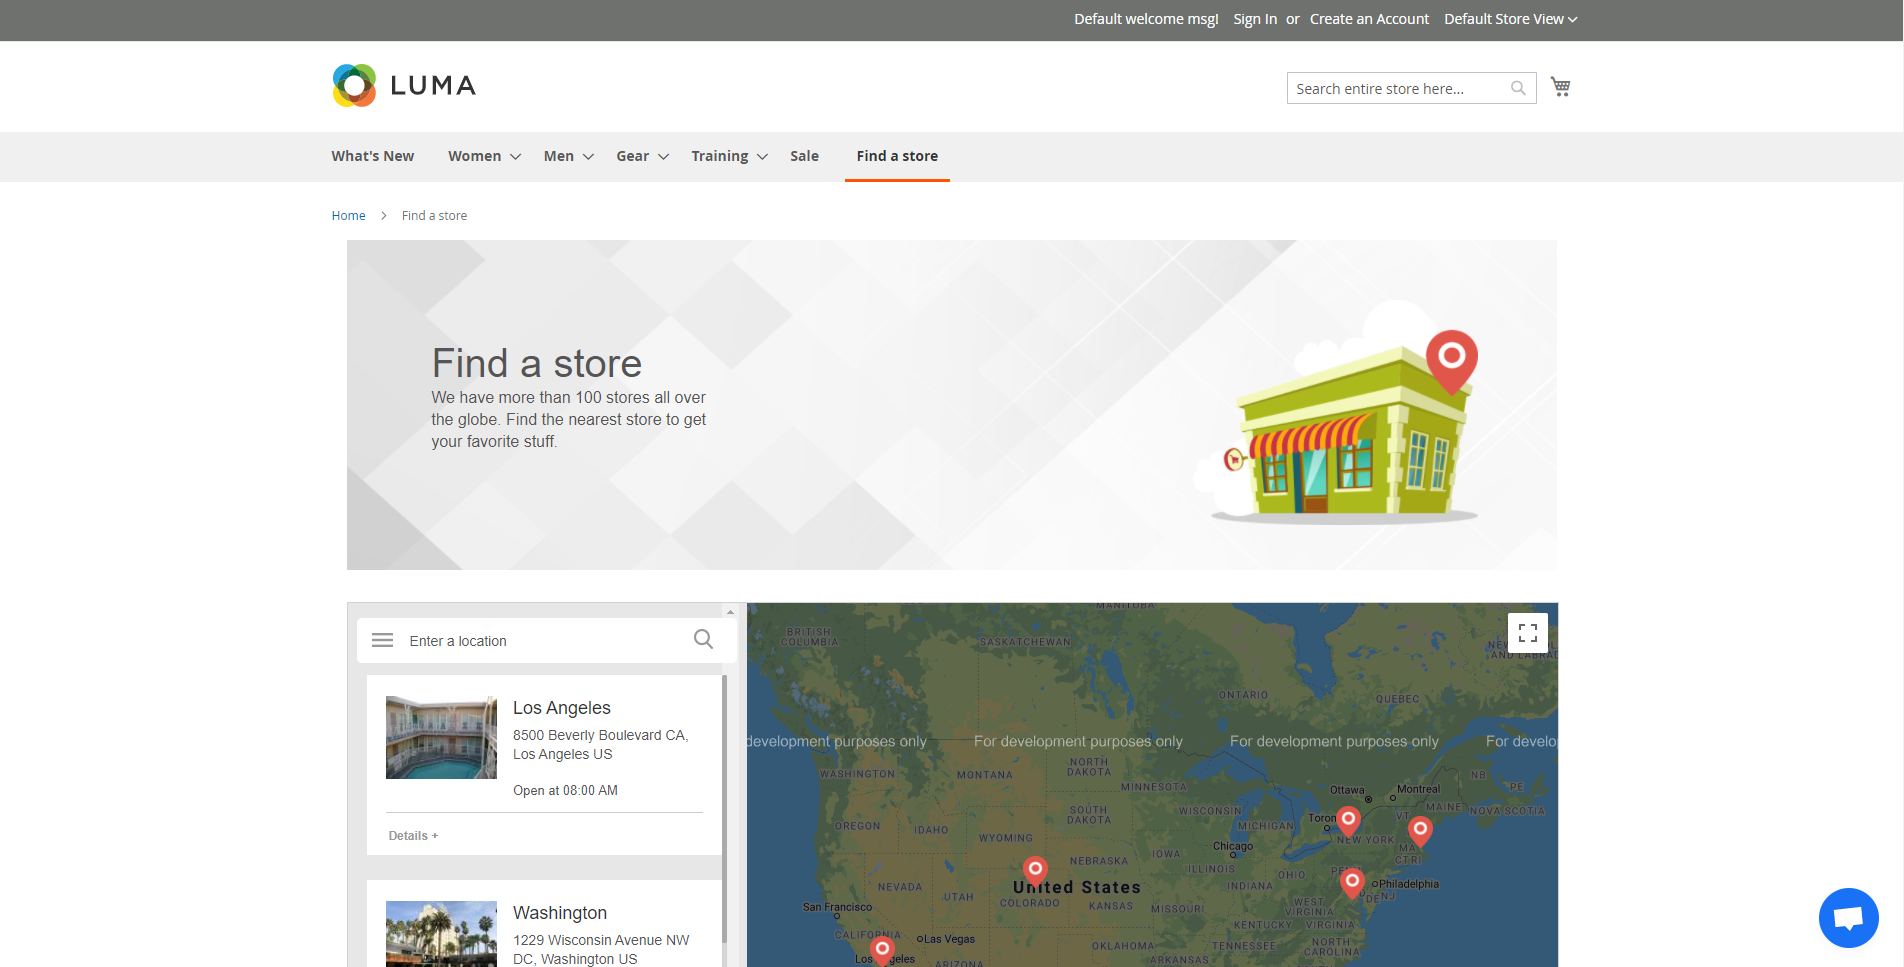
As you can see in the frontend, customers can easily choose a physical store to pick up their products in person.
Summary
The Magento 2 Store Pickup extension by Mageplaza can help complete your online store better. The module saves a certain amount of the shipping fee for stores and creates a better shopping experience for customers. Nothing is better than making your customers happy and satisfied, right?
Consider installing Mageplaza Store Pickup for Magento today to discover all of its unique features.
HOT DISCOUNT: Use coupon code FIREBEAR to receive a 10% discount when purchasing.
Related posts
 How to update products that are not listed in a product table during Magento 2 import
 Shopware 6 Advanced Pricing Guide + Import Tutorial
- How to generate order increment IDs automatically during Magento 2 import
- How to Import Customers & Customer Addresses to Magento 2
 Magento 2 Release Notes
 Magento 2 B2B Company Guide: Revealing Company Structure & Import
 Adobe (Magento 2) Commerce and Cloud (Enterprise Edition) Specific Features
 Amasty ChatGPT AI Content Generator for Magento 2