
Firebear Import & Export Tool for BigCommerce User Manual

is a BigCommerce app that can be installed on your store, allowing you to import and export products and other entities in and out of your e-commerce website. You can use CSV, XML, and XLSX formats to import any data files. Also, it is possible to match columns from the file with the product and customer properties from your store using mapping to transfer any custom table to your BigCommerce website.
Table of contents
How it works
You start by creating an import or export profile where you decide on which type of data you want to import or export. Then, you specify the file type, either CSV, XML, or Excel XLSX, and decide on the additional options such as: where the profile should run by schedule, how the images should be processed, and specify the separators used in the file you want to import.
After that, you upload the file and apply mapping to the file columns if required. The mapping allows you to match the columns from the imported file with the product or customer properties at your BigCommerce store. In other words, you can import files from your suppliers or ERP/CRM system without editing the file.
The Import & Export Tool app processes the file and communicates with your store using BigCommerce API to either create or update the entities you are importing.
App features
File formats
- CSV
- XML
- XLSX
- Google Sheet
Entities
- Product import and export
- Customer import and export (in progress)
- Order export (in progress)
Import and export sources
- Direct file upload
- FTP/FTPS
- URL import
- Google Drive
- Google Sheets
Performance
- Maximum number of imported rows: 300000
- Maximum number of exported rows: 300000
- Number of import jobs that can be launched simultaneously: 3
- Number of export jobs that can be launched simultaneously: 3
- File Limit for URL & Manual Uploads: 200Mb
Installation
The application can only be installed from your BigCommerce backend via your BigCommerce Account.
- Log into your store’s backend and proceed to Apps -> Marketplace.
- Proceed to the BigCommerce app marketplace.
- Search for Firebear Import & Export Tool
- Click the Firebear Import & Export Tool application
- Click the “GET THIS APP” button
- Continue the installation process.
This is it, you have just installed our data transfer solution for BigCommerce.
Find The Extension
You can find the application under Apps -> My Apps -> Firebear Import & Export Tool.
Import
You will see the import side of the tool on the application’s main page. It is divided into the following two sections: List of import profiles & Import log.
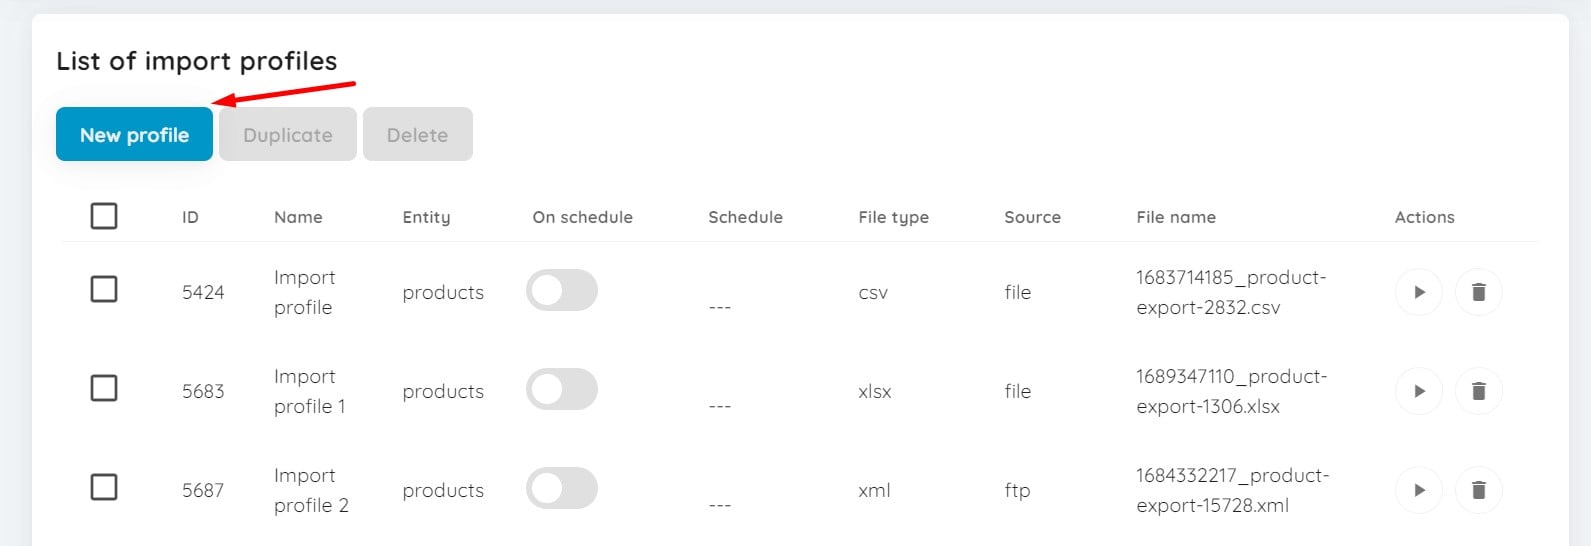
You can see the List of import profiles section below:
And this is your Import log:
Now, let’s explore each section in more detail.
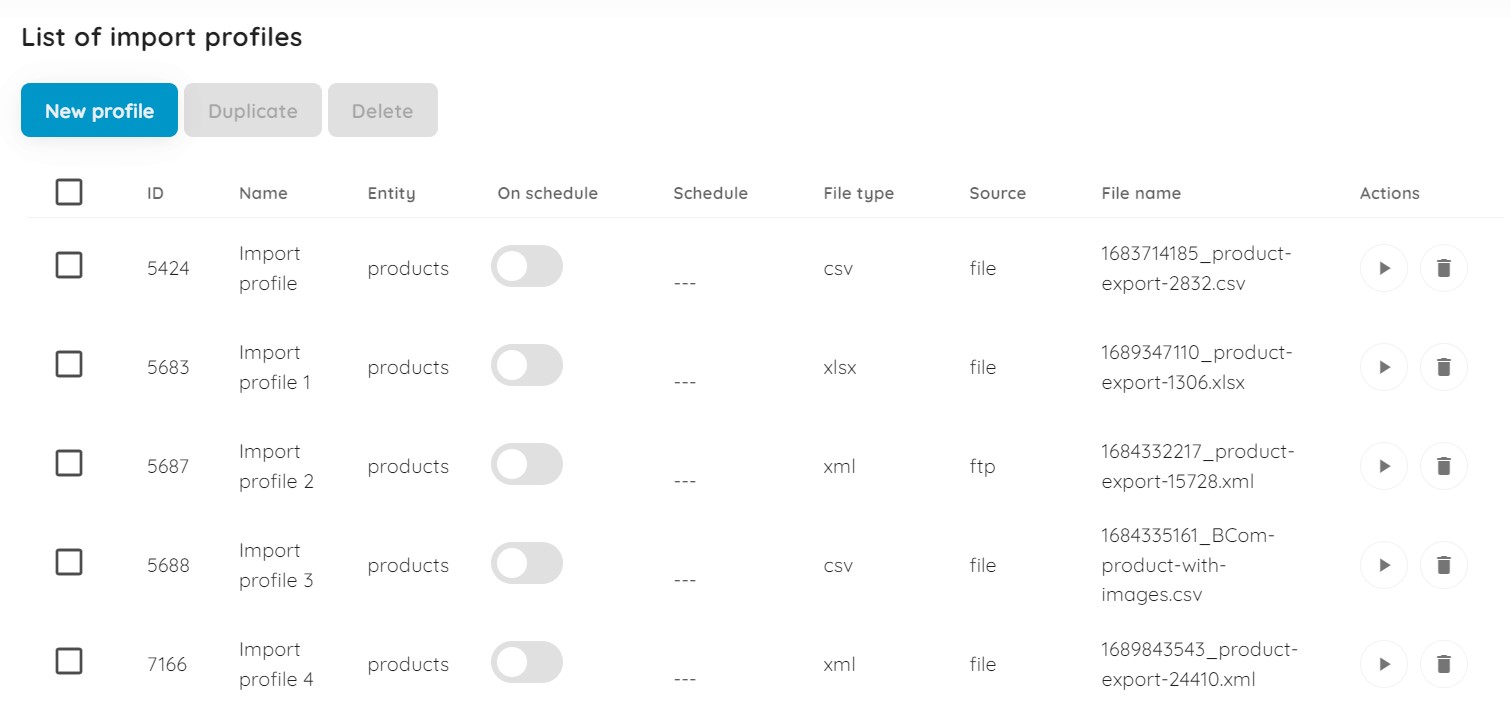
List of import profiles
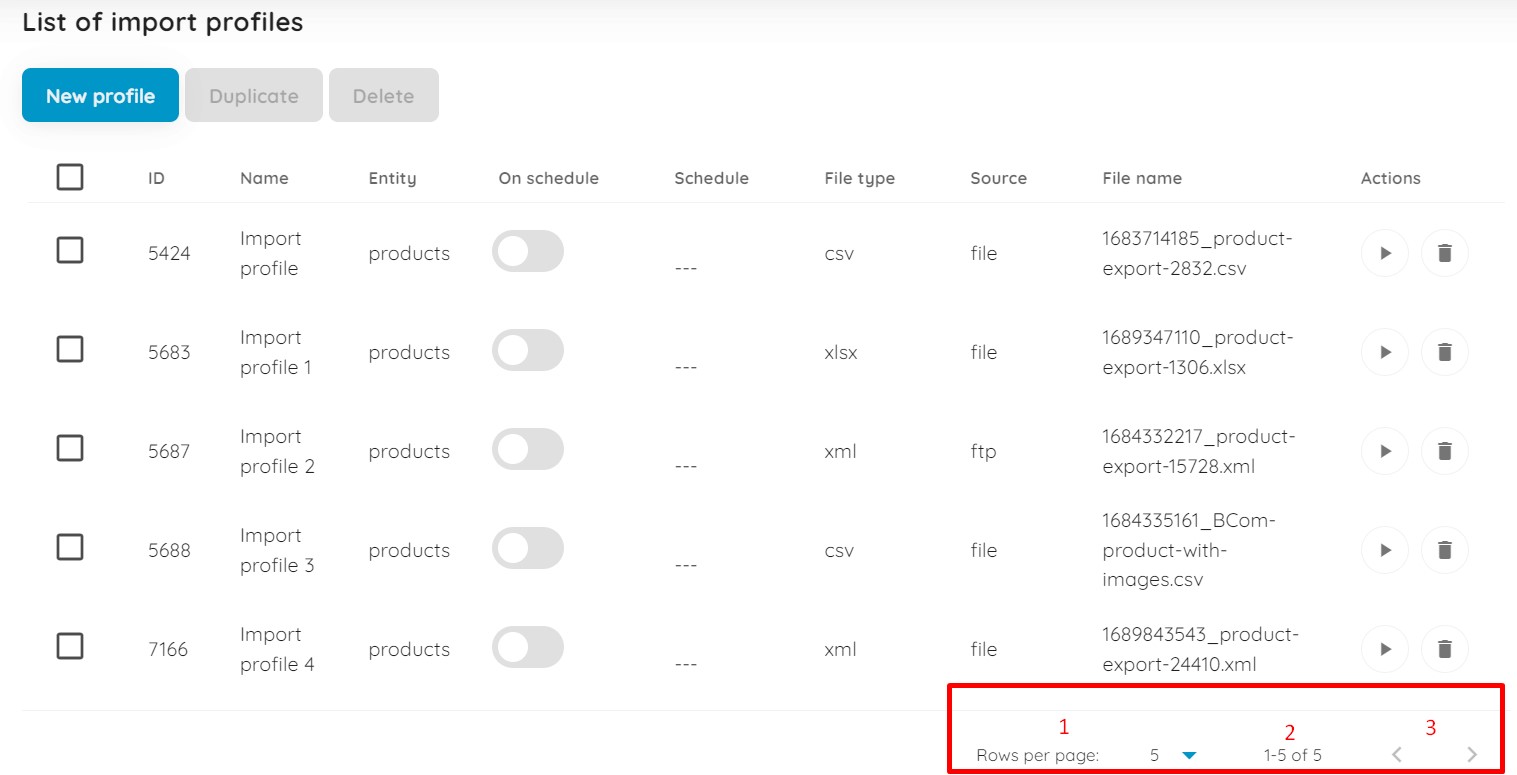
The List of import profiles section contains a grid with all your import jobs (profiles). You can create new profiles(1) as well as duplicate(2) and delete(3) profiles from this section.
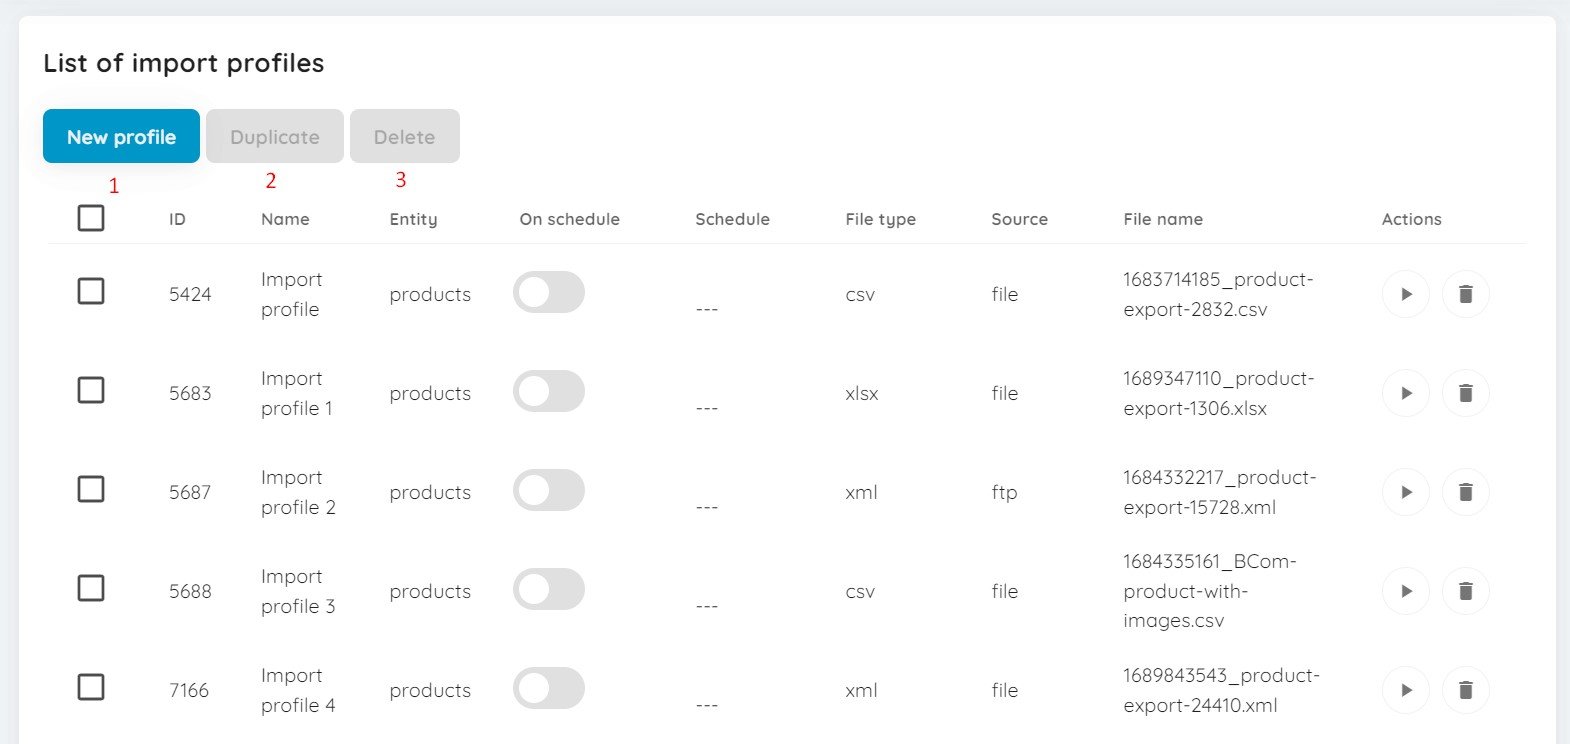
However, the Duplicate and Delete buttons are inactive. You need to select at least one profile to enable the delete or duplicate functionality. It is possible to select multiple profiles simultaneously to apply bulk actions.
As you can see, the Duplicate and Delete buttons are highlighted in blue and red respectively when you select an import profile from the grid. It means that they are now active.
The import profile grid consists of 10 columns:
- Checkboxes – you can select import jobs to apply actions in bulk here;
- ID – each import job has a unique numerical identifier that cannot be changed. It is assigned automatically;
- Name – each import job has a name that you specify while creating a new import profile. A job name can be changed later;
- Entity – this column shows an entity that the profile transfers;
- On schedule – here, you can enable or disable automated data transfers. If the profile doesn’t have an import schedule, you will need to create it manually;
- Schedule – this column displays a unique update schedule per profile (every hour, day, week, or month);
- File type – here, you can see a file type used to transfer data via each import profile (CSV, XLSX, or XML).
- Source – this is a source of your update. It can be a file uploaded manually or a file imported via FTP, from URL, Google Drive, or Google Sheets;
- File name – this column displays the exact files associated with each import profile;
- Actions – you can launch each import process per profile here. When the import is running, the stop action displays so that you can turn it off before the procedure is complete. Also, it is possible to delete import profiles from this column.
You can specify the number of rows per grid page(1), view which page is currently displayed (2), and switch between the grid pages(3).
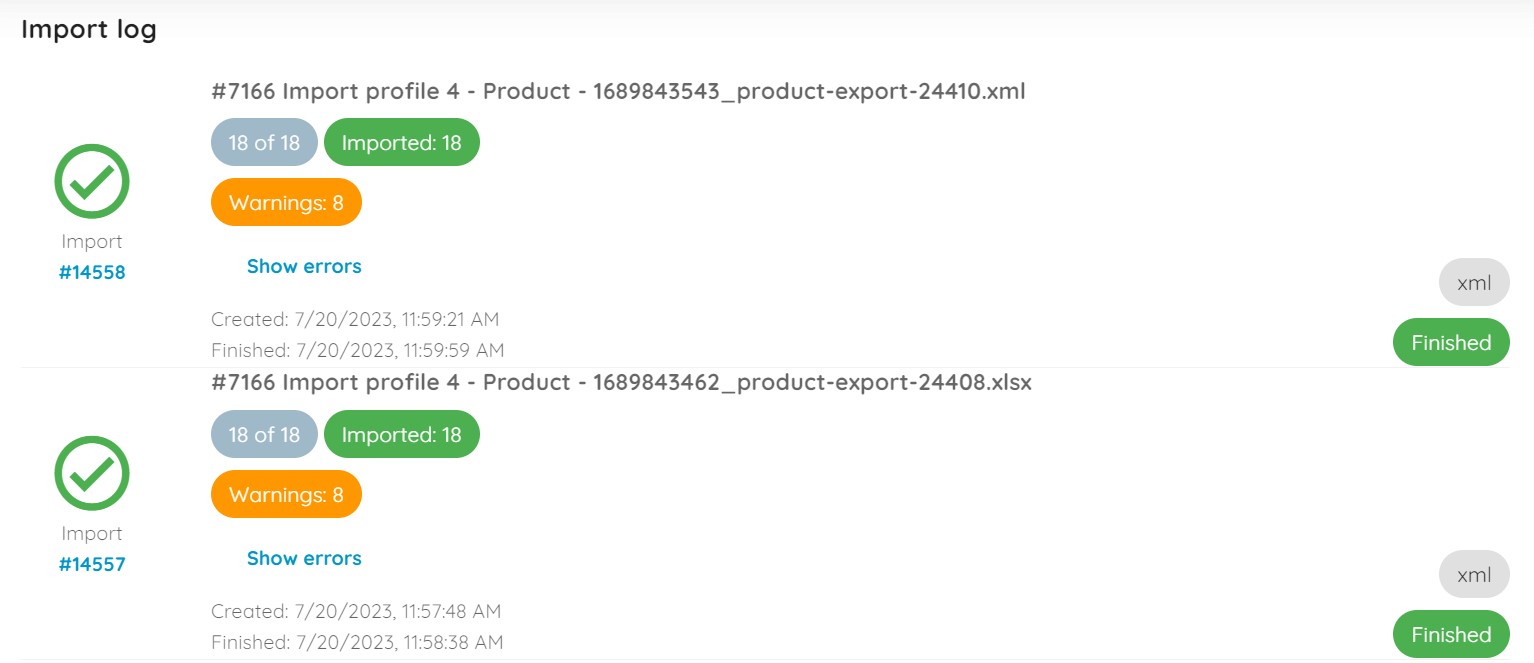
Import log
The application’s Import log is pretty straightforward. It contains all the information about the import job: ID(1), Name(2), Entity(3), File name(4), and File type(5).

Also, you can view the import status(1), time frames(2), and results(3), such as the number of imported records and warnings.

Click the Show Errors link to view the Error Log.
Error Log
The Error Log lists particular items(1) along with associated errors(2).
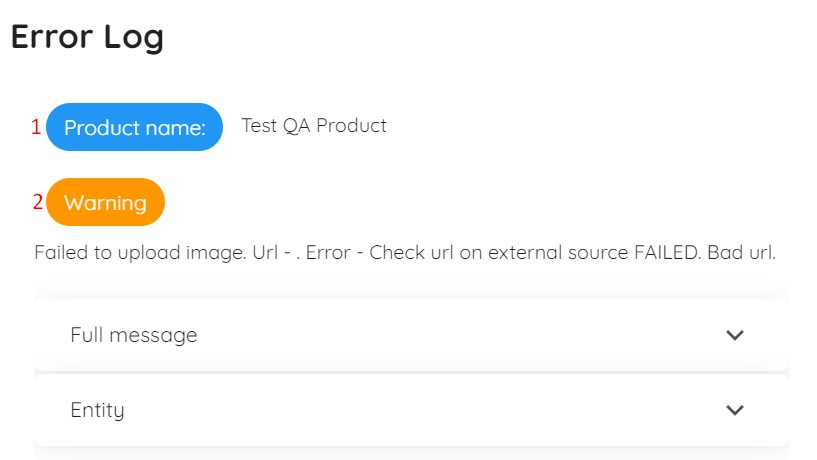
You can view a full error message and the entire entity description upon clicking the corresponding areas
Export
Click on the menu button on the top left to switch between import and export procedures. Select Export to proceed to the export section of the Firebear Import & Export Tool for BigCommerce.
The Export interface is similar to the Import section described above: it is divided into the List of export profiles and Export log sections.
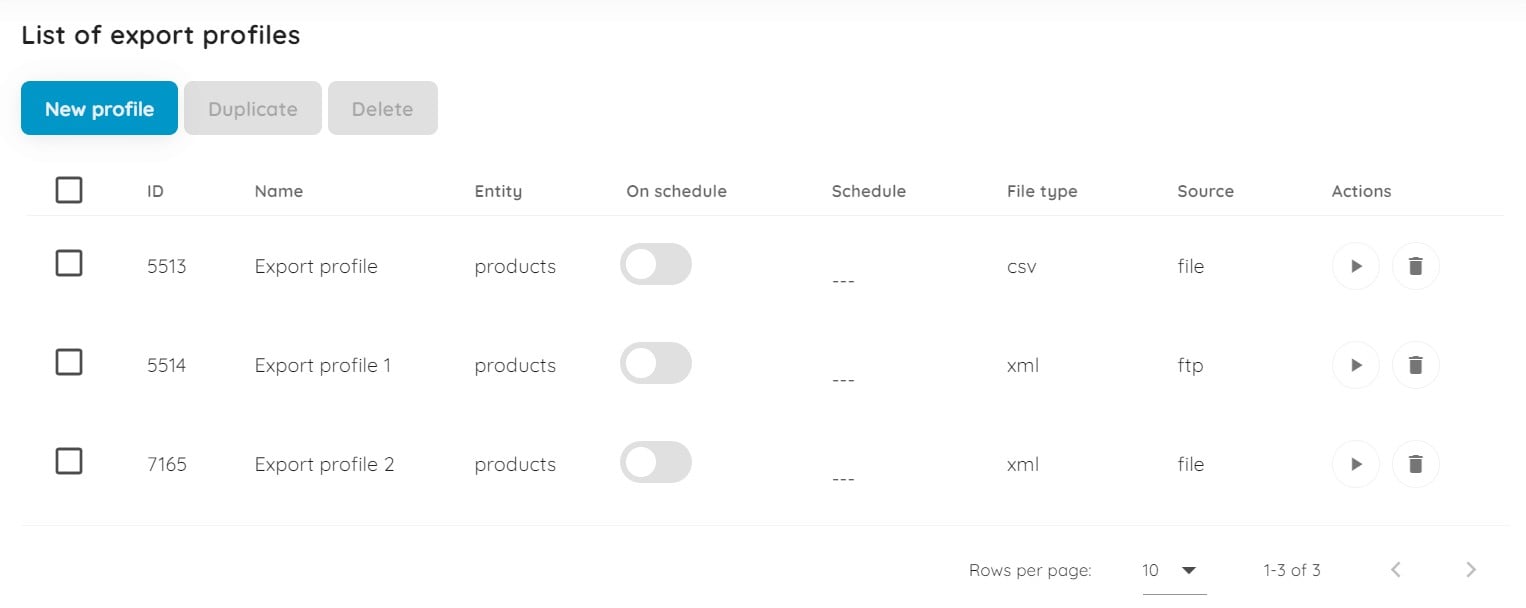
You can see the List of export profiles section below:
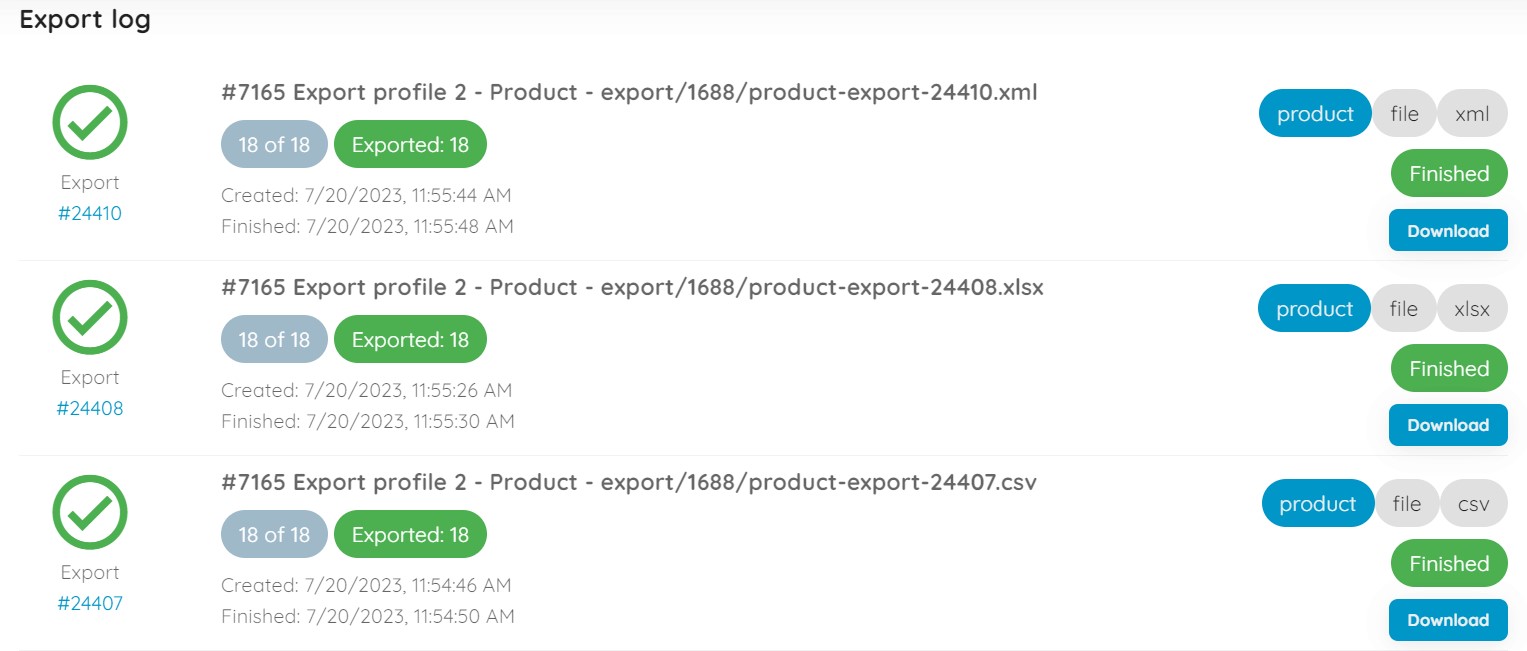
And this is your Export log:
Although they have multiple common elements, each one differs from the corresponding import section described above.
For instance, the List of export profiles grid doesn’t have the file name column because the corresponding file is generated after the export. You can download it in the Export log section by clicking the Download button:

Also, you can see that the Export log section displays the entity and the source next to the file type on the right.
You won’t find any warnings or error logs in the Export log section.
How to import data
Below, we explain how to import data to BigCommerce using Firebear’s Import & Export Tool. The process is divided into the following four steps:
- Select file
- Configure mapping
- Preview results
- Import
But before you begin, you need to go to the application’s import page situated under Apps -> My Apps -> Firebear Import & Export Tool. Here, click the New profile button or select one of the existing import profiles to start the import process.
Let’s explore the first option. Upon clicking the button, the application redirects you to a new screen associated with the four steps described below.
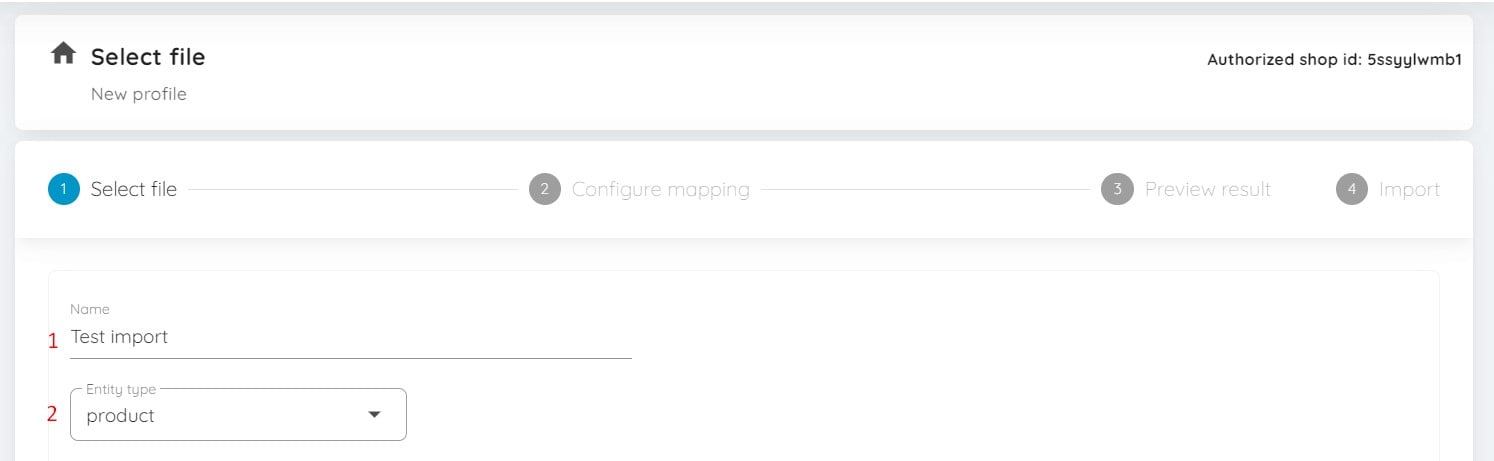
Step 1: Select file
During the first step, you need to specify the title of your import profile(1) and select an entity to import(2).
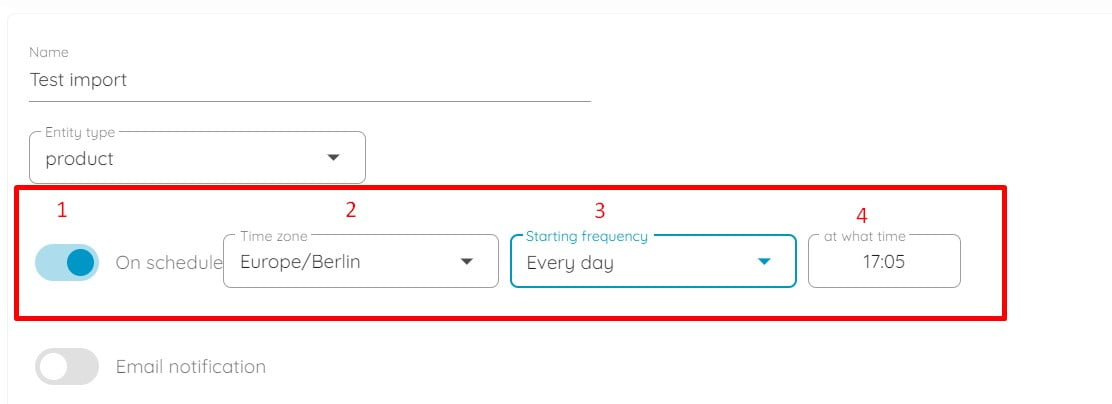
Next, you can automate your import processes by creating a schedule of updates. Turn on the toggle(1), choose your time zone(2) (you can type in the city instead of scrolling), specify your starting frequency(3) (every hour, day, week, or month), and configure additional parameters(4) (such as the exact time if you choose daily update or day and time if you decide to update once per week).
You can read more about automated import processes in our guide to BigCommerce import automation.
Now, you can configure email notifications for successful or failed attempts or both:
- Enable the notification toggle.
- Choose your notification type: succeed, failed, or succeed and failed jobs.
- Specify an email address to send notifications to.
- Select the encryption.
- Specify the host for your email address.
- Type the port.
- Specify a sender’s username (an email address).
- Provide the corresponding password.
- You can attach job logs to the notification emails. However, they may be huge in size.
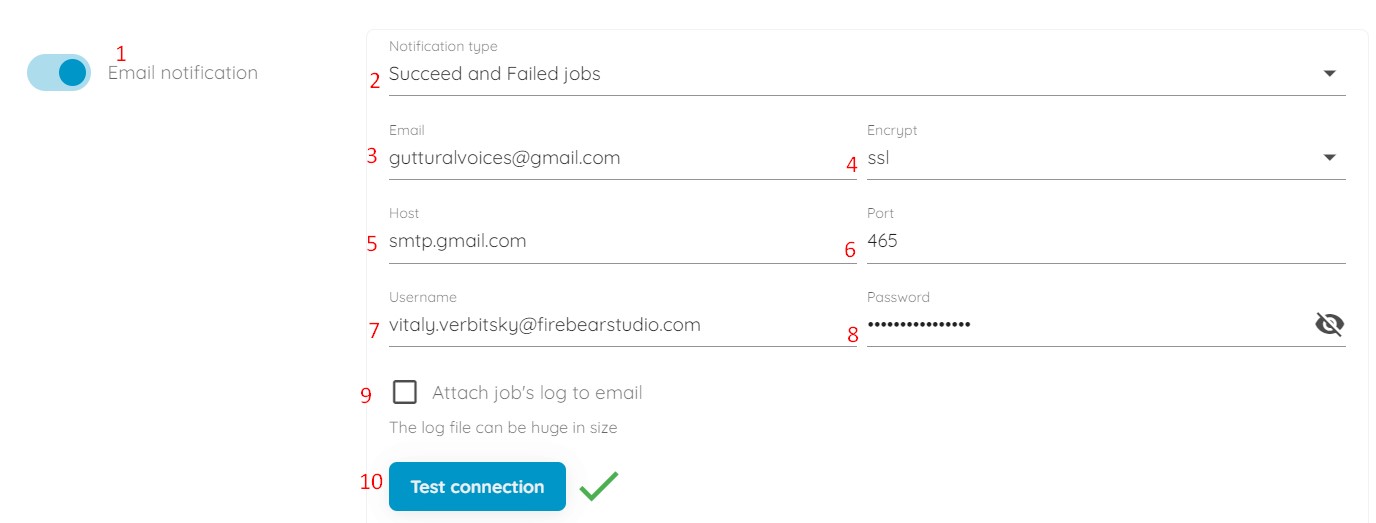
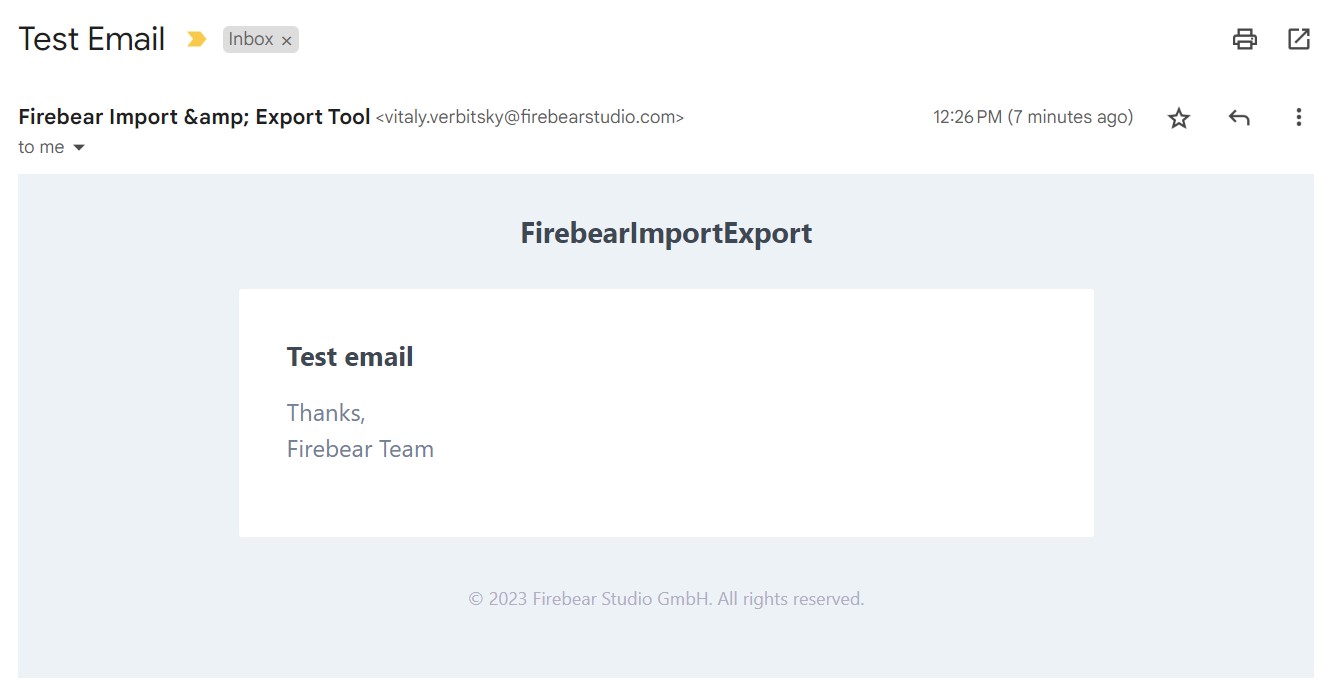
- Click the Test connection button to test your connection. If all the information is correct, you will see a notification message in your mailbox.
We explore email notifications here: BigCommerce Import Notifications.
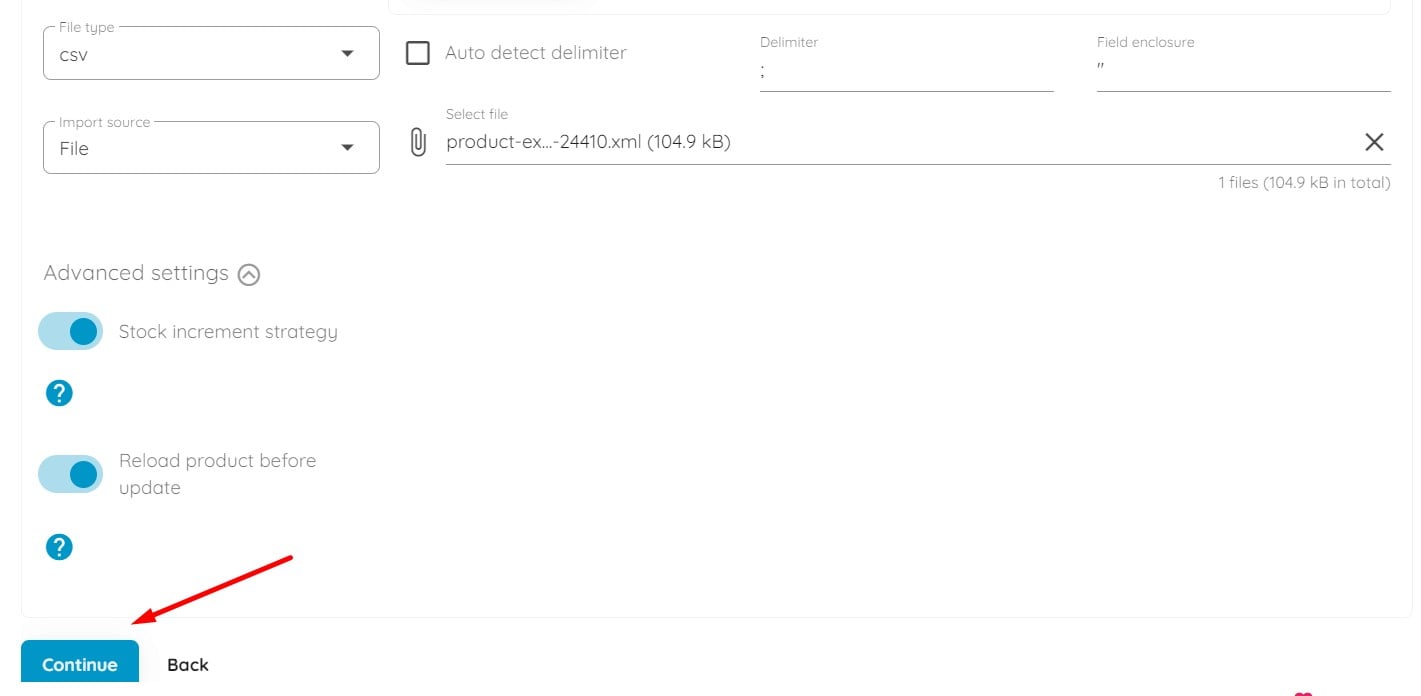
After turning on the notifications, you need to select your file type: CSV, XML, XLSX, or Google Sheets.
Although XML, XLSX, and Google Sheets files do not require additional parameters, you need to specify the delimiter(2) and field enclosure(3) if you use a CSV file. The extension lets you automatically detect delimiters(1) for CSV files if you enable the corresponding feature. Click the “Auto detect delimiter” checkbox and let the extension do the job.

Note that for XML import to BigCommerce your file structure should be organized as follows:
Where column names (attributes or properties) are stored between <item> and </item>.

Now, it is time to select the source of the import. Firstly, you can upload the file manually:

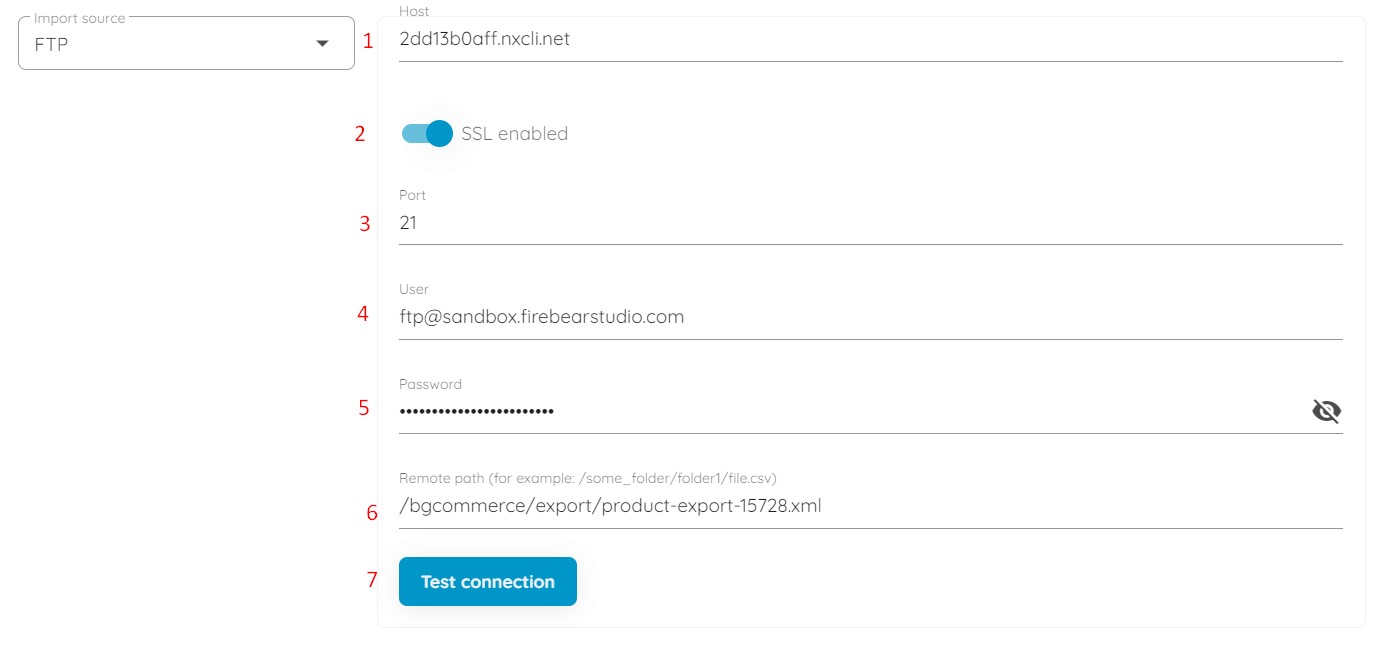
Secondly, it is possible to provide it via FTP:
- Specify your host;
- Enable/disable SSL;
- Specify your port;
- Provide a user email to get access to the remote file source;
- Specify the corresponding password;
- Type the remote path to your update file;
- Test the connection to make sure you’ve provided the correct credentials.
You can find more information in our BigCommerce FTP Import Guide.
Good old URL imports are possible too. Just select “URL” as your import source. Next, specify a public URL where your update is stored, for example, https://example.com/download-me.
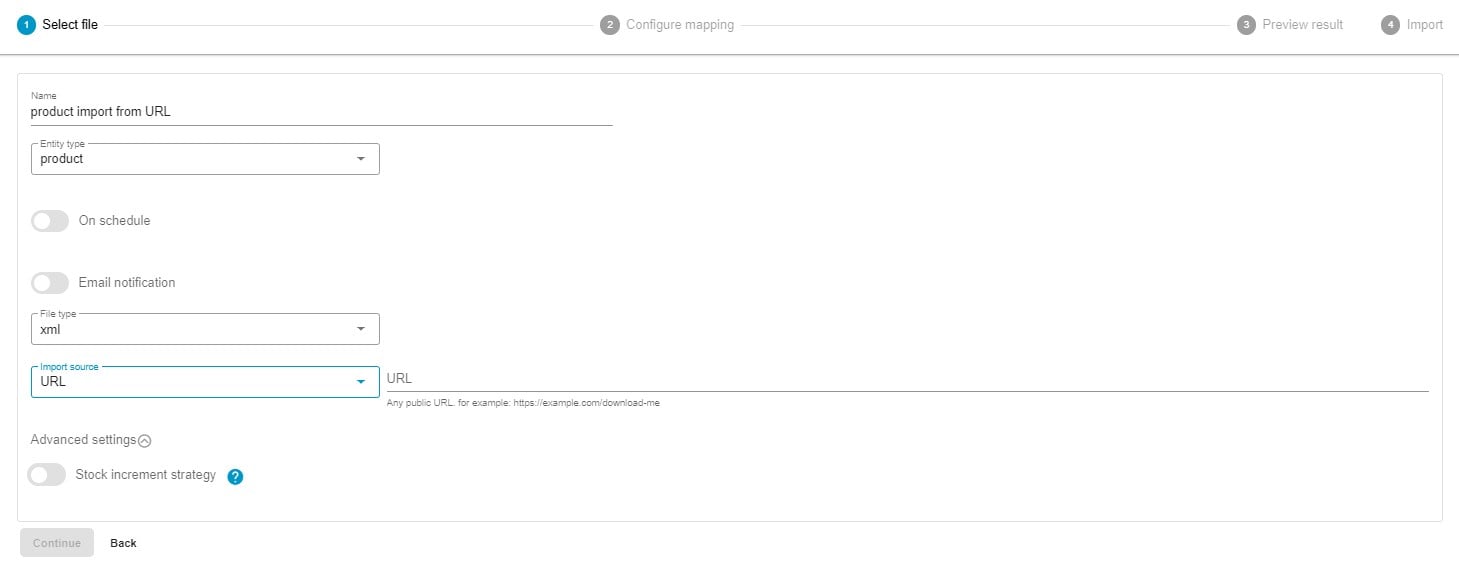
Please keep in mind that when you input a URL for importing, the underlying file type at that address is crucial, as the application cannot handle all file formats. For instance, attempting to use an image URL for CSV import from a URL will result in an error.
To help you avoid this issue, the application verifies the file’s MIME type and refrains from downloading it if the MIME type is incompatible.
MIME type, short for Multipurpose Internet Mail Extension, is a standard that specifies the format of a file. It serves as a fundamental characteristic of a digital resource, influencing its accessibility and usability over time.
Below is a list of MIME types currently supported by the application:
|
1 2 3 4 5 6 7 8 9 10 11 12 13 14 15 16 17 18 19 20 |
"csv" => [ "text/html", "text/csv", "text/comma-separated-values", "text/x-comma-separated-values", "text/tab-separated-values", "application/x-csv", "application/csv", "text/plain", "application/octet-stream" ], "xml" => [ "text/html", "application/xml", "text/xml" ], "xlsx" => [ "application/vnd.ms-excel", "application/vnd.openxmlformats-officedocument.spreadsheetml.sheet" ] |
If you import an unsupported file, the app displays the following error:
Failed! Bad url. mime/type mismatch or max size exceed
You can find more information in our BigCommerce File Import from URL Guide.
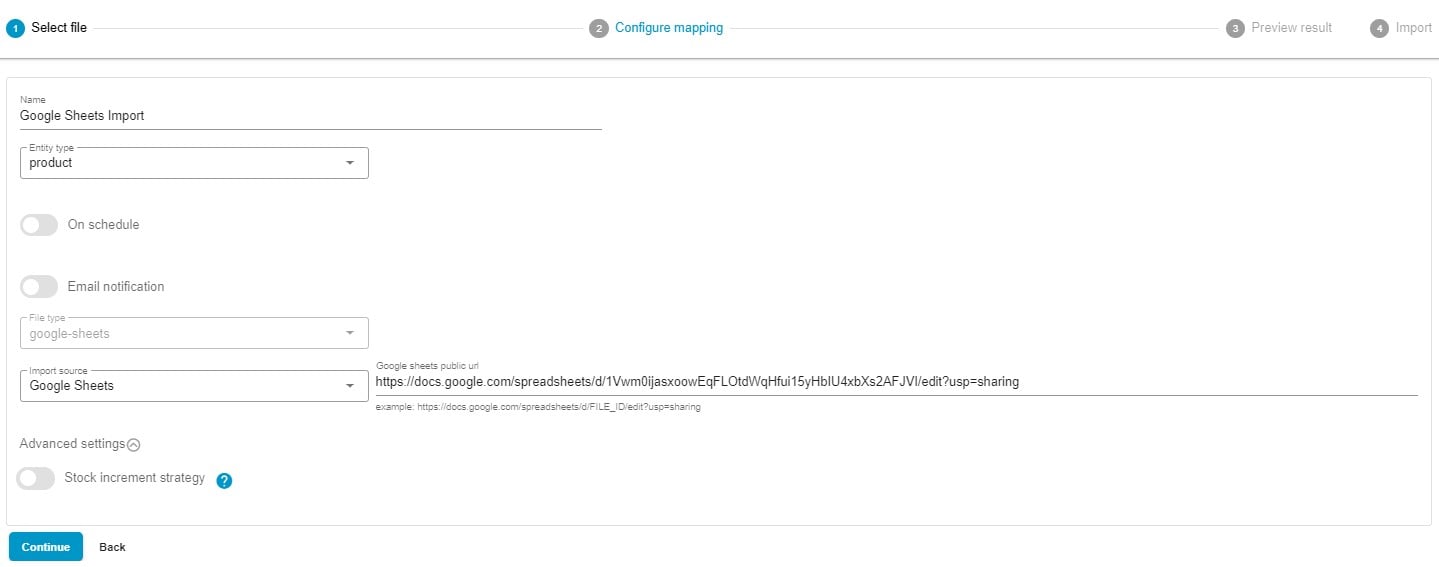
If you decide to import data to your BigCommerce store from Google Sheets, select your file format as “google-sheets” (the app also supports CSV, XML, and XLSX files) and then opt for Google Sheets as your import source. Paste the link to your sheet and proceed to the next step.
For further information follow our BigCommerce Google Sheets Import Guide.
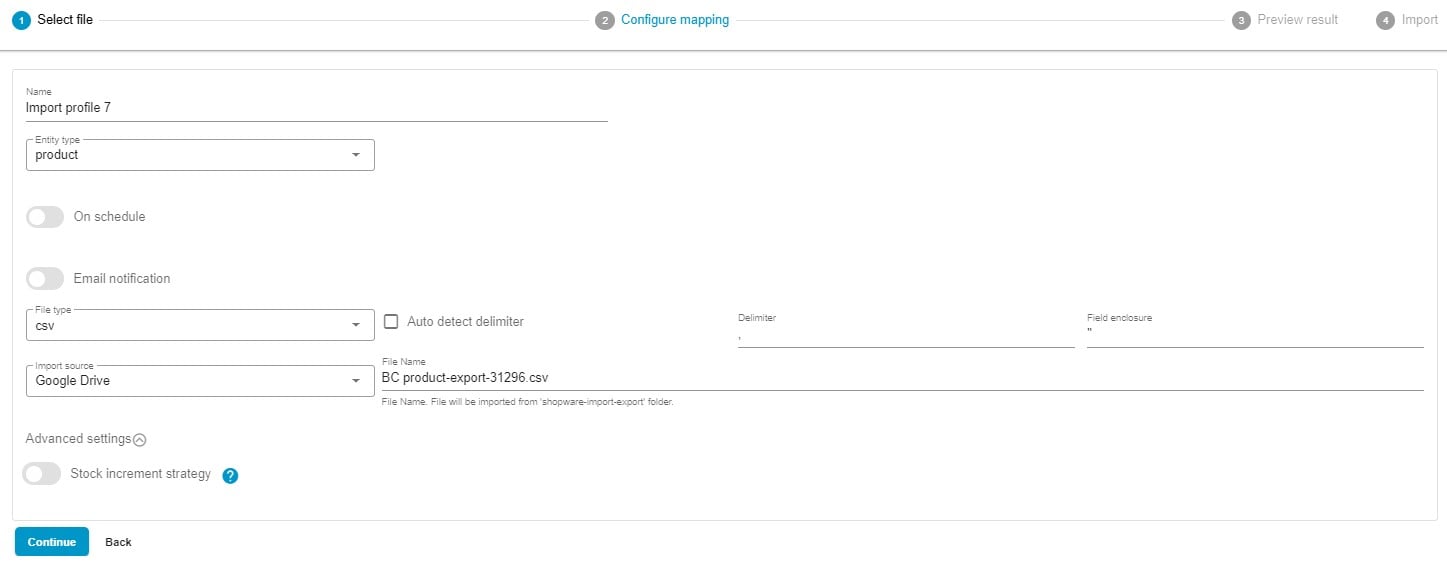
Alternatively, you can choose Google Drive as your import source:
- Let the Firebear Import & Export Tool access your storage – enable all permissions;
- Specify a full file name with its extension, e.g., “BC product-export-31296.csv”;
- Note that your fill will be imported from the “shopware-import-export” folder that should have been previously created.
Visit our BigCommerce Google Drive Import Guide for more information.
In Advanced settings, you can enable a stock increment strategy and reload products before the update.
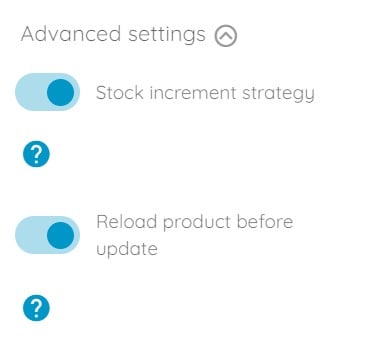
Stock increment strategy:
- If disabled -> the Qty of the product is updated to the one specified in the import file. If the store qty = 100 and the update qty is set to 50 in the import table, then after import the store qty = 50.
- If enabled -> the product qty is increased by the amount specified in the import file. If the actual product qty is 100 and the import table is set to 50, then after import the store qty = 150.
Reload product before update:
- If disabled -> then qty is updated immediately without reloading the product data (following the selected stock increment strategy).
- If enabled -> then the product data is reloaded first and then the qty is imported (following the selected stock increment strategy).
This feature is useful for the case when a product is ordered from the storefront, but the qty after the order is placed has not been updated. If you enable this feature, then the product is reloaded first to get the actual quantity, and then the qty specified in the import file is added.
When every option is configured, you can proceed to the next step. Click the Continue button:
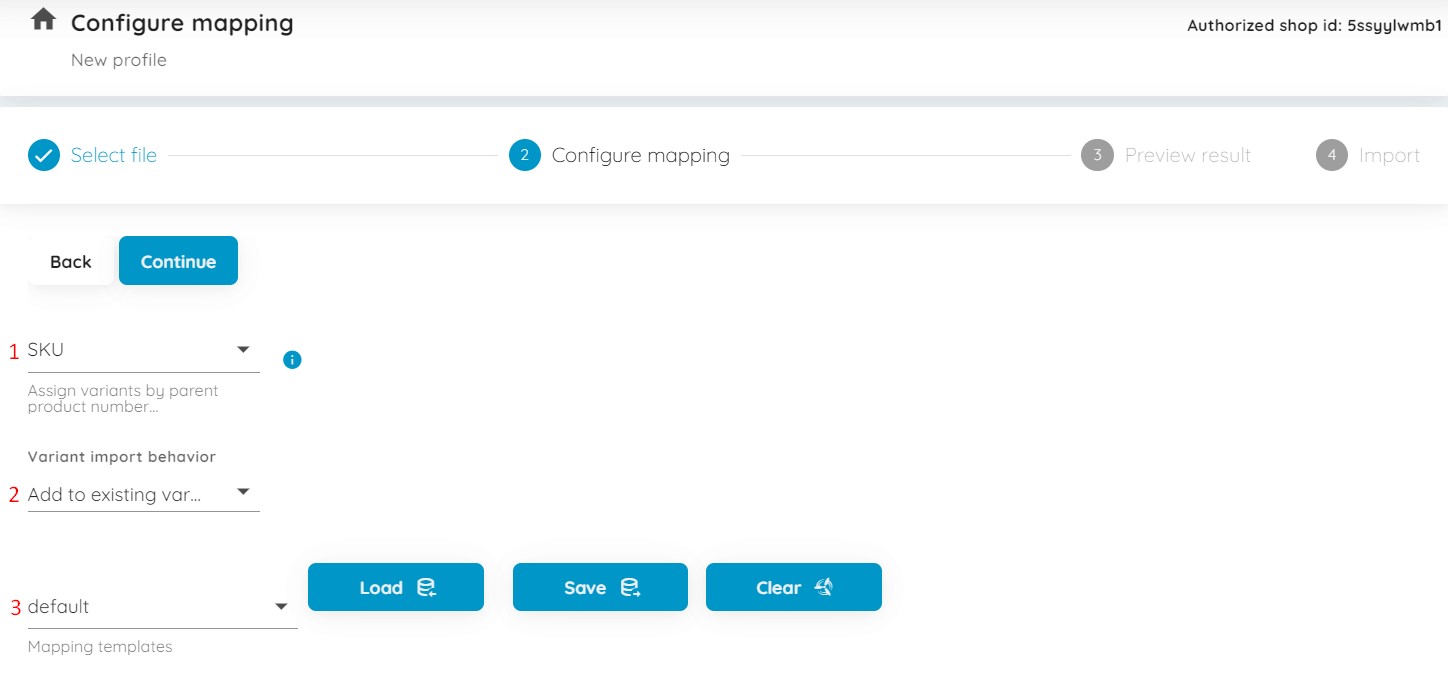
Step 2: Configure mapping
In the Configure Mapping section, you can choose whether to assign variants by parent product ID or SKU(1).
Next, select your variant import behavior(2): you can add new variants to the existing variants or replace them.
There is an option that lets you select a mapping template(3) or save your custom matching preferences.
In the Mapping section, you are suggested to specify which columns from the imported file match properties from your BigCommerce store.
BigCommerce requires the product properties to have a particular name so that the store can understand them. However, you can import the files with property names different from the BigCommerce naming due to the mapping section:
- The first row with the property names contains the properties from the file you are importing.
- The second row, where you can choose properties, lets you select the corresponding properties from your BigCommerce store.
Match these properties to import any custom file.
Mapping templates
We introduced mapping templates to save you time by allowing you to quickly save and load the mappings you use frequently.
The mapping section includes the ‘Default’ template, which is automatically loaded to match the names of the properties in your BigCommerce store with the names of the properties in your imported file.
If you prefer, you can re-map the properties manually and save a custom template. Simply click the ‘Save’ button and enter the template’s name to quickly ‘Load’ it in further imports.
What are product properties and how to work with them
Each of your BigCommerce products has multiple fields, such as “Name”, “Type”, “SKU”, etc. These fields are product properties or attributes, whatever you call them. Each of these properties has a related database entity where the property’s values are stored. And each property inside the database has a dedicated internal name which doesn’t allow spaces.
When importing products, you are addressing the database via API, so you need to address product properties as they are listed in the database.
For instance, a Bin Picking Number will be listed inside the database as “bin_picking_number”, and Parent SKU will have the name ‘parentSku’. You can check the exported file to see how different properties are named.
This is important because you need to name the columns with product properties as they are named inside BigCommerce to let the extension understand that you are importing proper values for a particular property. Otherwise, your import process fails.
That’s where the Mapping section of the Firebear Import & Export Tool comes into play.
Let’s suppose, Microsoft is your supplier. The company sends you a CSV file with the product update. However, instead of the “sku” property, there is “‘microsoft_product_number”.

If you try to import this file, your BigCommerce store won’t understand what data is stored in the “microsoft_product_number” column. Use the Mapping section to match the “microsoft_product_number” column to the “sku” column.
When all third-party columns are matched to the ones used in BigCommerce, you can preview the import results.
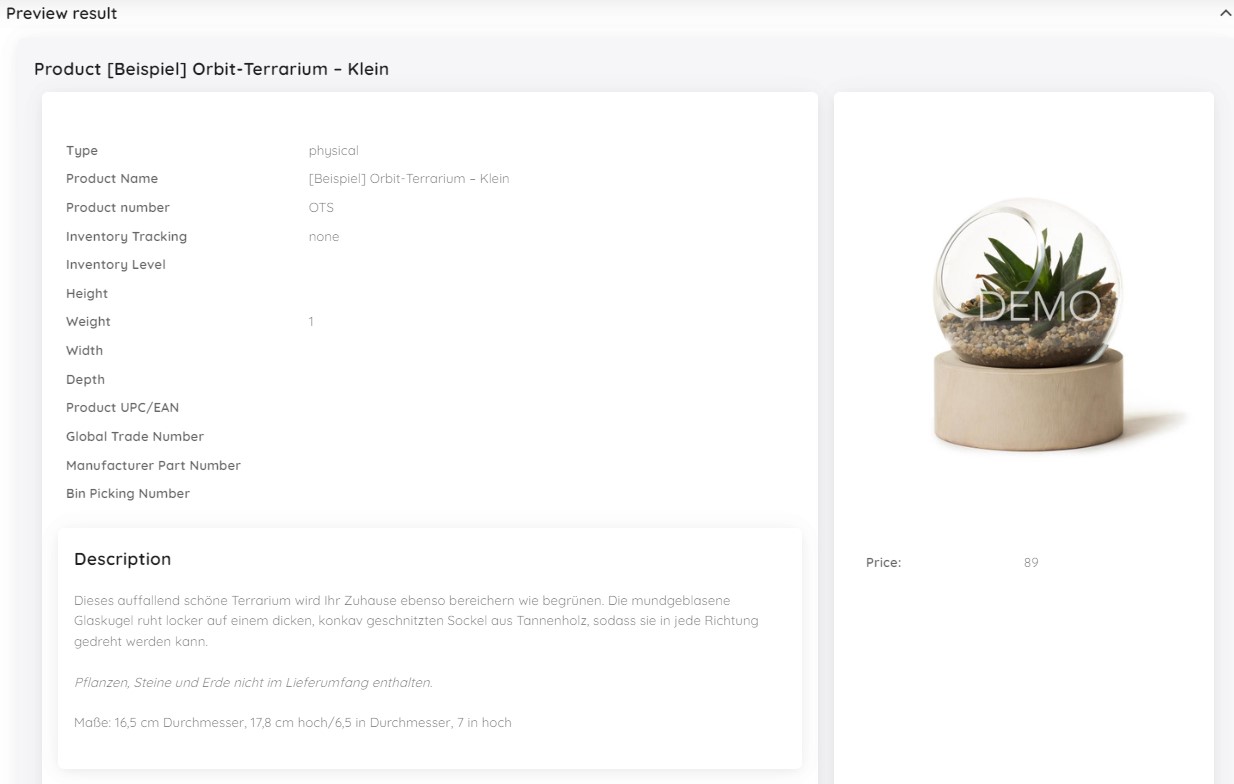
Step 3: Preview results
Before beginning the import procedure, the app recommends that you preview how the products will appear on the storefront. You get the ability to confirm that the product attributes and properties have the correct values.
The ‘Preview result’ section lets you examine the first 3 rows of the imported file. When you’ve reviewed the results, it’s time to begin the import process.
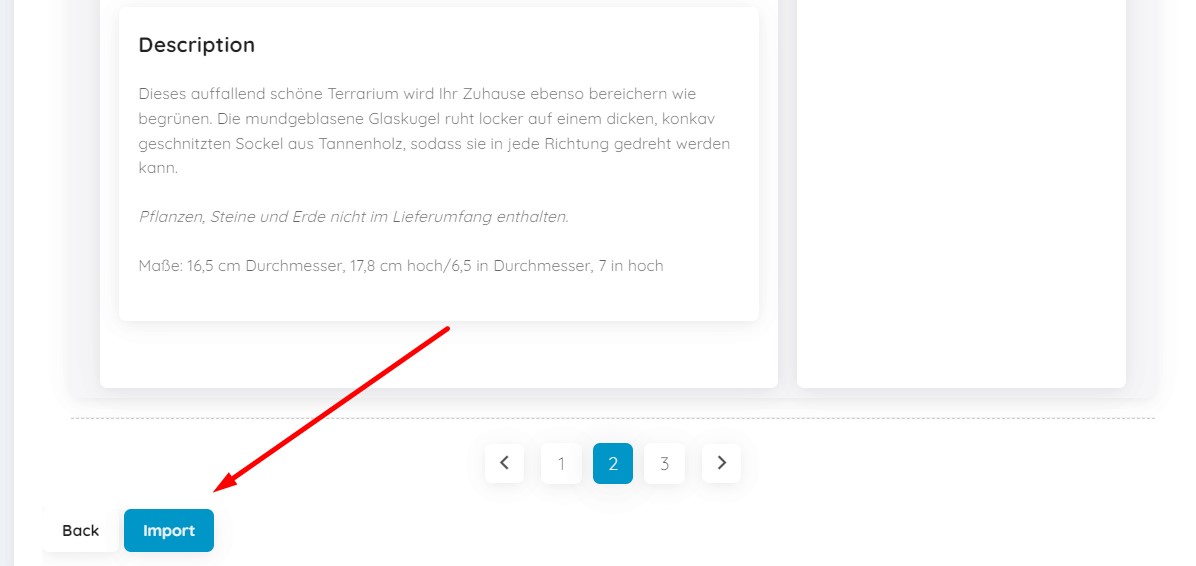
Save your profile to proceed to the next step. Click the Save button below.
Final step: Import
When you click the Import button at the bottom of the Preview result page, the application starts importing the uploaded file.
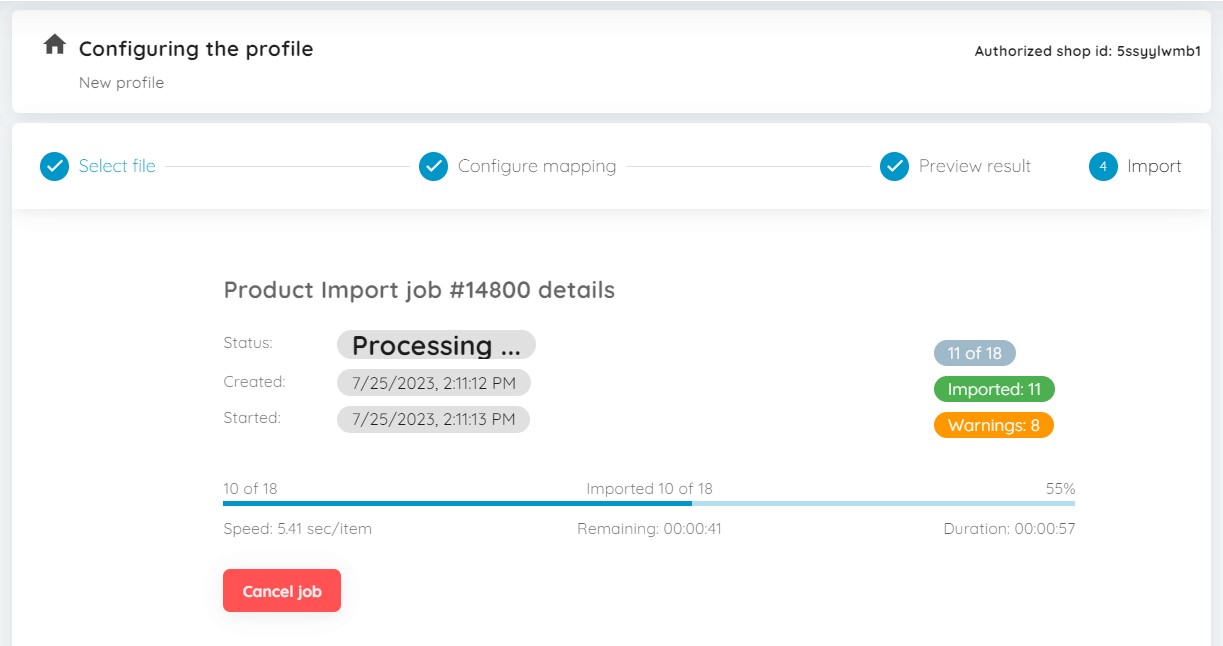
During the import, you will see the number of imported products, import duration, speed, and warnings.
Once the process is finished, you can check the import results, including the error log.
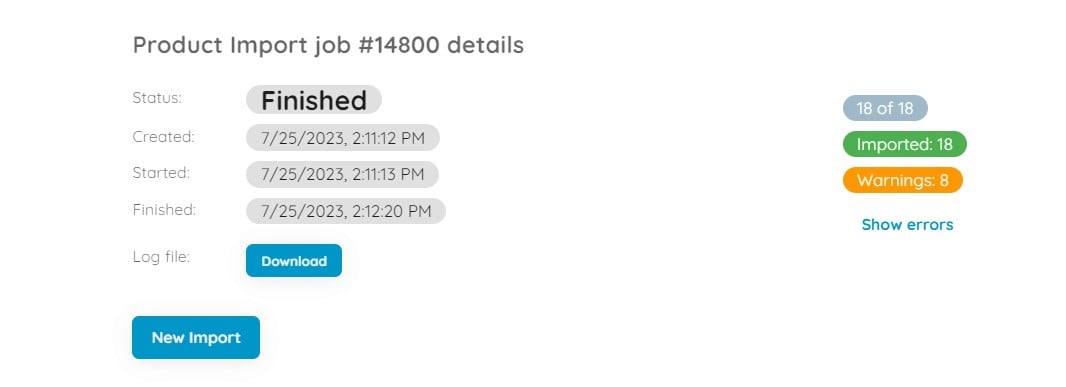
Also, note that this information is also available in your import log.
How to export data
As for the export procedure, it is almost the same as import, but even more straightforward. Instead of four steps, you deal with three:
- Configure export;
- Select columns;
- Export.
Step 1: Configure export
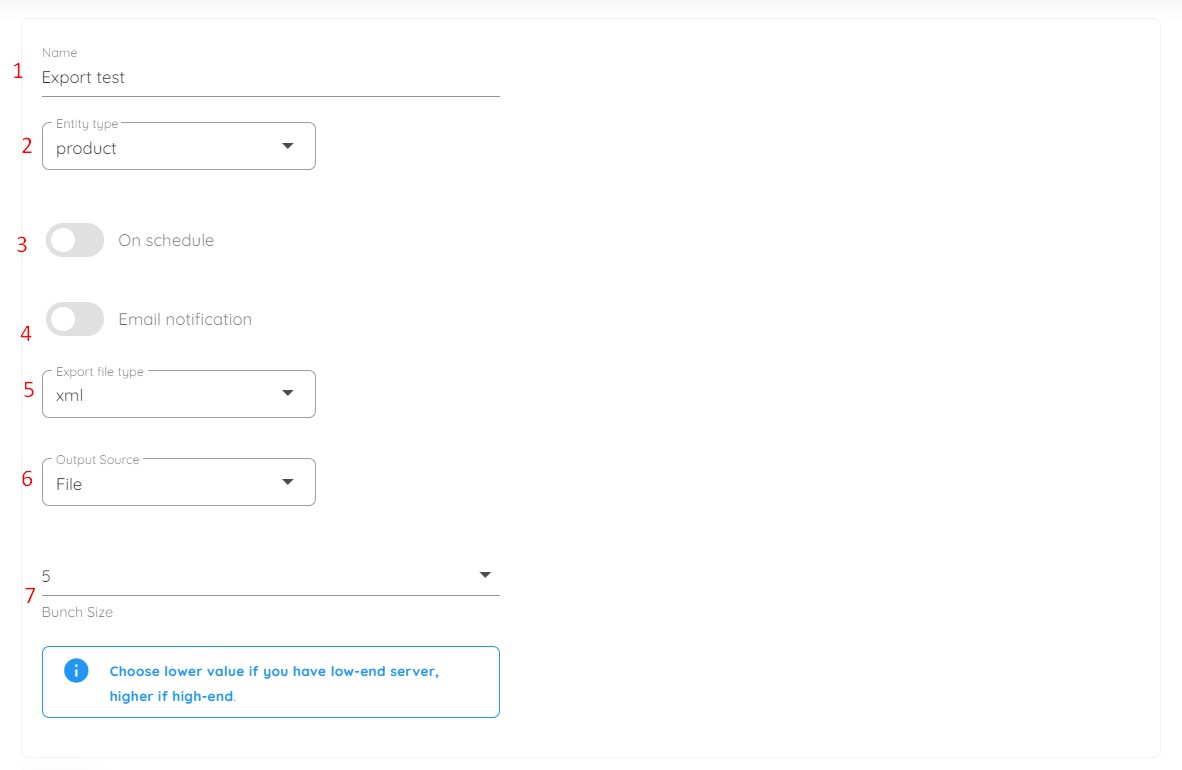
Provide the following information during the first export step:
- Name your export profile;
- Select the export entity;
- Configure the update schedule;
- Configure email notifications;
- Select your export file type (CSV, XML, XLSX, or Google Sheets);
- Choose an output source (File, FTP, Google Sheets, or Google Drive);
- Configure the Bunch Size parameter (5, 15, 50, or 100). Choose a lower value if you have a low-end server.
If you choose FTP as your export source, follow these steps:
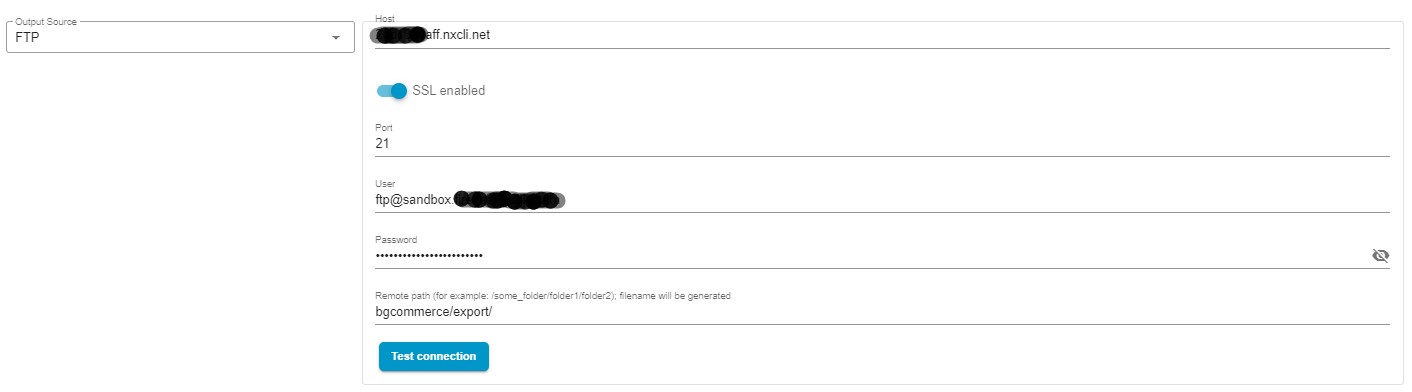
- Provide your host;
- Enable/disable SSL;
- Provide your port;
- Specify a user email to get access to the remote file source;
- Set the corresponding password;
- Specify the remote path to store your update file;
- Test the connection to make sure you’ve provided the correct credentials.
You can find more information in our BigCommerce FTP Export Guide.
If you decide to go with Google Drive as your export destination, let the Improved Import & Export Tool access your storage and specify a file name.
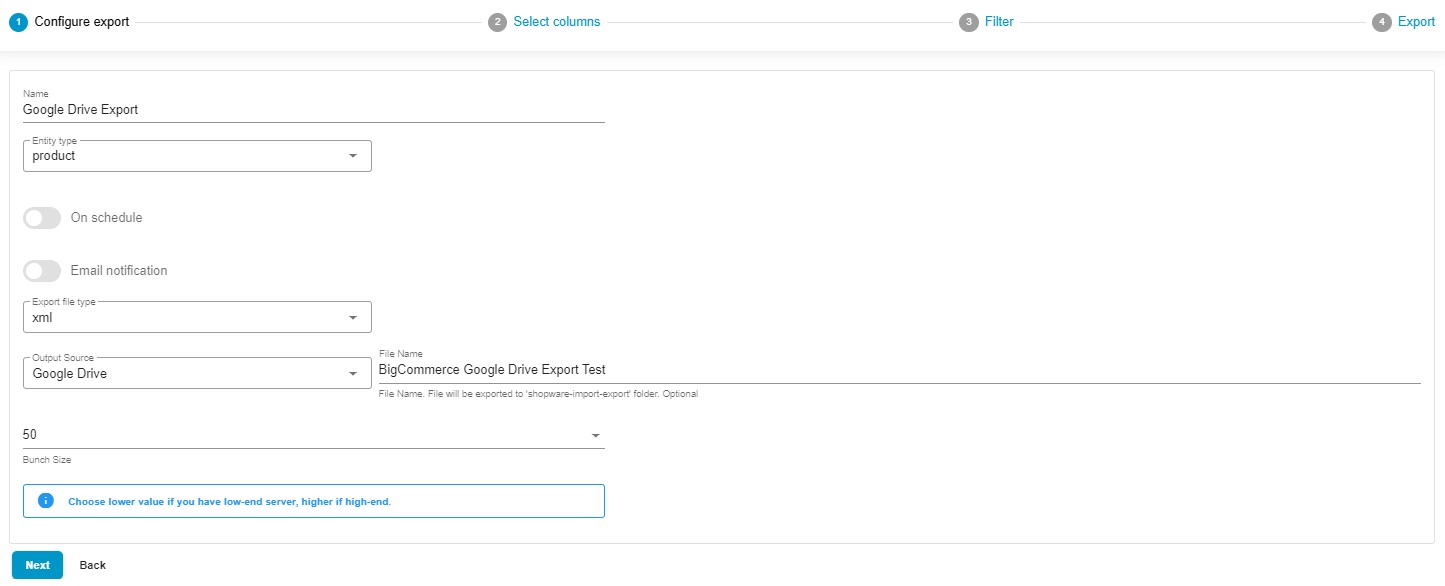
You can find more information in our BigCommerce Google Drive Export Guide.
Regarding Google Sheets, you need to grant the Improved Import & Export Tool access to your Google Drive storage and specify either a new file name or an existing spreadsheet’s ID. This choice dictates whether a new spreadsheet will be created or if data will be exported to an existing table.
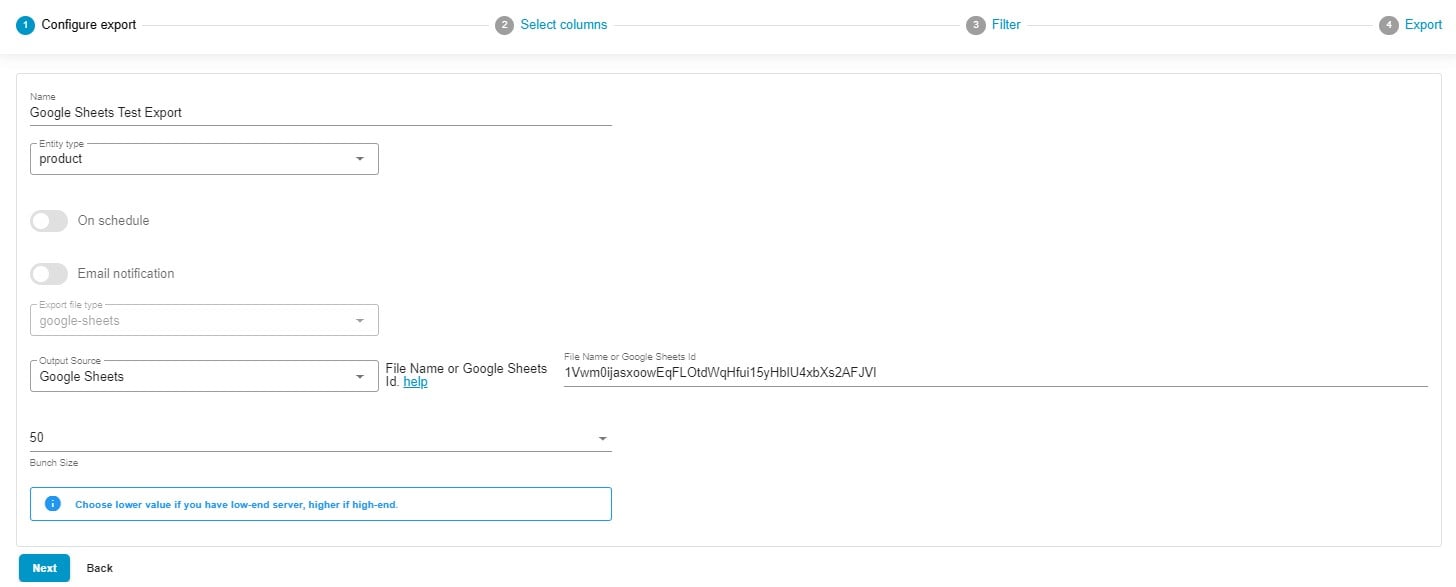
You can find more information in our BigCommerce Google Sheets Export Guide.
Step 2: Select columns
Now, you can rename all the default BigCommerce columns, specifying any new custom names. For instance, let’s replace Item with Fanuidhol and ID with Wild Horses of Fire. Due to the endless flexibility, you can create an output file that is 100% suitable for any custom requirements!
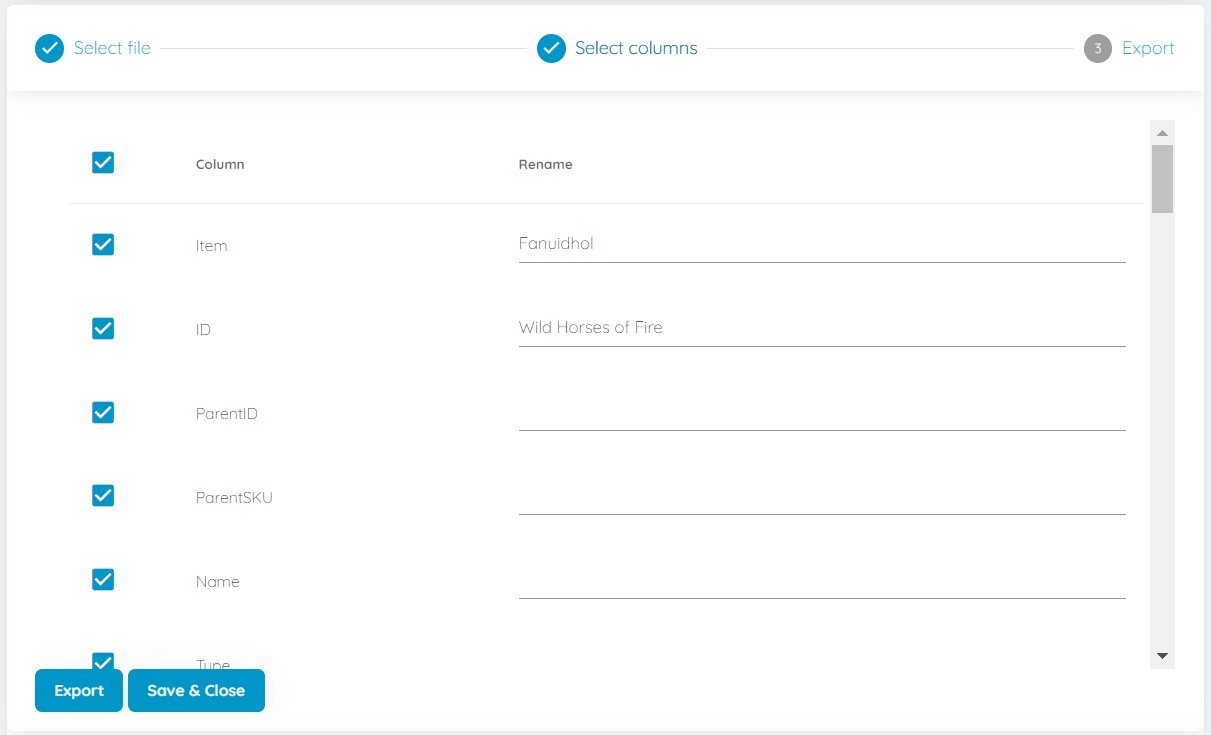
Also, note that it is possible to uncheck columns that you don’t want to export.
The latest version of our application also lets you change the order of columns and add default values:
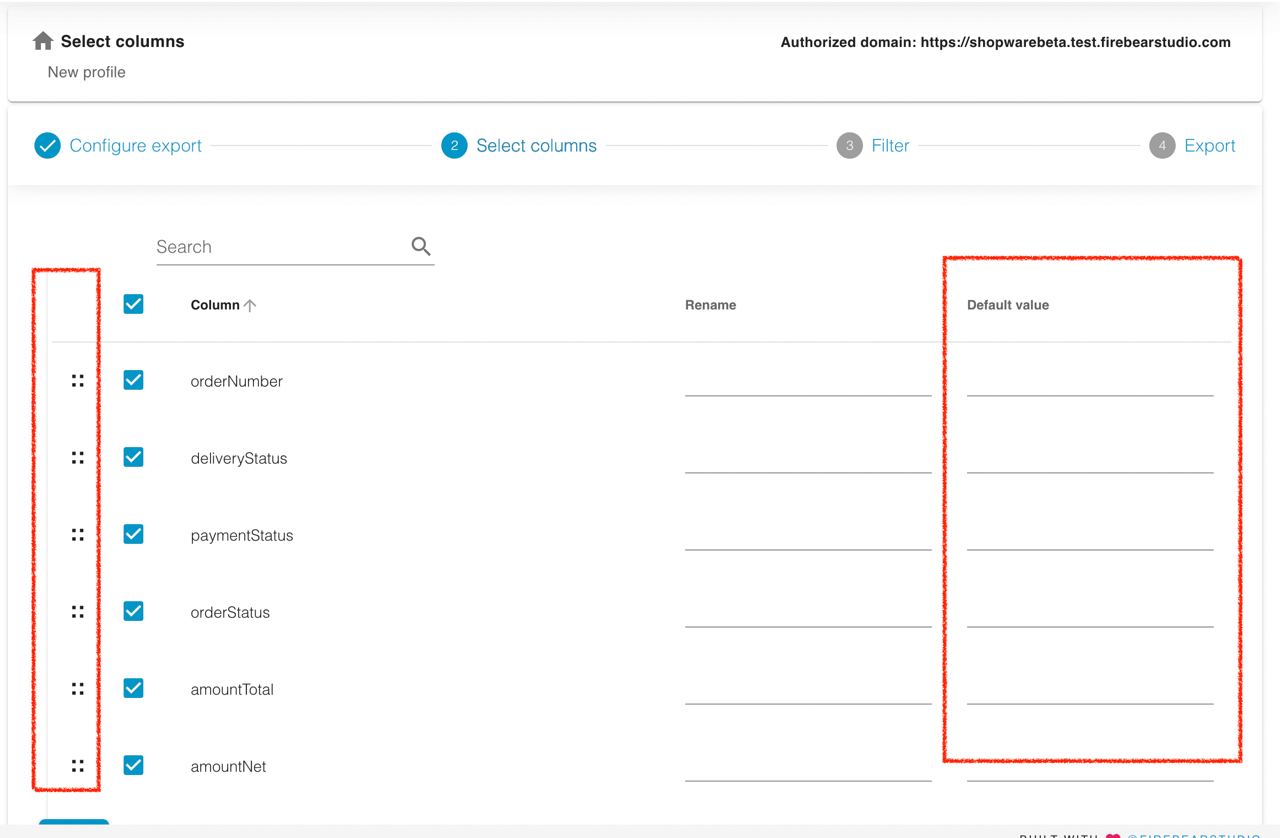
- Column Sorting: Now, during export, you can easily sort columns, arranging them in the desired order within the export file. This feature provides you with greater control over the layout of your data.
- Default Values: You can also include default values when exporting. This means that if a specific attribute has no value, the export file will automatically include the designated default value in its place. This simplifies data management and ensures consistency in your exports.
Column sorting is achieved through a simple drag-and-drop interface, and these enhancements are applicable to all entities, including products, orders, and customers. It’s all about making your data management in Shopware more efficient and user-friendly.
At this step, you can either save and close your profile or launch the export process.
Final step: Export
When the export procedure is complete, you will see the following export process recap:
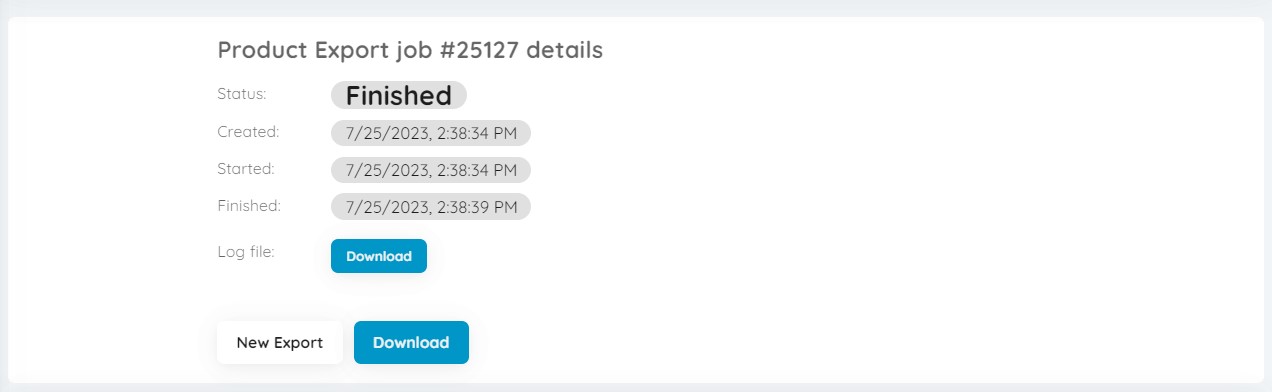
Click the “Download” button at the bottom of the export process recap to download the exported file or find the file in the corresponding export destination.
Also, you can get a log file by clicking the “Download” button in the Log File row.