
Magento 2 Backend Exploration: Themes & Schedule
Below, we continue the exploration of the Content section of the Magento 2 backend. The following article sheds light on Themes and Schedule. After exploring Pages, Blocks, and Widgets, we can proceed to the remaining two subsections of the Magento 2 admin. Below, we describe what to do with the corresponding screens and how to add new elements there.

Table of contents
Magento 2 Design
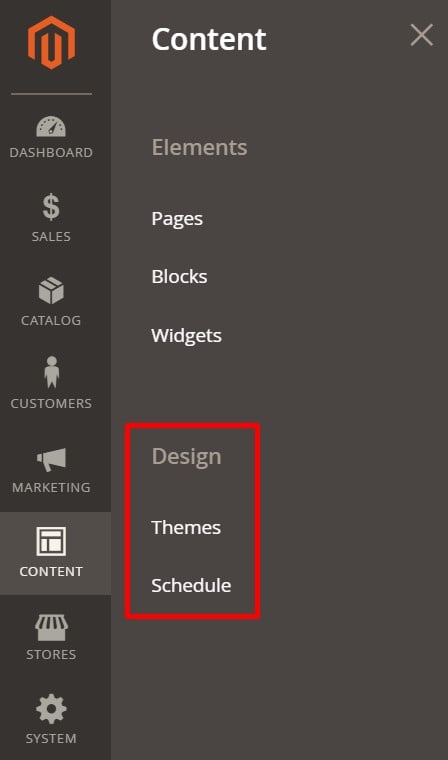
While all CMS pages, blocks, and widgets are available under Content-> Elements, themes and schedules are situated under Content->Design. Each content type is represented on a separate screen in a grid.
Magento 2 Themes
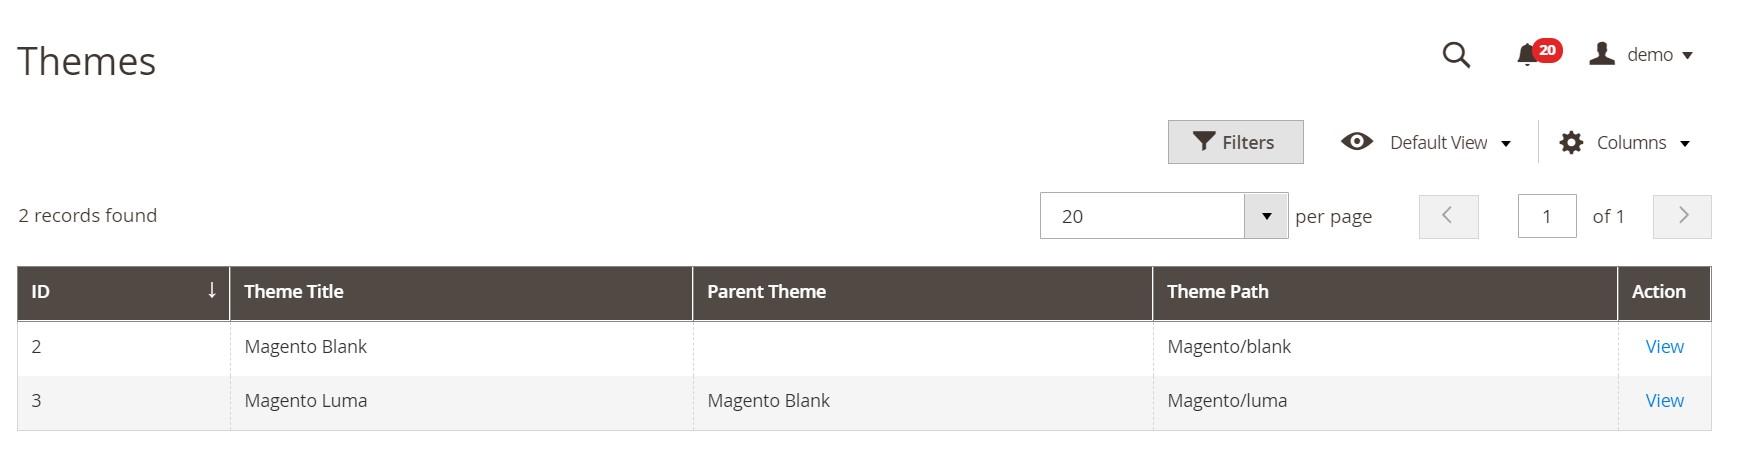
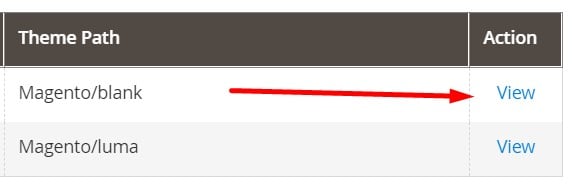
A grid with all themes is quite simple. It consists of 5 columns only:
- ID – an ID number of a theme;
- Theme Title – a title of a theme;
- Parent Theme – a corresponding parent theme;
- Theme Path – a path to a theme;
- Action – you can view a theme here.
Magento 2 lets you apply filters to each column to find a particular theme.

At the same time, you can show/hide columns from the grid.

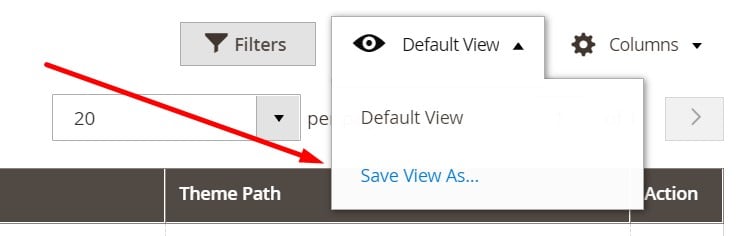
Every custom view can be saved as new.
And of course, you can find standard pagination elements over the grid.
To view a theme, you should double click on its row in a grid or use a link in the Action column.
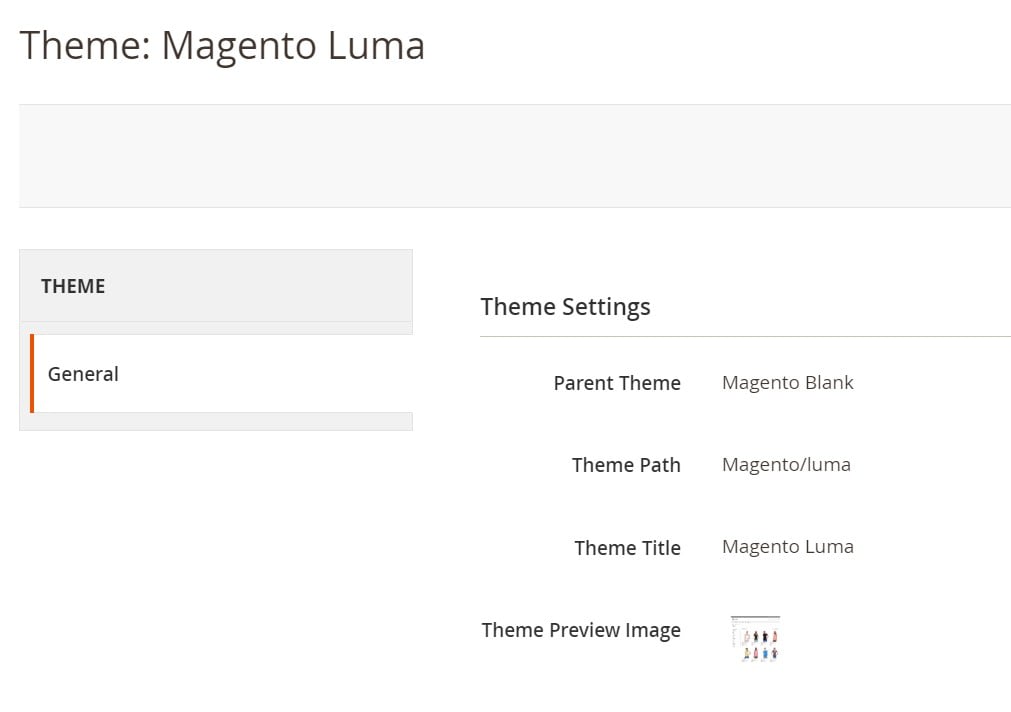
An individual theme page looks as follows:
To preview a theme’s design, click on its preview image.
Magento 2 Schedule
As for schedules, you can find them under Content->Design->Schedule. The Store Design Schedule grid consists of four columns:
- Store – a corresponding store view to which you apply a design change;
- Design – a theme to switch the look of a store view;
- Date From/To – two columns that specify an interval of an update.
Note that filters are built-in each column. Besides, you have standard pagination controls.
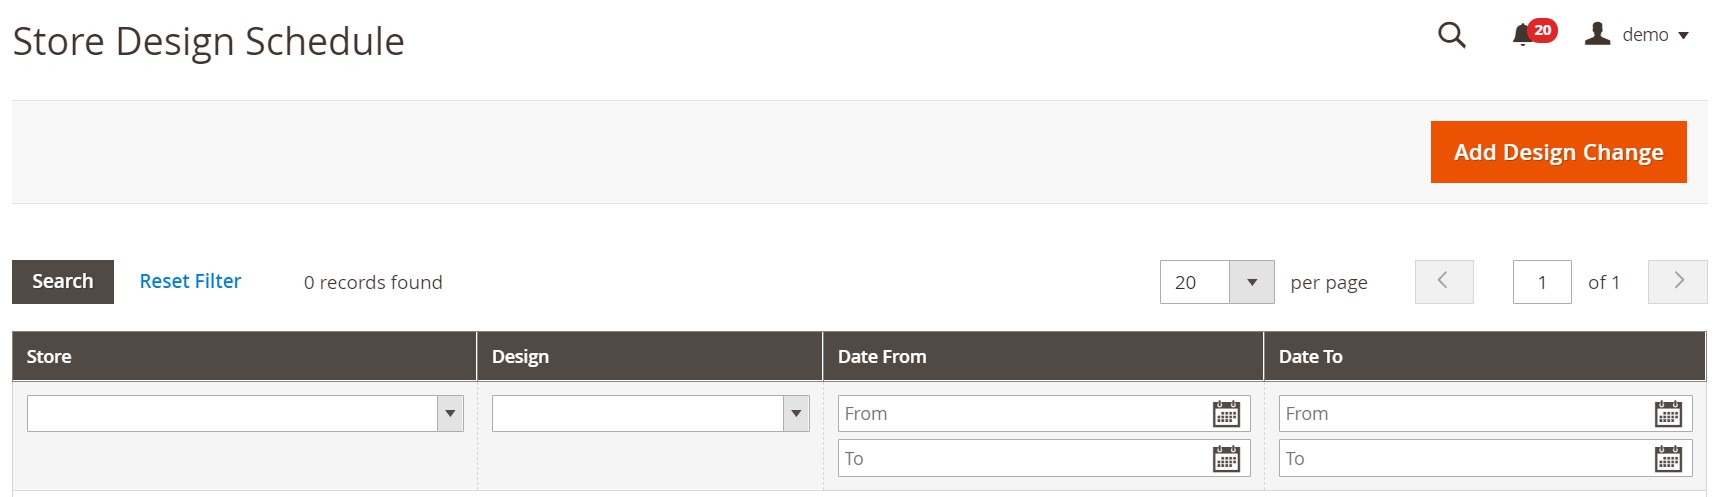
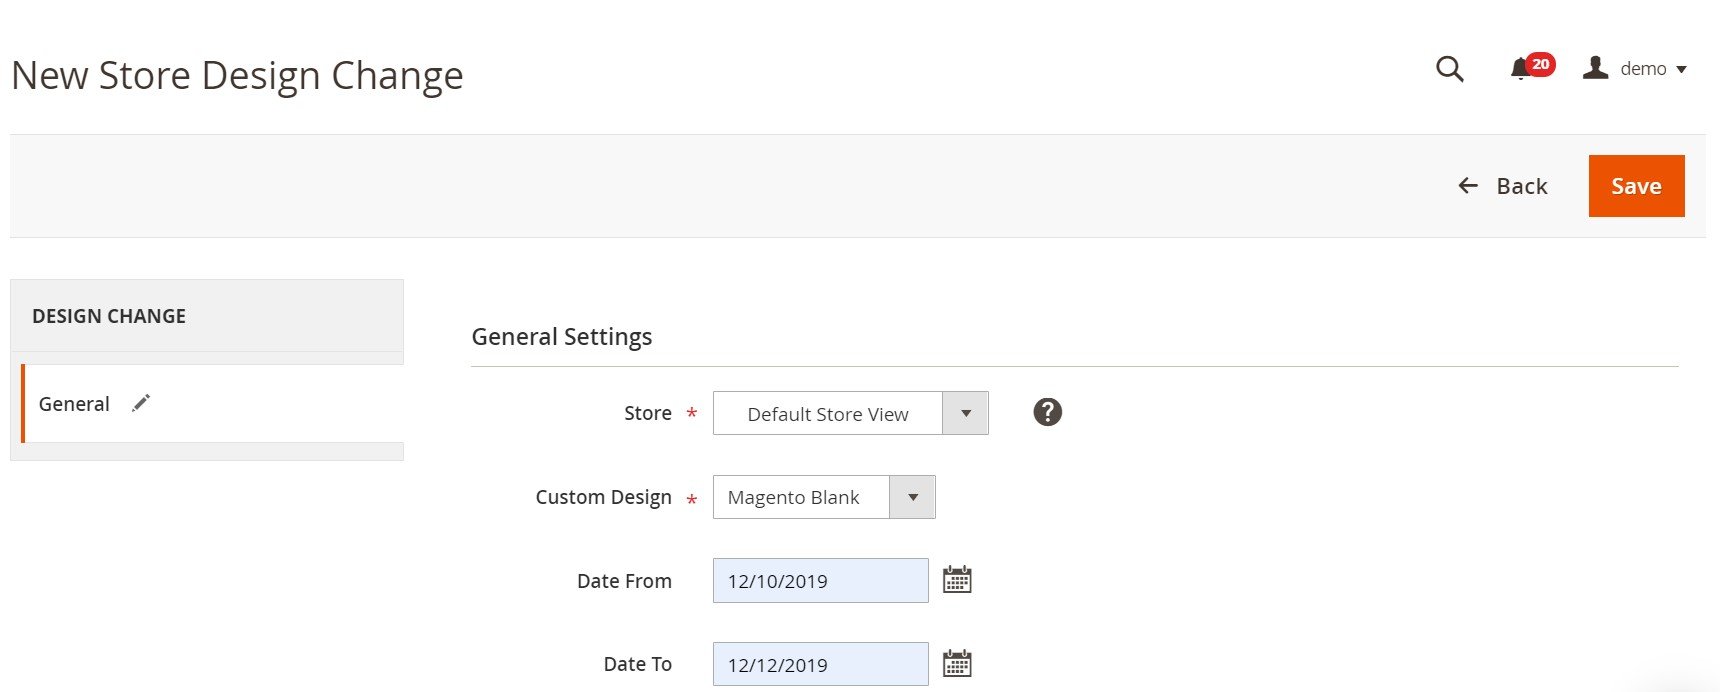
How to add a new store design change in Magento 2
On the Schedule screen, hit the corresponding button on the top right. You will be redirected to a new page. Here, specify a store view to apply your new change to. Select a custom design that will be utilized. Next, configure a time interval to use the selected store view according to it. Save changes. That’s it.
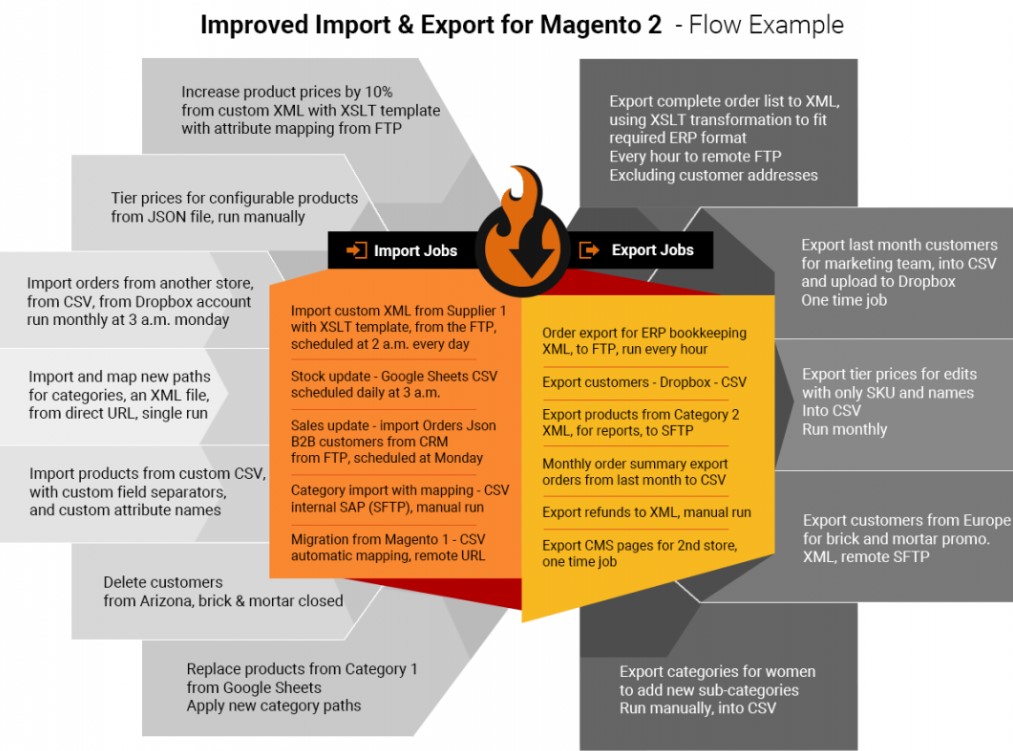
Note that you cannot import/export themes. However, you can use the Improved Import & Export Magento 2 extension to transfer other entities of the Content section. The module lets you create a schedule of data transfers, choose a file format and a destination for imported/exported files, and configure other parameters necessary to move data between your store and any external system. Furthermore, you can transfer data using API or intermediary services. Let’s take a look at these and other features.
Improved Import & Export Features
We created the Improved Import & Export extension to improve our daily routine related to product transfers. None of the existing solutions could satisfy our needs at that time, so a custom instrument was required. After that, we faced multiple new challenges related to data transfers improving the basic functionality of the module. Now, Improved Import & Export offers much more extensive opportunities than other third-party import/export solutions, not to mention the default transfer tools of Magento 2. It is capable of moving all possible entities to and from your e-commerce store automatically.
Automated Import & Export
Our extension lets you automate import and export processes in two different ways. You can either use schedules or create event-based triggers. Let’s describe each approach separately.
Schedules
Schedules utilize the default cron syntax to make both import and export processes automated. You specify an interval to launch a job. Next, the module transfers data at a specific date. You can choose a predefined range or create a custom one. Besides, it is possible to create a profile with no schedule. Such profiles are useful when you need a single transfer, or your import/export processes are not bound to specific date and time. Note that you can also leverage a manual launch any time you need to transfer data. Asynchronous transfers work with scheduled profiles as well.
Events
Another way to automate data transfers is related to event-based triggers. They enable real-time updates. Here is how everything works:
- You select a trigger associated with a specific event;
- The trigger launches a data transfer;
- The extension synchronizes two systems right after a particular event takes place.
For instance, the extension can export customer data right after a new customer registers on your website. Read this article for further information: How to Run Magento 2 Import or Export After Specific System Event or Process.
Advanced Mapping Features
Another essential problem the Improved Import & Export extension solves is caused by different standards for storing data that most e-commerce systems and related platforms have. By default, you cannot transfer information between to platforms without applying modifications. You should edit every data file before moving it into Magento 2. And you cannot avoid the same procedure then exporting entities to external systems. You should edit data files created on your Magento 2 store with the requirements of a third-party platform in mind.
Unfortunately, these processes may take lots of time depending on the number of third-party designation in a file. However, you can dramatically reduce the amount of work with the help of Improved Import & Export. You can not only apply all changes right in the Magento 2 backend but also automate attributes editing with the help of presets.
Mapping Presets
Improved Import & Export provide mapping presets out-of-the-box. You can use these predefined schemes to replace third-party attributes with ones used internally. Our module does all the other work for you, so you only have to select a scheme suitable for your integration. After that, the extension will scan the input data, define third-party attributes, and replaces them with the corresponding internal ones.
As for export processes, the module acts the same, changing Magento 2 attributes with ones utilized within an external system. You can see how everything works below:
Matching Interface
Of course, we cannot provide ALL presets. So, in case the necessary mapping scheme is absent, the module offers a matching interface. The Improved Import & Export Magento 2 extension adds a corresponding section to every import and export profile. You can map attributes there as follows:
- select an entity,
- choose a system attribute,
- specify a relevant external designation.
This gif image shows how everything works:
It is possible to add hardcoded (default) values. The extension provides all imported items with them for the selected attribute. The following example explains the feature: you need to import products from different store views to a single website. Our extension lets you move them there via a hardcoded value for a store view attribute.
Filters
It is also possible to narrow down the selection of data in an export file with the help of filters. Сlick ‘Add Filter,’ select an entity and a system attribute, and specify filtering parameters. Note that filter parameters may vary depending on the selected attributes. Now, you can create an output that is more suitable for your partner. Add as many filters as you need.
Attribute Values Mapping & Editing
In addition to attributes, you can map and edit attribute values in the Magento 2 backend with Improved Import & Export. The module enables you to eliminate incorrect designations that prevent import processes. It offers an interface that is similar to the one we described above. Thus, the procedure of attributes mapping is quite simple. You have to choose a third-party attribute value and specify a corresponding internal one in front of it. The feature is described here in more detail: Attribute Values Mapping.
However, attribute values mapping is not always enough. But the Improved Import & Export Magento 2 extension lets you edit attribute values in bulk to make them more suitable for your e-commerce website. You can add a prefix/suffix to multiple attribute values as well as split or merge them depending on your needs. The module lets you combine these rules and apply them to numerous values in bulk. We describe attribute values editing here: How to Modify Attribute Values During Import and Export in Magento 2.
Category Mapping
You can also simplify the way you transfer products and all the corresponding data to Magento 2. Our extension lets you replace third-party product categories with ones used internally. Category mapping provides the ability to modify information from external catalogs right in your backend. Take a third-party product category and specify a replacement like shown below:
If a category is absent, you can create it on the fly. Select a parent category and define a new one. That’s it! The procedure is described here: Category Mapping.
Attributes On The Fly
In case some attributes are absent in a data file, our extension also offers a solution. The Improved Import & Export module provides the ability to create attributes on the fly using the following general form:
Attribute|attribute_property_name:attribute_property_value|…
Just add it to a data file to let our plugin generate the missing designations. We describe this procedure here: Product attributes import.
Extended Connectivity Options
To let you work with any external systems, Improved Import & Export offers several extended connectivity options. Let’s see all the improvements.
Multiple File Standards
Providing Magento 2 works with CSV only, you have to convert data files into this format before importing them to your website. When it comes to export, you have to convert CSV files to external formats. However, Improved Import & Export eliminates this time-consuming procedure by introducing support for XML, JSON, ODS, and Excel.
Furthermore, you can now freely deal with file archives since the plugin can unzip compressed data automatically. You no longer need to extract updates before transferring them to Magento 2.
Multiple File Sources
To make your data transfers even more flawless, the Improved Import & Export Magento 2 extension lets you streamline several file sources. You can use FTP/SFTP. Note that both local or remote servers are under your disposal. Dropbox and other cloud storages(Box, iCloud, Google Drive, OneDrive, and Amazon Drive) are also among the provided opportunities. If you prefer direct URL uploads, they are supported as well.
Alternative Ways of Import & Export
In addition to file transfers, you can also streamline such more powerful alternative options as API connections and intermediary services. Nothing similar is available in Magento 2 by default. As for Improved Import & Export, it can create direct REST API connections to transfer data between your e-commerce store and any third-party systems. It also works with SOAP and GraphQL if necessary.
As for intermediary services, they include such platforms as Google Sheets, Office 365 Excel, and Zoho Sheet. Connect to them to transfer updates right to your store with no data files. Below, you can see how to move products from Google Sheets:

Another critical moment is that you can leverage all the extension’s features with all the connection types it offers. Besides, the Improved Import & Export module offers additional opportunities due to WSDL and WADL support.
The following video displays the module in action:
Final Words
All design elements of Magento 2 are under your disposal. As you can see, there is nothing complicated in editing or adding them. Furthermore, if you use Improved Import & Export, it is also possible to transfer the corresponding entities with no headaches. For further information about the opportunities our plugin offers, follow the link below:
Get Improved Import & Export Magento 2 Extension