
How to Edit a Menu Bar in Shopware 6

In the following article, we provide an answer to a popular question about Shopware 6. Many merchants ask how to edit a menu bar in Shopware. We’ve discovered several ways how people do that. If you also have no idea how to change the appearance of frontend menus in Shopware or know only a single solution, you’ve come to the right place. Below, we describe the most popular methods that let you achieve the best appearance for your menu bars in Shopware 6.

Note that we provide Shopware integration with external platforms. Contact our support for further information or try our Improved Import & Export Extension for Shopware.
Table of contents
- 1 Create Proper Menu Elements for Your Shopware Website
- 2 Use Extensions to Edit The Menu Bar in Shopware 6
- 3 Editing a Menu Bar in Shopware 6
- 4 Shopware 6 Essentials FAQ
- 4.1 How to create a Shopware account?
- 4.2 What about a Shopware ID?
- 4.3 What is Shopware master data?
- 4.4 How to add a new Shopware shop?
- 4.5 How to add a payment method to your Shopware account?
- 4.6 How to create a deposit in Shopware?
- 4.7 How to purchase Shopware extensions?
- 4.8 How to get support in Shopware?
- 4.9 How to automate import and export processes in Shopware 6?
- 4.10 How to migrate to Shopware 6?
- 4.11 How to integrate Shopware 6 with external systems?
Create Proper Menu Elements for Your Shopware Website
So, if the problem is in particular elements that you don’t want to display, don’t create them. Construct a substructure within the category tree that matches your expectations and assign it to the menus. Please note that the top category must be enabled to show the dependant elements.
So, how to edit the menu bar in Shopware 6 by creating a proper category structure? First, create categories you want to use in your navigation menus. Below, you can see an example of a category tree:
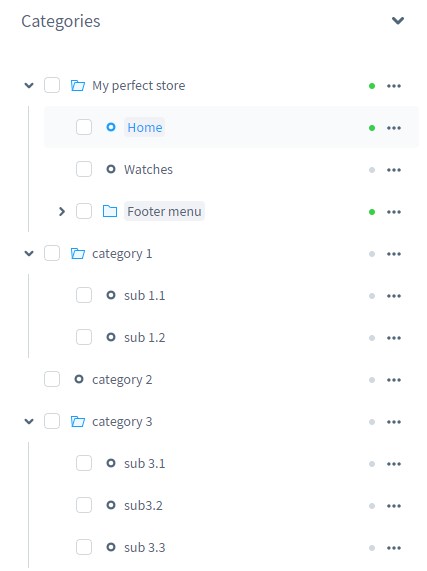
Use the “…” button in the context menu to add a new category. Next, hit the context menu of the category you’ve just created and click on the option that generates a new subcategory. Create as many subcategories as you need. Name and activate them.
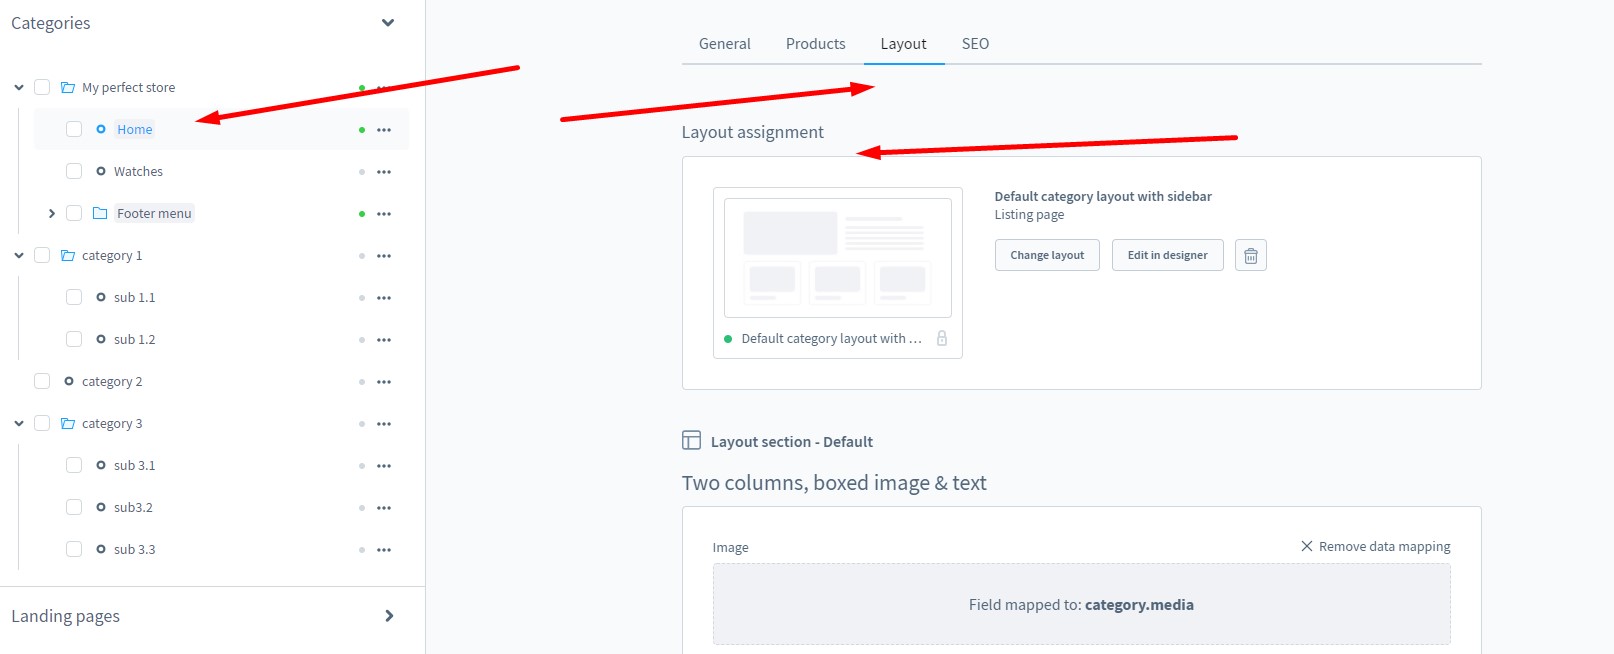
You can also choose a category page layout per each element of a category tree. Select a category you want to edit, proceed to the Layout tab, and choose a corresponding option.
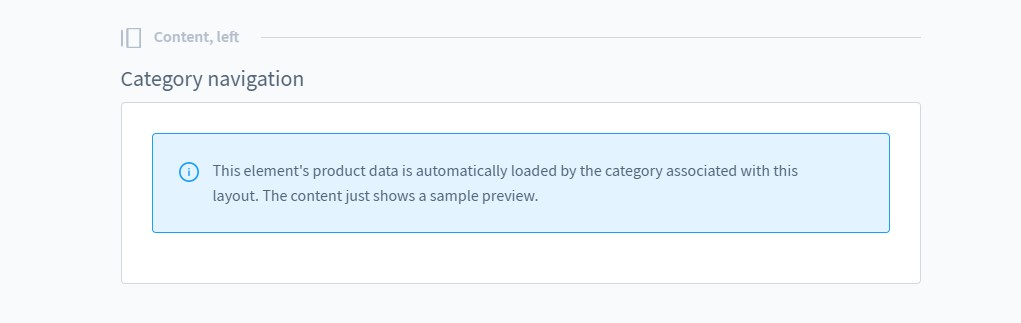
Scroll down to edit the category navigation.
You can find a detailed guide here: How to Create Categories in Shopware 6.
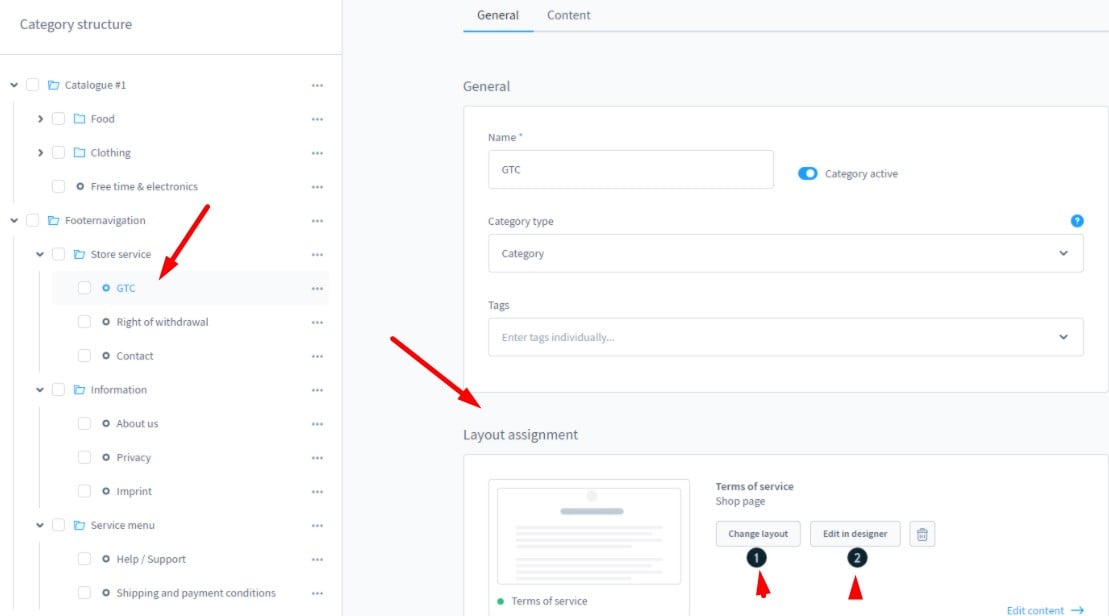
You can also create Shopping Experiences and assign the created layout to the respective category under Layout assignment (1). It is also possible to open the layout editor of the shopping experiences to create a new layout (2).
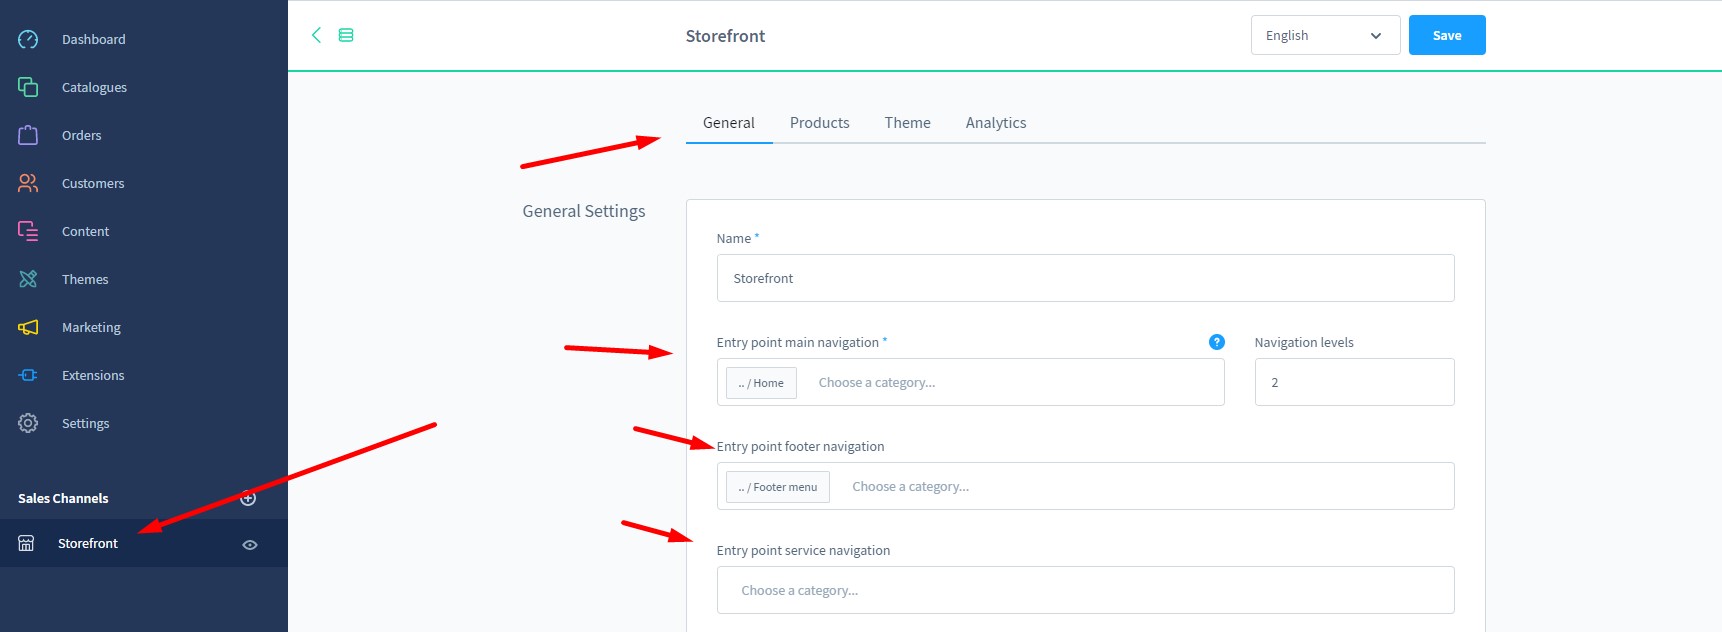
Now, you need to ensure that the menus are shown on the frontend. Specify the menus as entry points. Go to settings for the relevant sales channel. For instance, you can specify the footer structure with the help of the entry point for the footer navigation (1). Alternatively, Shopware 6 lets you use a separate menu for the service navigation. The corresponding option is available under the entry point for the service navigation (2).
Apply other customizations creating a category tree that suits your vision of the Shopware 6 menu bar. You can find more guides on how to create other store pages displayed in a category tree here: Exploring Shopware: Getting Started With The Platform.
Import Products
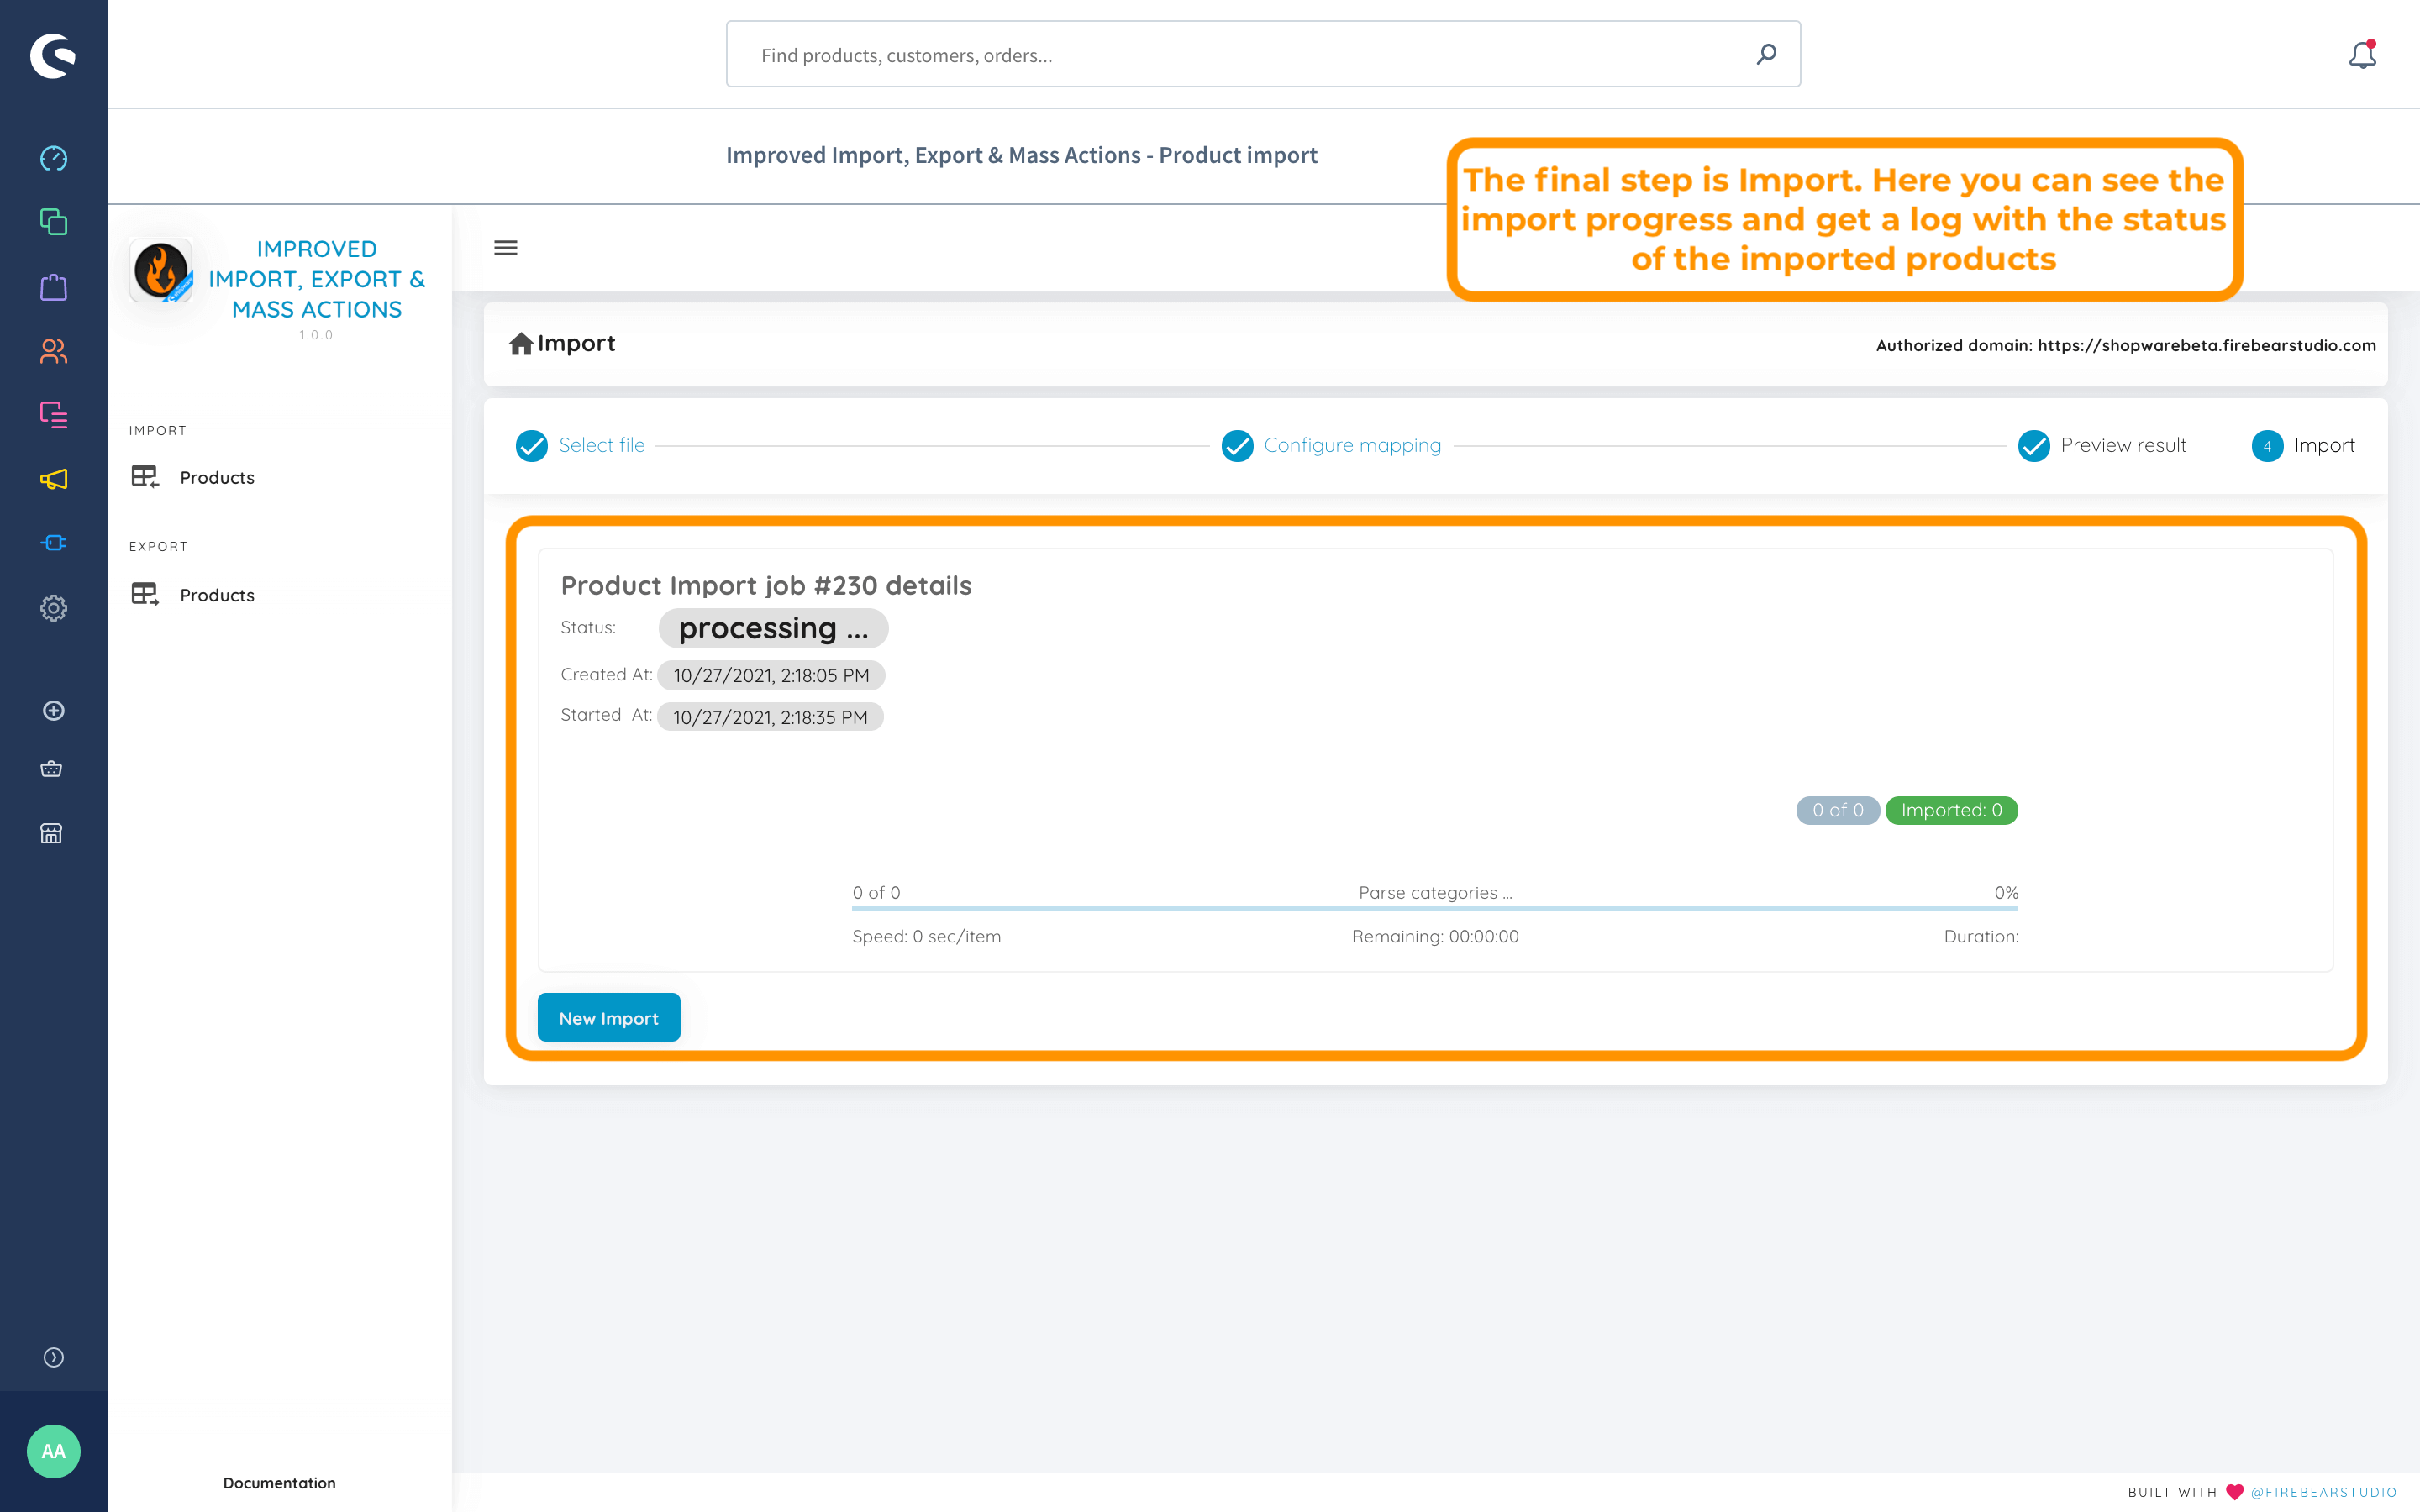
You can also import product data to your website to create product pages automatically. Use the extension to simplify this process. The module provides the ability to create mapping schemes matching any external product data to the corresponding columns in your Shopware 6 database. Even custom product attributes and properties are supported! Furthermore, soon, the module will be able to transfer other entities, creating the entire category tree automatically.
Unfortunately, this approach doesn’t help you hide particular categories from the menu bar after adding them to your category tree. You can do that with the help of other tools.
Use Extensions to Edit The Menu Bar in Shopware 6
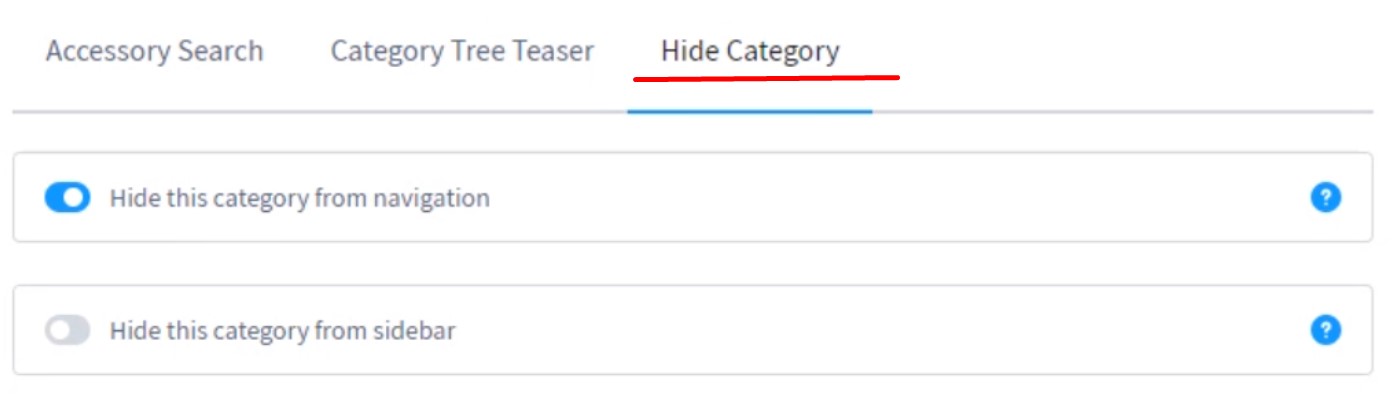
This extension lets you customize the menu bar of Shopware 6. You can create an individual design for your navigation elements, including a sidebar menu. It provides the ability to hide the selected categories from the navigation in just a few clicks. The extension adds a new tab to a category configuration page where you specify its display parameters for the navigation and sidebar menu.
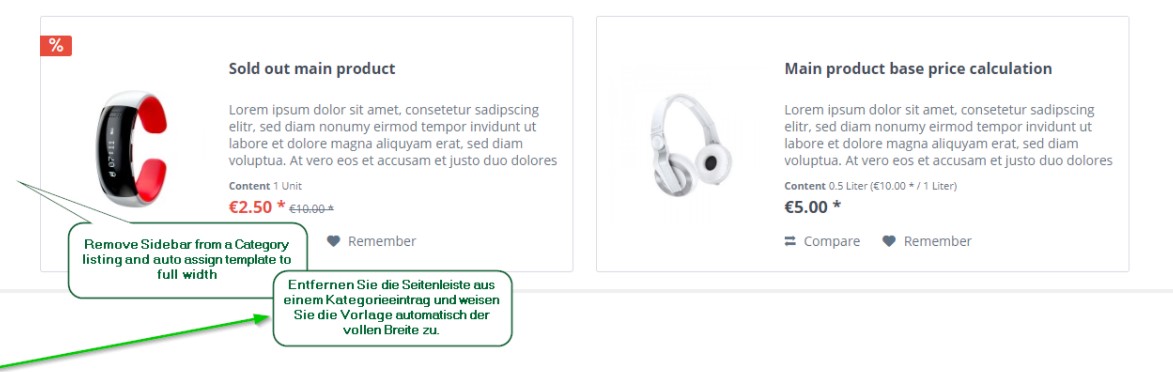
Removing a sidebar sometimes helps improve the user experience. With this module, you get the ability to turn it off on all Shopware 6 shop pages. The extension provides the ability to use the screen space more efficiently. However, you cannot edit particular elements of the menu bar. If you need to show/hide them, use the previous module.
Editing a Menu Bar in Shopware 6
As you can see, editing a menu bar in Shopware 6 is a complex process that involves creating a specific category tree structure and enabling/disabling its elements with the help of third-party modules. If you know better tools for achieving the same goal, please, let us know through the comment section.
Shopware 6 Essentials FAQ
How to create a Shopware account?
To get the ability to customize the menu bar in Shopware, you need to create an account and add a sales channel to it. Visit the registration page, hit the Register Now link, and fill in the form. After receiving a confirmation email, follow the instructions provided in it.
What about a Shopware ID?
Without a Shopware ID, you won’t be able to customize the navigation bar in Shopware. However, you get it automatically upon registration.
What is Shopware master data?
Before going to any storefront customizations, you need to provide information about your company. It is called Shopware master data. It includes physical addresses, phone numbers, emails, etc. You provide this information via the registration form.
How to add a new Shopware shop?
As we’ve already mentioned, you can add shops and other sales channels to your Shopware account in your merchant area. Click the corresponding link to activate the process. After that, choose the type of your new shop (a cloud storefront or an on-premise installation) and provide all the information the system requires.
How to add a payment method to your Shopware account?
You will also need to add a payment method for editing your navigation bar with the help of a third-party extension. You can do that under Basic Information -> Accounting. Choose PayPal, credit card, or direct debit as a way to transfer funds to your account. This payment method will be used for purchasing the modules.
How to create a deposit in Shopware?
You can add a deposit for purchasing extensions and themes in your Merchant Area -> Shops after the internal payment method is configured. Choose a shop to provide funds to. Click Open Account Details and transfer a deposit that covers the amount of your future purchase.
How to purchase Shopware extensions?
You can purchase the modules mentioned earlier in this article on the Shopware Marketplace and in the Plugin Manager. Create a deposit, select a tool you want to buy to edit your Shopware navigation bar, and complete the checkout. As we’ve already mentioned, the deposit should be equal to the amount of your future purchase.
How to get support in Shopware?
If you have questions regarding accounting and financial services, you will find help here: financial.services@shopware.com or +49 2555 9288 510. info@shopware.com or +49 2555 9288 50 are helpful for solving license issues.
How to automate import and export processes in Shopware 6?
You can rely upon the Improved Import, Export & Mass Actions extension to automate import and export processes associated with recurring data transfers. Create schedules to launch the corresponding import and export processes automatically, following the specified criteria. It requires no interaction on the admin side if configured properly.
How to migrate to Shopware 6?
The Improved Import, Export & Mass Actions module is also designed to assist in the Shopware migration. Use it to transfer data from your existing website to the new platform. You can migrate from other e-commerce systems or Shopware’s previous versions. Since we also offer export solutions for systems like Magento and Shopify, you can simplify your data transfers between them and Shopware. for more information.
How to integrate Shopware 6 with external systems?
ERPs, CRMs, accounting tools, and other similar platforms can be connected to Shopware 6 with the help of Improved Import, Export & Mass Actions. The extension lets you run repetitive import and export processes based on schedules and mapping presets. The latter ones are used to modify data according to the requirements of your Shopware store during import as well as follow the rules of the connected platform during export. If the tool is properly configured, no interaction on the admin side is necessary.
Related posts
 Shopware 6 Advanced Pricing Guide + Import Tutorial
 Reputon Amazon Importer Review: How to Connect Shopify to Amazon in a Few Clicks
 A Complete Guide to Shopify Customer Import
 How To Bulk Import Products In Shopify: CSV Description & Step-By-Step Guide
 Adobe (Magento 2) Commerce and Cloud (Enterprise Edition) Specific Features
 Magento 2 B2B Company Guide: Revealing Company Structure & Import
 How to Import Customers & Customer Addresses to Magento 2
 Magento Open Source and Adobe Commerce 2.4.7 Release Notes