Aitoc Checkout Fields Manager Magento 2 Module

It is obvious that we live in a world, in which information reigns. Thus, those who possess it, virtually rule the world. Furthermore, we are pretty aware of the fact that when it comes to e-commerce business, a certain piece of valuable data is able to have a dramatic effect on the way you gain profit, enjoy consideration among people, and design marketing strategies. Therefore, in this article, we would like to introduce you to Aitoc Checkout Fields Manager Magento 2 Module. With the assistance of this tool, you will be able to gather information from your customers on the checkout page which you can apply while planning your further actions to gain larger part of market share. Basically, you get an extremely powerful instrument to understand better your website visitors.

What you will be able to do, once you acquire the Magento add fields to checkout:
- add additional fields, the status of which is defined by you (required, optional);
- gather valuable information on your customers;
- enjoy all field types support;
Table of contents
Module functionality
So, the name of the module speaks for itself, therefore, the creation of additional fields on checkout page will not be a problem once you install the Magento custom checkout fields. Besides, you are able to select the type of your fields, thus,optimizing the filling-in process. It supports the following field types: multiple select, dropdown, Yes/No, Date, Text area, Radio Button, Checkbox, and Text field. To make sure, your clients provide you with certain information, you are able to change the field status to required. Apart from, in case you have several store views, the extension allows you to add fields in certain stores to guarantee a better targeting of a specific customer group. Subsequently, when your website visitors filled in the custom fields, you as well as your clients will be able to see all the data in Order details. Besides, it is up to you where the additional information field will be placed, be it during payment method step or shipping option selection phase. No matter. Customize the fields according to the necessities of your store.
How we can process the data collected
In essence, in order to process the data collected, you can export the data from custom fields to .xls or .csv with the help of Orders grid. Filter the orders and choose the ones you need, and then download the file.
What to expect
In further module release, you will be able to enjoy even more features which can considerably optimize adding custom fields process. Thus, the Magento 2 extension will allow you to place custom fields on the page of registration, and, once a customer has filled in it, there is no need to do the same thing in checkout page since the module copies the data in an automatic fashion. Apart from, you will be able to display additional custom fields to certain Customer groups, as a result, becoming even more accurate in data collection. However, besides, the Magento 2 tool will take different products and categories into account. Therefore, if a website user orders a certain item, you will be able to place specific custom fields during checkout process which do not show up in other products.
Frontend
Taking a look at the picture below, you will be able to see the way custom fields are added on your checkout page.

Backend
After Aitoc Checkout Fields Manager Magento 2 module installation, Follow System => Checkout Fields Manager (or Stores => Attributes => Checkout) to see all the checkout attributes. In order to find a particular attribute, insert the necessary data in the fields above the grid, and click search. Besides, here, you are able to add new attributes as well as edit the existing ones. To make some alterations, simply click on the attribute you are interested in.

Once you clicked on a certain attribute, you will get to the page as displayed below. There, you will be able to choose input type, determine the default label name, and decide whether this field is required or optional. Besides, you can leverage advanced attribute properties.

In this section, you are able to manage titles.

Choose a store view(s) in which the custom field will be showcased.

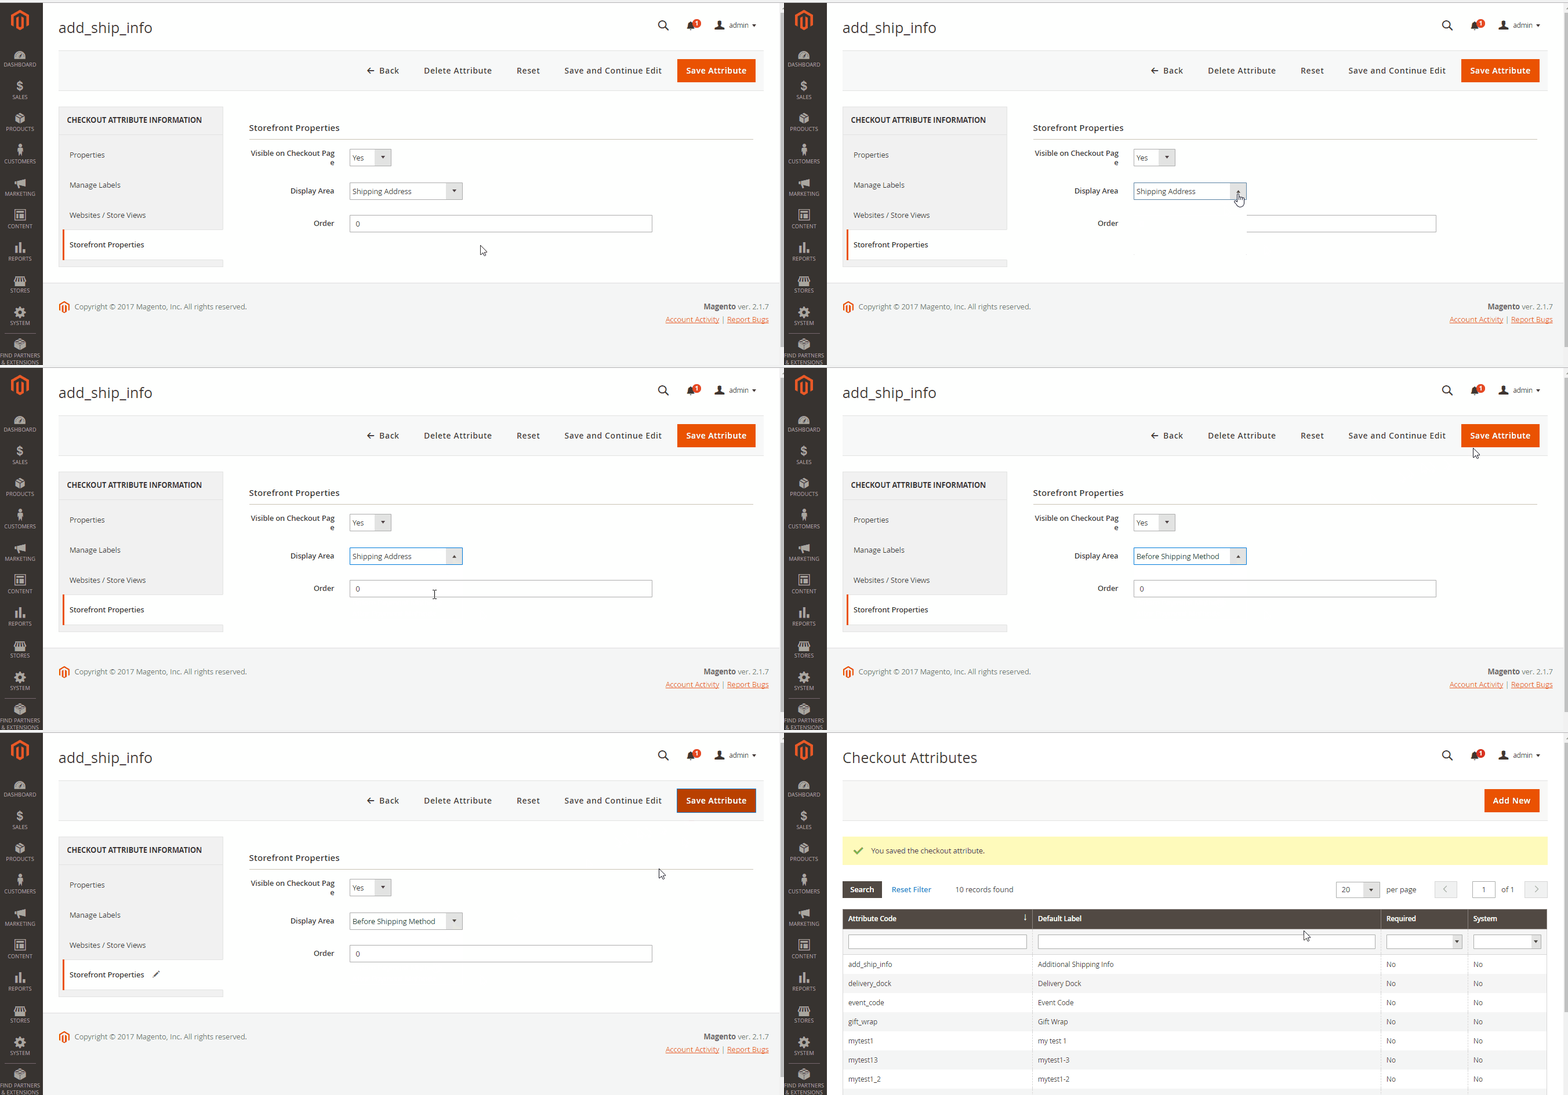
In storefront properties, determine when you would like to display the custom field, using the drop-down-menu: shipping address, before shipping method, before payment method, after payment method. Apart from it, you can enable/disable this field on checkout page.

To configure general settings of the Aitoc Checkout Fields Manager Magento 2 module, follow Stores => Settings => Configurations => Aitoc Extensions => Checkout Fields Manager. In this backend section, you are able to permit the ability to edit cart in checkout as well as disable the cart.

With the assistance of the Magento 2 extension, you will be able to edit the data inserted by a client in a custom field. To do so, go to Sales => Orders, choose a certain order, and you will find yourself on the order details page as displayed below.

Final words
So, having discussed the features the Aitoc Checkout Fields Manager Magento 2 module offers, we can state that its application in your e-commerce business will make a huge contribution to the way you plan marketing strategies as well as interact with your customers. Therefore, we do recommend you to acquire it to be able to improve shopping experience on your website.
The Magento 2 tool costs $125.
Whenever you get a question on the module functionality, you can always contact the developer company, and they will gladly respond to you. To visit the official module page, follow the link below:


