
Jet Magento 2 Integration by CedCommerce

Jet-Magento Integration is an extension developed by CedCommerce that enables Magento1 and Magento 2 users establish a synchronization of inventory, price, other details for product creation and its management between the Magento store and Jet.com. This extension interacts with Jet Marketplace to integrate the synchronized product listing between the Magento and the Jet.com retailers. After installing the extension, a merchant can create the Jet Categories and the dependent attributes on the Magento store.

The process enables a merchant to configure the desired product category into Magento for automatic submission of the selected product to the same Category on Jet.com.
Jet Magento Integration extension provides following features:
- Profile-based product upload
- Easy Jet Category and Attribute mapping
- Manage Jet Product and Upload Product (directly from grid and bulk upload all products)
- Product Synchronization
- Automatic process on each product edit
- Manual synchronization process
- Review Product Upload Errors
- Automated Order Import and Acknowledgement
- Shipment and Cancellation of Orders
- Automated Shipment with Shipworks and Shipstation
- Multiple Shipment of an Order
- Fetch and Submit Return
- Create Refund
- Upload Configurable Product
- Upload simple Product
- Archive Selected Product
- Archive Products in Bulk
- Unarchive Selected Product
- Unarchive Products in Bulk
- Shipping Exception
- Return Exception
- CRON Facility
- Knowledge Base
- Map Magento Global variant attributes
Once the extension is successfully installed on the Merchant’s store, the Jet menu appears on the top navigation bar displayed in the Magento Admin Panel. The merchant has to fill in the API credentials in the Jet Configuration page of the admin panel.
The user has to log in the https://partner.jet.com/ to obtain the following API credentials:
- Jet API key
- API Secret
- Fulfillment Node Id
After obtaining the API credentials, the merchant has to copy all of them one by one from the Jet Partner account and paste it one by one to the Configuration page of the admin panel of the merchant.
To follow the process of copying and pasting of the API credentials,
Open the Jet Partner account and the Magento Admin Panel in two different tabs or windows of the browser. Thus, copy the keys from the Jet Partner account and paste them one by one to the Magento Admin Panel.
OR
Use the Get Jet Credentials button available on the Jet Configuration page of the admin panel of the merchant.
To Copy the API Key details from the Jet Partner account
- Go to the https://partner.jet.com/ login.
The page appears as shown in the following figure:
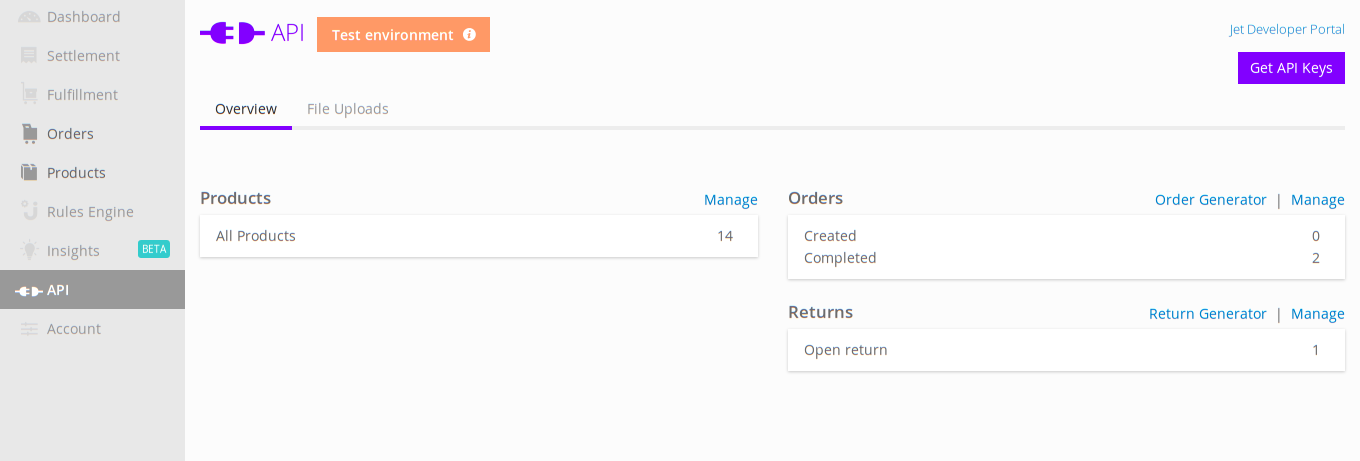
- In the right-upper corner of the page, click the Get API Keys button.
The Sandbox API Keys dialog box appears as shown in the following figure:
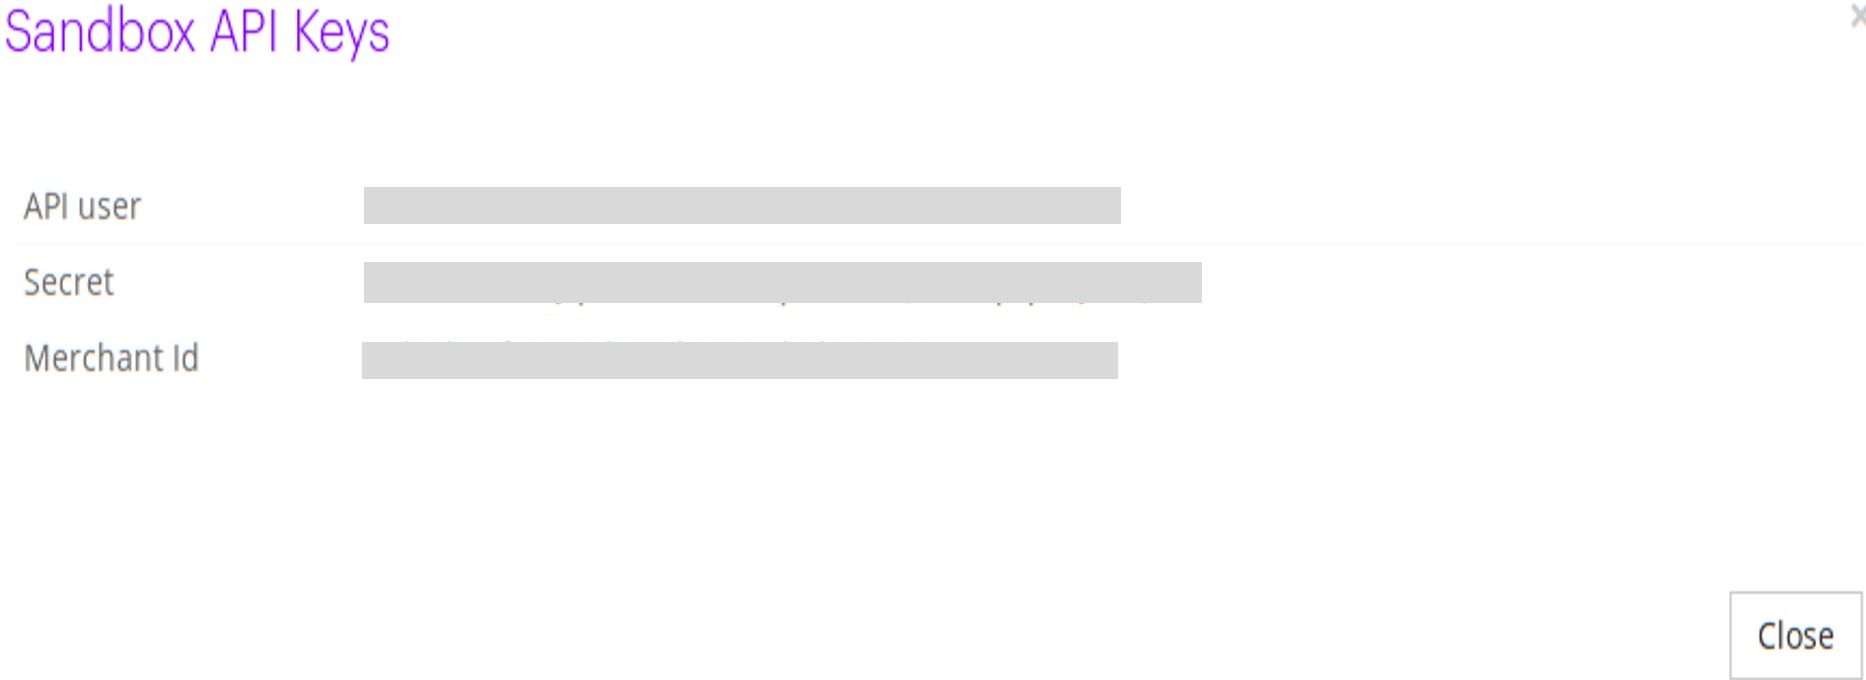
3.Copy all the API keys for further use.
4.Click the Close button.
5. On the left navigation bar, click the Fulfillment menu.
The Fulfillment Node ID is generated and the page appears as shown in the following figure:
Fulfillment
6.Copy the Fulfillment Node ID from the Fulfillment Node ID column
To update the Jet Configuration Setting of the extension
1) Go to the Magento Admin panel.
2) On the top navigation bar, click the Jet menu.
The menu appears as shown in the following figure:
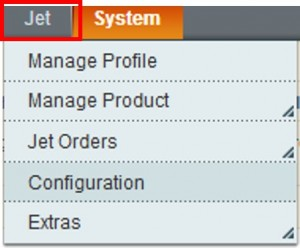
3) Click Configuration.
The Jet Configuration page appears as shown in the following figure:
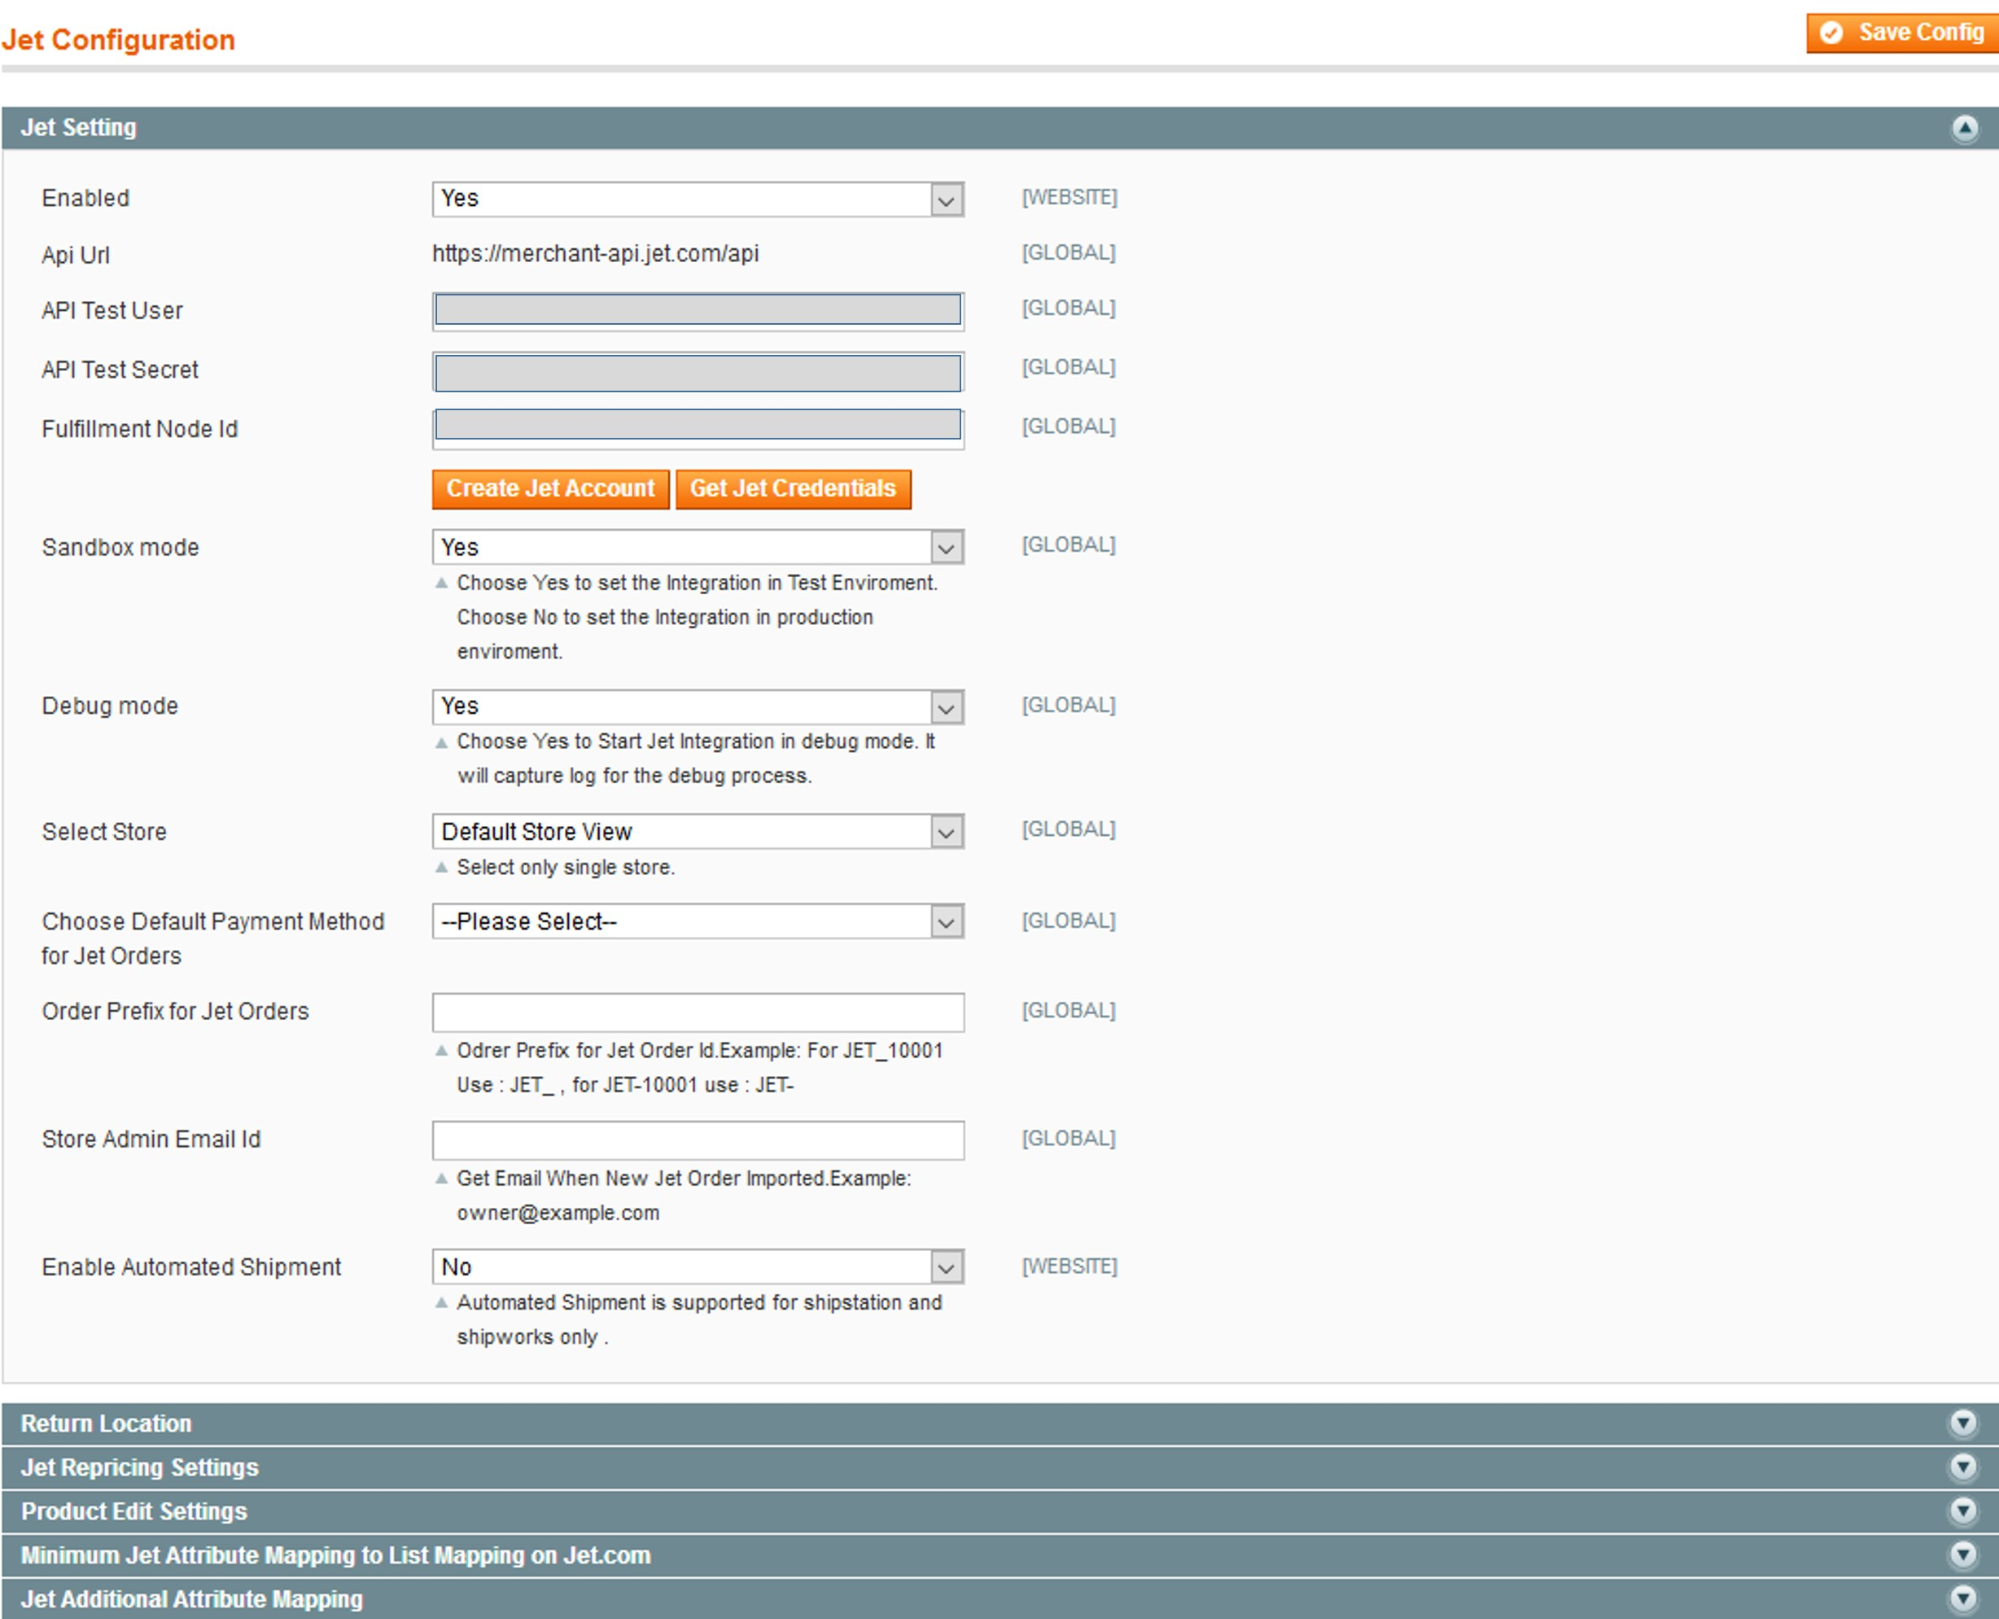
4) Under Jet Settings, do the following steps:
a) In the Enabled list, select Yes.
b) In the Sandbox mode list, select Yes to configure the Integration in the Test Environment.
c) Click the Get Jet Credentials button to obtain the API credentials from the existing Jet partner account.
OR
Click the Create Jet Account button to create the account to obtain the API credentials.
d) In the API Test User box, paste the corresponding API User value copied from the Sandbox API
Keys dialog box of the Jet Partner Account.
e) In the API Test Secret box, paste the corresponding Secret value copied from the Sandbox API Keys dialog box of the Jet Partner Account.
f) In the Fulfillment Node Id box, paste the corresponding Fulfillment Node ID value copied from the Fulfillment & Returns Settings page of the Jet Partner Account.
g) In the Debug mode list, select Yes to start Jet Integration in the debug mode.
It captures the log for the debug process.
h)In the Select Store list, select the single store.
i) In the Choose Default Payment Method for Jet Orders list, select the required option.
j) In the Order Prefix for Jet Orders box, enter the prefix value.
k) In the Store Admin Email Id box, enter the email-id.
l) In the Enable Automated Shipment list, select the required option.
- Click the Return location tab.
The Return location tab is expanded as shown in the following figure:
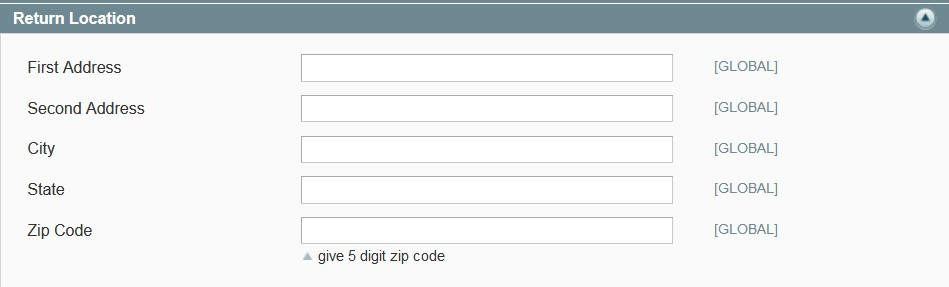
- Under Return location, enter the values in the following fields:
- First Address
- Second Address
- City
- State
- Zip Code
- Click the Jet Repricing Settings tab.
The Jet Repricing Settings tab is expanded as shown in the following figure:
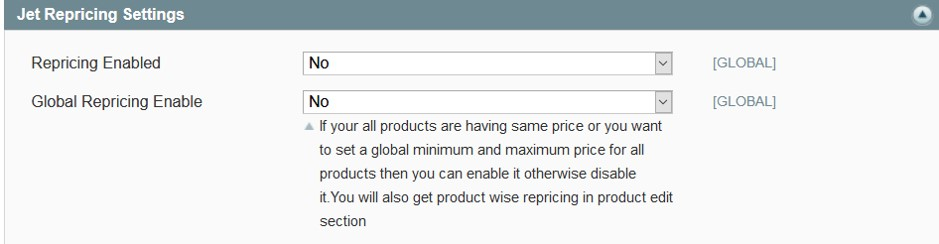
- Under Jet Repricing Settings, do the following steps:
a)In the Repricing Enabled list, select the required option.
In the Global Repricing Enable list, select the required option.
Admin can also enable or disable the product wise repricing in the product edit section.
9) Click the Product Edit Settings tab.
The Product Edit Settings tab is expanded as shown in the following figure:
10) Under Product Edit Settings, do the following steps:
a) In the Auto Sync With the Jet list, select Yes or No.
b) In the Show Upload Button list, select Yes or No.
c) In the Archive Child Products list, select Yes or No.
11) Click the Minimum Jet Attribute Mapping to List Mapping on Jet.com tab.
The tab is expanded as shown in the following figure:
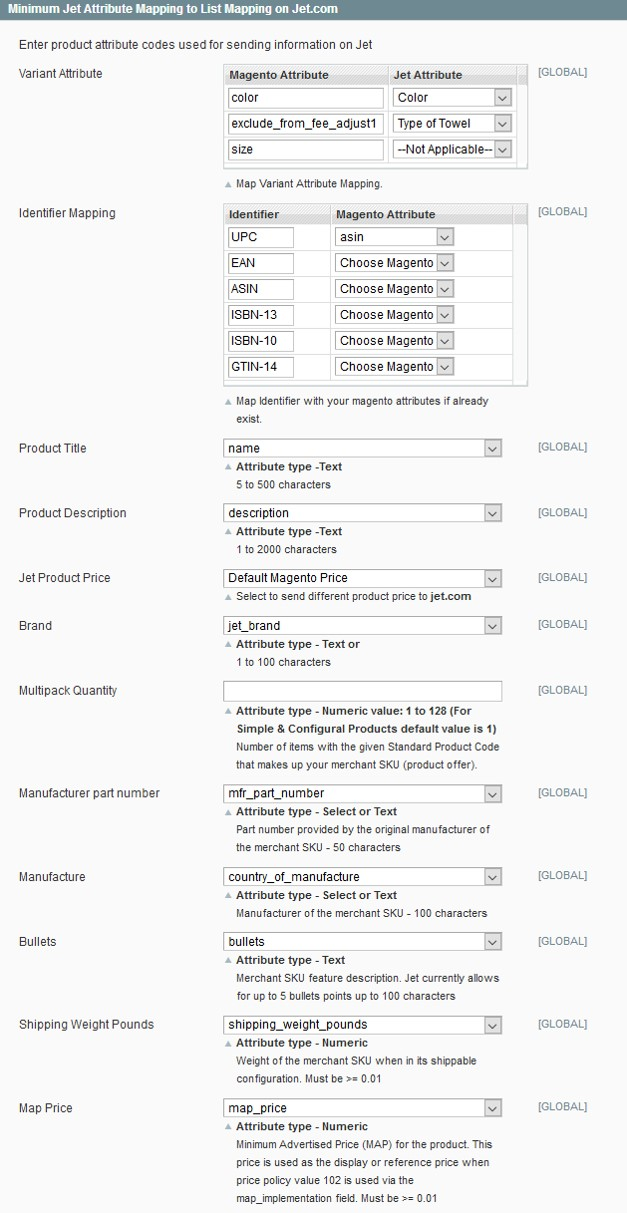
12) Under Minimum Jet Attribute Mapping to List Mapping on Jet.com, do the following steps:
13) Click the Jet Additional Attribute Mapping tab.
The tab is expanded as shown in the following figure:
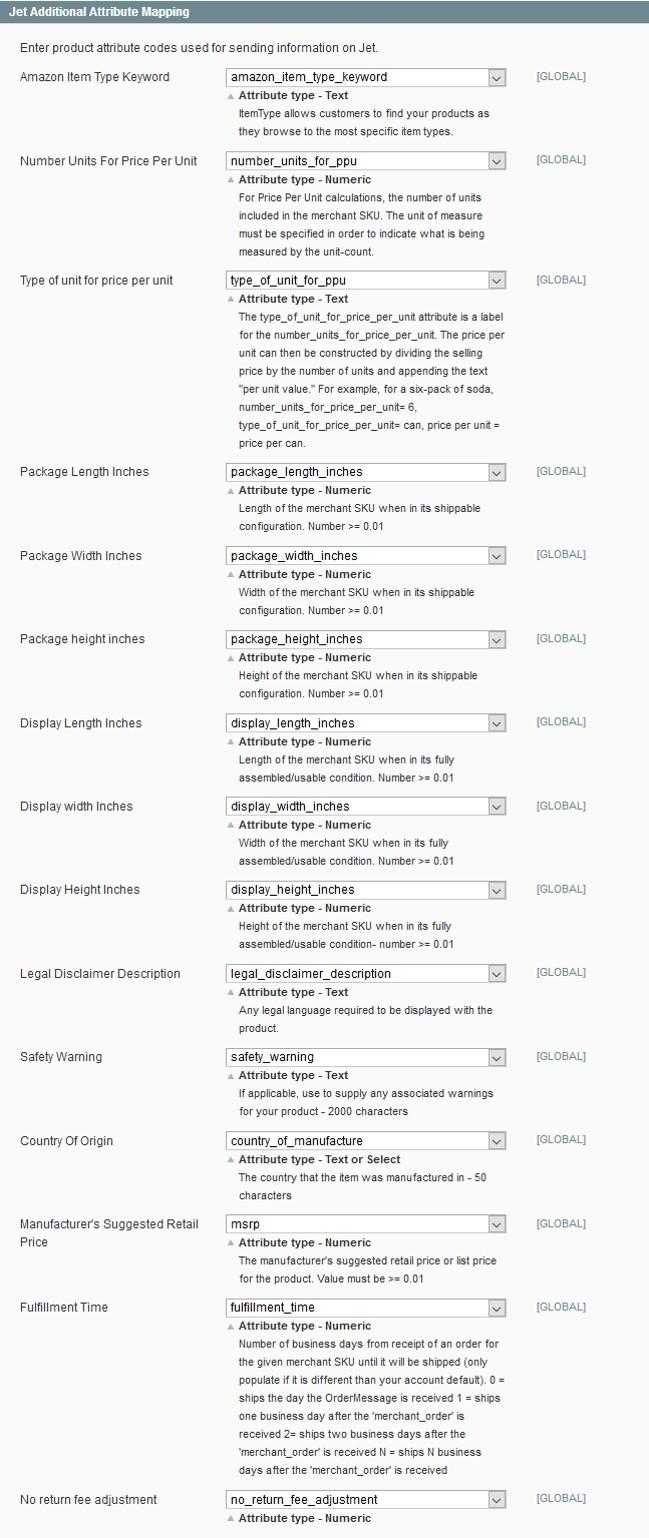
14 Under Jet Additional Attribute Mapping, select the corresponding attributes for mapping:
Amazon Item Type Keyword: Select the Text-Type attribute.
It allows customers to find the specific products.
Number Units For Price Per Unit: Select the Numeric-Type attribute.
The attribute value should specify unit of measure to indicate what is being measured by the unit-count.
- Click the Save Config button.
Conclusion:
This the entire process of Connecting your Magento 1 and Magento 2 stores with Jet Marketplace through CedCommerce.
Since Jet Magento extensions are based on one-time payment, sellers are saved from Monthly recursive payments in the subscription model or higher upgrading fee in Freemium models. Among other benefits of choosing Walmart Magento extensions from CedCommerce are:
- CedCommerce facilitates all the aspects – Product Management, Order Management, Inventory Management, and Shipment Management.
- After the Purchase of Extension, a dedicated account manager is aligned with the buyer who helps sellers to get familiar and even upload products, if they require.
- Also, free recursive updates are provided each time Walmart make changes to its APIs, for free.
Related posts
 How to generate order increment IDs automatically during Magento 2 import
 Reputon Amazon Importer Review: How to Connect Shopify to Amazon in a Few Clicks
 How To Bulk Import Products In Shopify: CSV Description & Step-By-Step Guide
- How to update products that are not listed in a product table during Magento 2 import
 Magento 2 B2B Company Guide: Revealing Company Structure & Import
- How to Import Customers & Customer Addresses to Magento 2
 Amasty ChatGPT AI Content Generator for Magento 2
 Magento 2 Release Notes