
Exploring Shopware: First Run Wizard for Shopware 6
![]()
We’ve just described how to install Shopware 6 on your server. The next step in your interaction with the platform is associated with the Shopware 6 First Run Wizard. The system launches this tool right after the installer logs you into the admin interface. It always happens after a successful installation.
What’s the purpose of the Shopware First Run Wizard, you will ask? It teaches how to set up your shop, dividing this process into several steps. Below, we shed light on such steps associated with the wizard as language packs installation, demo data, mailer configuration, PayPal settings, plugins installation, and account setup. Also, you will find out how to achieve the most robust import and export processes on your Shopware website, integrating it with any external systems. Other important aspects are discussed in the FAQ section.

Note that we provide Shopware integration with external platforms. Contact our support for further information or try our Improved Import & Export Extension for Shopware.
Table of contents
- 1 How to Install Language Packs for Shopware 6
- 2 How to add demo data to Shopware 6
- 3 How to configure Shopware 6 mailer settings
- 4 How to configure PayPal for Shopware 6
- 5 How to install Shopware 6 plugins
- 6 How to set up a Shopware account
- 7 How to Import Any Data to Shopware 6
- 8 Shopware 6 Essentials FAQ
- 8.1 How to create a Shopware ID?
- 8.2 How to create a Shopware account?
- 8.3 What is Shopware master data?
- 8.4 How to add a shop in Shopware?
- 8.5 How to add a payment method to your Shopware account?
- 8.6 How to create a deposit in Shopware?
- 8.7 How to purchase Shopware extensions?
- 8.8 How to get support in Shopware?
- 8.9 How to migrate to Shopware 6?
- 8.10 How to automate import and export processes in Shopware 6?
- 8.11 How to integrate Shopware 6 with external systems?
How to Install Language Packs for Shopware 6
Shopware 6 doesn’t include all the supported languages after the installation. Therefore, you may need to enable additional language packs. The first step associated with the Wizard is dedicated to this process. The tool lets you install additional language packs in Software 6:
- View all language packs available in the system.
- Click on the Install button of the language you want to add to your Shopware 6 store.
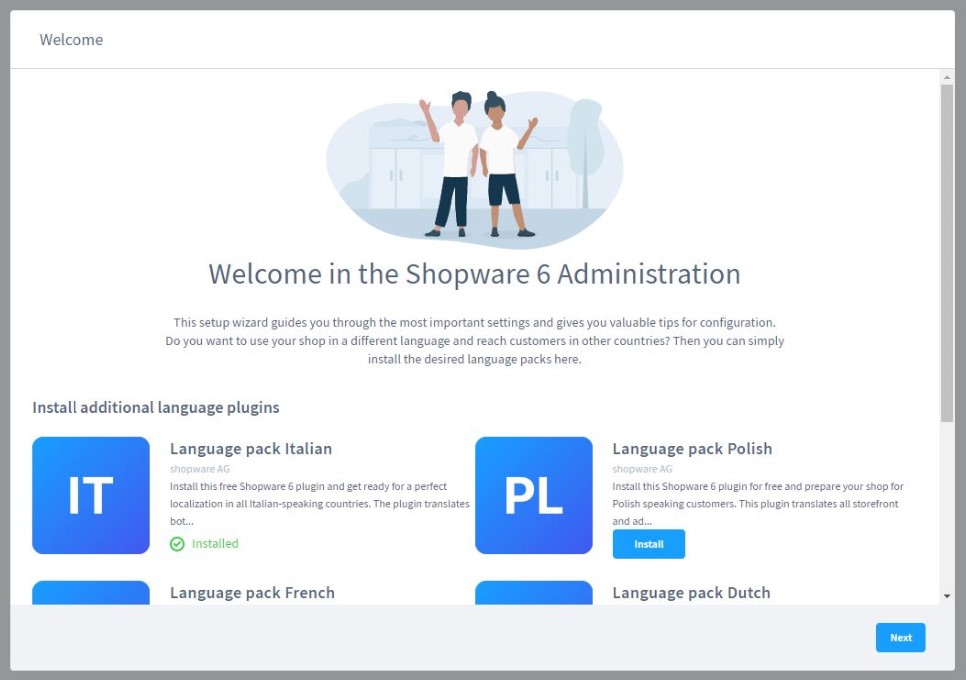
- Complete the installation.
- Now, you can change the language of the administration interface by selecting the added language.

Note that changing the language at this point affects only a particular personal experience of the administrator who applies the setting.
Shopware lets you define the language of your storefront in the configuration section of the respective sales channel.
After installing all the necessary language packs, click the Next button. You will proceed to the next step of the Shopware 6 configuration.
How to add demo data to Shopware 6
Now, we describe how to add demo data to Shopware 6. While the barebone installation doesn’t contain any products, the demo data is associated with products, categories, and manufacturers. You can skip this step or click the Next button to fill in your Shopware 6 website’s front end section.
Note that Shopware 6 provides the demo data for testing purposes only. Therefore, it is prohibited to use it in a production environment.
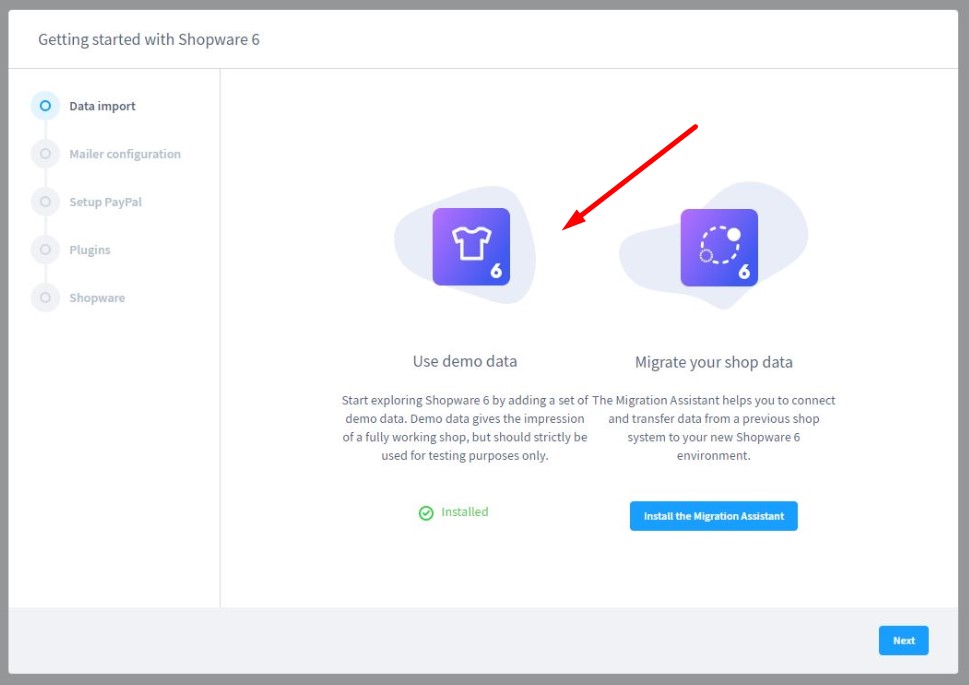
Alternatively, you can migrate your actual shop data to Shopware at this stage. Note that our team knows how to optimize and automate data migration to Shopware 6. Contact us for further information.
How to configure Shopware 6 mailer settings
At this step, the Shopware 6 First Run Wizard lets you configure the mailer settings. They are necessary for receiving and sending emails through your e-commerce webstore.
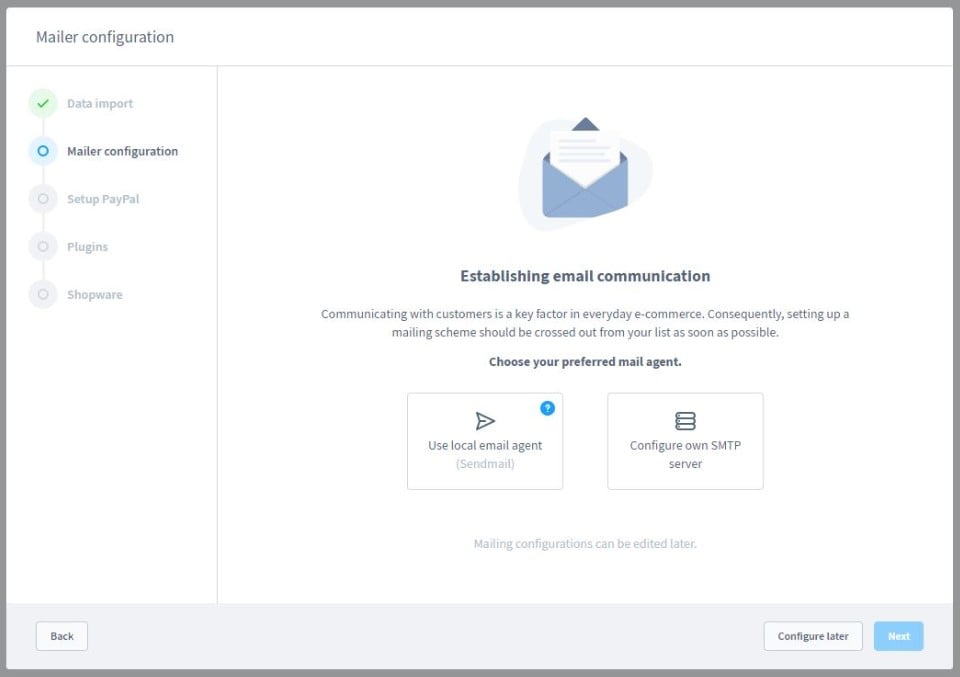
As you can see, the system empowers you to use a local email agent. At the same time, it is possible to configure your own SMTP server.
Alternatively, you can skip this step and configure Shopware 6 mailer settings outside of the First Run Wizard. Click on Configure later. We will describe how to configure this instrument in another article.
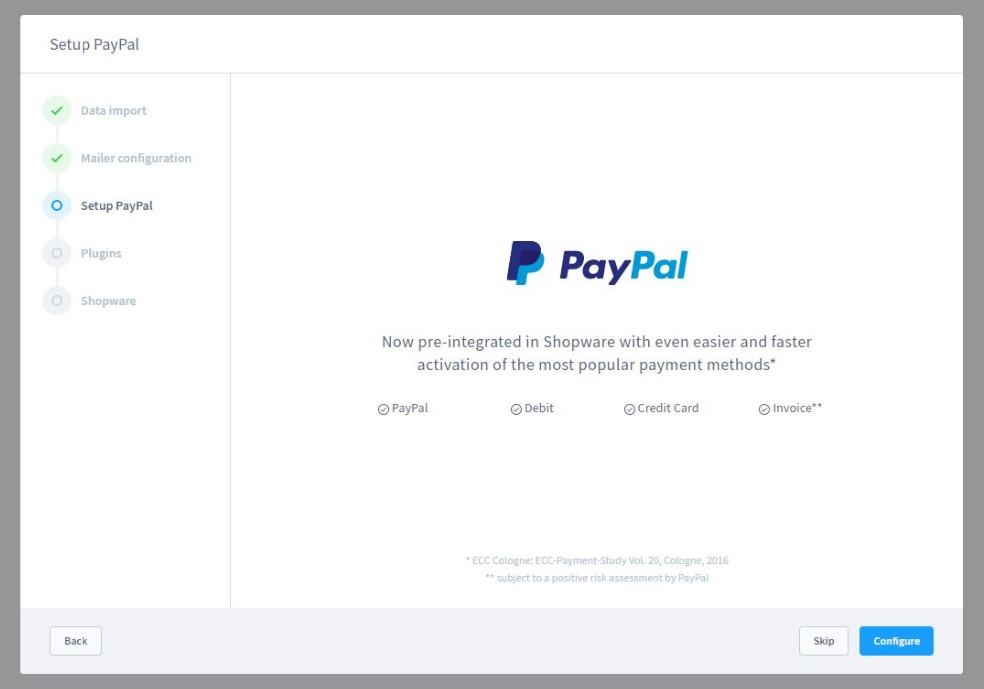
How to configure PayPal for Shopware 6
The Shopware 6 PayPal configuration is associated with the third step of the Wizard. At the corresponding screen, you can enter your PayPal API access data. The system saves it in the appropriate plugin.
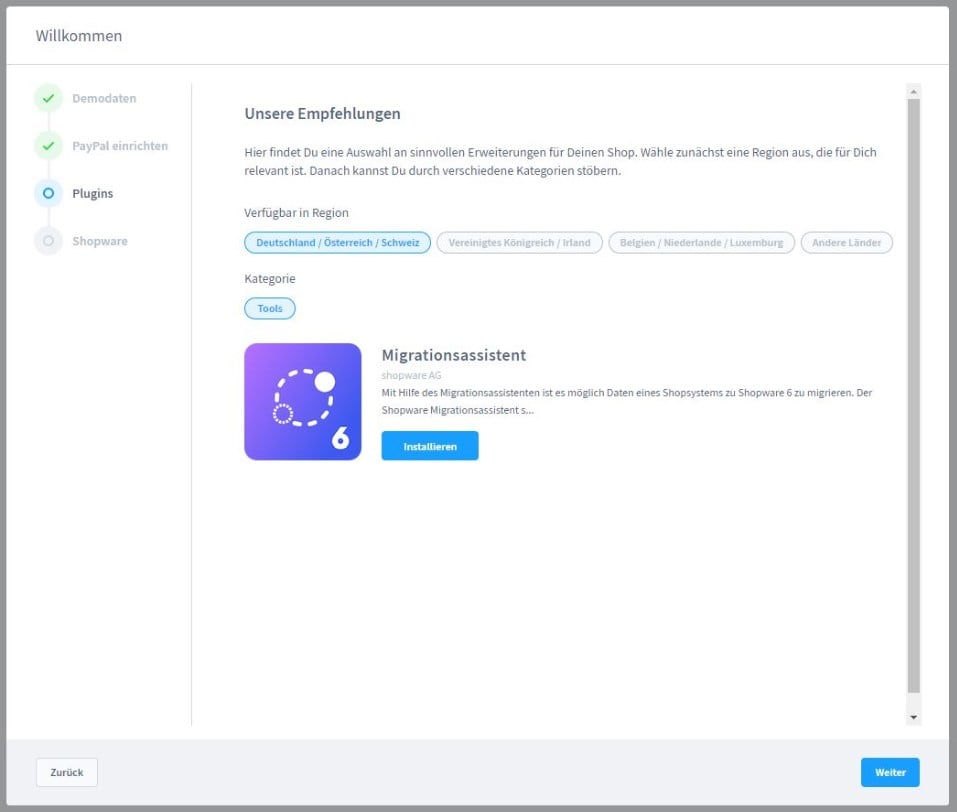
How to install Shopware 6 plugins
Now, the First Run Wizard empowers you to install plugins:
- Select your relevant region;
- Browse through different categories;
- Choose plugins you want to install;
- Click the Next button after installing all the necessary plugins;
- Proceed to the final setup step.
How to set up a Shopware account
Now, you can set up your Shopware account if you didn’t do that previously. Your account provides access to purchased plugins, licenses, and community resources.
- Enter your Shopware ID and password;
- Click the Next button;
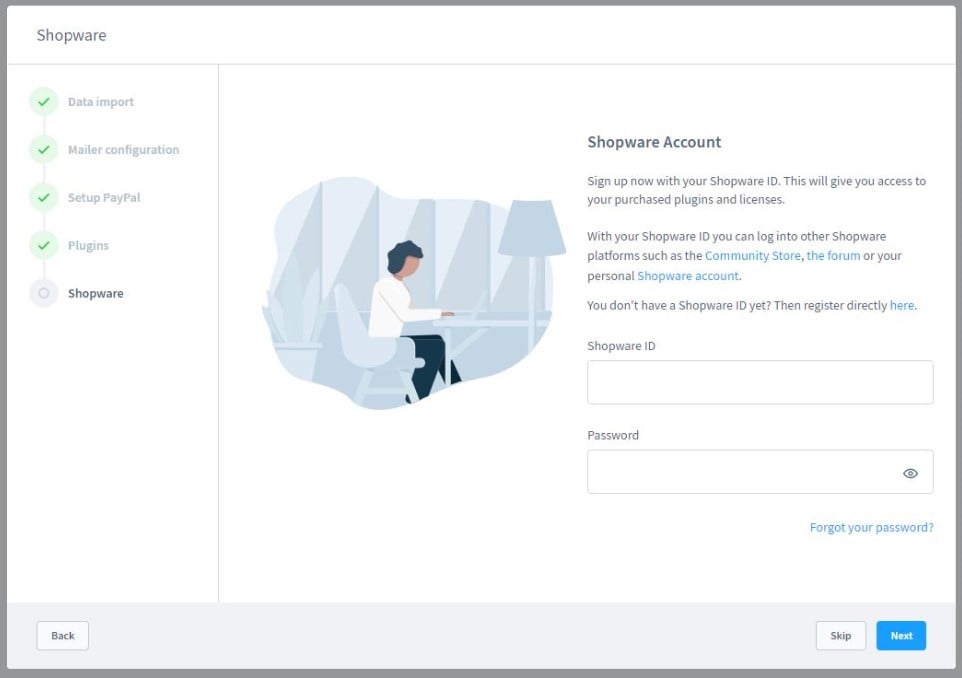
- The system will now link your Shopware 6 domain to the shop;
- Choose a preferred domain from the list of verified domains;
- Hit the Next button.
Use the Create button to generate a new shop domain. You can indicate that it is a Test environment with the corresponding checkbox.
Note that Shopware requires the following conditions to be met:
- The domain specified at this stage must be externally accessible;
- The corresponding web server must refer to the public directory within your Shopware 6 installation.
Note that all the domains you’ve created in the First Run Wizard are considered Community Edition domains in your Shopware account.
Congratulations! You’ve performed the basic configuration of your Shopware 6 website. Click the Finish button to finish the First Run Wizard setup.
How to Import Any Data to Shopware 6
The First Run Wizard helps you configure many areas of your Shopware 6 website. However, it doesn’t provide any guidance when it comes to import and export processes. Since they are vital for some steps from the very beginning of their existence, it is necessary to choose a reliable third-party extension that delivers the missing data transfer functionality to Shopware 6. For instance, you can simplify and automate any import and export process with our . We provide several facts about the tool below. Contact our support for more details.
Shopware 6 Essentials FAQ
How to create a Shopware ID?
Before running the First Time Wizard, you will have to get a Shopware ID. The system provides it while you create a Shopware account.
How to create a Shopware account?
Go to the registration page and hit the Register Now link to create a new Shopware account. Fill in the registration fields and get the confirmation link via email.
What is Shopware master data?
When you continue setting up your Shopware account, you need to provide additional information called master data. It includes your contact information and company details, such as an address, email, phone, company name, etc.
How to add a shop in Shopware?
Using Shopware for the first time is also associated with the creation of a new shop. You can do that in your merchant area’s start-screen. Just hit the corresponding link situated at its right section. You can create either a cloud storefront or an on-premise website. Next, you need to provide information about your new Shopware shop and save it.
How to add a payment method to your Shopware account?
It is also necessary to add a payment method to your Shopware account. It lets you create a deposit for purchasing extensions and themes. Go to Basic Information -> Accounting and choose PayPal, credit card, or direct debit to add a payment method to your Shopware account.
How to create a deposit in Shopware?
As we’ve just mentioned above, you can pay in advance for your purchases with Shopware. Go to MerchantArea -> Shops, select a shop to add funds to, click Open Account Details, and add funds.
How to purchase Shopware extensions?
You can purchase extensions for your Shopware website after adding a deposit. After the required money amount is provided to the system, proceed to the Shopware Marketplace, choose tools you want to buy, and complete the purchase. Also, it is possible to use the Plugin Manager to perform the same actions.
How to get support in Shopware?
Shopware provides support regarding account and license via email (info@shopware.com) or by phone (+49 2555 9288 50). You can send inquiries about accounting and financial services to financial.services@shopware.com or +49 2555 9288 510.
How to migrate to Shopware 6?
Shopware 6 migration is a complex topic that deserves a separate guide. Therefore, we’d like to draw your attention to a single aspect associated with the default platform’s limitation. Due to the scarce import and export solutions available in Shopware, you need a third-party extension to run the migration. Use the Improved Import & Export tool for Shopware 6 to perform this process. Contact our team for more information.
How to automate import and export processes in Shopware 6?
You can use the Improved Import & Export extension for Shopware 6 to automate import and export processes that take place on your e-commerce website. If you regularly get data updates or need to provide information to external systems, our solution can simplify these procedures dramatically. It lets you create a schedule of updates to run import or export processes automatically.
How to integrate Shopware 6 with external systems?
Install the Improved Import & Export extension for Shopware 6 to integrate your e-commerce storefront with external systems. It provides the ability to connect your Shopware website to ERPs, CRMs, accounting systems, and other similar tools. Our module automates import and export processes as well as applies changes to the transferred data according to the requirements of your Shopware store and the connected platforms upon import and export correspondingly.
Related posts
 Shopware 6 Advanced Pricing Guide + Import Tutorial
 A Complete Guide to Shopify Customer Import
 How to Import Customers & Customer Addresses to Magento 2
 How To Bulk Import Products In Shopify: CSV Description & Step-By-Step Guide
 Reputon Amazon Importer Review: How to Connect Shopify to Amazon in a Few Clicks
 Magento 2 B2B Company Guide: Revealing Company Structure & Import
 Magento Open Source and Adobe Commerce 2.4.7 Release Notes
 CopyAI Review 2023