
How to Import Multiselect Attribute Values to Magento 2

In the following article, we explain how to get multiselect attribute values in Magento 2 via import and export processes. But how it it possible if the default data transfer tools don’t offer the desired functionality?
The default data transfer capabilities of Magento 2 still need various improvements, especially if you use the Open Source version of the platform. However, numerous community-based initiatives that tend to improve the basic functionality are at your service. They vary between coding tricks and standalone extensions. Depending on the complexity of your business, your technical skills, or the faced issues, you can select one that perfectly suits your needs. What to do if you cannot find the solutions? Ask the community for support.
Recently, we came across an interesting issue on . The author was wondering whether it was possible to create values for a multiselect attribute when uploading a CSV file. Below, we share two solutions: the community-based algorithm for addressing the problem and the Firebear-proposed tool. While the first one requires additional coding experience and is almost unreal to implement for non-technical users, the extension we offer is admin-friendly and intuitive so that anyone can use it to cope with the difficulties described below.
To make a long story short, let’s explore the issue and describe how Magento lets you get product multiselect attribute values. More tips are available here: Magento 2 Cookbook.

Table of contents
Impossible to import multiselect attribute values to Magento 2
tries to figure out how to create values for a multiselect attribute by uploading a CSV file. The author needs to populate a new multiselect attribute “Year.”
He provides a few sample entries as well as the additional_attributes data that look as follows:
|
1 |
make=Audi,model=A3,year=1990|1991|1992 |
However, the expected multiselect attribute values weren’t created in the system.
How to get multiselect attribute values in Magento 2 via CSV
reports that the discussed feature is not natively supported in Magento 2. However, the author offers a workaround to manage it. He adds new multiselect attribute options dynamically during CSV validation. The proposed solution works equally well for both manual import and Scheduled EE import.
Franck points to the fact that you need to reload the attribute option cache for each line after every update, but it is not the biggest issue. The problem is that you need to create a new module so that this approach is aimed at coders only. Let’s see how to add multiselect attribute values by importing a CSV file according to the Magento community.
To create a new ImportExport module, you have to add the following dependencies in etc/di.xml first:
|
1 2 3 |
<preference for="Magento\CatalogImportExport\Model\Import\Product\Validator" type="Hublot\ImportExport\Model\Import\Product\Validator" /> <preference for="Magento\ConfigurableImportExport\Model\Import\Product\Type\Configurable" type="Hublot\ImportExport\Model\Import\Product\Type\Configurable" /> <preference for="Magento\CatalogImportExport\Model\Import\Product\Type\Simple" type="Hublot\ImportExport\Model\Import\Product\Type\Simple" /> |
Next, Franck proposes to extend the following class
|
1 |
app/code/Vendor/ImportExport/Model/Import/Product/Validator.php |
with this code:
|
1 2 3 4 5 6 7 8 9 10 11 12 13 14 15 16 17 18 19 20 21 22 23 24 25 26 27 28 29 30 31 32 33 34 35 36 37 38 39 40 41 42 43 44 45 46 47 48 49 50 51 52 53 54 55 56 57 58 59 60 61 62 63 64 65 66 67 68 69 70 71 72 73 74 75 76 77 78 79 80 81 82 83 84 85 86 87 88 89 90 91 92 93 94 95 96 97 98 99 100 101 102 103 104 105 106 107 108 109 110 111 112 113 114 115 116 117 118 119 120 121 122 123 124 125 126 127 128 129 130 131 132 133 134 135 136 137 138 139 140 141 142 143 144 145 146 147 148 149 150 151 152 153 154 155 156 157 158 159 160 161 162 163 164 165 166 167 168 169 170 171 172 173 174 175 |
<?php /** * Copyright © 2016 Magento. All rights reserved. * See COPYING.txt for license details. */ namespace Vendor\ImportExport\Model\Import\Product; use Braintree\Exception; use \Magento\CatalogImportExport\Model\Import\Product as Product; use \Magento\CatalogImportExport\Model\Import\Product\RowValidatorInterface as RowValidatorInterface; class Validator extends \Magento\CatalogImportExport\Model\Import\Product\Validator { protected $dynamicallyOptionAdded = array(); /** * @param \Magento\Framework\Stdlib\StringUtils $string * @param RowValidatorInterface[] $validators */ public function __construct( \Magento\Framework\Stdlib\StringUtils $string, $validators = [], \Magento\Catalog\Model\Product\Attribute\OptionManagement $optionManagement, \Magento\Eav\Api\Data\AttributeOptionInterfaceFactory $optionDataFactory, \Magento\Framework\Api\DataObjectHelper $dataObjectHelper, \Psr\Log\LoggerInterface $logger ) { $this->optionManagement = $optionManagement; $this->optionDataFactory = $optionDataFactory; $this->dataObjectHelper = $dataObjectHelper; $this->_logger = $logger; parent::__construct($string, $validators); } /** * @param string $attrCode * @param array $attrParams * @param array $rowData * @return bool * @SuppressWarnings(PHPMD.CyclomaticComplexity) * @SuppressWarnings(PHPMD.NPathComplexity) */ public function isAttributeValid($attrCode, array $attrParams, array $rowData) { $this->_rowData = $rowData; if (isset($rowData['product_type']) && !empty($attrParams['apply_to']) && !in_array($rowData['product_type'], $attrParams['apply_to']) ) { return true; } if (!$this->isRequiredAttributeValid($attrCode, $attrParams, $rowData)) { $valid = false; $this->_addMessages( [ sprintf( $this->context->retrieveMessageTemplate( RowValidatorInterface::ERROR_VALUE_IS_REQUIRED ), $attrCode ) ] ); return $valid; } if (!strlen(trim($rowData[$attrCode]))) { return true; } switch ($attrParams['type']) { case 'varchar': case 'text': $valid = $this->textValidation($attrCode, $attrParams['type']); break; case 'decimal': case 'int': $valid = $this->numericValidation($attrCode, $attrParams['type']); break; case 'select': case 'boolean': case 'multiselect': $values = explode(Product::PSEUDO_MULTI_LINE_SEPARATOR, $rowData[$attrCode]); $valid = true; // Start custom foreach ($values as $value) { // If option not exist and not already dynamically added if (!empty($value) && !isset($attrParams['options'][strtolower($value)]) && !isset($this->dynamicallyOptionAdded[$attrCode][strtolower($value)])) { // Create option value $optionDataObject = $this->optionDataFactory->create(); $this->dataObjectHelper->populateWithArray( $optionDataObject, array( 'label' => $value, 'sort_order' => 100, 'is_default' => true ), '\Magento\Eav\Api\Data\AttributeOptionInterface' ); // Add option dynamically if ($this->optionManagement->add($attrCode, $optionDataObject)) { // Add new option value dynamically created to the different entityTypeModel cache $entityTypeModel = $this->context->retrieveProductTypeByName($rowData['product_type']); $configurableEntityTypeModel = $this->context->retrieveProductTypeByName('configurable'); // Refresh attributes cache for entityTypeModel cache if ($entityTypeModel) { $entityTypeModel->refreshCacheAttributes(); } if ($configurableEntityTypeModel) { $configurableEntityTypeModel->refreshCacheAttributes(); } $this->dynamicallyOptionAdded[$attrCode][strtolower($value)] = true; $attrParams['options'][strtolower($value)] = true; } } } if (isset($this->dynamicallyOptionAdded[$attrCode])) { foreach ($this->dynamicallyOptionAdded[$attrCode] as $key => $value) { $attrParams['options'][$key] = $value; } } // end custom foreach ($values as $value) { $valid = $valid && isset($attrParams['options'][strtolower($value)]); } if (!$valid) { $this->_addMessages( [ sprintf( $this->context->retrieveMessageTemplate( RowValidatorInterface::ERROR_INVALID_ATTRIBUTE_OPTION ), $attrCode ) ] ); } break; case 'datetime': $val = trim($rowData[$attrCode]); $valid = strtotime($val) !== false; if (!$valid) { $this->_addMessages([RowValidatorInterface::ERROR_INVALID_ATTRIBUTE_TYPE]); } break; default: $valid = true; break; } if ($valid && !empty($attrParams['is_unique'])) { if (isset($this->_uniqueAttributes[$attrCode][$rowData[$attrCode]]) && ($this->_uniqueAttributes[$attrCode][$rowData[$attrCode]] != $rowData[Product::COL_SKU])) { $this->_addMessages([RowValidatorInterface::ERROR_DUPLICATE_UNIQUE_ATTRIBUTE]); return false; } $this->_uniqueAttributes[$attrCode][$rowData[$attrCode]] = $rowData[Product::COL_SKU]; } if (!$valid) { $this->setInvalidAttribute($attrCode); } return (bool)$valid; } } |
After that, you need to do similar manipulations over another class
|
1 |
app/code/Vendor/ImportExport/Model/Import/Product/Type/Configurable.php |
Use the following code to extend it:
|
1 2 3 4 5 6 7 8 9 10 11 12 13 14 15 16 17 18 19 20 21 22 23 24 25 26 27 28 29 30 31 32 |
<?php // @codingStandardsIgnoreFile namespace Vendor\ImportExport\Model\Import\Product\Type; use Magento\Catalog\Api\Data\ProductInterface; use Magento\CatalogImportExport\Model\Import\Product as ImportProduct; /** * Importing configurable products * @package Magento\ConfigurableImportExport\Model\Import\Product\Type * @SuppressWarnings(PHPMD.TooManyFields) * @SuppressWarnings(PHPMD.ExcessiveClassComplexity) * @SuppressWarnings(PHPMD.CouplingBetweenObjects) */ class Configurable extends \Magento\ConfigurableImportExport\Model\Import\Product\Type\Configurable { /** * In case we've dynamically added new attribute option during import we need to add it to our cache * in order to keep it up to date. * * @todo Try an optimal solution in order to update only the need part of the cache (Check AddAttributeOption) * */ public function refreshCacheAttributes() { // Need to force reload attribute cache self::$commonAttributesCache = []; $this->_initAttributes(); } } |
And the last step is related to this class:
|
1 |
app/code/Vendor/ImportExport/Model/Import/Product/Type/Simple.php |
You have to extend it with this code:
|
1 2 3 4 5 6 7 8 9 10 11 12 13 14 15 16 17 18 19 20 21 22 23 24 25 26 27 |
<?php /** * Copyright © 2016 Magento. All rights reserved. * See COPYING.txt for license details. */ namespace Vendor\ImportExport\Model\Import\Product\Type; /** * Import entity simple product type * * @author Magento Core Team <core@magentocommerce.com> */ class Simple extends \Magento\CatalogImportExport\Model\Import\Product\Type\Simple { /** * In case we've dynamically added new attribute option during import we need to add it to our cache * in order to keep it up to date. * * @todo Try an optimal solution in order to update only the need part of the cache (Check AddAttributeOption) * */ public function refreshCacheAttributes() { // Need to force reload attribute cache self::$commonAttributesCache = []; $this->_initAttributes(); } } |
Although adding three code snippets looks quite simple, we don’t recommend you do that if you don’t have the proper experience. You can rely on another method instead. We describe a more user-friendly solution to importing multiselect attribute values to Magento 2 that requires no programming skills.
How to import Magento 2 multiselect attribute values
As for the Firebear-proposed solution, it doesn’t force you to discover continents again. It is only necessary to install the Improved Import & Export module to get product multiselect attribute values in Magento 2.
With our extension, you can freely upload Magento 2 product attributes, attribute sets, and attribute groups, controlling every single aspect. Of course, you can add new multiselect attribute values from a CSV table.

The Improved Import & Export extension simplifies the process of transferring any data to and from Magento 2 as well as lets you automate all import and export procedures. Furthermore, it is possible to import attributes and their values to Magento 2 from any external system. Let’s explore the general algorithm.
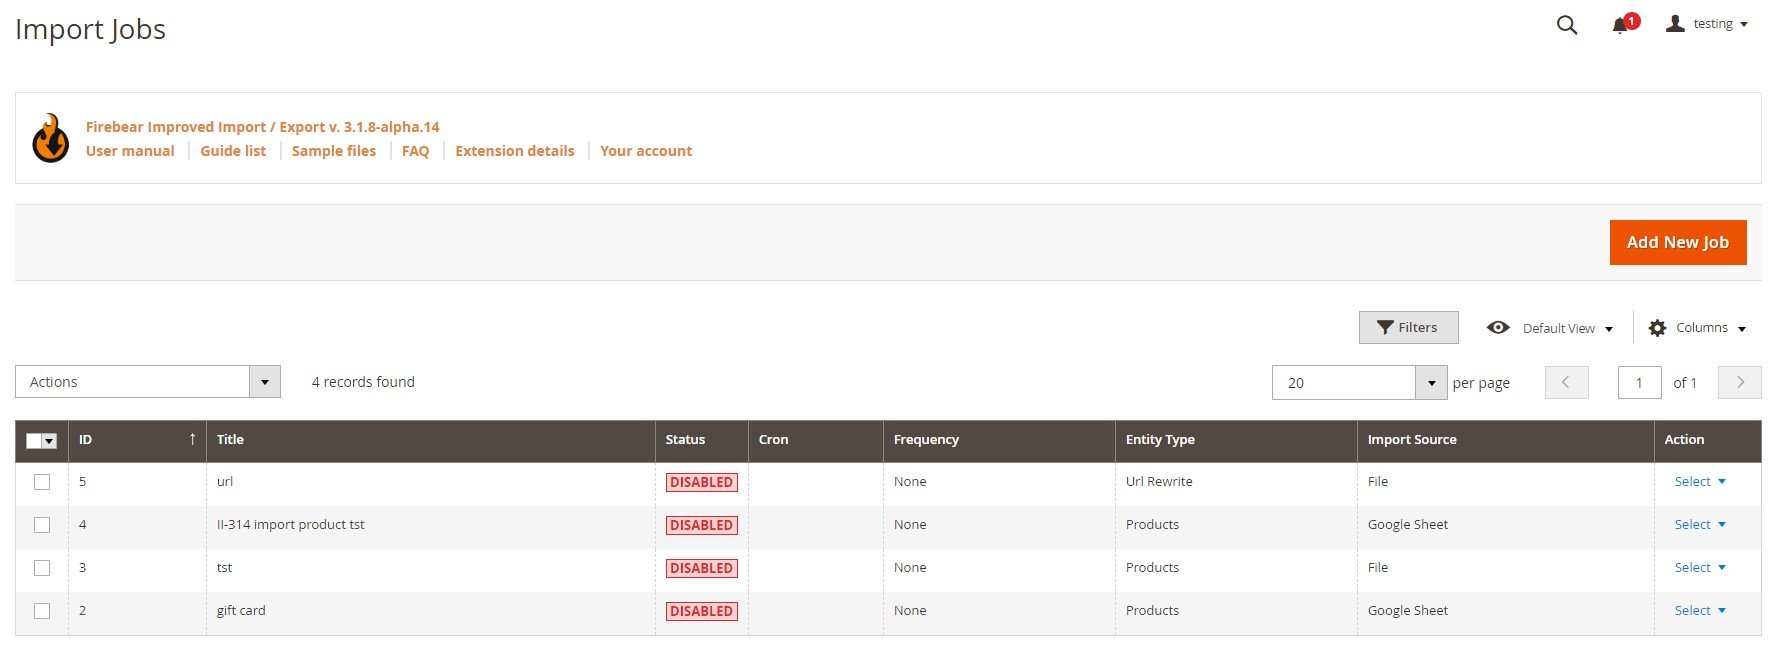
Your first stop after you install the plugin is situated under System->Improved Import/Export->Import Jobs. You have to click “Add New Job” and configure the settings described below.
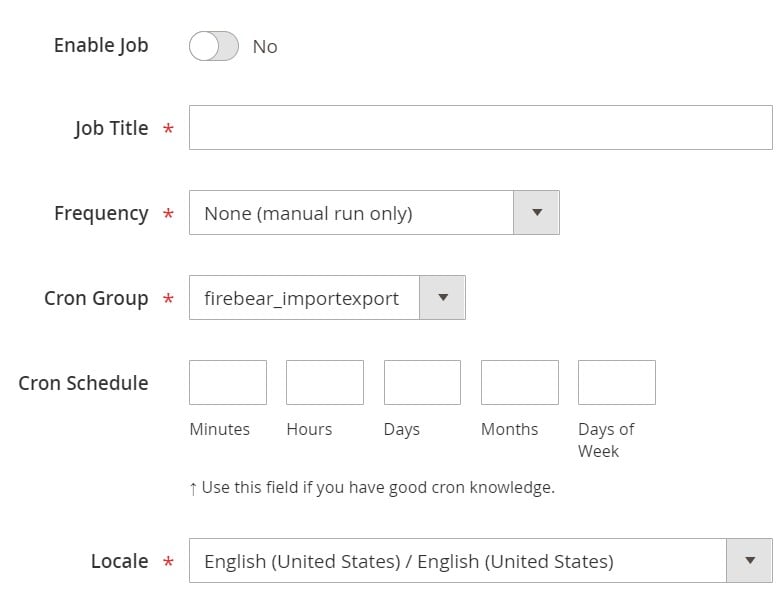
The system redirects you to the General Settings tab. Here, you can activate your new import job, specify its title, and add a schedule of transfers. Use the latter if you want to automate all further updates. Next, choose a language (locale) and enable/disable several more features.
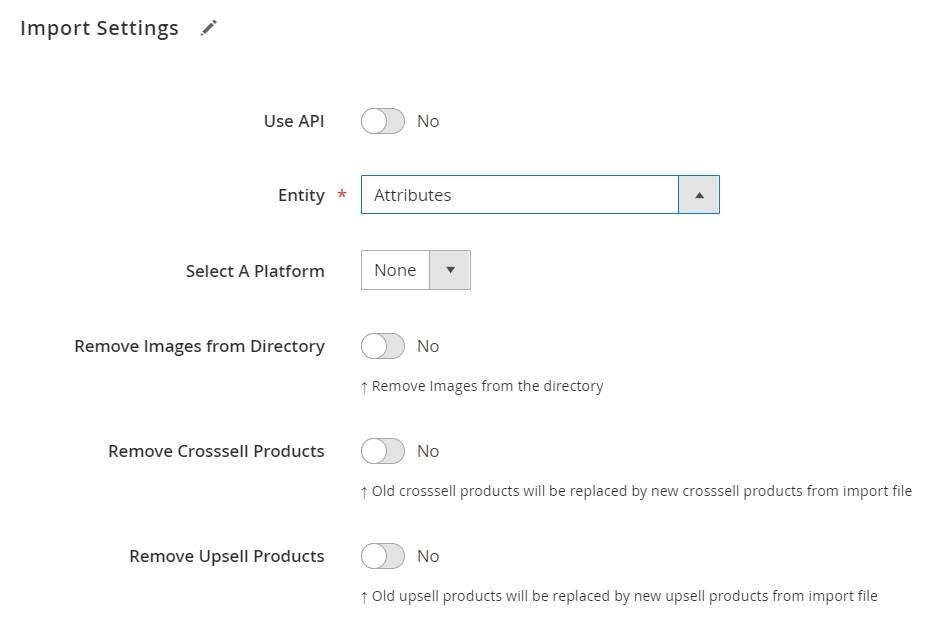
After that, you can proceed to the Import Settings section. Select attributes as your import entity, enable/disable API synchronization depending on your needs, and select a platform to import data from. This option applies a mapping preset that replaces third-party attributes with the corresponding local ones.
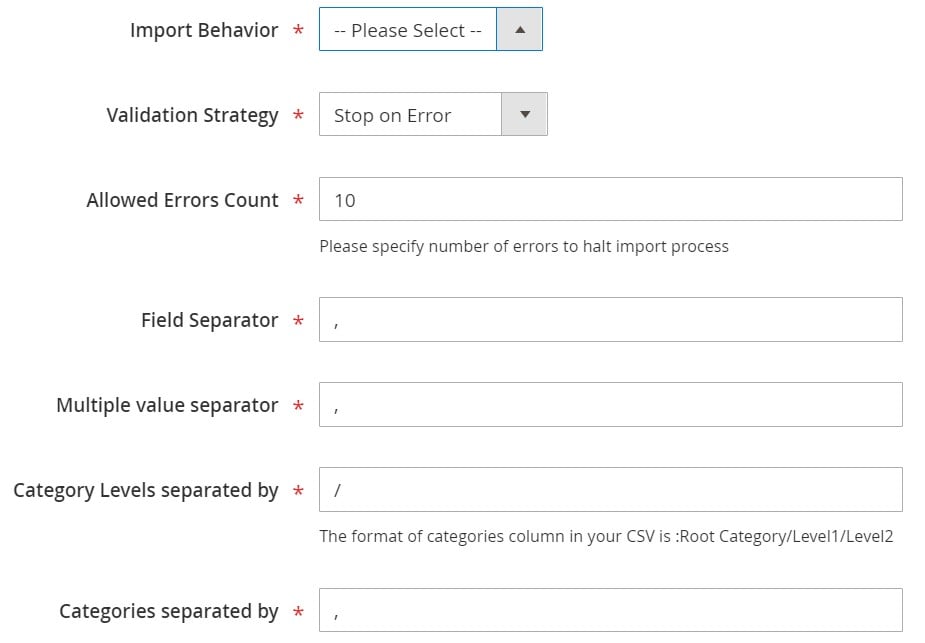
Proceed to the Import Behavior tab. Select how to act with the imported file: add, update, replace, or delete attributes you transfer. Next, specify a validation strategy and a maximum number of errors. The tab also lets you add any custom separators.
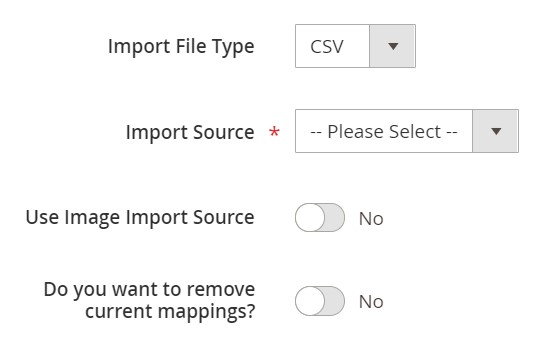
In the Import Source section, select a file format and an import source. You are no longer limited by CSV files and direct uploads. Or extension lets you transfer data via XML, XLSX, JSON, or ODS from a local or remote server, URL, via direct uploads, or from Dropbox and Google Sheets.
Hit “Save & Run” to add multiselect attribute values by importing a CSV file to Magento 2.
Magento 2 Attribute Import FAQ
Below, you can see other tips on how to manage Magento 2 multiselect attribute values in your admin.
How to import multiselect attribute values to Magento 2 automatically?
If you need to transfer multiselect attribute values or other entities to Magento 2 regularly, use the Improved Import & Export extension. The module provides the ability to leverage the cron scheduler to plan future updates.
How to import multiselect attribute values to Magento 2 from external systems?
With the Improved Import & Export Magento 2 extension, you can transfer multiselect attribute values not only between two Magento 2 stores but also from external systems. Unlike the default Magento 2 import solution that prevents transfers of third-party data, our module provides the ability to create a mapping scheme and match any external attributes to the default ones used in Magento 2. Furthermore, the extension provides the ability to match attribute values including multiselect attribute values. As a result, you can effortlessly adapt any external data to the native Magento 2 standards.
How to import multiselect attribute values to Magento 2 via API?
By default, Magento 2 neither lets you import multiselect attribute values nor transfer other entities via API. But you can use the Improved Import & Export extension to transfer the desired entities to Magento 2 via API.
How to import multiselect attribute values to Magento 2 via ODS files?
If you store multiselect attribute values in an ODS file, the Improved Import & Export Magento 2 extension will help you transfer them to your e-commerce website. While Magento 2 works with CSV files only, our module exceeds the existing limitations by adding support for other file formats.
How to import multiselect attribute values to Magento 2 via XLSX files?
If you store multiselect attribute values in an XLSX file, the Improved Import & Export Magento 2 extension will help you transfer them to your e-commerce website. While Magento 2 works with CSV files only, our module exceeds the existing limitations by adding support for other file formats.
How to import multiselect attribute values to Magento 2 via JSON files?
If you store multiselect attribute values in a JSON file, the Improved Import & Export Magento 2 extension will help you transfer them to your e-commerce website. While Magento 2 works with CSV files only, our module exceeds the existing limitations by adding support for other file formats.
How to import multiselect attribute values to Magento 2 via compressed files?
If multiselect attribute values are stored in an archive, you can also use Improved Import & Export to transfer them to Magento 2. Note that it should be a ZIP or TAR archive that contains a CSV, XML, ODS, XLSX, or JSON file.
How to import multiselect attribute values to Magento 2 from Google Sheets?
If your attribute values are stored in Google Sheets. It is no longer a problem: use the Improved Import & Export extension to import multiselect attribute values to Magento 2 from Google Sheets. You need to specify the corresponding table as your import source, providing its URL.
How to import multiselect attribute values to Magento 2 from Dropbox?
Along with Google Sheets and other file sources, the Improved Import & Export extension lets you transfer multiselect attribute values to Magento 2 from Dropbox. The requirements are simple: store your data in CSV, XML, ODS, XLSX, or JSON files. If they are compressed, they should be in either ZIP or TAR format.
How to import multiselect attribute values to Magento 2 from Google Drive?
Along with Dropbox and other file sources, the Improved Import & Export extension lets you transfer multiselect attribute values to Magento 2 from Dropbox. The requirements are simple: store your data in CSV, XML, ODS, XLSX, or JSON files. If they are compressed, they should be in either ZIP or TAR format.
How to use product import to mass update attributes in Magento 2?
You can explore community forums discovering various techniques that let you mass update attributes in Magento 2 by transferring products. However, the Improved Import & Export extension lets you update multiselect attribute values by transferring product attributes only. Update multiple attributes and attribute values in bulk and apply any changes your business requires. Note that the plugin lets you specify product attributes as your import entity and choose the add/update import job behavior.
How to import csv with several attributes to Magento?
With the Improved Import & Export module, you get the ability to transfer a CSV file with several attributes to Magento 2. Also, you can import XML, XLSX, ODS, and JSON files. And as we’ve just mentioned above, you can import multiselect attribute values from Google Sheets or via API.
How to remove attribute multiselect values on catalog import to Magento 2?
It is possible to delete attribute multiselect values during the Magento 2 import by adding the option:delete_values to your import table. Specify the attribute values you want to remove in this column. The attribute itself stays untouched. For instance, the column lets you remove green, red, yellow, or other similar values for the attribute ‘color’.
How to export product attributes and attribute multiselect values in Magento 2?
You can also use the Improved Import & Export extension to export attributes along with multiselect attribute values from Magento 2. You only need to create a new export job where you choose the corresponding export entity and configure other transfer parameters.
Final Words
The Improved Import & Export Magento 2 extension lets you add multiselect attribute values without any new line of code. You just need to install the module to leverage its functionality. In addition to the ability to import and export entities that are not supported in Magento 2 by default, it also offers a bunch of robust improvements. Thus, you can entirely automate data transfers between your e-commerce website and external platforms with the help of schedules.
The extension also lets you replace unsupported attributes and attribute values most easily. You can leverage either mapping presets or a matching interface. At the same time, several features are aimed at more efficient attribute value editing. And you can create lacking attributes on the fly.
With the help of extended connectivity options, the Improved Import & Export Magento 2 plugin also lets you move updates via API or from Google Sheets, avoiding standard data file transfers. And as we’ve just mentioned, you are no longer limited to the CSV standard and direct uploads. For further information on how to add multiselect attribute values via CSV, follow the link below or contact our support:
Get Improved Import & Export Magento 2 Extension
Not sure how to import specific data types into Magento 2? Our guide covers everything — from products and customers to CMS pages and B2B entities.
👉 Browse all Magento 2 import topics
Related posts
 Magento Inventory Management: A Complete Guide to Stock Optimization and Efficiency
 Shopify Metafields Explained: How to Add, Manage & Import Them
 Magento to Shopify Migration – The Ultimate Guide
 Magento 2 Export Customers Tutorial: Export Customer Data with Ease
 Discovering Shopify Shop Chat: Your Ultimate Tutorial to Customer Help on Your Website
 Magento to Shopify Product Migration: CSV Field Reference & Step-by-step Guide
 Magento 2 Bundle Product with Custom Options: Complete Guide to Benefits, Limits & Import
 SaleHoo in a Nutshell: Overview & Shopify Integration Tips