Paradox Labs Authorize.Net CIM for Magento 2

Today, we are describing an integration with a reliable and secure payment method – Authorize.net CIM – built by Paradox Labs for Magento 2 ecommerce sites. Authorize.Net is one of the largest payment gateways worldwide, enabling online stores to accept credit cards and eCheck from their clients. The Paradox Labs Authorize.Net CIM extension for Magento 2 extends the default platform functionality by allowing to transmit financial data via the secure network. Since Authorize.Net is a PCI compliant solution, merchants can prove the highest security of the saved credit card data to their customers and protect themselves from fraudulent actions.
Below, we describe the benefits you will get after installation of the Magento 2 Authorize.Net CIM extension and look closer at the module’s backend and frontend functionality.

Table of contents
Features
- Credit card details can be saved for future payments;
- Management of payment data in the customer account;
- Control over saved payment info in the backend;
- Partial invoices and refunds;
- Credit card and eCheck (ACH) payments are supported;
- Credit card details are stored on the secure Authorize.Net CIM server;
- Magento 2 PCI compliance;
- Full support of Accept.js;
- AVC and CCV verification;
- Advanced Fraud Detection Suite (AFDS);
- Support for multiple stores;
- Compatible with Paradox Labs Adaptive Subscriptions;
- Magento API support.
The Magento 2 Authorize.Net CIM extension provides your store visitors with a smooth and customer-friendly checkout process. If enabled in the backend, customers get the possibility to save their credit cards info for future purchases, which makes shopping on your store more convenient. With this feature, your clients can perform the checkout in one click. Besides, online shoppers get access to the details of their saved credit cards in the dedicated tab of a customer account, where they can edit or delete existing cards, as well as add new ones.
Stored payment information also streamlines order management and payments processing for your admins. Admin users can view, edit, and delete saved payment data and add new credit cards in the same way as on the frontend. Besides, Magento admins can place orders on behalf of customers using credit cards saved in a customer’s profile. The Authorize.Net CIM module also enables its users to create partial invoices with reauthorization, as well as make partial refunds.
Note that besides credit card payments, the Magento 2 extension also accepts eCheck, or ACH, which can be enabled or disabled in the backend depending on your needs.
As for the high-level security provided by the module, first, we should mention that all credit cards info is stored on the Authorize.Net servers. It allows merchants not to keep confidential payment data on their servers and guarantees their website security. Moreover, the Authorize.Net CIM extension is PCI compliant and supports Accept.js API. With the Accept.js functionality, customers’ credit cards info is sent directly to Authorize.Net, completely bypassing your servers. At the same time, the payment form is integrated into your web store pages and doesn’t affect user experience.
It is also necessary to mention that Authorize.Net for Magento 2 allows putting additional security layer with CCV verification, as well as adding a field for address verification (AVS). It makes transactions on your store even more secure and builds customers’ trust.
The module also uses the Advanced Fraud Detection Suite (AFDS), protecting your web store from possible frauds and helping to identify suspicious activity.
Backend
Let’s see how to set the general configuration of the Paradox Labs Authorize.Net CIM Magento 2 module. Note that you must have an Authorize.Net merchant account with Customer Information Manager (CIM) enabled to use the extension.
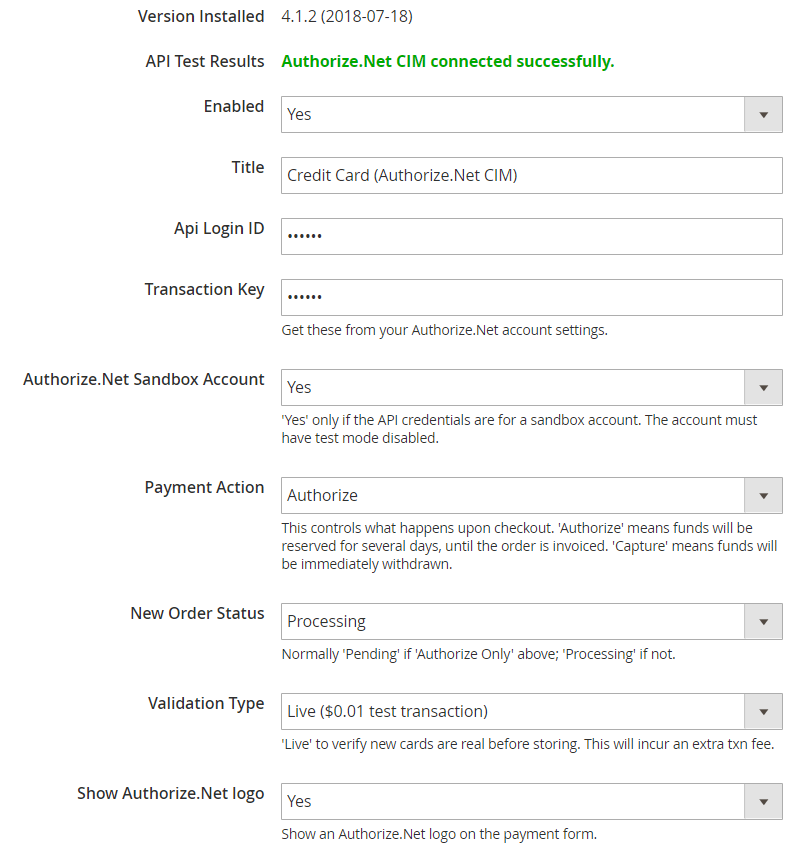
You will find the configuration settings under Stores -> Settings -> Configuration -> Sales -> Payment Methods -> Authorize.Net CIM. At the top, you can view the version of the module installed on your website, as well as the result of the API test. First, enable the extension to use the Authorize.Net CIM payment method on your store and change its title if necessary. Then, insert your API Login ID and Transaction Key that you will get with your Authorize.Net account. For testing purposes, you can specify your API credentials for a sandbox account. Next, select a payment action (Save info (do not authorize), Authorize, or Authorize and Capture) and validation type (Live, Test, or None) and decide whether to show the Authorize.Net logo on the payment form.
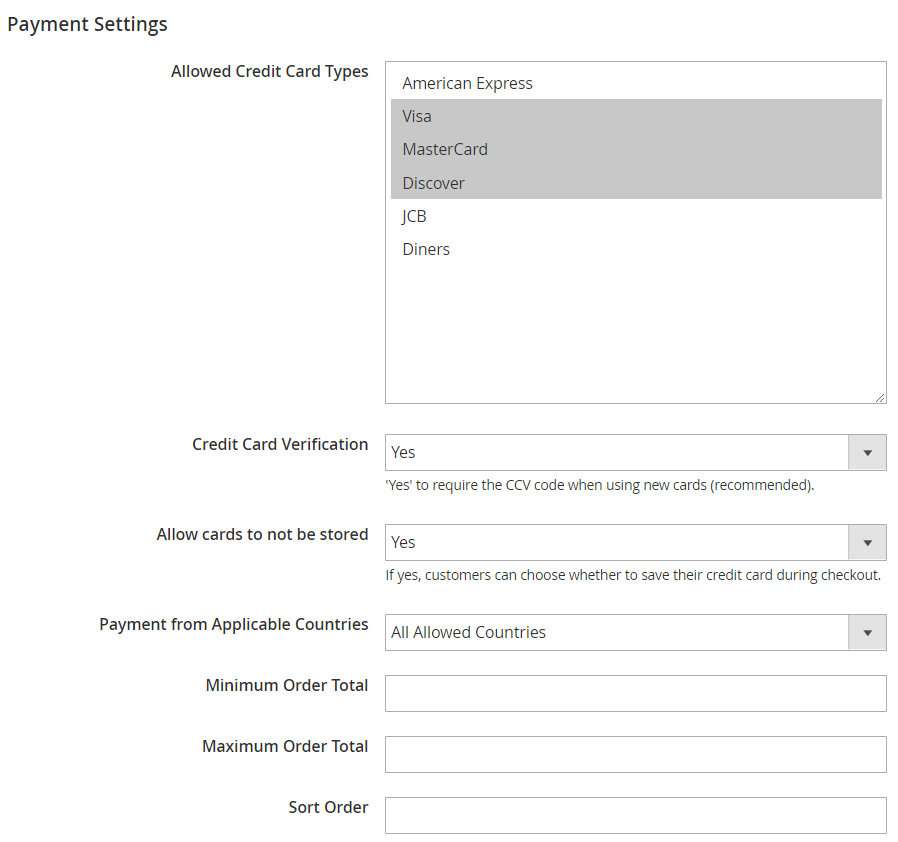
Next, there is the Payment Settings section where you select credit card types that will be accepted at the checkout, enable/disable CCV, decide whether to give customers an option to save or not their credit card information for future use, and choose the countries from which you want to accept payments. Also, specify the minimum and maximum order value to make the Authorize.Net CIM payments available, as well as the sort order.
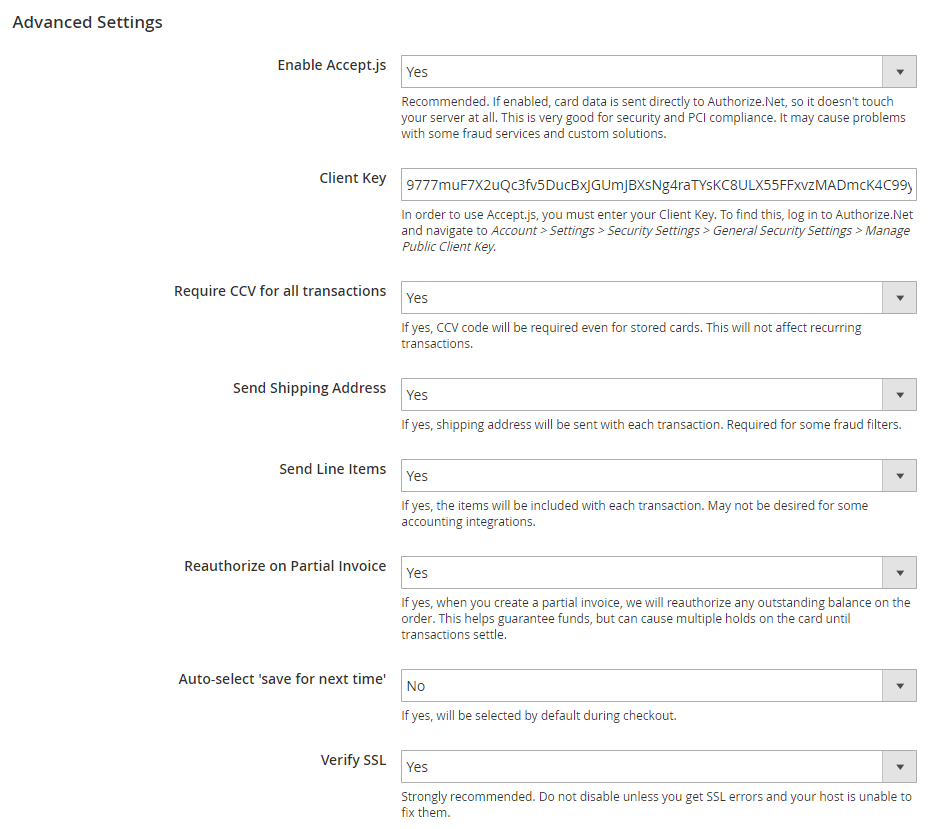
In Advanced Settings, you can enable Accept.js to send credit card details entered on your website directly to the Authorize.Net server. You should insert your client key to use the Accept.js functionality. Then, you decide whether to request specifying CCV for all transactions and include shipping address and order items in the information sent to the server. Also, here you can allow the creation of new authorization for partial invoices and enable saving entered credit card info by default, as well as activate SSL verification.
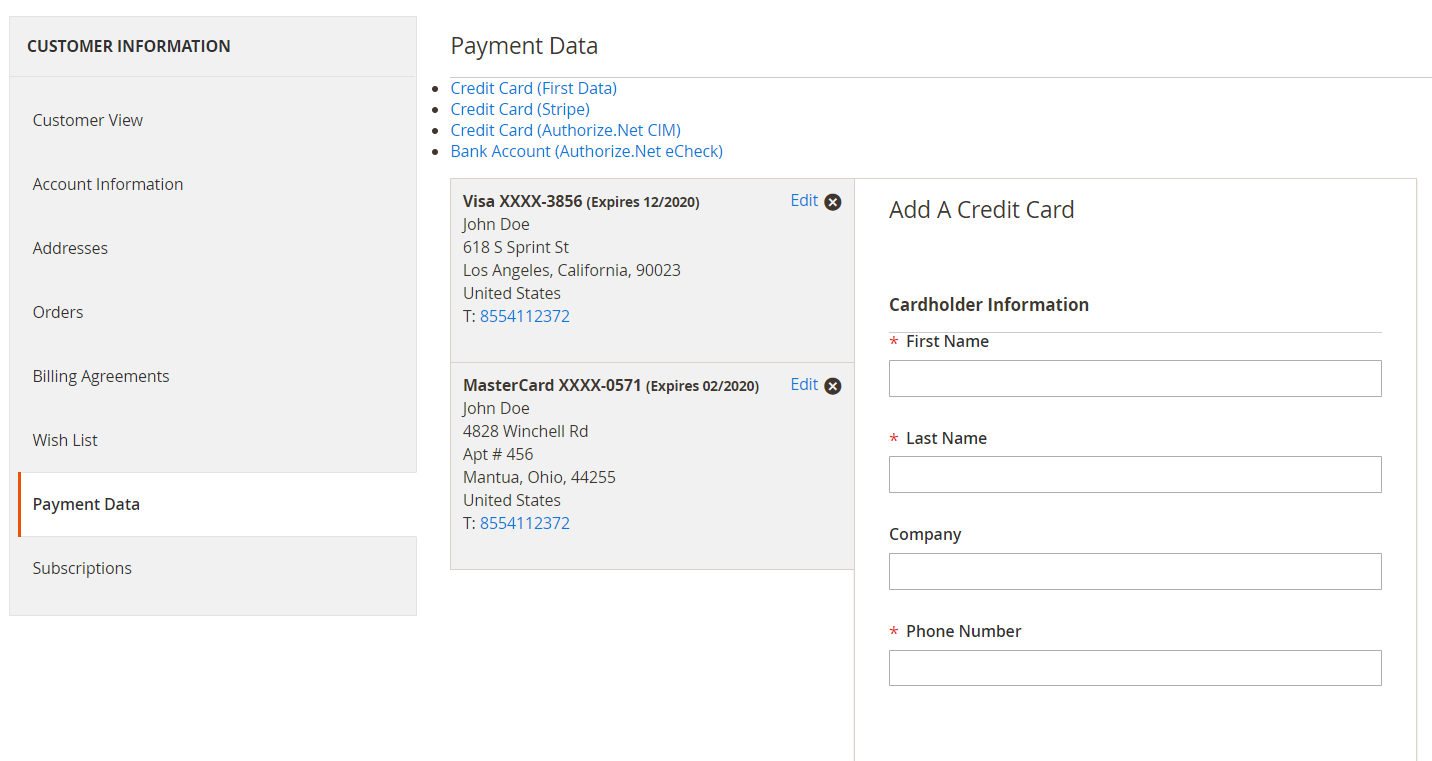
As an admin user, you can view and edit customers’ saved cards, as well as add new cards on their behalf. You can do it by selecting a customer from the Customers grid and navigating to the Payment Data tab on the customer information page.
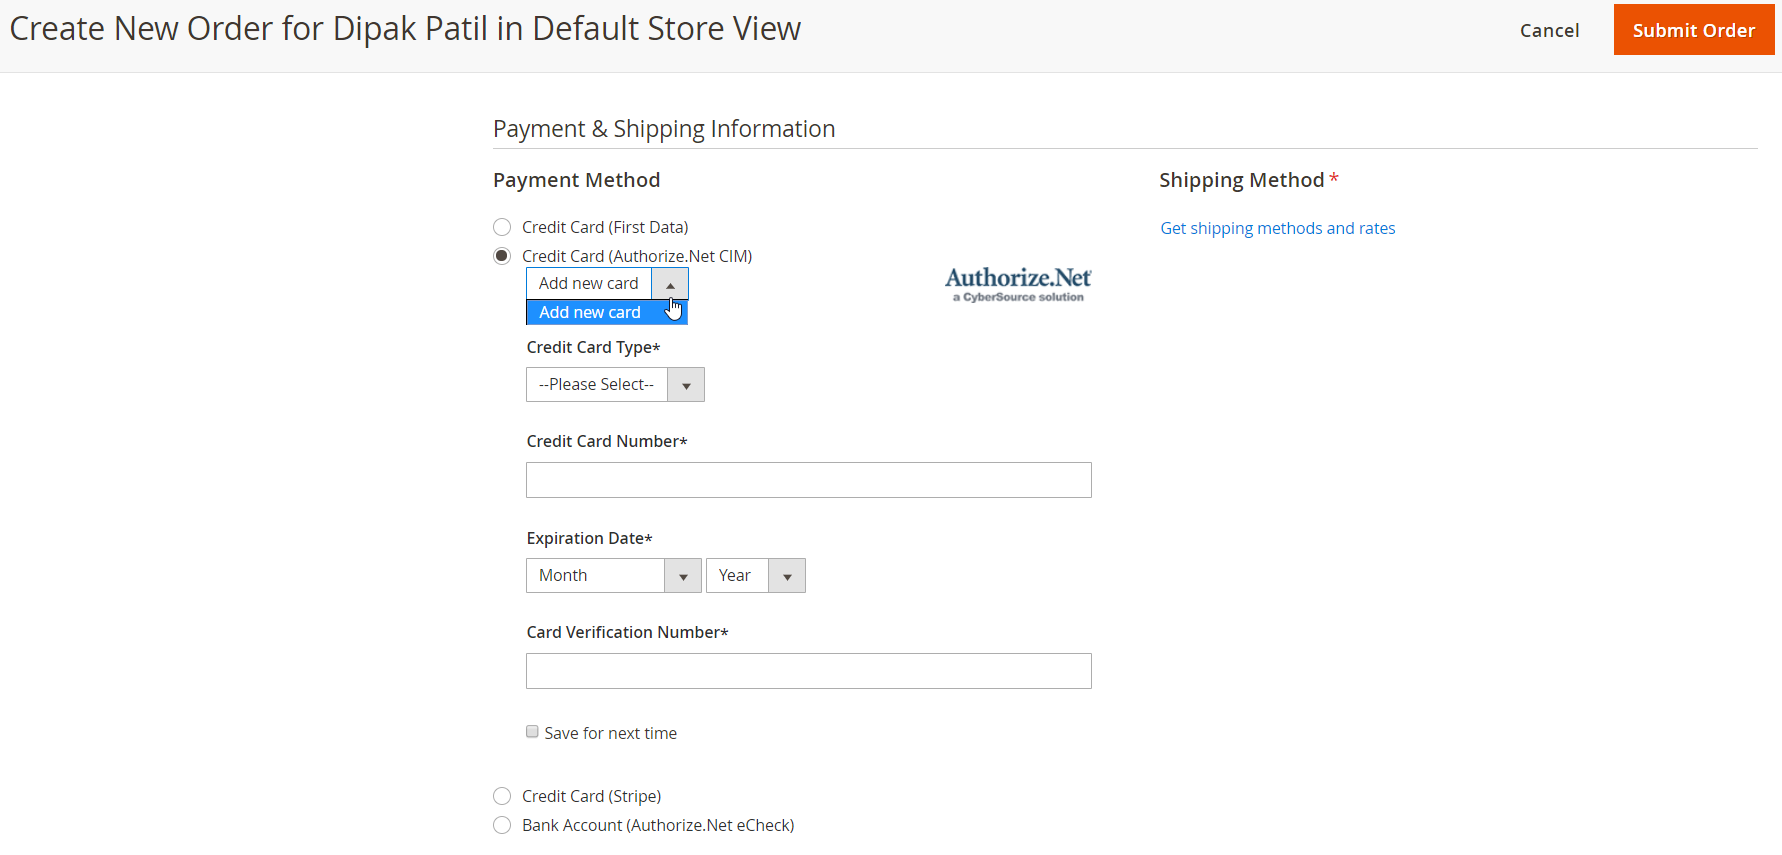
When creating an order on behalf of a customer from the backend, you can use the Authorize.Net CIM payment method and select one of the customer’s saved cards or add a new card.
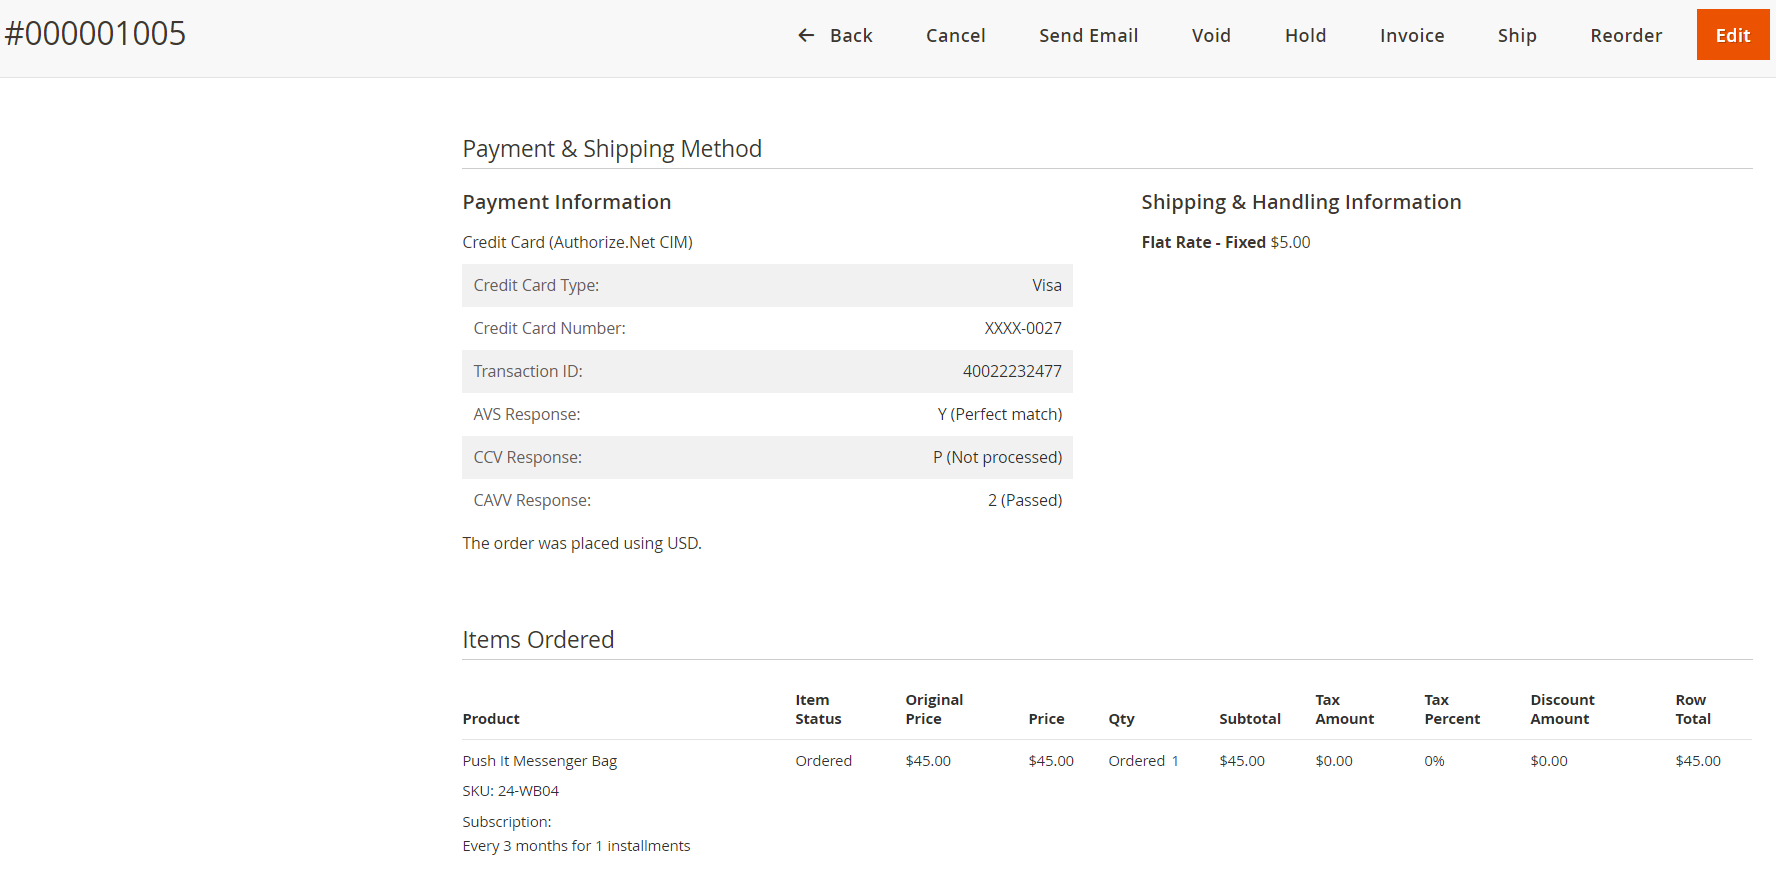
For the placed orders, you can view detailed information on the payments processed via Authorize.Net CIM.
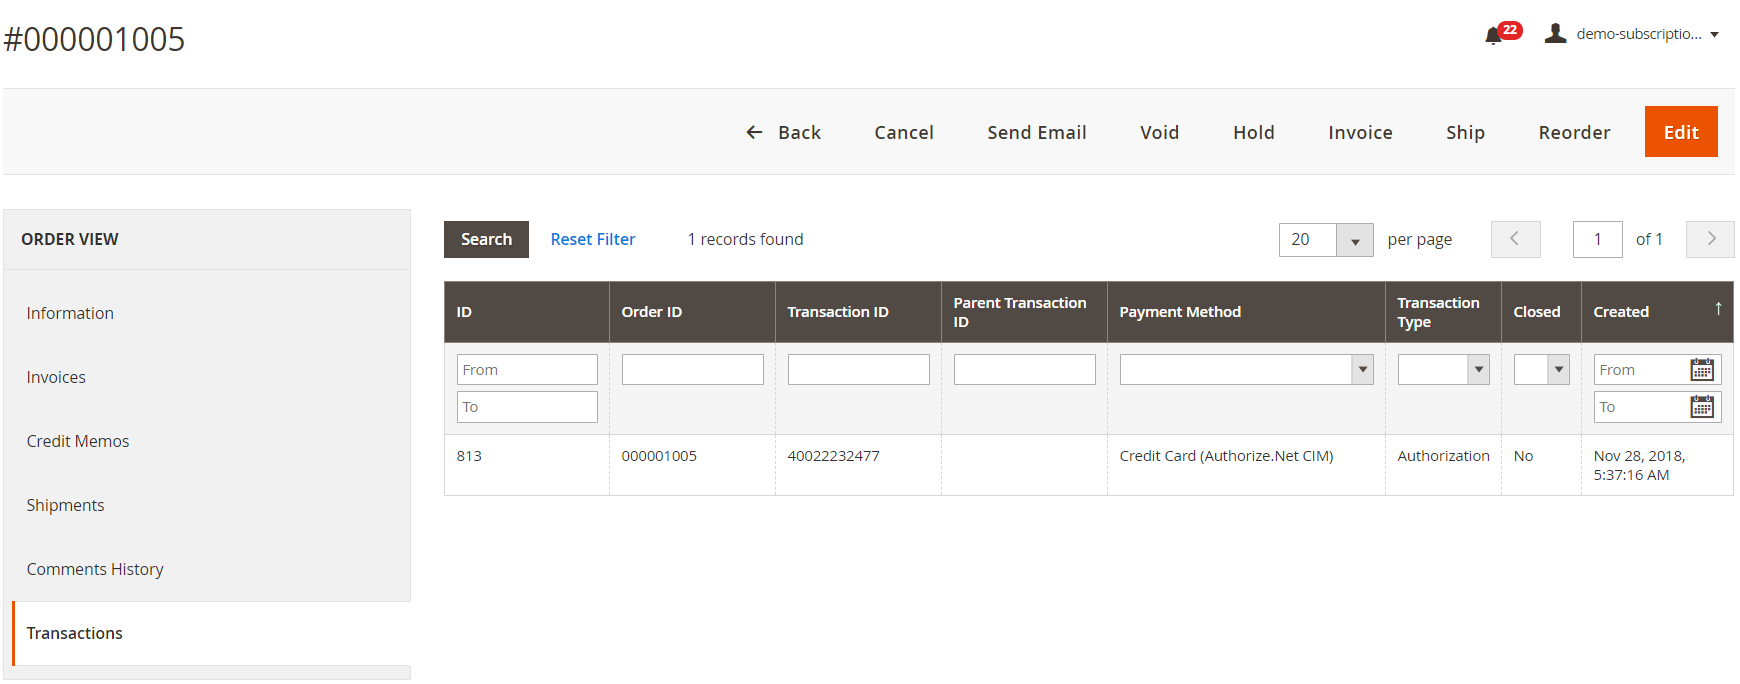
The Transactions tab on the order view page displays full transaction info.
Frontend
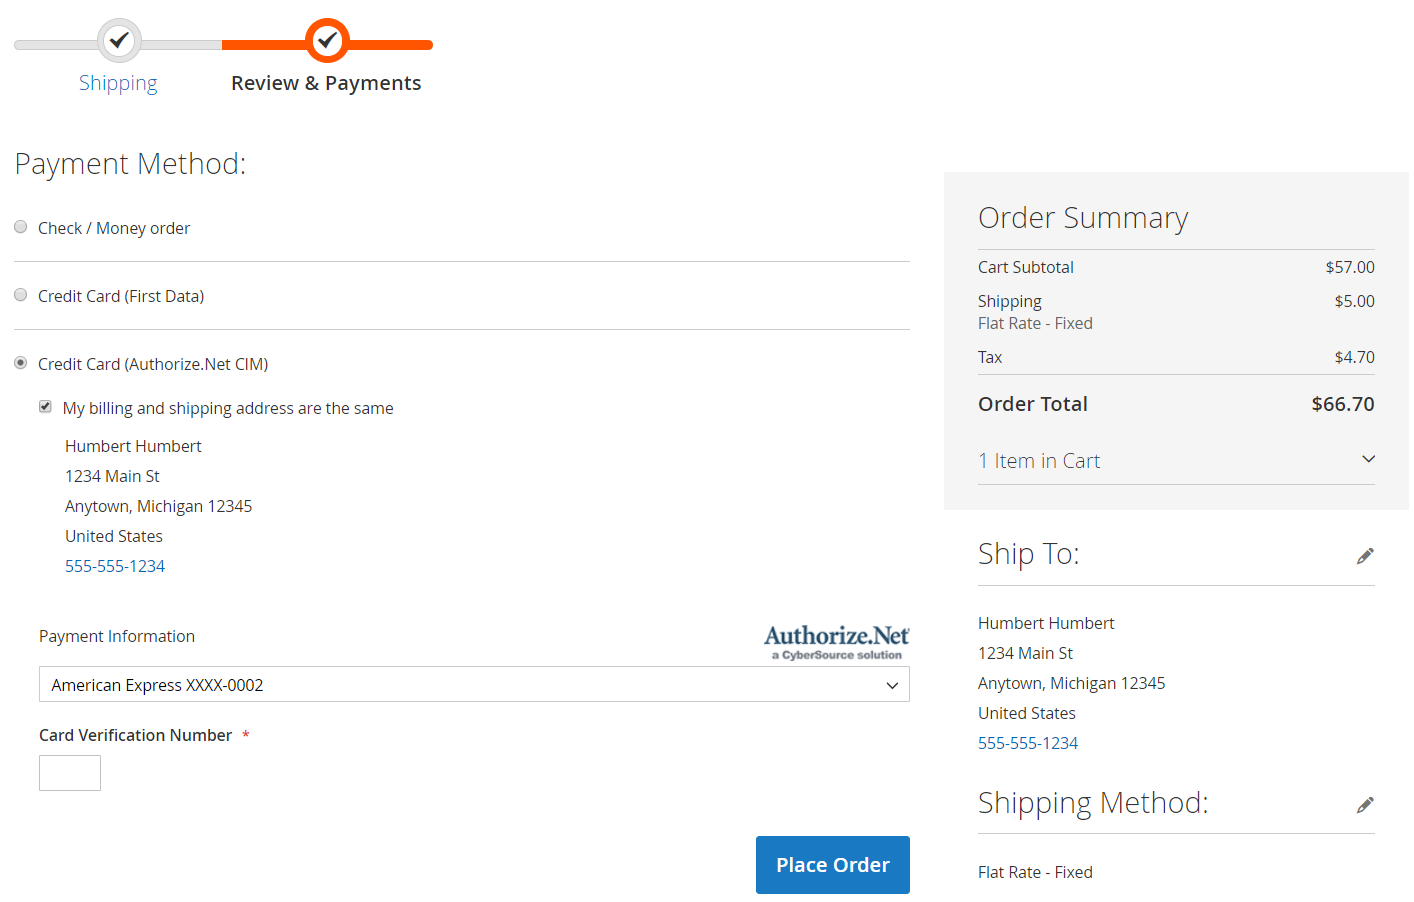
As for the frontend experience, with the Authorize.Net CIM extension installed on your store, a customer can choose Authorize.Net CIM as a payment method at the checkout. It is possible to select one of the saved cards or enter the details of a new card. Note that in the example below, a store owner doesn’t provide an option to save a card for future use, though you can configure it from the backend.
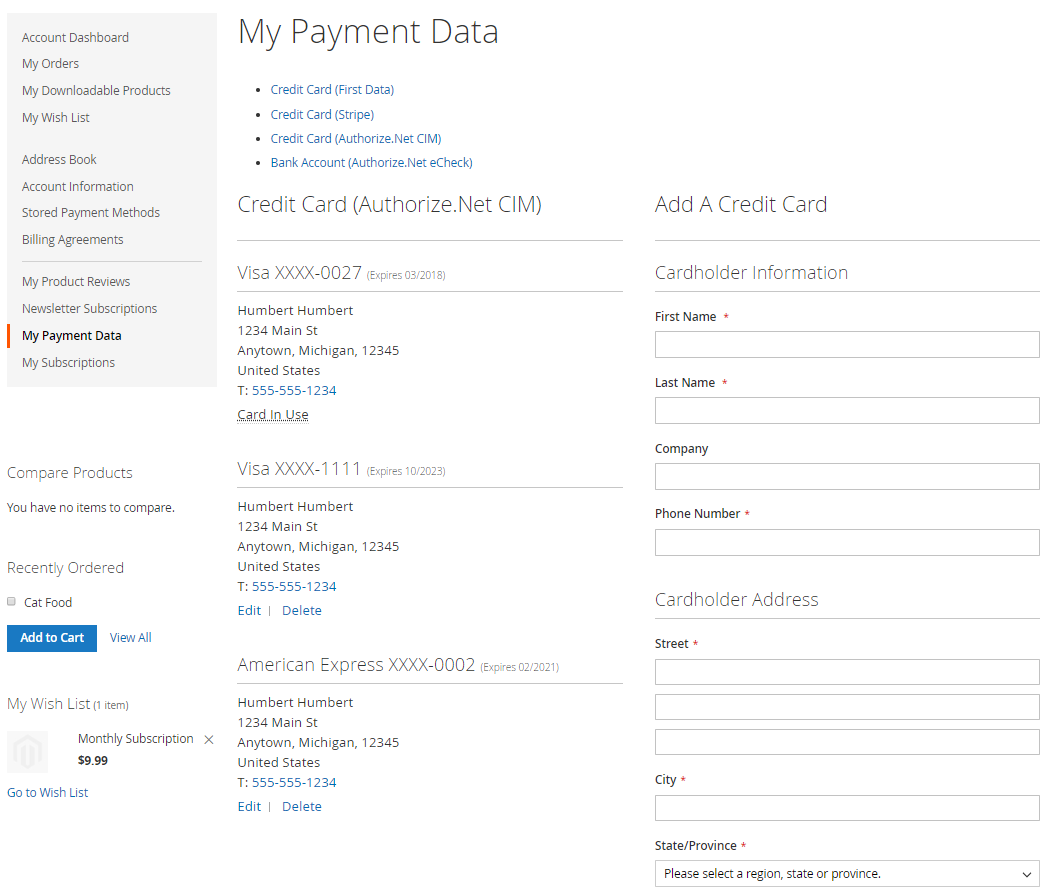
Besides, customers can view and manage their saved credit cards under the My Payment Data tab in their accounts. Under each card’s details, there are “Edit” and “Delete” buttons. Also, there is a possibility to add a new card here.
Final Words
Paradox Labs brings Magento 2 merchants the possibility to seamlessly integrate their web stores with the Authorize.Net CIM payment gateway. Besides supporting all standard payment actions, the Magento 2 module extends payment options on an online shop, providing customers with a secure and convenient checkout process. Authorize.Net CIM for Magento 2 costs $279, and you can buy it here:


