
Magestore Inventory Management Magento 2 Extension
We’ve already described Purchase and Barcode Management Magento 2 extensions, and now it’s time to tell a few words about Magestore Inventory Management Magento 2 module – the key tool from the inventory management set. Inventory Management is designed to reduce time and effort necessary for various operations related to stocks. For instance, you can easily edit, adjust, or transfer stocks in line. Another great improvement introduced with the module is a stock prediction. In case you need more items to be purchased in the nearest future, the extension sends a notification. Note that there is a support for multiple warehouses and you can easily connect Magestore Inventory Management with third-party systems and modules via API.

Magento Inventory Management System is now a module in the Omnichannel solution for Magento retailers. For further information, follow this link:
Below, you can see the review of the module’s core features that are still represented in the Magento 2 Inventory Management extension by Magestore.
All features of the Magestore Inventory Management Magento 2 extension can be divided into the following categories: Stock Listing, Prediction, Transfer Stocks, and Stock Control. The first one includes the following opportunities:
You can easily update stocks for certain products selecting a necessary warehouse. Besides, it is possible to assign any non-warehouse item to a chosen warehouse. Note that there is a history of all stock movements in both directions: inward and outward. And as a store owner, you can assign different roles to administrators in selected warehouses.
As for predictions, the Magestore Inventory Management Magento 2 module provides the ability to forecast your current supply needs. You just need to create rules that will trigger a low stock notification. To make predictions more precise, it is possible to set various conditions for selected products.
Various stock transfer features provide the ability to both send and request stocks between internal and external warehouses. All stock movements can be recorded and associated with email notifications.
Stock controls are stock inline editing, CSV product import, future product list adjusting, multiple participants on stocktaking, as well as stocktaking and stock adjustment sessions records.
These were the core features of the Inventory Management Magento 2 Extension by Magestore. Now, we can take a look at how things are going in the module’s backend.
Table of contents
Backend
Stock Listing
Let’s start with the Manage Stock screen. You can select a warehouse or display stocks for all warehouses on the same grid. Besides, there is a button that allows you to update stocks. The grid itself displays such information as product SKU, name, price, quantity on a warehouse, quantity to ship, available quantity, and status. Note that filters are built into the grid.
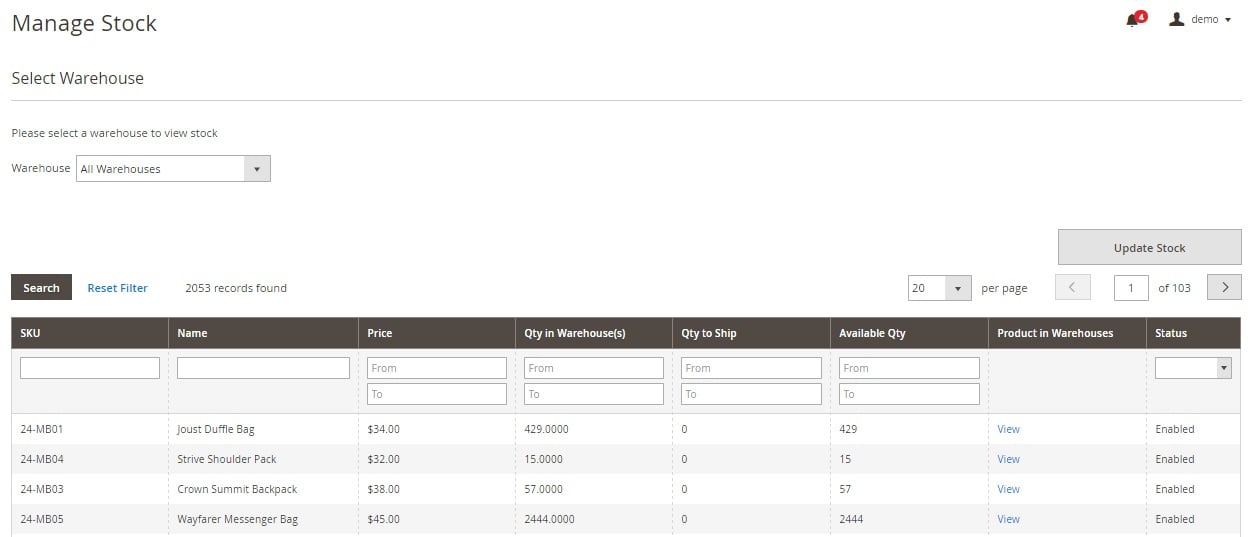
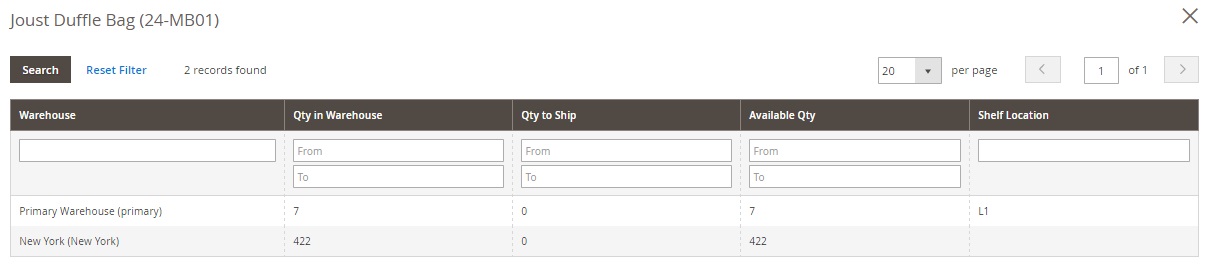
You can view each product in each warehouse separately from the Product in Warehouses column.
And this is how the Non-Warehouse Products screen is designed:

This time, filters appear after you hit the corresponding button. Besides, you can show/hide columns saving each new view. Another important element of the screen is Actions. The drop-down menu lets you assign non-warehouse products to chosen warehouses in bulk. The grid shows product ID, SKU, name, and quantity. Besides, it illustrates warehouses to which the product can be added as well as provides links to corresponding product pages that contain full information.
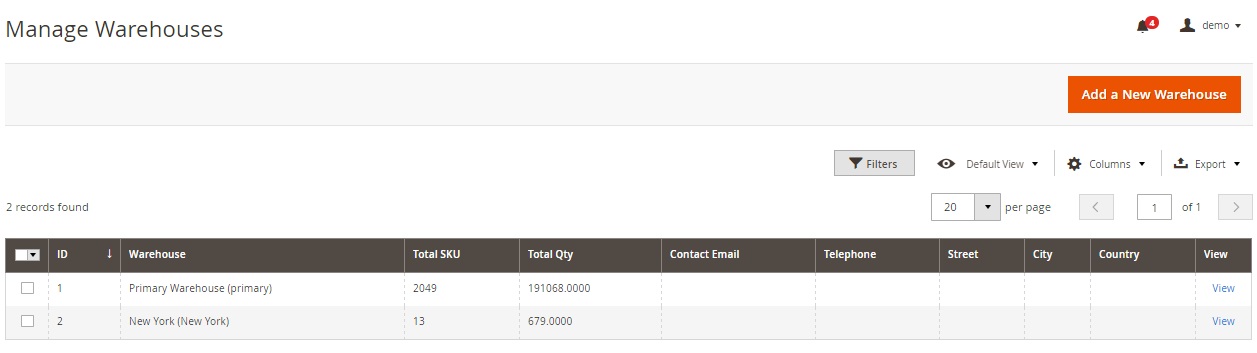
The Manage Warehouses page also contains a grid. You can apply filters, save custom views, show/hide columns, and export data on this screen. A new warehouse can be added here as well. The grid shows warehouse ID, name, total SKU quantity, contact email, telephone, street, city, and country. More details are available via the View link (General Information, Stock On-Hand, Stock Movement, Warehouse Permissions, and Dashboard).
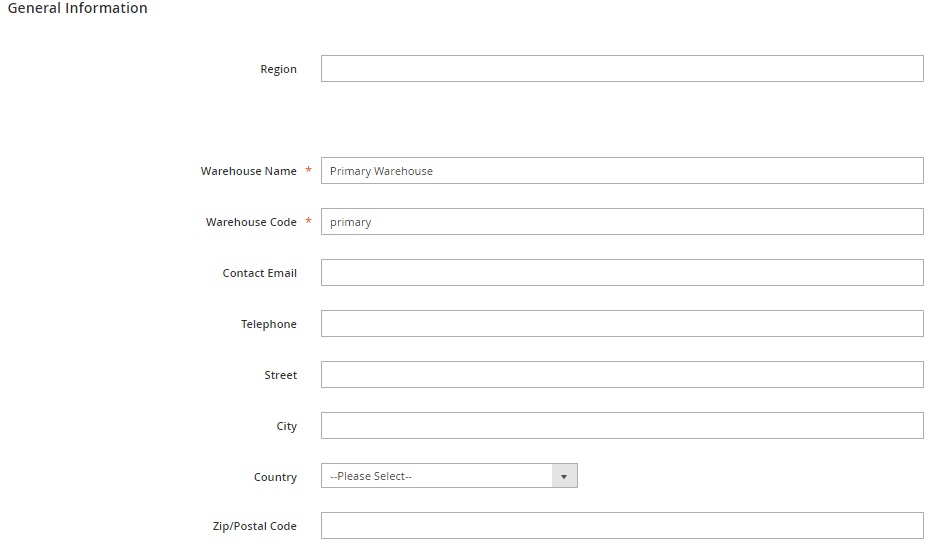
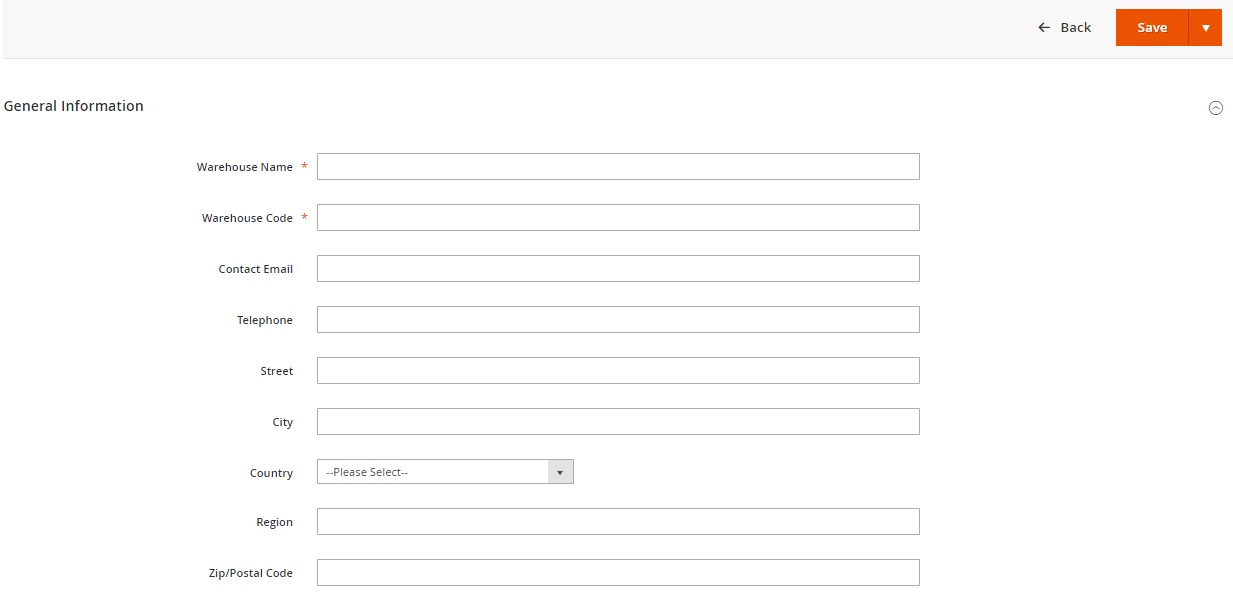
The General Information section contains the following fields: Warehouse Name, Warehouse Code, Contact Email, Telephone, Street, City, Country, Region, and Zip/Postal Code.
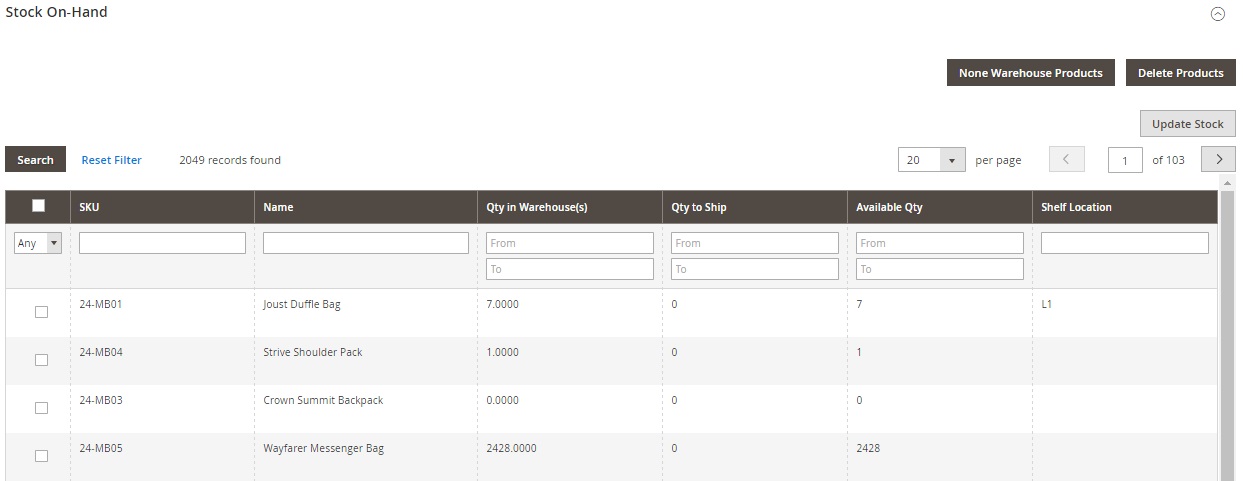
And this is how the Stock On-Hand section looks like:
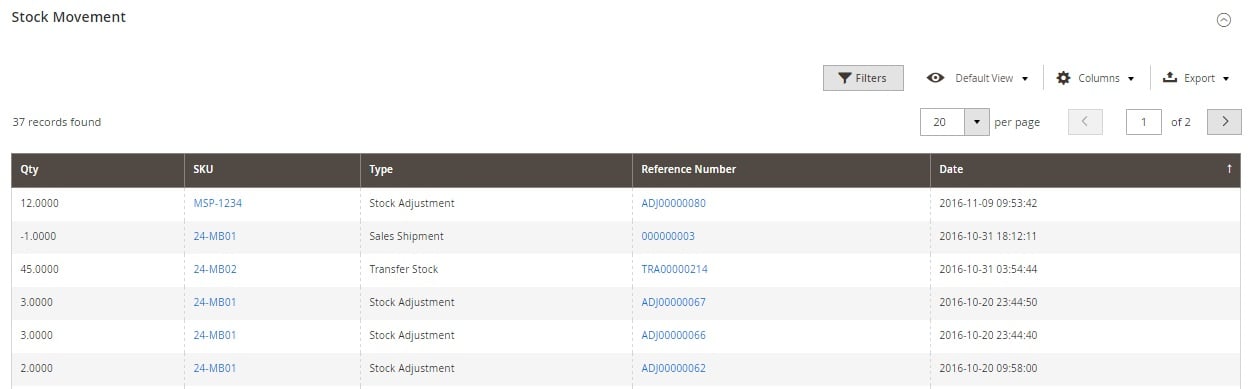
The Stock Movement section displays product quantity, SKU, movement type, reference number, and date. You can export this information as CSV or XML.
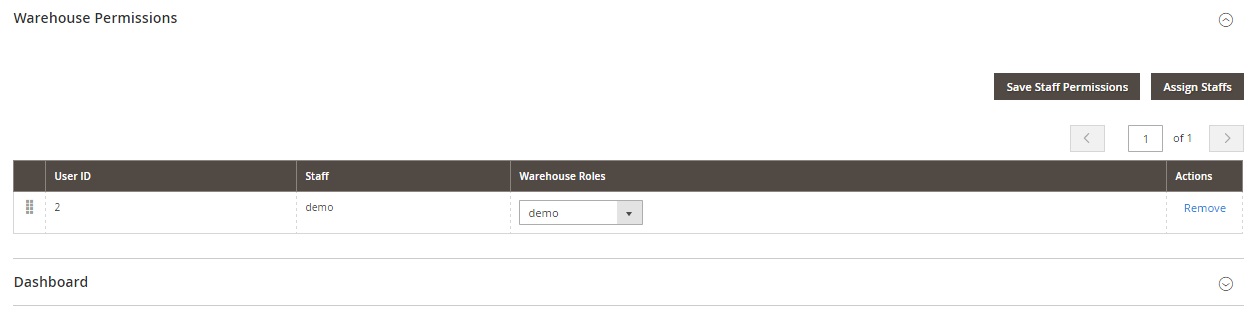
Warehouse Permissions is a place where you decide what roles each administrator has.
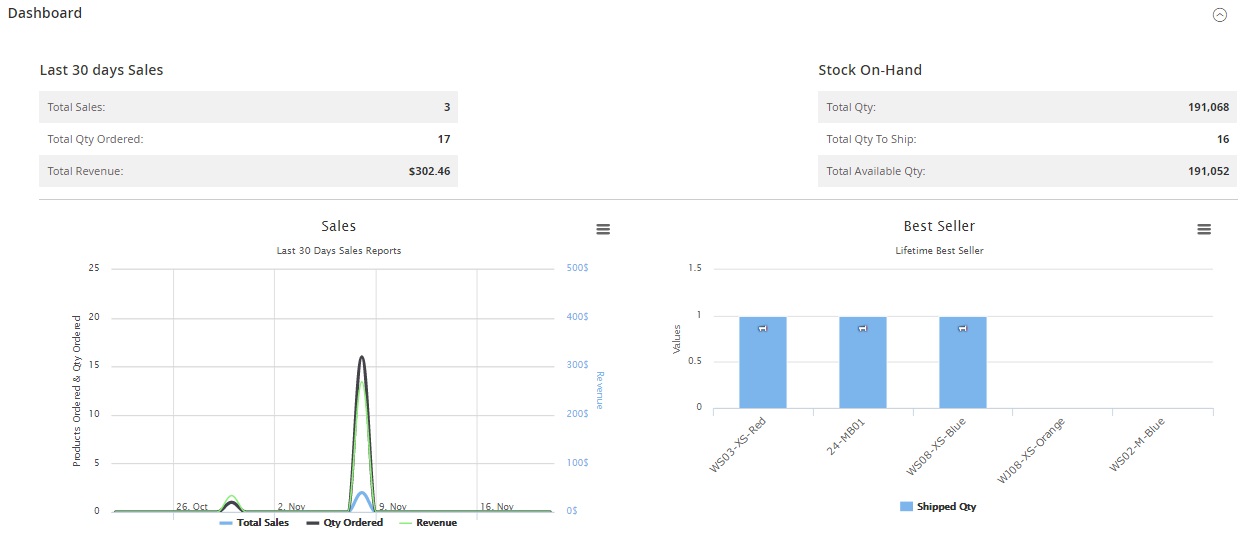
The Dashboard section illustrates various stats related to the warehouse.
To add a new warehouse, specify general information: Warehouse Name and Code. Other fields are not mandatory.
Prediction
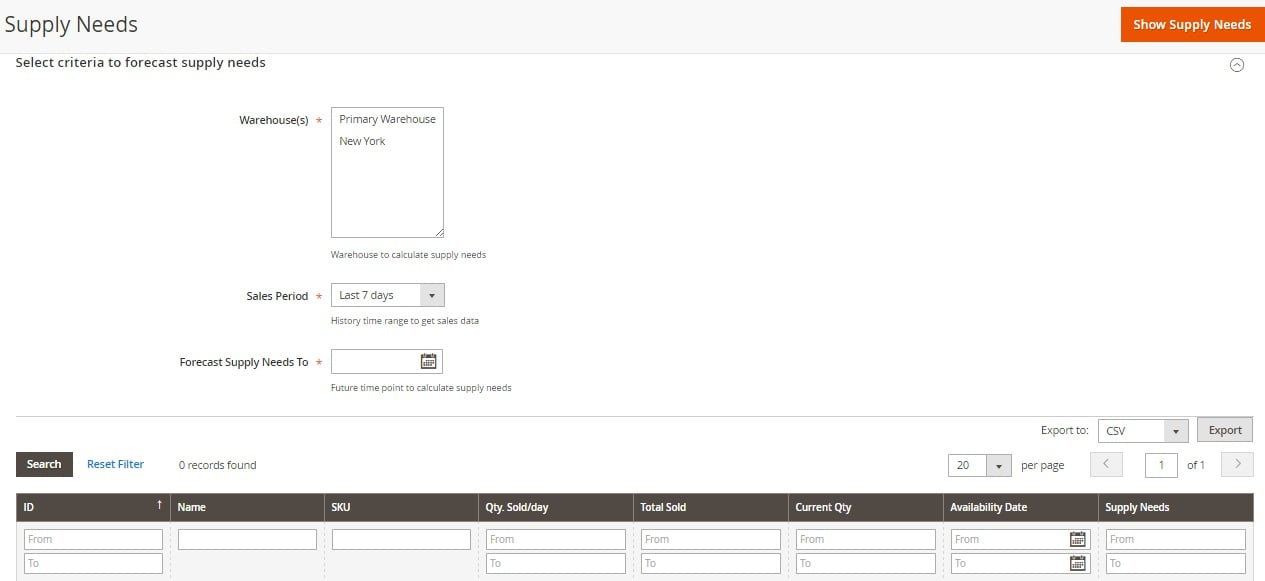
On the Supply Needs screen, you select criteria to create a forecast. Choose a warehouse, a sales period, and a future time point to calculate supply needs, Hit the “Show Supply Needs” button, and get a grid with results. You can export the forecast via CSV or XML.
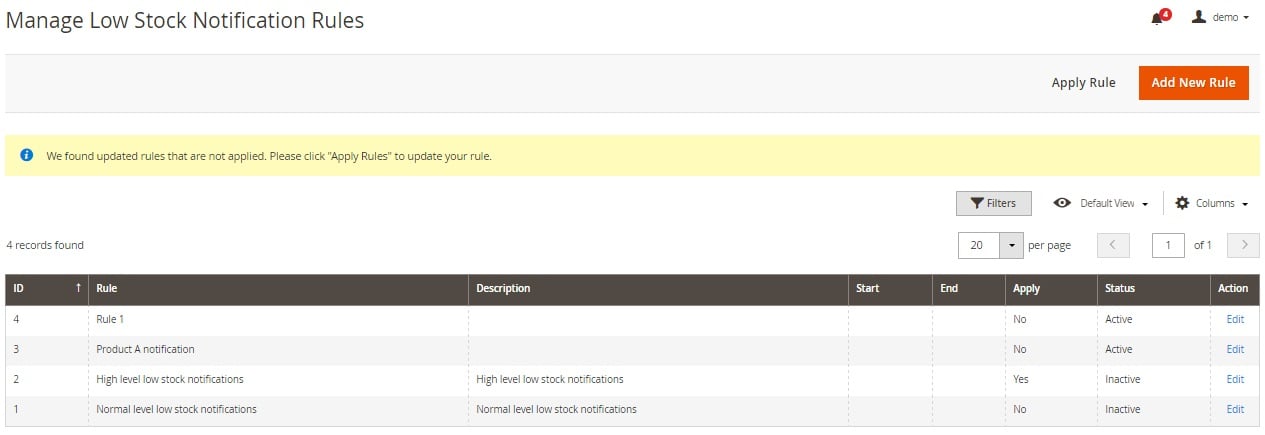
As for low stock rules, they are gathered in a grid on the Manage Low Stock Notification Rules page. The grid consists of the following columns: ID, Rule, Description, Start, End, Apply, Status, and Action. You can edit or apply any existing rule as well as create a new one.
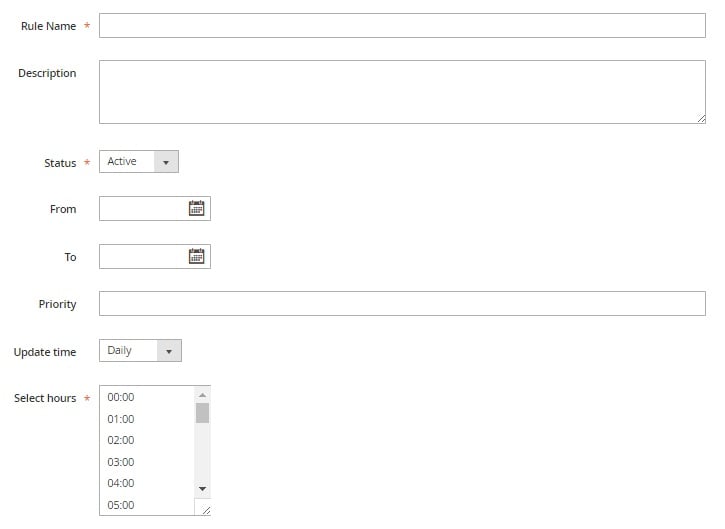
The creation of a new rule is divided into 3 steps: Rule Information, Conditions, and Actions. In Rule Information, you should specify rule name, status, and time periods depending on the update time (daily or monthly). Although other fields are not mandatory, we recommend you to write a short description and set priority – these tiny actions will simplify your further interaction with the rule.
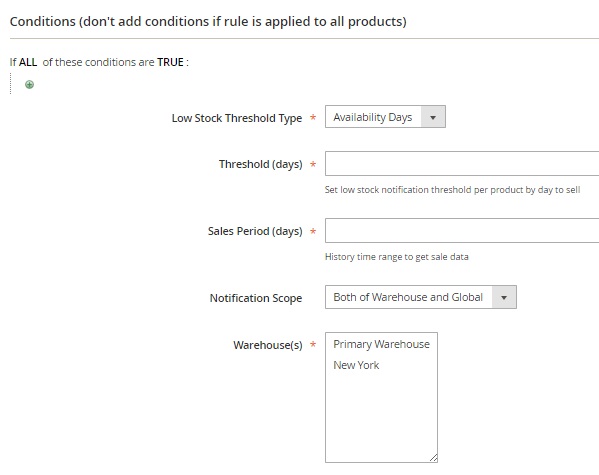
Next, you create any custom condition and specify the following data: Low Stock Threshold Type, Threshold (days), Sales Period (days), Notification Scope, and Warehouse(s).
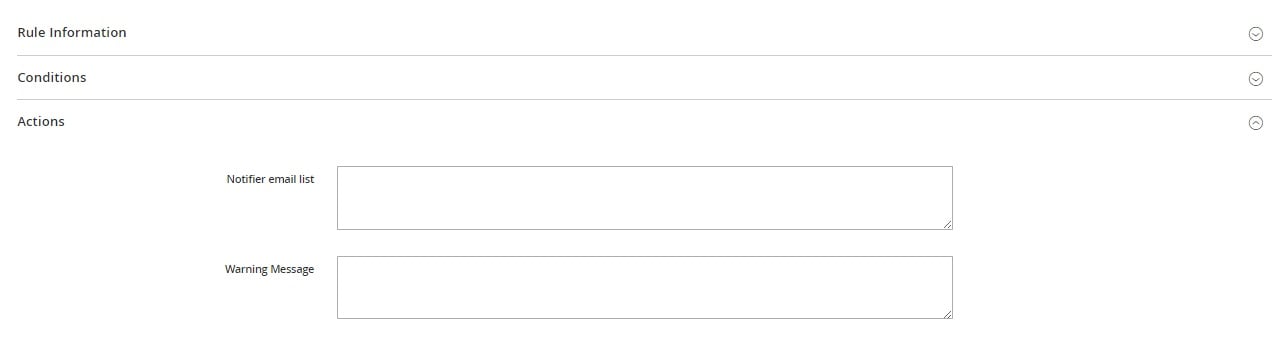
In Actions, you create a notifier email list and write a warning message.
Note that all low stock notifications are gathered in the Notification log. Since we are reviewing the demo version of the Magestore Inventory Management Magento 2 extension, the appropriate grid is empty.

Transfer Stocks
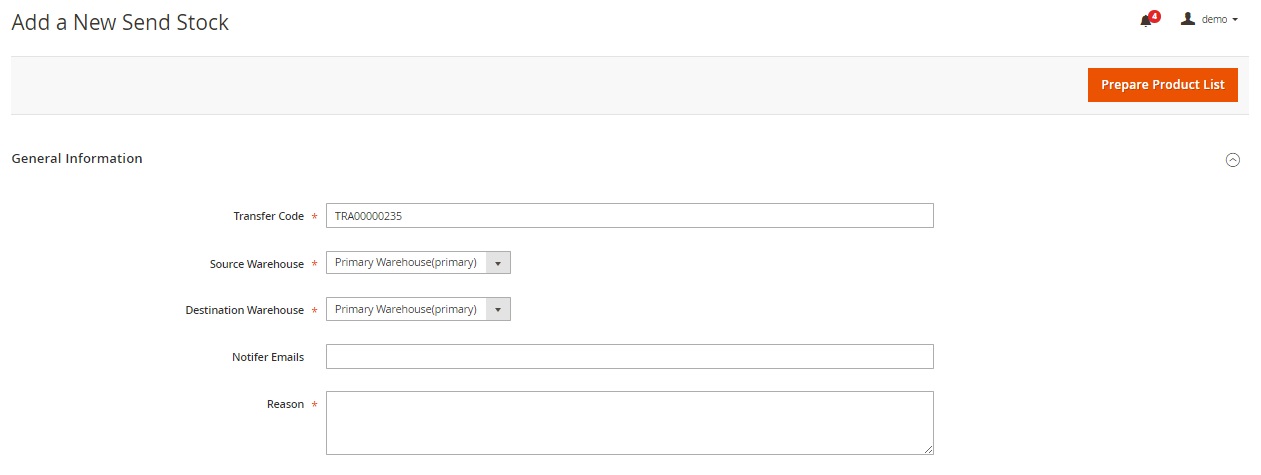
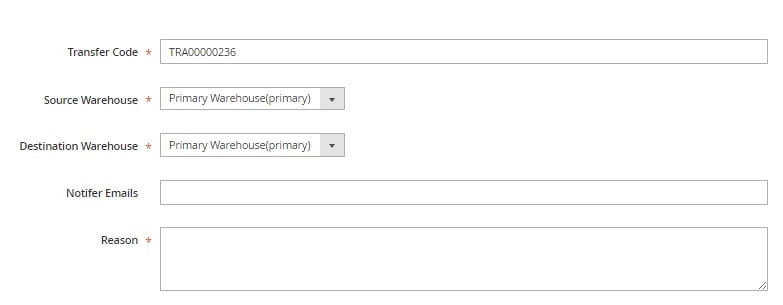
While adding a new stock transfer, you should specify such information as a transfer code, a source warehouse, a destination warehouse, notifier emails, and a reason for transfer. Next, it is necessary to prepare a product list.
The same is about requesting a transfer:
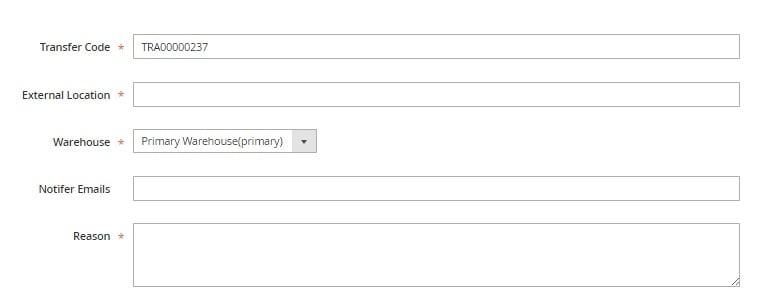
While creating a transfer to an external location, the situation is similar:
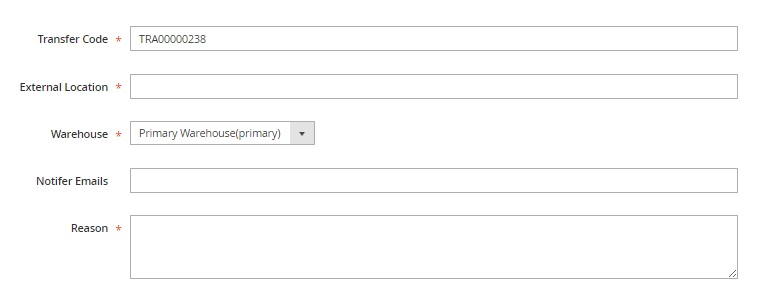
And this is the form for transferring stock from an external location:
Transfer Stock History
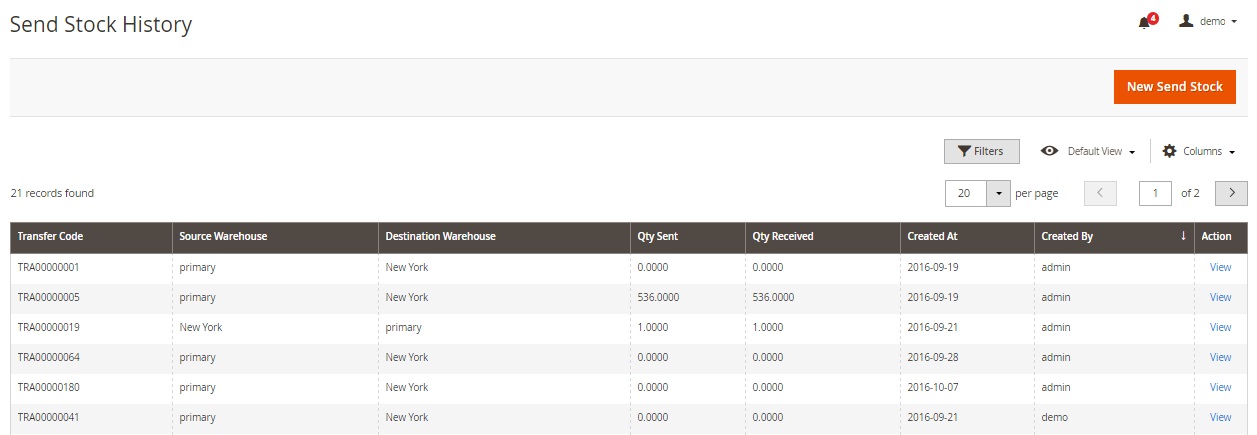
Send Stock History is represented with the help of a grid. You can apply filters, save views, and hide/show columns. The grid contains the following columns: Transfer Code, Source Warehouse, Destination Warehouse, Qty Sent, Qty Received, Created At, Created By, and Action.
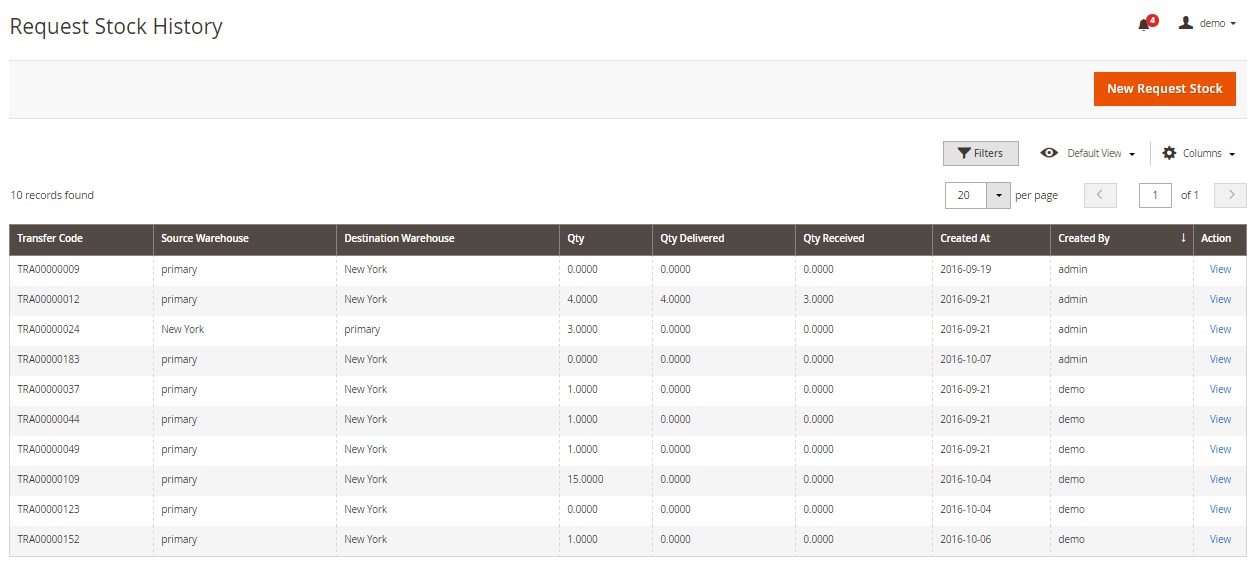
A similar grid is used on the Request Stock History page:
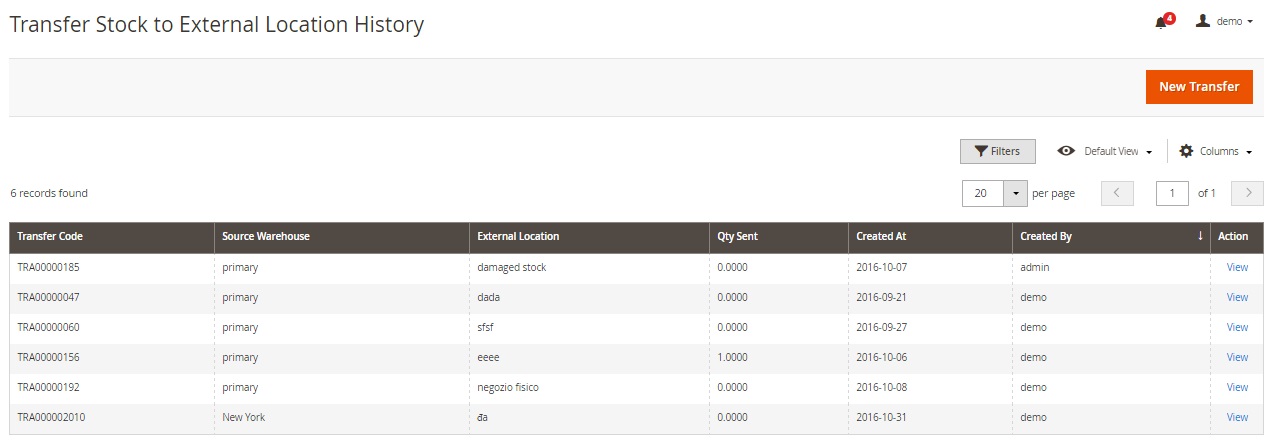
Transfer Stock to External Location History:
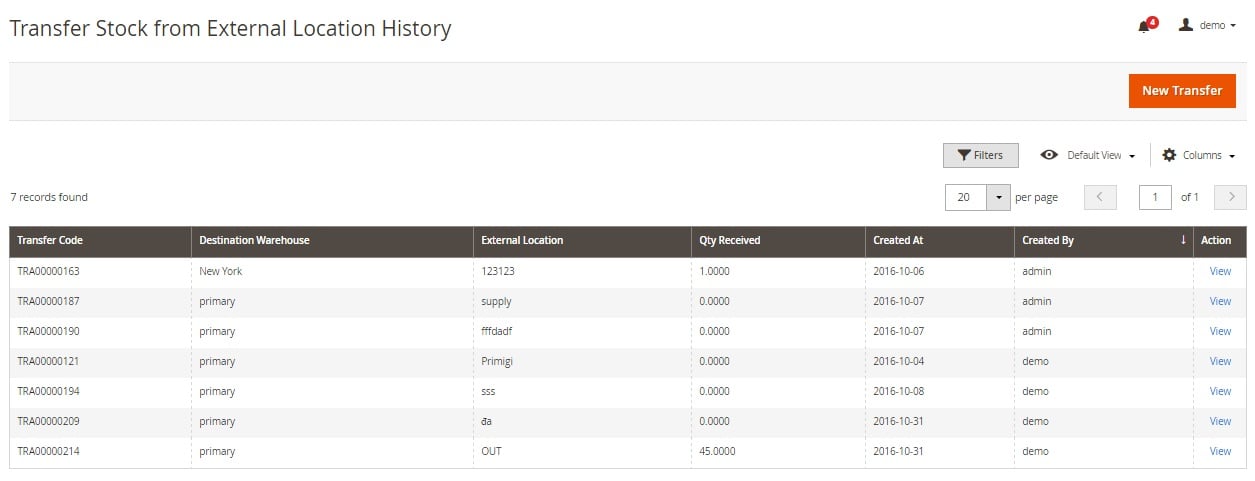
Transfer Stock from External Location History:
Stock Control
Due to this section, you can keep the data accuracy in practice and in the record all the time. Fixing all differences by selecting products and entering adequate Qty requires only a few clicks.
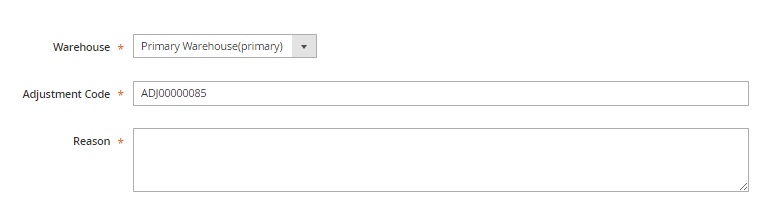
While adding a new adjustment, you select a Warehouse, specify an adjustment code, and write a reason.
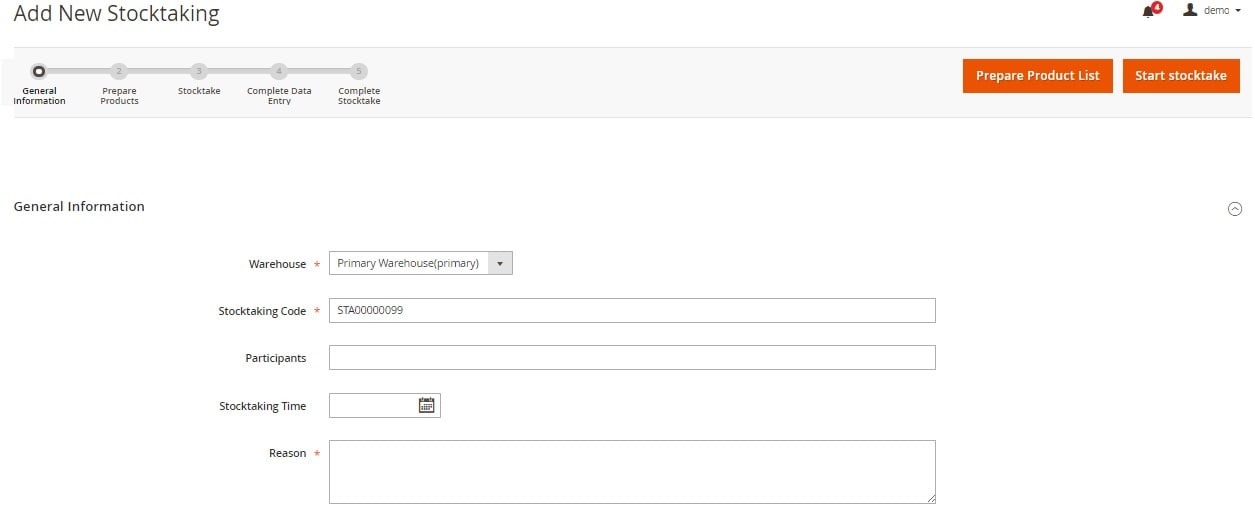
While adding a new stocktaking, you run through the following 5 steps: General Information, Prepare Products, Stocktake, Complete Data Entry, and Complete Stocktake.
The General Information section contains the following fields: Warehouse, Stocktaking Code, Participants, Stocktaking Time, and Reason.
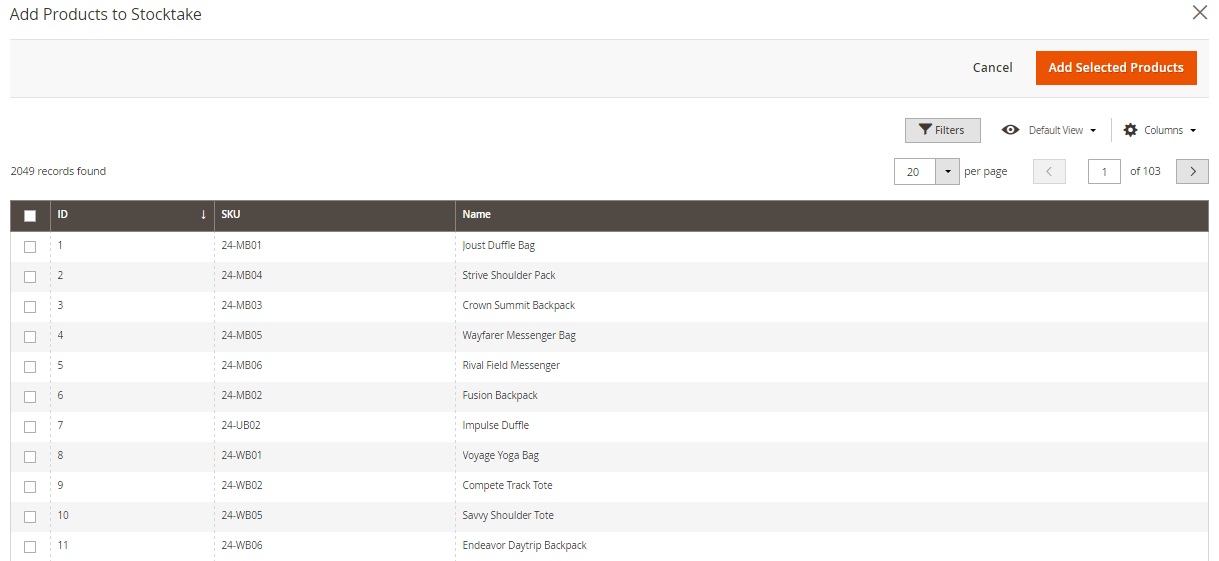
Next, you can add products manually or import them via CSV by SKU or barcode.
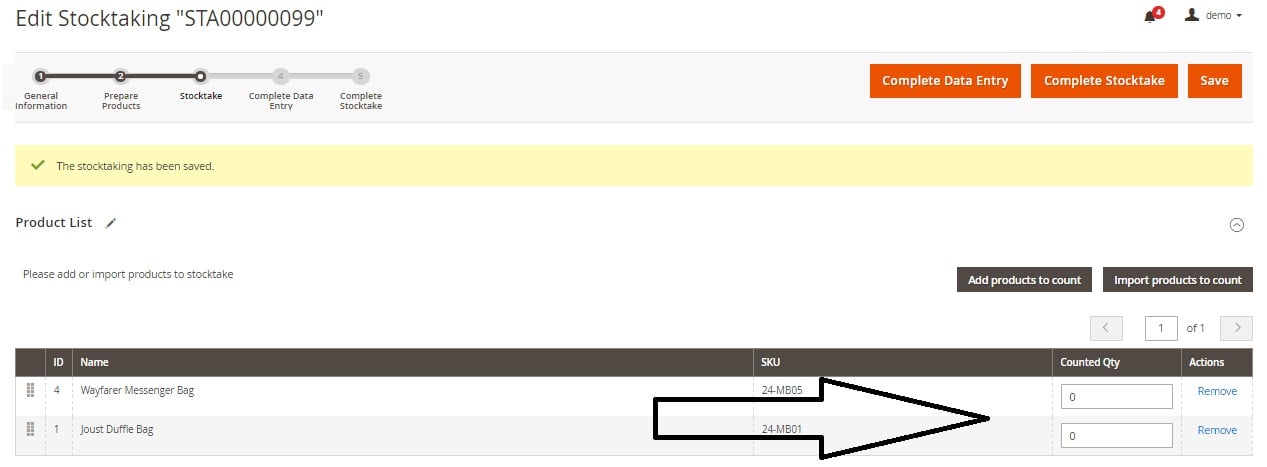
During the Stocktake stage, you specify the counted quantity of selected products.
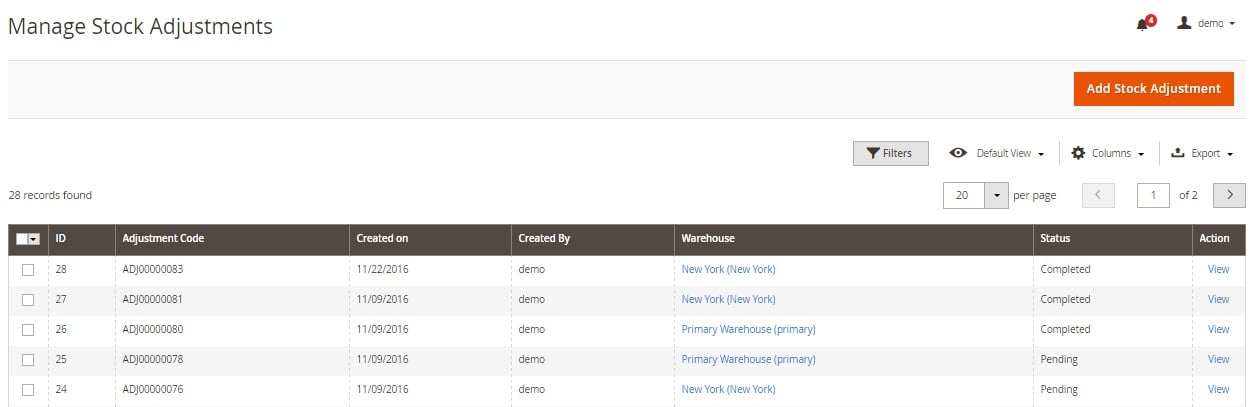
The Manage Stock Adjustments screen contains a grid that illustrates the Adjust Stock history. You can export all data, view existing adjustments, as well as create new ones.
The same is about the Manage Stocktaking screen:
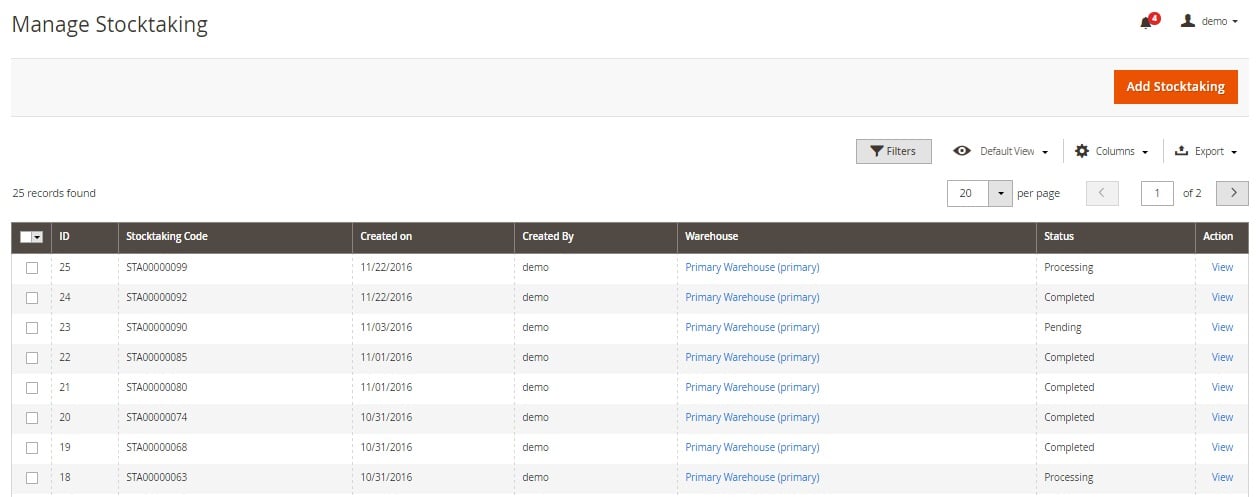
… and the Stock Movement history:

Configuration
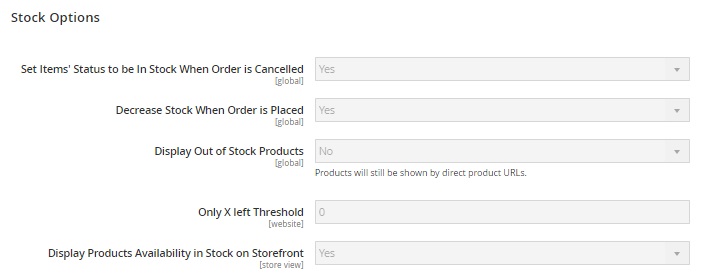
As for configuration, there are two sections of settings: Stock Options and Product Stock Options. The first one allows you to Set Items’ Status to be In Stock When Order is Cancelled; Decrease Stock When Order is Placed; Display Out of Stock Products, set the Only X left Threshold, and Display Products Availability in Stock on Storefront.
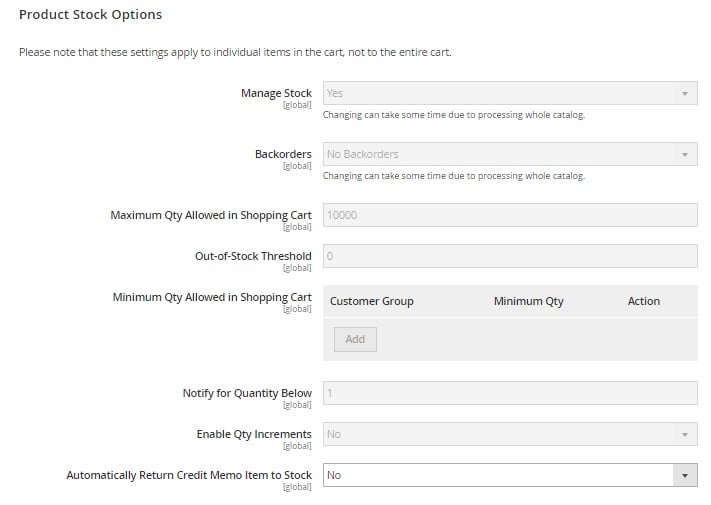
The second section contains the following fields: Manage Stock, Backorders, Maximum Qty Allowed in Shopping Cart, Out-of-Stock Threshold, Minimum Qty Allowed in Shopping Cart, Notify for Quantity Below, Enable Qty Increments, and Automatically Return Credit Memo Item to Stock.
Final Words
Along with Purchase and Barcode Management, the Magestore Inventory Management Magento 2 extension completely revamp the default approach to stock management. All three extensions make the routine processes available in Magento 2 a piece of cake. If you want to forget about headaches relates to your Magento 2 inventory, start improving the system with the Inventory Management module. You can purchase it for $499 here:
Related posts
 How to update products that are not listed in a product table during Magento 2 import
 Magento 2 B2B Company Guide: Revealing Company Structure & Import
- How to Import Customers & Customer Addresses to Magento 2
 Magento 2 Release Notes
 Adobe (Magento 2) Commerce and Cloud (Enterprise Edition) Specific Features
- How to generate order increment IDs automatically during Magento 2 import
 Amasty ChatGPT AI Content Generator for Magento 2
 Reputon Amazon Importer Review: How to Connect Shopify to Amazon in a Few Clicks