
Magento 2 Before After Image by Webkul

The before-after comparison is usually used between the two images of a product or its outcome that is like before and after effect which will help the buyers to see the difference in result in advance, before purchasing the product or a service.
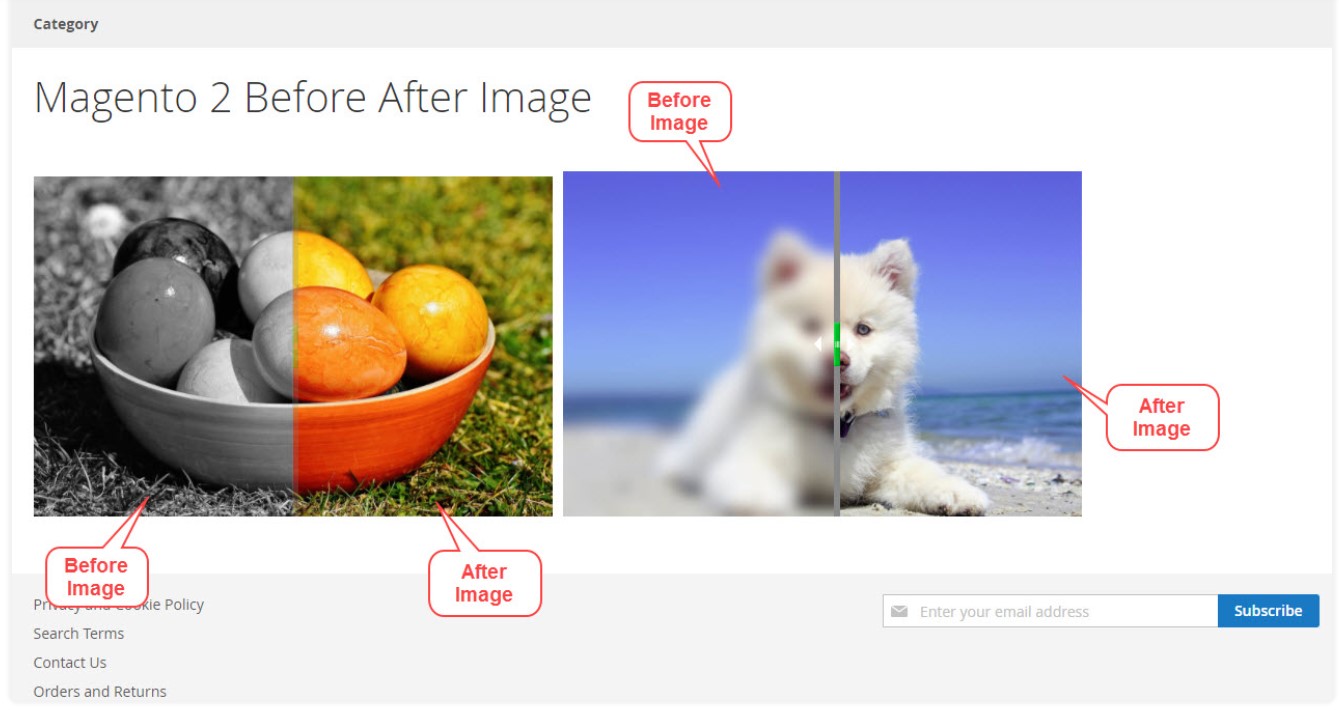
Webkul Before After Image for Magento 2 module allows the store admin to show before and after image comparison of products to customers. This module will give you the unique before and after perspective of two different views, of the product images or its outcomes.

The technique used by this module for image comparison let you spot the smallest difference between the two images by using a slider or more concisely we can compare between the original product and its enhanced version.
Webkul Before After Image for Magento 2 module can be easily configured as you just have to insert the widget to the CMS page and upload the images, that’s it.
The customer just needs to navigate to the page and by the help of this widget, a comparison can be done between the images. Also, multiple widgets can be added to the same or different CMS pages.
Webkul Before After Image for Magento 2 module helps the customers to observe the desired output of the product or a service before purchasing the products.
Table of contents
Features
- Show image comparison using two images.
- Easy to set up and configure the widget.
- Users can use the slider for viewing the images.
- Users can download both the images.
- Set widget width & height values.
- Enter suffix when using multiple widgets.
- Animation works without using the flash or java plugin.
- Works on all devices – mobile, desktop, laptop, tablet.
- Supported image file extensions – jpg, jpeg, png.
- Module source code is open for customization.
In order to compare the two images in the real world, you can usually place them side by side and compare it. But you can do it digitally by using Magento 2 Before After Image module.
The use cases of this module are numerous such as – for the doctors, physicians, cosmetic shop selling beauty products, interior designer, real estate, dentists, dermatologist, skincare specialists, cleaning equipment or service, etc.
For example, a seller can use this module on the online store to show a comparison of house wall painted using your products and see before and after results. Or you might use it to show work you just did on a house renovation, car detailing, paint protection, polishing.
Now let us take a brief look over the listed features of this module.
Image Slider
Here, you can find a slider for comparing the effect on the images. The slider is present between the two images, and the customer moves the slider slightly in left or right to analyze the difference between the photos.
Download Images
The customer can easily download both images – the original (before) image and (after) image with variation.
Set widget width & height
The admin can efficiently manage the widget width & height. A widget can cover a small part or may have covered a significant part over the screen.
Add Suffix
To differentiate between multiple widgets, you can add the suffix to the widgets.
The suffix is added at the end of the widget name in order to notice the difference between multiple widgets.
No Flash or Java plugin Required
The effect which is observed when the slider is moved over the images does not work on any java plugin or require any flash or third-party software installation. It is an inbuilt feature of the module.
Compatible on all devices
The feature works on every device that can be a smartphone, tablet, laptop, or desktop. The widget adapts with the size & resolution of the specific device on which the feature is displayed.
Supported Image Formats
The images used in this module supports jpg, jpeg & png file formats which are the most widely used image formats.
Widget Configuration
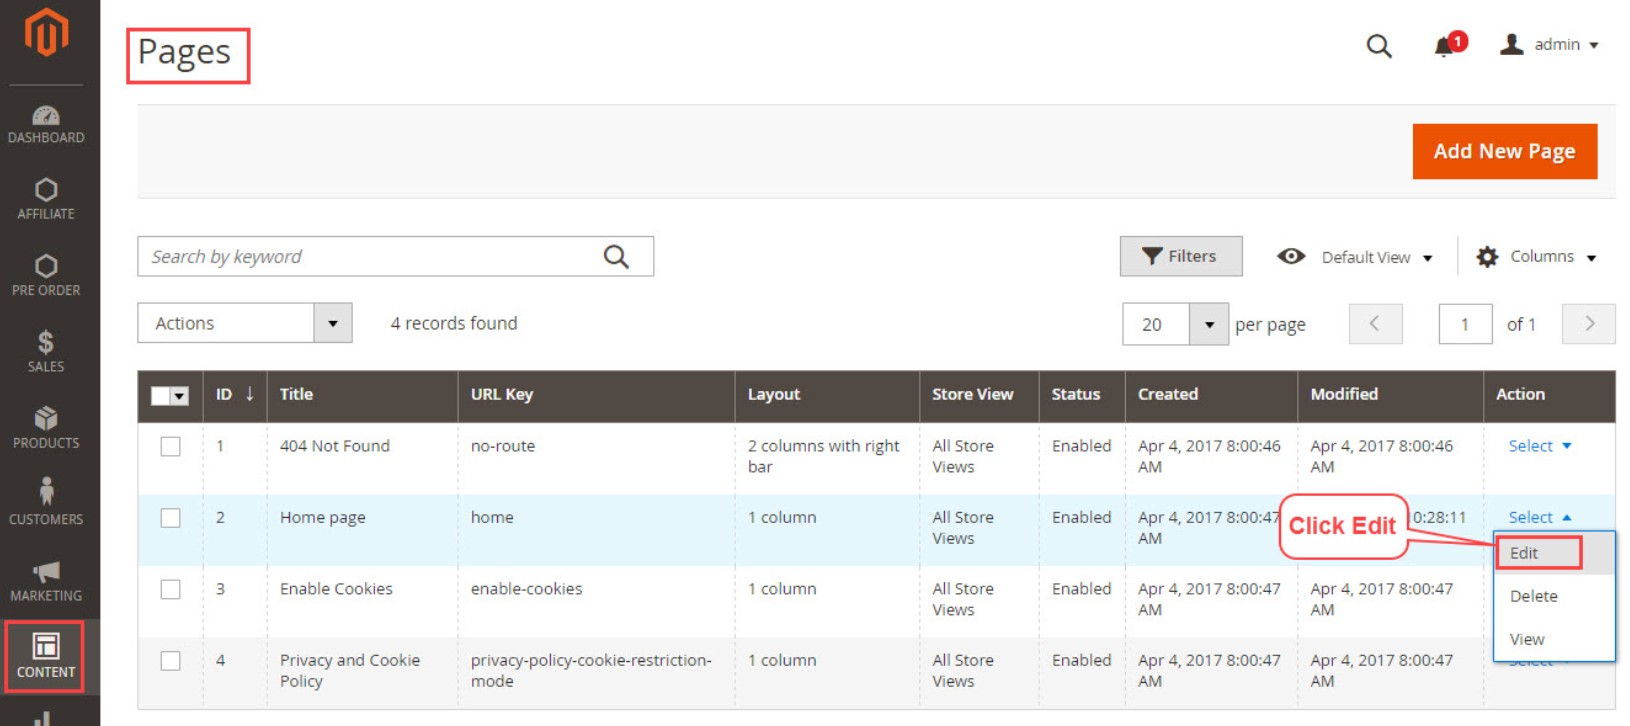
To configure this module, the admin from the back-end will navigate to the Content>Pages, Now from here, select the page where the widget is to be added. Click on Edit to manage the respective page.
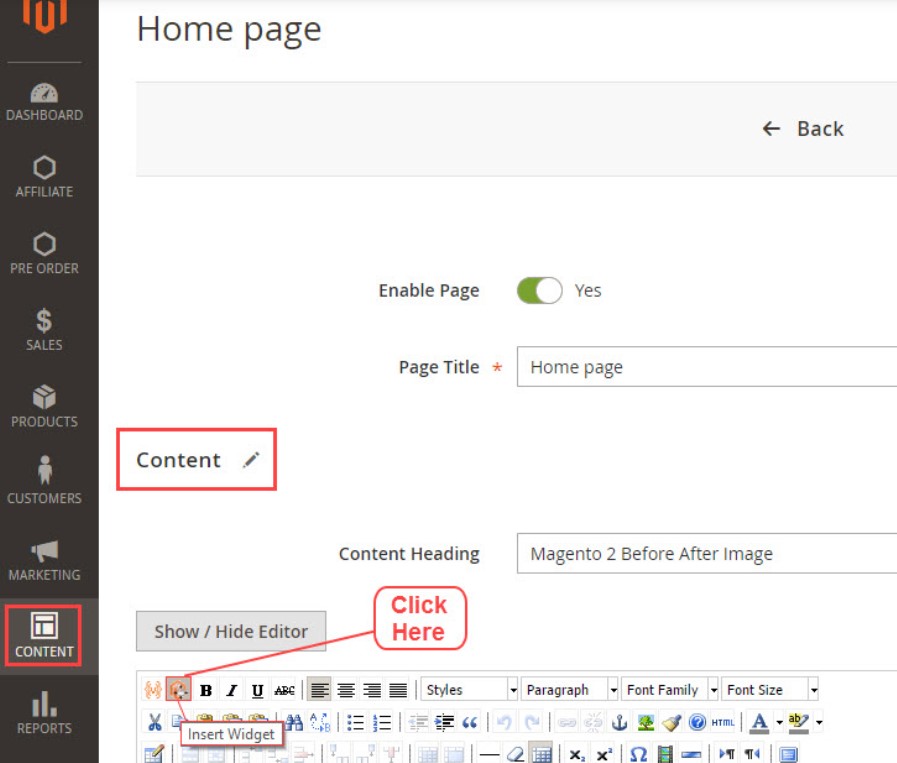
After coming to the edit page, go to the editorial panel here, click on “Insert Widget icon”.
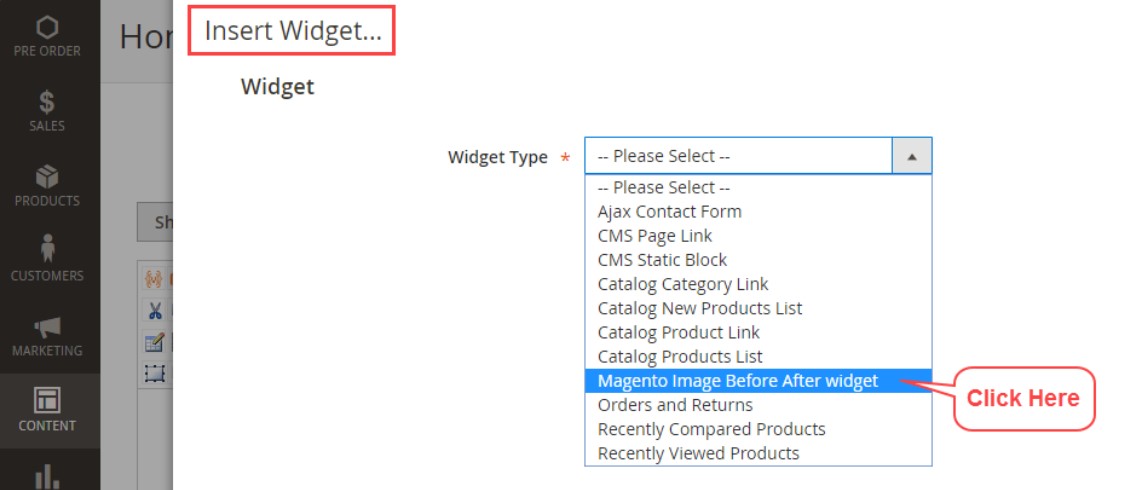
A pop-up window will appear next, where the admin will select the “Widget Type” as Magento Image Before after Widget and then click on “Insert Widget”.
Now after this you will need to enter some fields in the widget options like:-
- Image Suffix – Enter any text here to differentiate between multiple widgets.
- Width – Enter the width value of the widget for the front-end.
- Height – Enter the height value of the widget for the front-end.
- Image 1 – Upload the before image.
- Image 2 – Upload the after image.
Now, after making entries in each field, click on “Insert Widget” button.

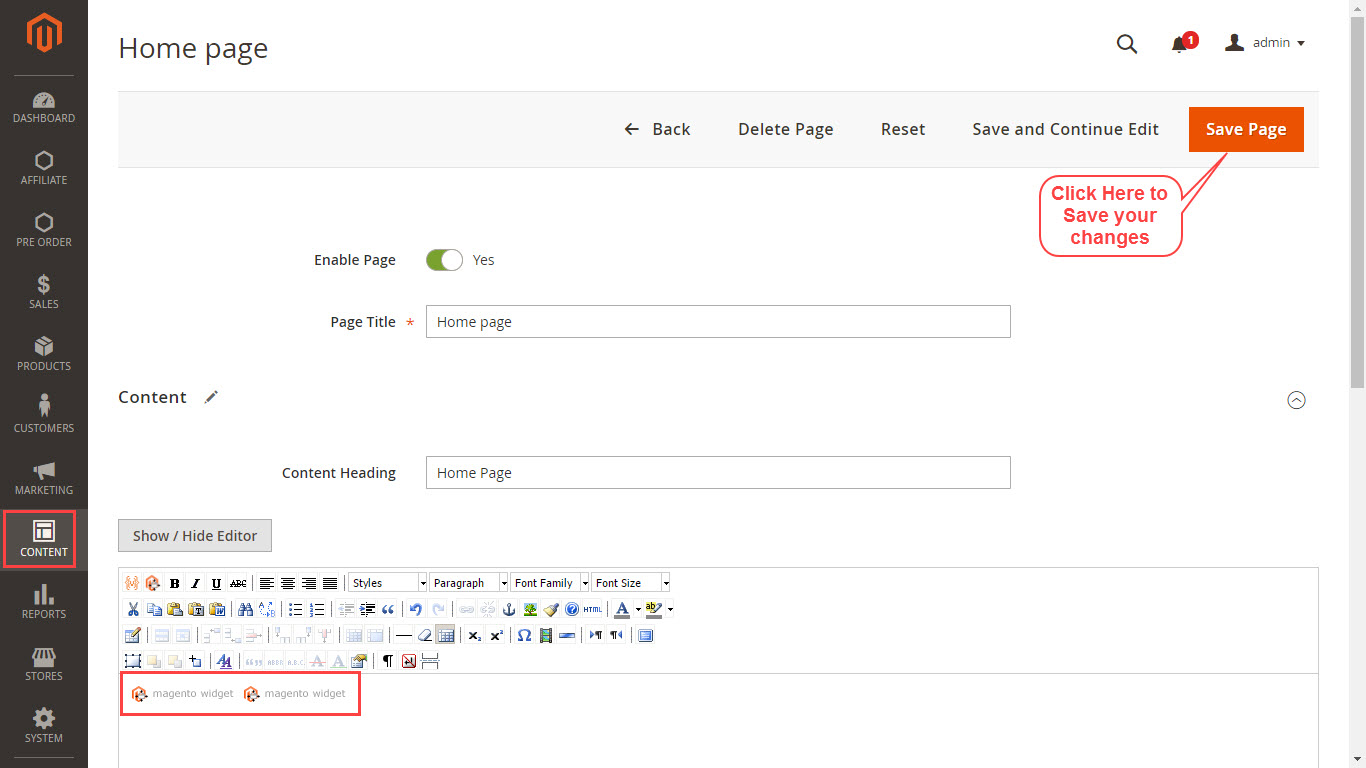
Now on the edit page, you can find widget will appear in the content area, Click Save Page button to apply your changes. On the front-end, the before-after image widget will appear.
Customer Frontend View
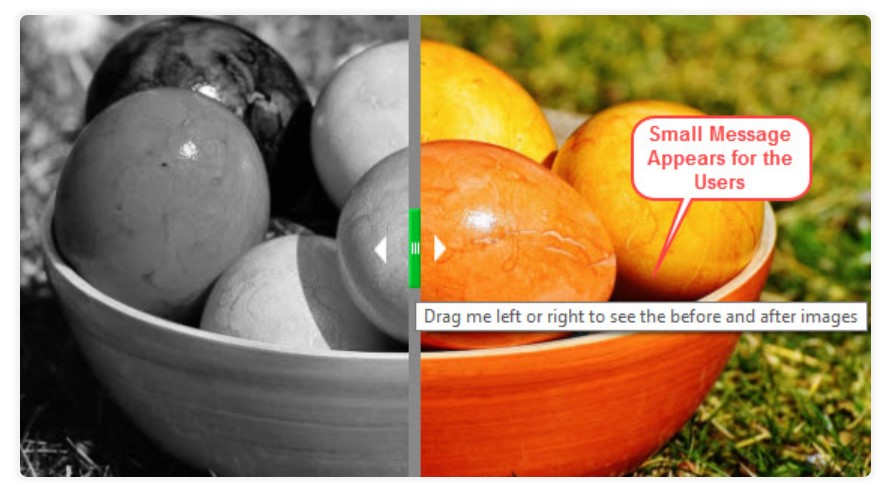
Here, on the front-end, the user can view both before & after images on the page. They can use the mouse cursor to slide the images.
Also, you can see a small alert message pop up on the image as you move the cursor over the images.
That’s all for Webkul’s module. You can check the and for a better understanding of the module here:
Related posts
 Magento 2 Release Notes
 Shopware 6 Advanced Pricing Guide + Import Tutorial
 How To Bulk Import Products In Shopify: CSV Description & Step-By-Step Guide
 How to Import Customers & Customer Addresses to Magento 2
 Magento 2 B2B Company Guide: Revealing Company Structure & Import
 Amasty ChatGPT AI Content Generator for Magento 2
 Reputon Amazon Importer Review: How to Connect Shopify to Amazon in a Few Clicks
 Adobe (Magento 2) Commerce and Cloud (Enterprise Edition) Specific Features