Sage Pay Suite PRO Magento 2 Extension

It is crucial for ecommerce businesses to have a trustful payment provider to protect sensitive customer card data and increase security against possible fraudulent actions. Today, we want to talk about Sage Pay payment gateway and how you can integrate it in your store with the Magento 2 Sage Pay Suite PRO extension by Ebizmarts.
is one of the top payment providers in Europe that offers a set of features for streamlining payment procedures and safe processing of credit card data. Sage Pay Suite Pro for Magento 2 was developed in collaboration with Sage Pay to provide ecommerce merchants with extended payment options and secure transactions.
In this post, we dive deep into the benefits of Sage Pay payments and describe the functionality of the Magento 2 Sage Pay Suite module.

Table of contents
About Sage Pay Payment Gateway
Sage Pay is one of the biggest payment service providers in Europe that covers more than 4 billion payments every year. The number of companies using Sage Pay passed the point of 55000, including both established businesses and newly created online shops. The Sage Pay payment processor ensures fast and secure payments without any hidden fees and offers a wide variety of payment options.
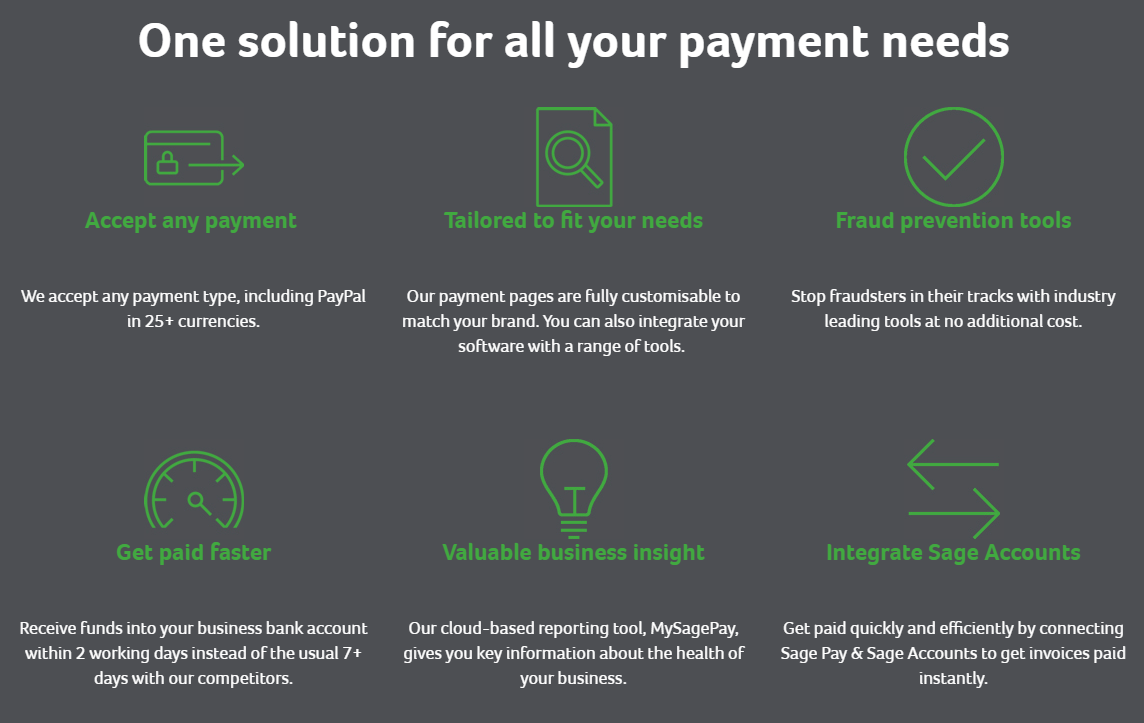
Sage Pay provides a few payment options so that companies of any size can implement the most suitable solution according to their needs. Sage Pay payment products range includes the following:
- Online payments
Online payments empowered by Sage Pay is a quick and secure option of payments processing for every store. Merchants decide how they want to accept payments at the checkout: using a Sage Pay drop-in form or with their own form integration.
- Phone payments
Phone payments provide customers with broader options to pay for their purchases. Sage Pay implements a Virtual Terminal interface which allows to process phone payments fast and securely.
- Card machine payments
Card machine, or face-to-face, payments make paying via a card terminal quick and hassle-free. Sage Pay provides a variety of card machine types to suit any business, including countertop, portable, and mobile card terminals. Besides, it is possible to connect a card machine to your POS system, as well as leverage contactless payments.
- Invoice payments
Sage Pay enables online merchants to get paid faster with e-invoicing. With the feature, customers can pay a bill by clicking a single button on their invoice, whether online or via phone. Integration with Sage Accounts saves time on invoices processing due to the automated software.
Below, we provide an overview of the benefits online store owners get with the Sage Pay gateway:
- Wide range of payment options
With Sage Pay, merchants get the ability to accept various types of payments, including PayPal and local European payment methods.
- Multi-currency support
Sage Pay integration allows store owners to accept payments in more than 25 currencies.
- Dynamic Currency Conversion (DCC)
The DCC functionality makes it possible for customers to make payments in their card currency.
- Support of major credit and debit cards
The Sage Pay gateway processes all major card types, which provides customers with extended payment options.
- Customizable and responsive payment pages
- Checkout in one click
When making a payment, customers have an option to save their credit cards and use them for other purchases in the future. This way, you provide your clients with improved user experience by enabling them to check out with a single click.
-
Recurring and deferred payments
Sage Pay allows accepting recurring payments, which is especially useful for stores selling memberships or product and service subscriptions. Moreover, the deferred payment feature lets sellers be sure of a customer’s sufficient balance on a credit card before delivering a product.
-
Advanced fraud screening tools
- PCI DSS Level 1 certification
No matter which type of payment processing you implement on your store, it is obligatory for any business to be PCI compliant. As a payment processor with the highest level of card data security (PCI DSS Level 1), Sage Pay makes it easier for online sellers to acquire a PCI certificate.
- Integration with Sage Accounts
Possibility to integrate with Sage Accounts allows merchants to receive instant payments online or via phone due to the “Pay Now” button integrated into invoices.
- Online reporting tool
Sage Pay users get access to real-time analytics on processed transactions and settlement reports within MySagePay account area.
- Priority reports
With Sage Pay, store owners also get priority reports. You decide which data to include in the report depending on your business needs and who will receive it.

Sage Pay Suite PRO for Magento 2: Highlights
- Full integration with Magento order processing workflow
- Various types of Sage Pay integration
- Form integration method
- Standard server integration
- Server inFrame integration
- Direct (PI) integration type
- PayPal support
- Possibility to save credit cards in the customer account
- Card data tokenization
- Partial invoices and refunds
- Support of Defer and Authenticate/Authorise actions
- MOTO orders
- Enhanced security with fraud checks
- Fraud reports
- Compatibility with Magento 2 One Step Checkout
Sage Pay Suite PRO for Magento 2 provides all necessary tools for processing transactions using Sage Pay payment provider. The variety of integration methods available with Sage Pay includes direct (PI), form, server, server inframe, and PayPal integration. All of these types are PCI compliant, which provides merchants with a secure cardholder data protection model.
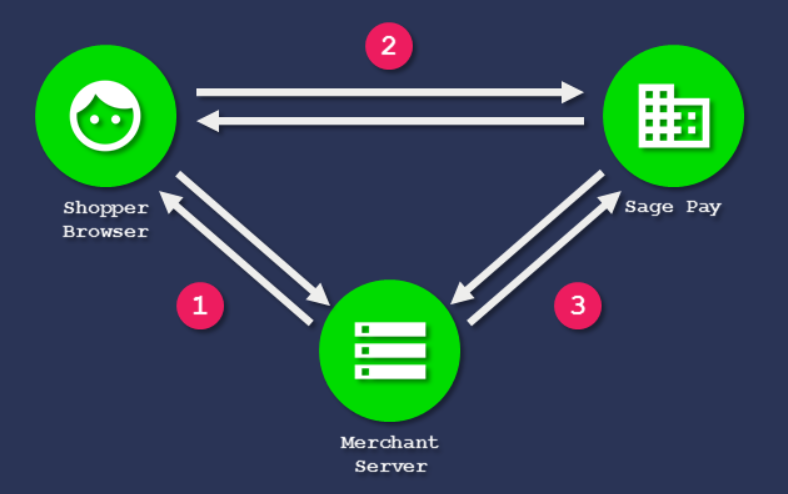
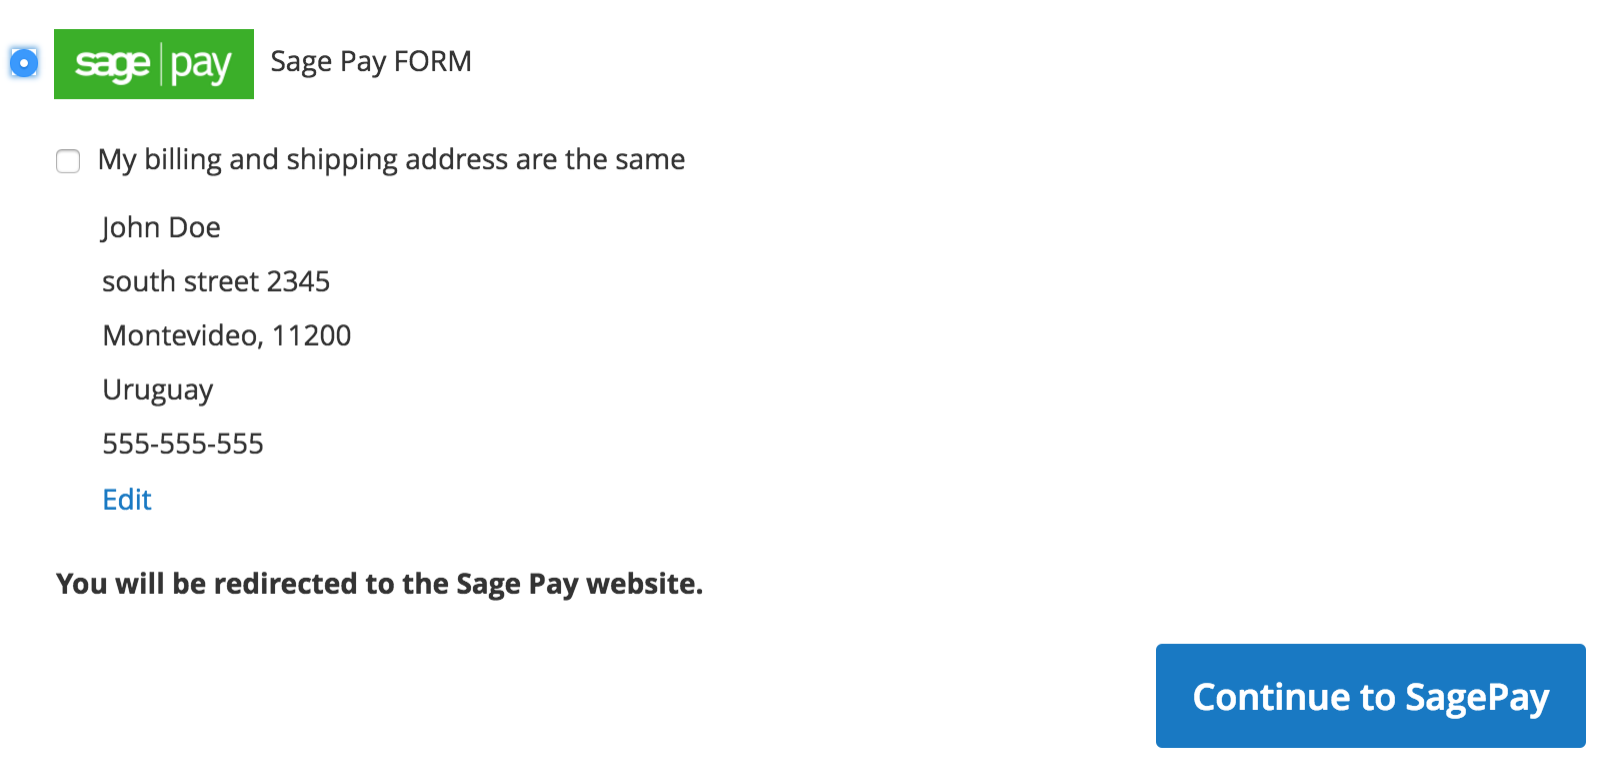
The easiest way to integrate your store with Sage Pay with minimal PSI DSS compliance required from merchants is a form method. With this type, customers are redirected to the Sage Pay hosted payment page after placing an order. The payment processor collects credit card details and authorizes the payment, after which a customer gets back to your website. With this option, store owners don’t need to store sensitive cardholder data since everything is done on the payment provider’s site. Moreover, payment pages are customizable, so you can make them fit into your website for improved customer experience.
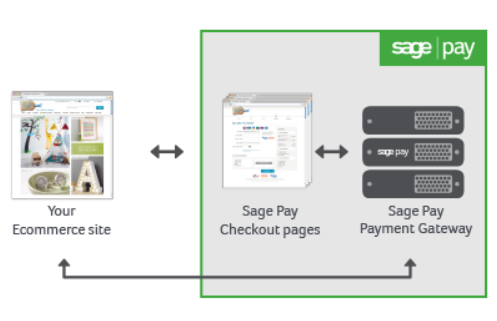
As for the server integration method, it gives store owners more control over payment transactions processing without the necessity to capture and store credit card data. With this option, customer experience remains the same as with the form integration. From the backend side, the core difference is that you operate your own server to gather customer and transactional information like names, billing addresses, and other.
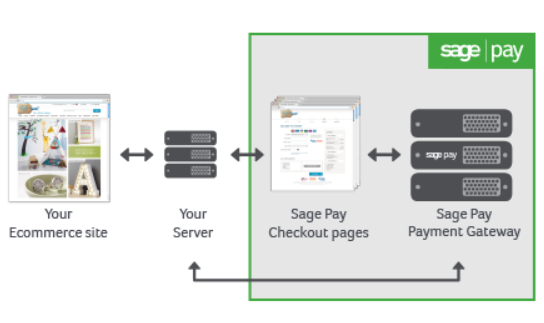
Another way of server integration is server inframe. With this option, frontend experience will be different since customers stay on your website when proceeding to payment rather than being redirected to the Sage Pay hosted page. This way, you provide your clients with a smooth checkout experience, since payment data is collected on one page. Besides, the iFrame payment form can be customized to give the feeling to your web store visitors like they never leave your site. At the same time, credit card details are processed by Sage Pay, so store owners don’t have to store sensitive data on their servers.
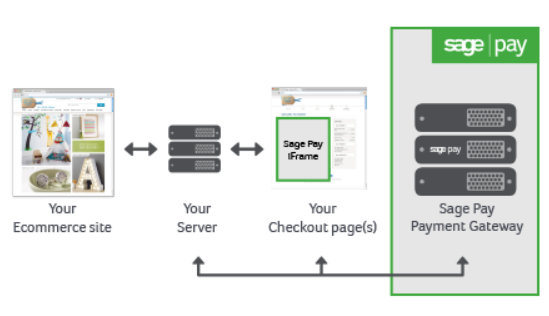
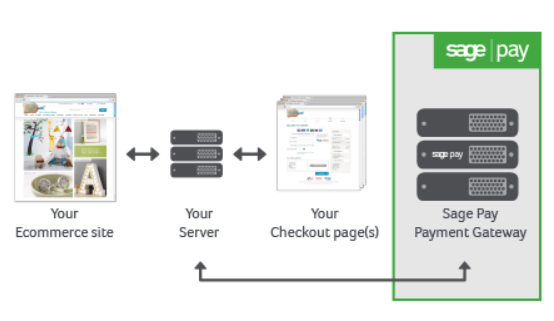
For those sellers who want to have full control over payment transactions and a payment page design, Sage Pay offers direct integration. With this option, credit card information is captured on your website and stored on your server, while payment data is sent to Sage Pay only for authorization and confirmation.
As for extended possibilities on the frontend, registered customers get an option to save credit cards they use for buying products. It makes checkout process faster since customers can pay in one click by selecting a card stored in their account. Since Sage Pay replaces sensitive card data by a token, it provides a higher level of security against possible frauds.
The Magento 2 Sage Pay Suite module also supports the creation of partial invoices in the backend as well as online credit memos for partial refunds. Besides, admin users can place mail and telephone orders (MOTO) from the Magento panel in case of the form or direct integration.
As for the high level of security provided by Sage Pay Suite, merchants get access to advanced fraud management tools. Using the module, you can activate CVN, AVS, and 3D Secure fraud prevention for smooth and safe payment transactions.
Backend
To start using the Sage Pay Suite extension, first, you will need to apply for your .
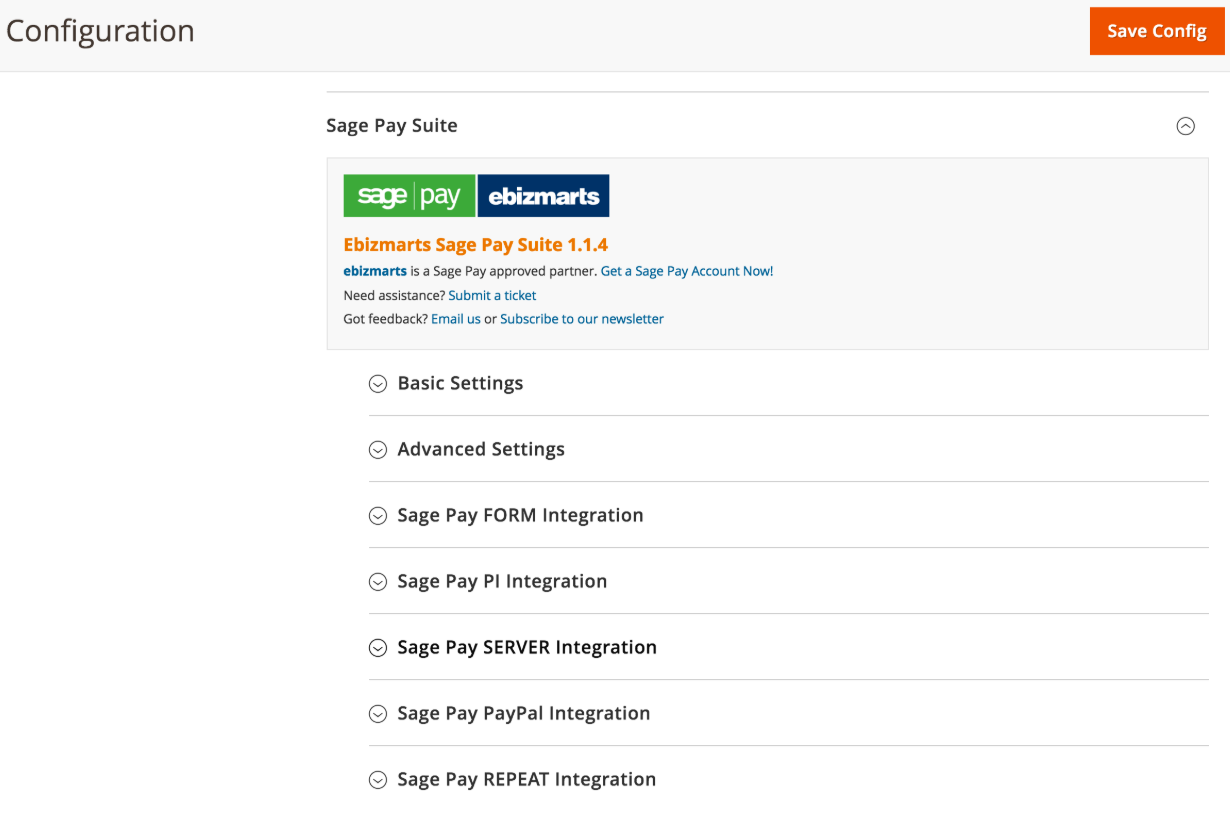
To configure the module, navigate to Stores → Settings → Configuration → Sales → Payment Methods and select Sage Pay Suite. The extension’s configuration page allows specifying required basic settings and options for each integration type separately: Sage Pay FORM Integration, Sage Pay PI Integration, Sage Pay SERVER Integration, Sage Pay PayPal Integration, Sage Pay REPEAT Integration.
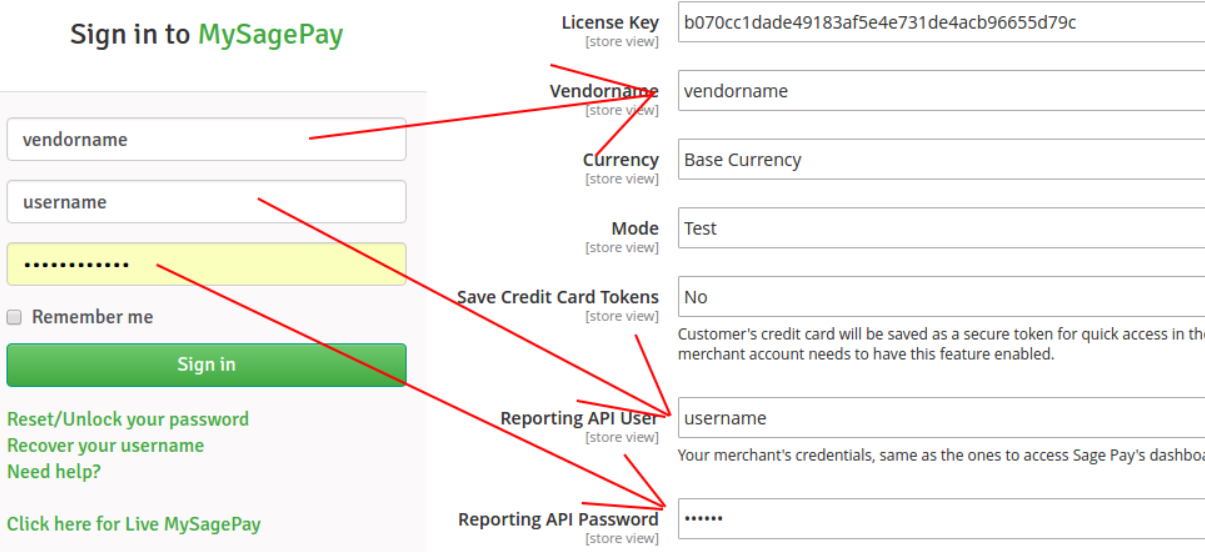
In the License Key, Vendorname, Reporting API User, and Reporting API Password fields, insert the credentials from your MySagePay merchant account. Also, specify currency and mode (write Test if you want the extension to work in the development environment) and decide whether to allow saving customer credit cards as tokens.
Now, let’s have a look at the specific settings depending on the module integration type you choose to enable.
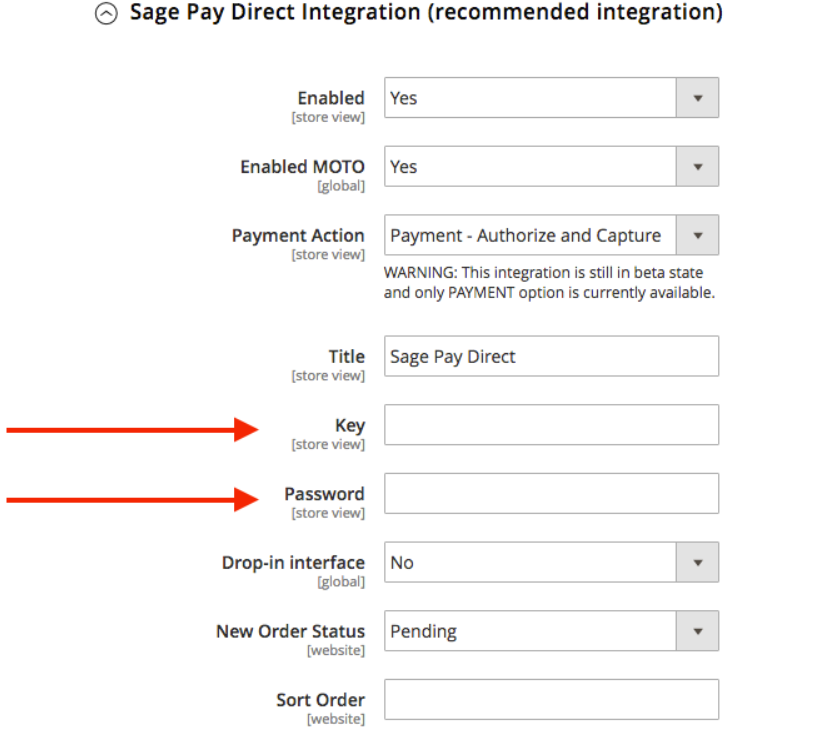
If you are going to use Sage Pay PI (direct) integration, enable/disable the MOTO functionality, select a payment action, and create a title that will be visible on the frontend. Next, you should specify a key and password from your API credentials. Then, decide whether to use the drop-in form and select a new order status, as well as set the sort order.
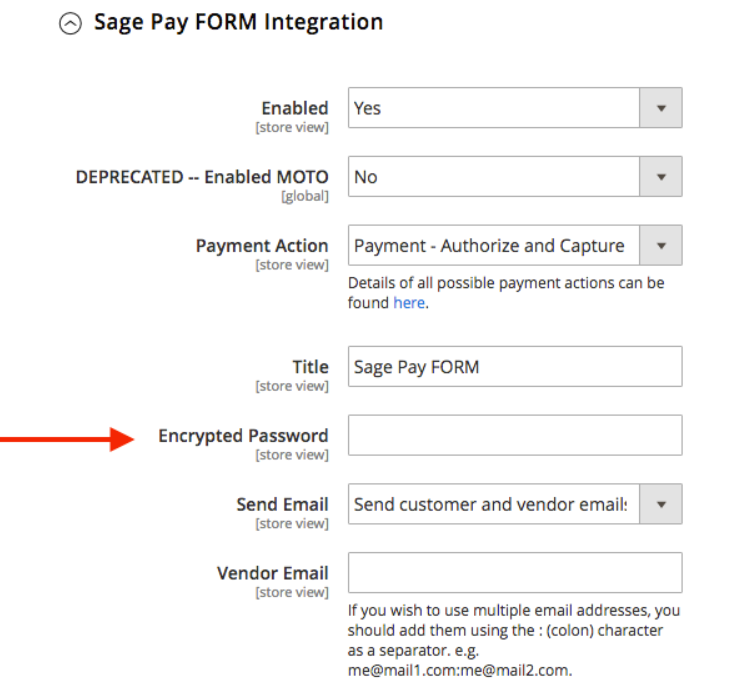
For the Sage Pay form integration, enable/disable MOTO (note that using it with this integration type is not recommended), choose a payment action, and specify the title. In Encrypted Password, insert an encryption key that you can get from your MySagePay account. Then, select which emails you want to send and specify vendor email addresses.
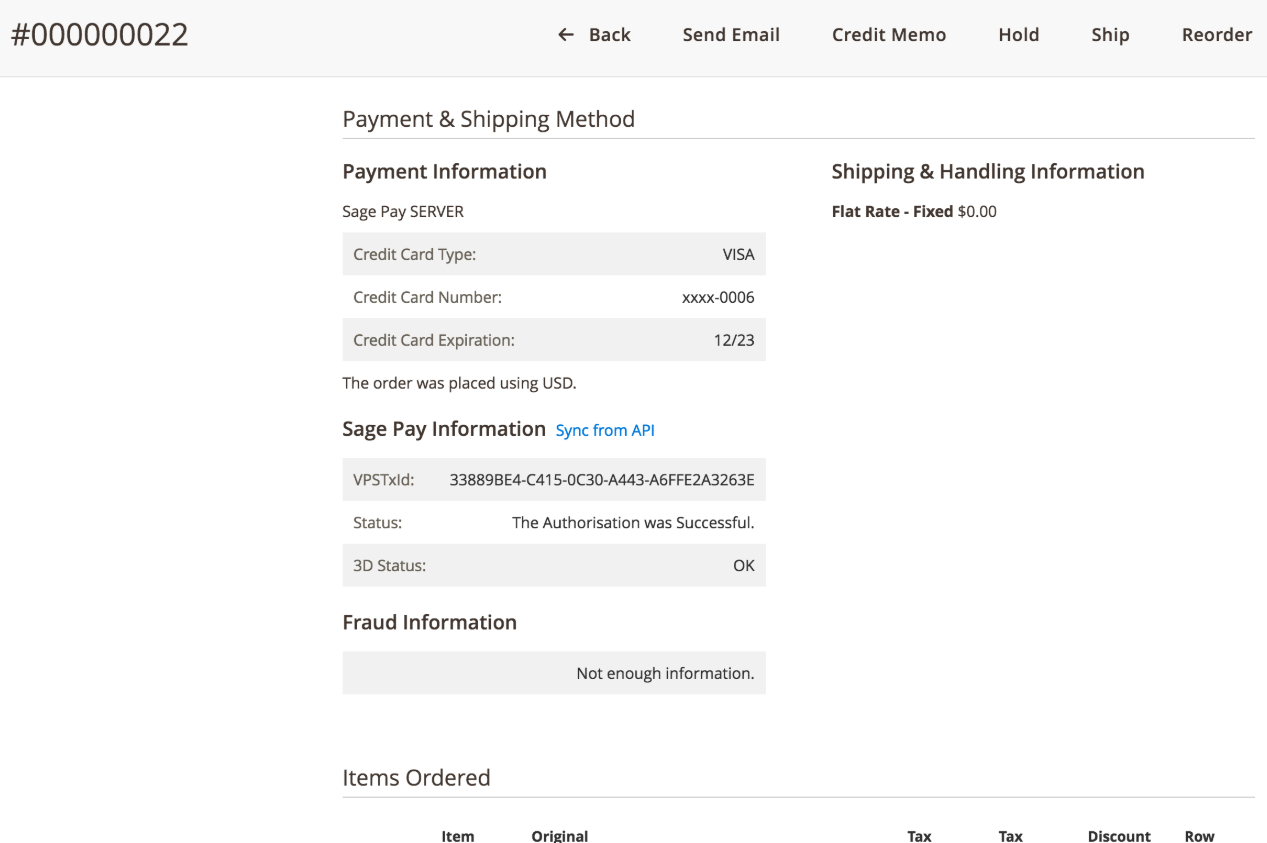
If you want to check payment details of the orders placed with Sage Pay, go to Sales → Orders and click on the necessary order in the grid.
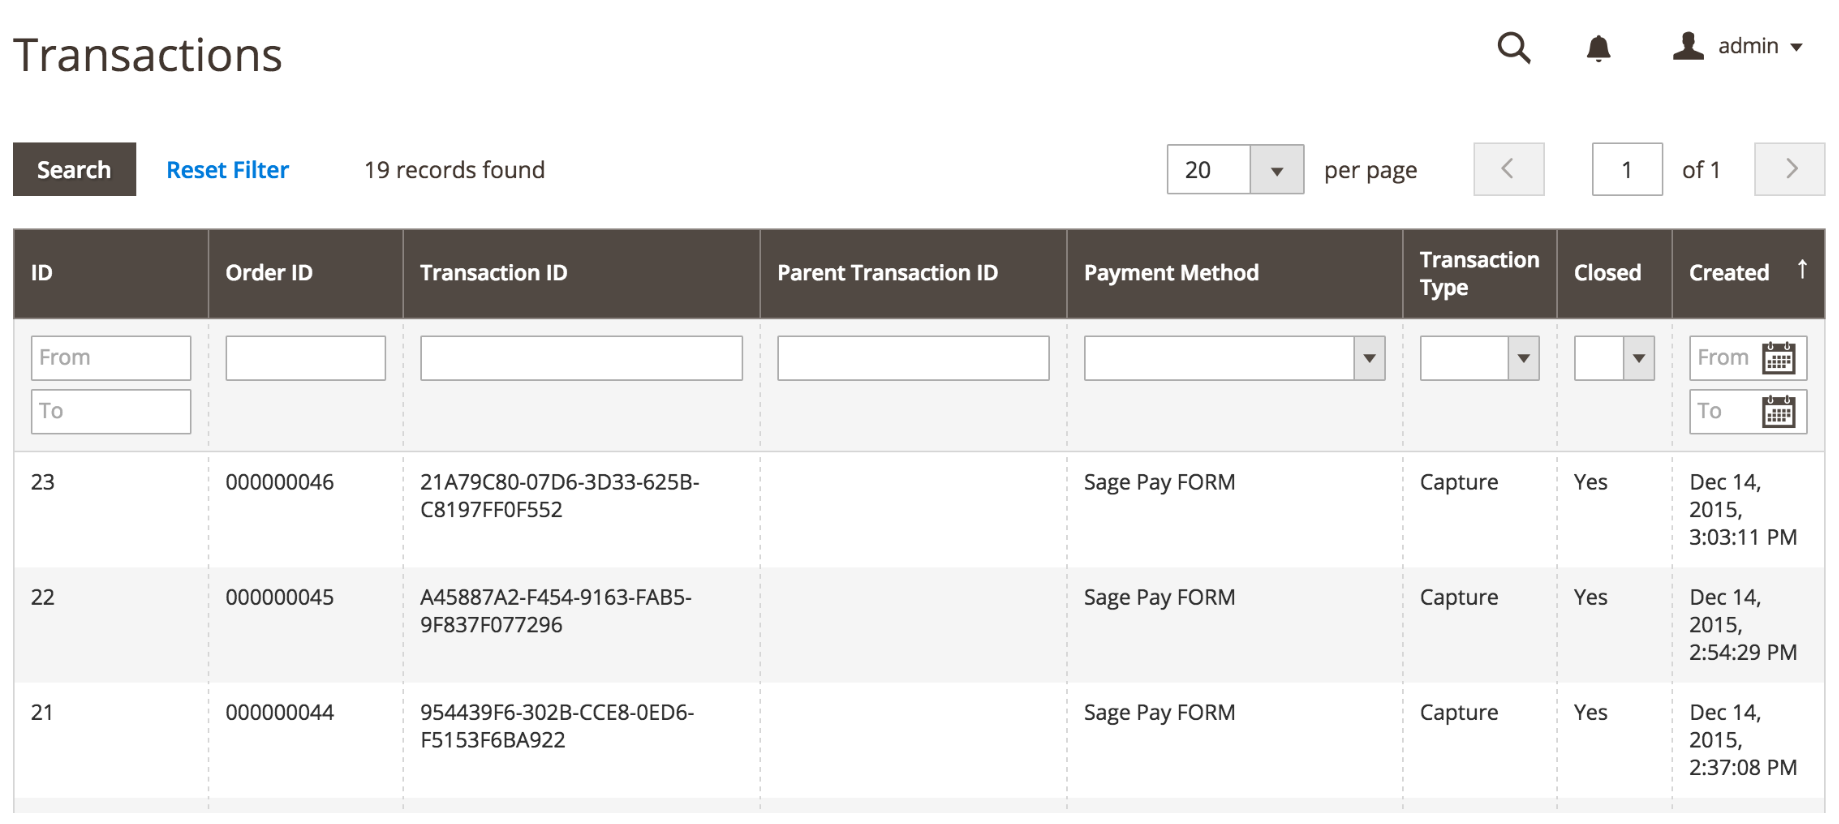
You can view details of each payment transaction processed using Sage Pay method in the Transactions tab on the order view page.
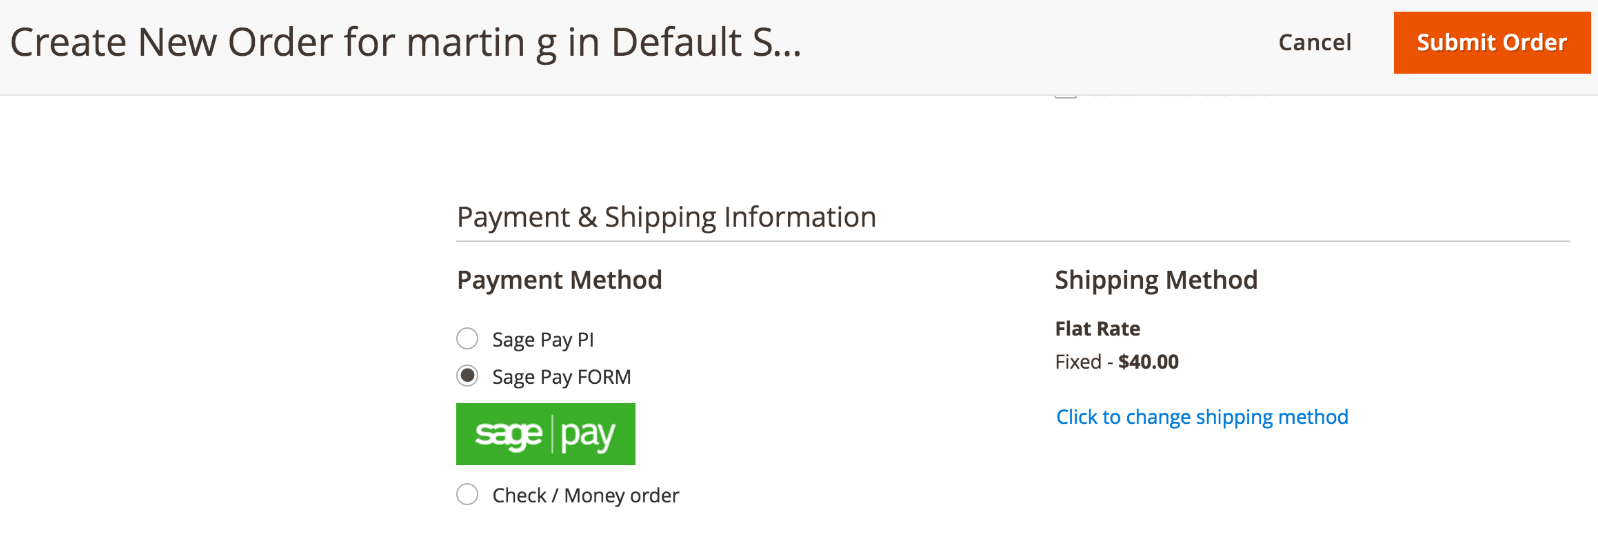
When creating an order in the backend, admin users can select one of the Sage Pay methods for payment processing.
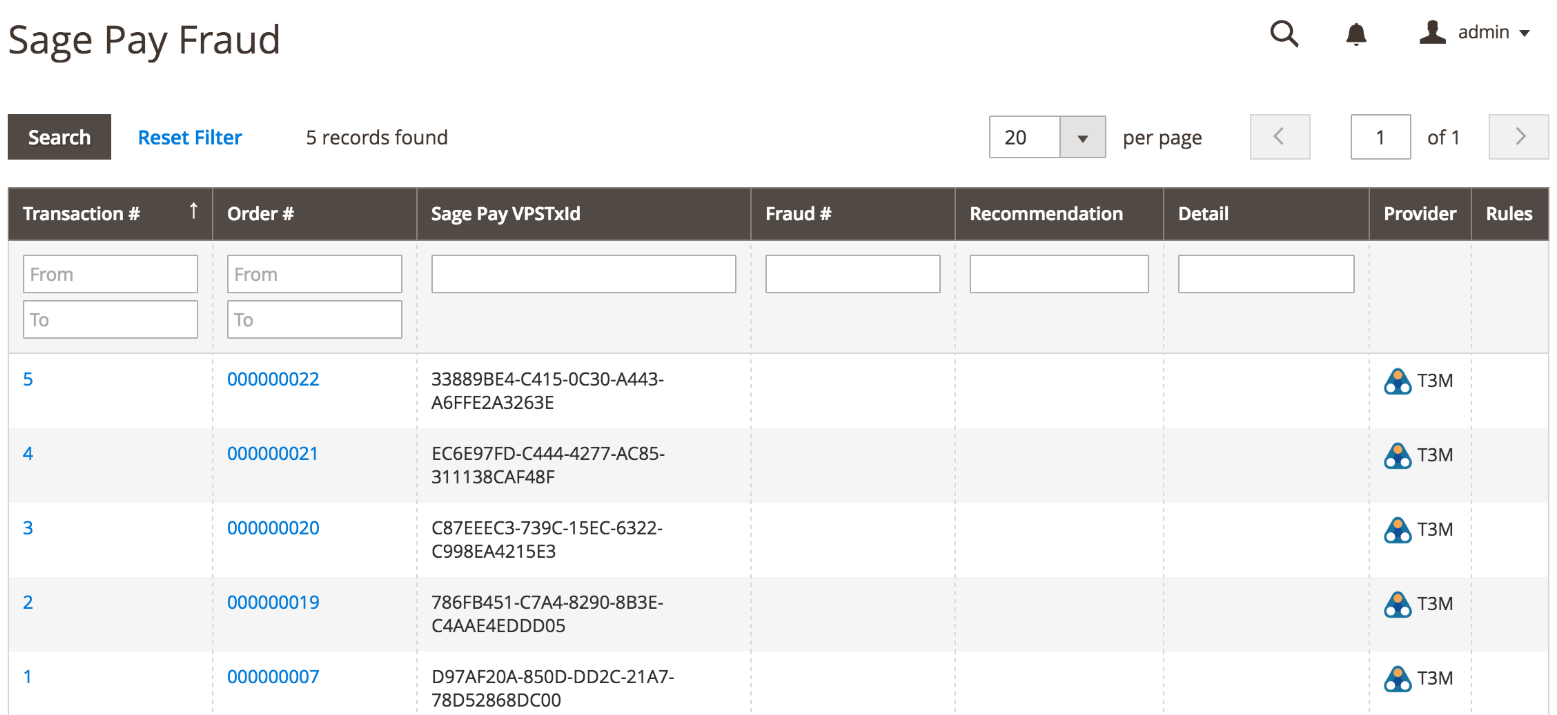
Sage Pay Suite PRO allows Magento admins to control fraud risks using the Sage Pay Fraud report.
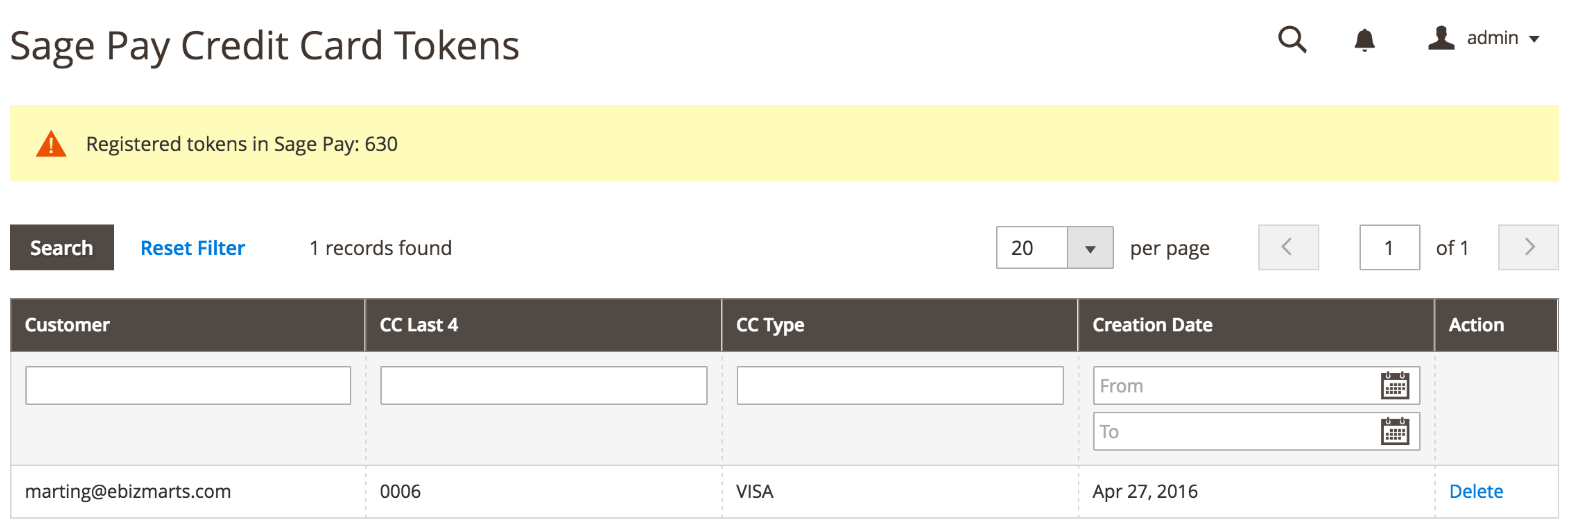
Another report provided by the module allows managing created credit card tokens.
To learn more about the module’s configuration, check out the .
Frontend
Depending on which type of integration with the Sage Pay gateway you enable in the backend, customers will have a different experience on the checkout page.
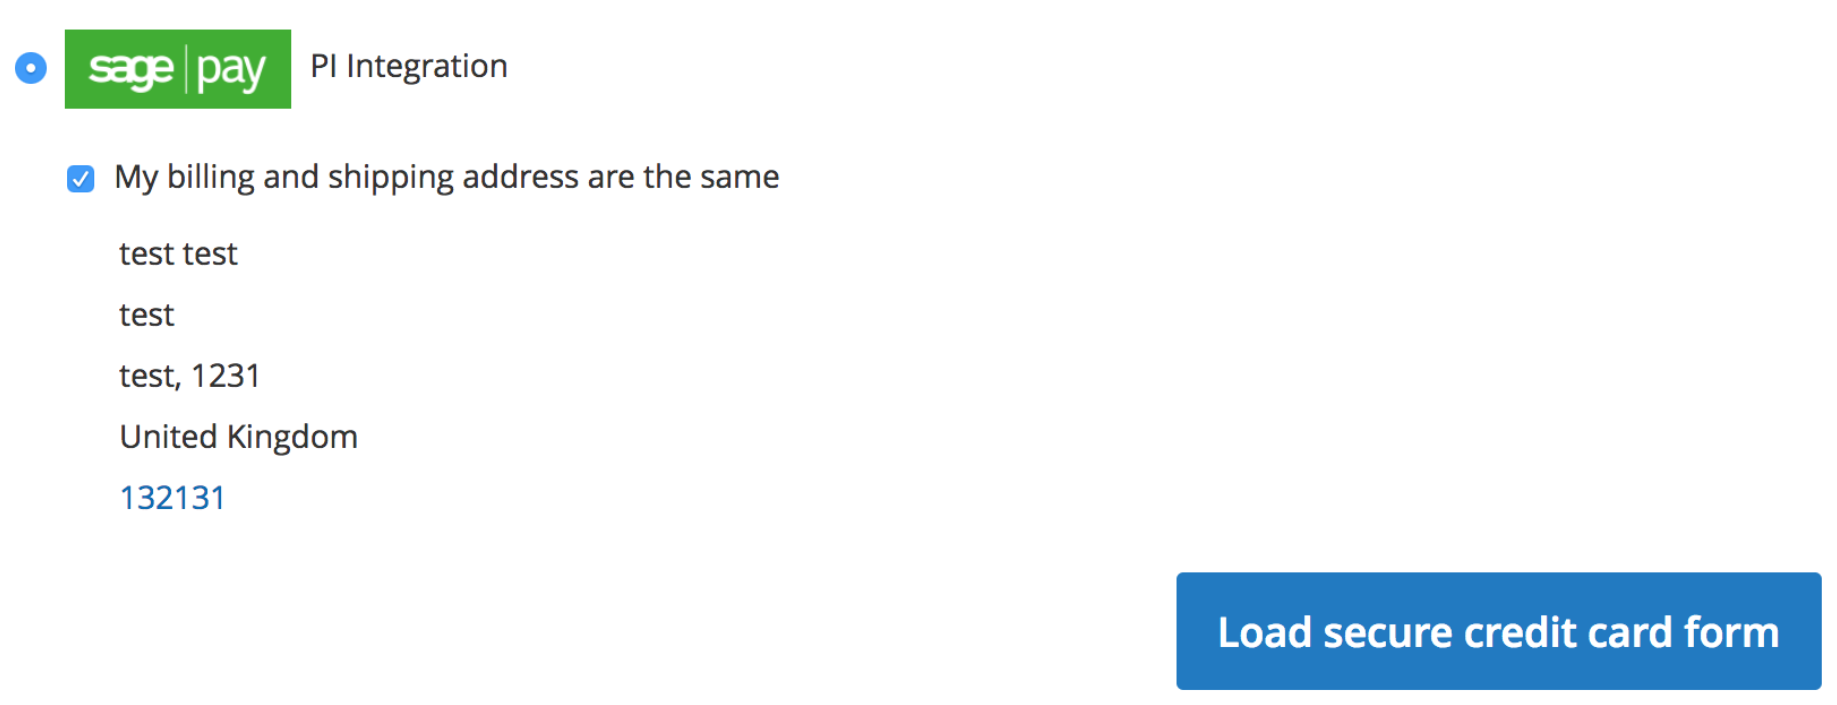
In case of direct integration, it will look like this:
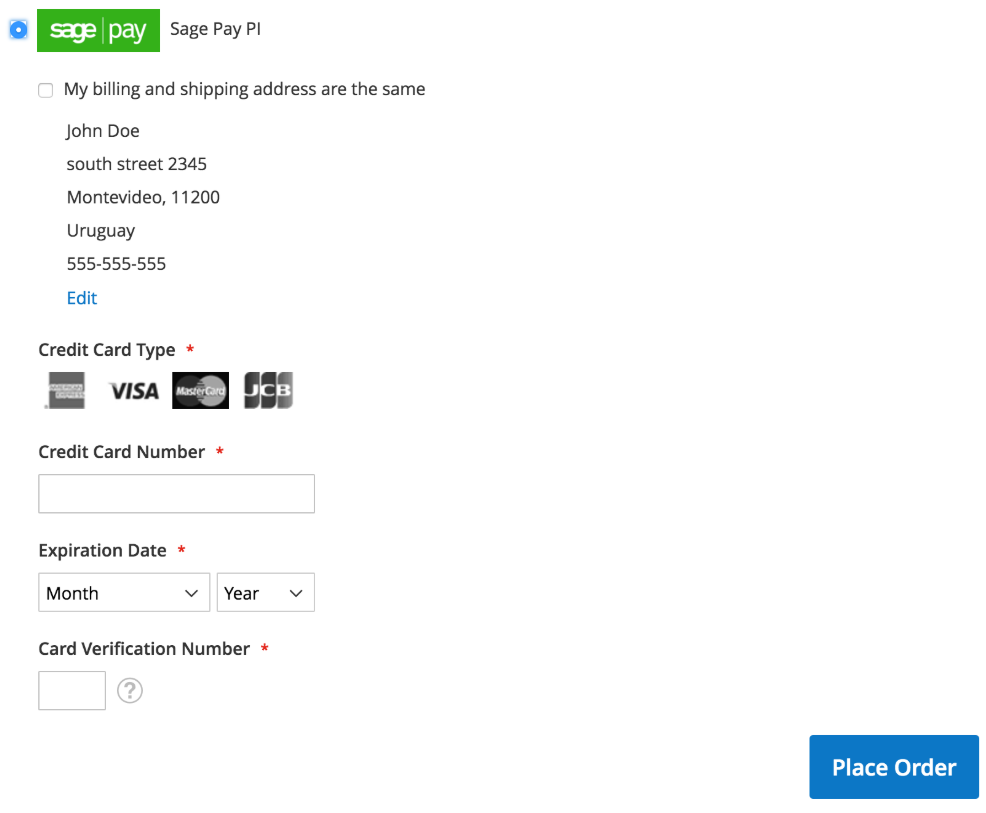
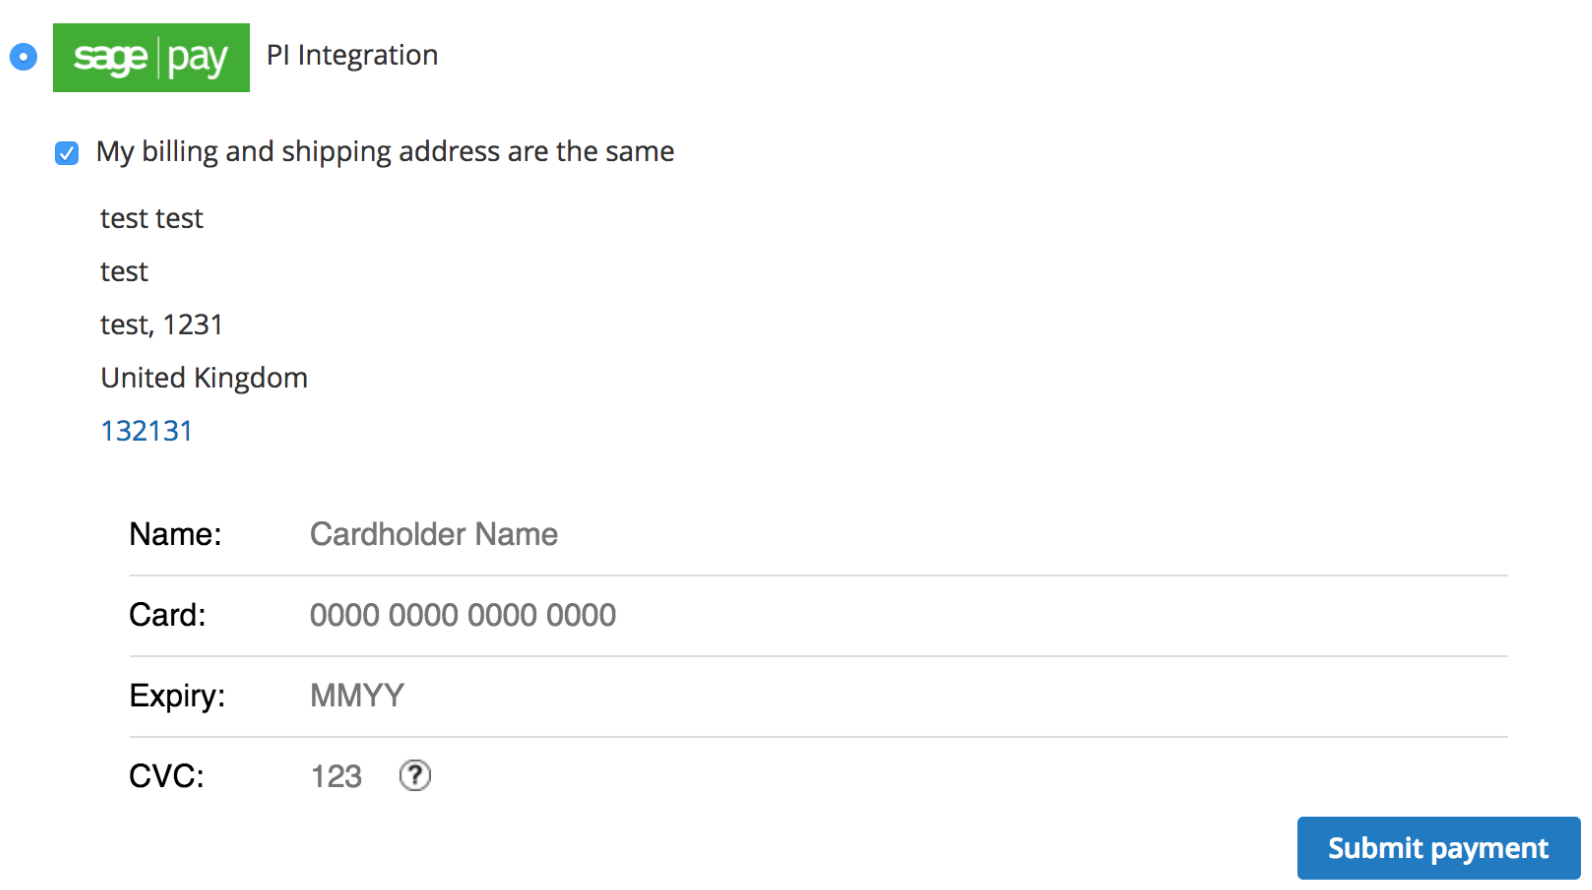
If you enable the drop-in interface, customers will do the checkout in two steps – the first to load the iFrame form:
The second – to place an order:
In case of using Sage Pay Form, it will redirect a shopper to the Sage Pay website.
Example of the Sage Pay PayPal integration:

On the payment form, customers can select one of the credit cards saved in their account or add a new card.
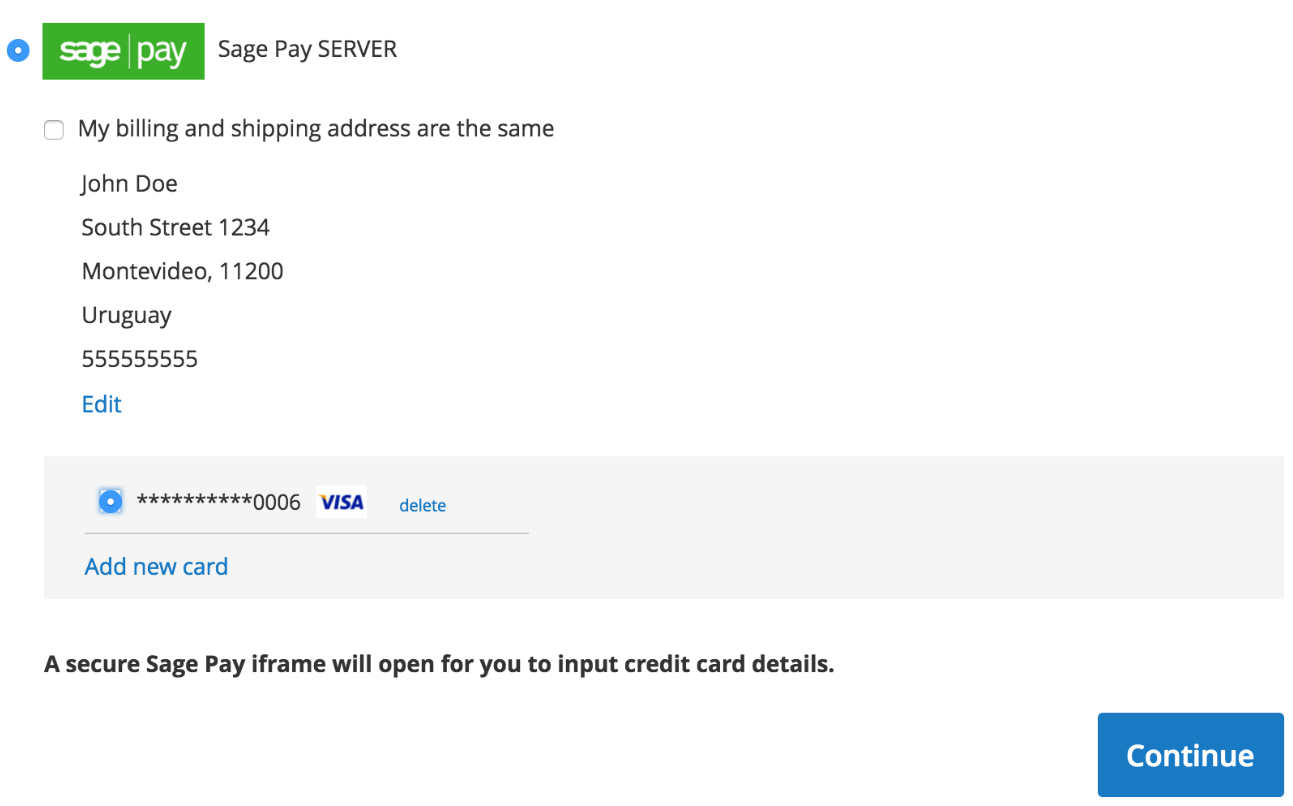
The Magento Sage Pay Suite module adds a new tab to the customers account area – My Saved Credit Cards. Here, registered customers can view details if their saved cards information and delete them.

Final Words
Sage Pay Suite Pro for Magento 2 provides online merchants with secure and reliable payment solution. Payment methods available with Sage Pay extend customers’ payment options and increase their trust due to safe payment transactions. Customized payment pages and the possibility to store credit cards makes checkout experience faster and more user-friendly. From the admin perspective, the module’s backend interface offers flexible settings and all necessary management tools for efficient orders and transactions processing.
You can buy the M2 extension for the price of $348.60 with free installation service and one-year updates included.


