MageArray Multi Vendor Marketplace Magento 2 Extension
When it comes to a multi vendor marketplace on the basis of our favorite ecommerce platform, people are often looking for the Magento 2 marketplace Webkul module. Although it is a reliable tool, there are some alternative solution, and below we describe one of them. Meet the MageArray Magento 2 Multi Vendor Marketplace extension. Below, you will find its core features as well as backend and frontend tutorials.

Table of contents
Features
- Magento 2 multi vendor marketplace;
- Support for multiple vendors;
- Full control over vendors:
- products they sell,
- commissions they pay,
- orders they have;
- Intuitive backend for both admins and vendors;
- Customer-friendly frontend.
After installing the Magento 2 marketplace extension by MageArray, you will easily turn your ecommerce storefront into a robust marketplace that supports multiple vendors. Each seller gets his/her own page with products, detailed brand information, and social media links. There is a separate sign up with microstore URL. All information and products can be managed by a vendor. Besides, the Magento 2 multi vendor extension allows to create a media gallery, add different attributes, and use multiple categories.
As a Magento 2 administrator, you get a total control over vendors that work on your marketplace approving new accounts and working with other details. Even product approval is possible with the MageArray Multi Vendor Marketplace Magento 2 module.
It is also necessary to tell a few words about a vendor dashboard. It displays lots of various important information, including sales stats, latest order details, 5 most viewed products, as well as low inventory products, etc.
Besides vendors get the ability to import/export stock data and products, apply mass quantity update, and view transactions. Note that comments are visible to sellers on ‘My Reviews’ page. Both registered buyers and guests can leave them. There is also a notification system that informs vendors about transactions and new orders.
Let’s explore the backend section of the Magento 2 marketplace module by MageArray to get better understanding of the extension’s functionality.
Backend
Admin Login
Configuration
Go to Stores -> Settings -> Configuration -> MageArray Extensions -> Marketplace. The page is divided into 7 sections: General Options, Vendor Signup, Approve Vendor, Vendor Products Page, Product Options, Vendor Order, and Seller Page.
In ‘General Options’, you can only select a sender email address to send email notifications to vendors/sellers.

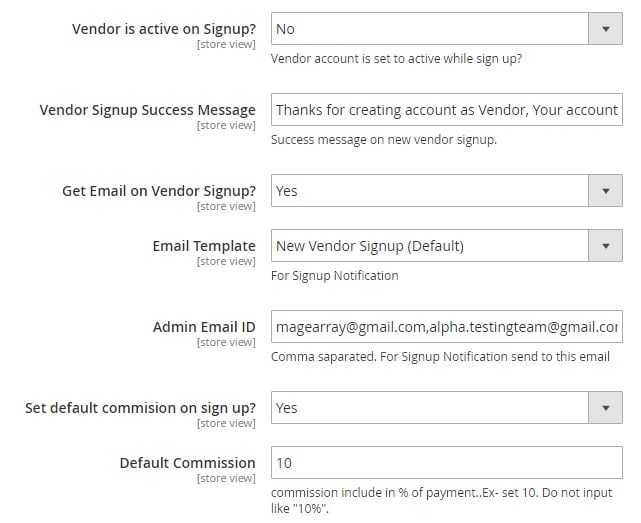
As for ‘Vendor Signup’, this section contains more options. Here, you can make vendor account active on signup. If you want to approve vendors before allowing them to sell on your Magento 2 multi vendor marketplace, disable this option.
Next, create a vendor signup success message. It’s a good idea to inform a seller about successful signup and provide him/her with further information about admin approval.
Next, enable admin email notifications for new vendor signup. Choose a template and specify admin email addresses to send notifications to.
Besides, you can set a default commission on signup. Set the percent of payments you’d like to charge.
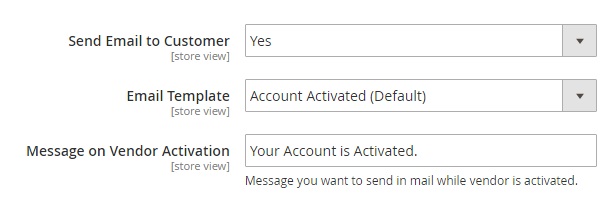
In ‘Approve Vendor’, enable vendor notifications, choose an email template, and type a message. Thus, the Magento marketplace multi vendor module by MageArray allows you to inform sellers about account activation as fast as possible.
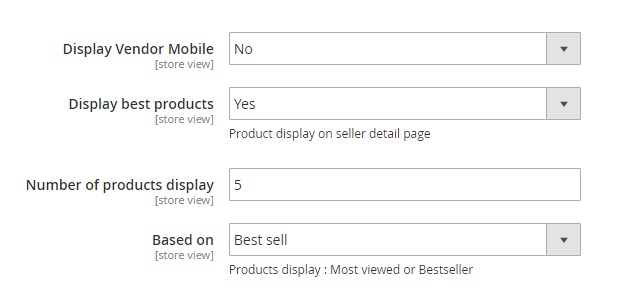
The ‘Vendor Products Page’ settings allow you to show/hide vendor mobile as well as best products on a seller detail page. It is possible to specify the quantity of displayed products and choose their display mode: most viewed or bestseller.
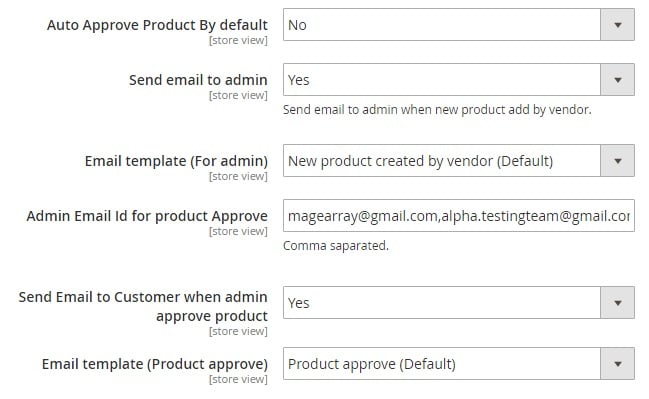
In ‘Product Options’, the Magento marketplace extension allows you to enable/disable automated product approval. If the feature is enabled, vendors can easily add new products. If it is disabled, products appear on a vendor’s page only after the administrator approves them. In any case, it is possible to notify admins via email when new product is added. Select a template and specify addresses.
Besides, the MageArray Multi Vendor Marketplace Magento 2 extension provides the ability to enable vendor notifications. Set the appropriate option to ‘Yes’ and choose a template.
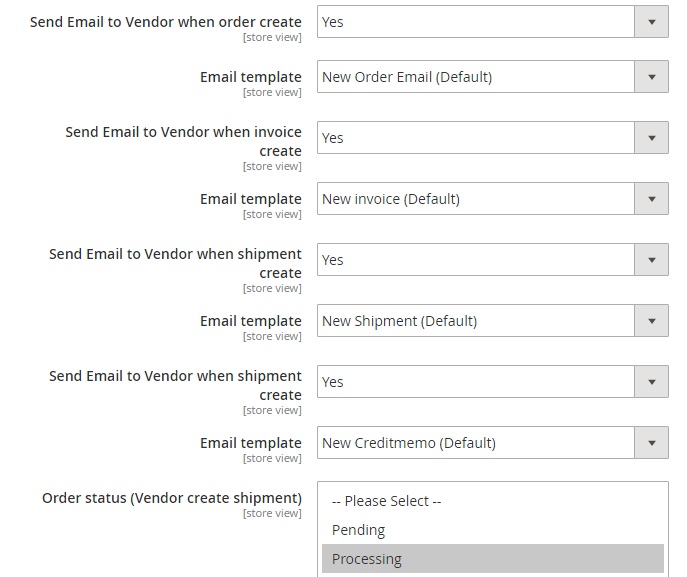
In ‘Vendor Order’, enable more notifications and choose email templates for them. The section allows to inform sellers about new order, invoice, shipment, credit memo, and payment transaction. You can select a template for each notification type. Besides, it is possible to select an order status to create a new shipment.
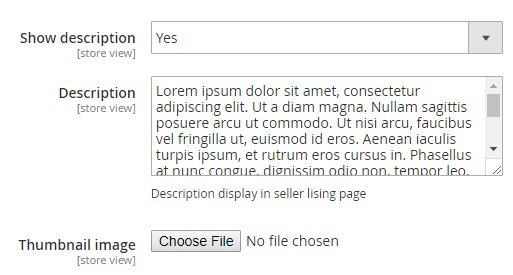
And in ‘Seller Page’ settings, create and activate a description and upload an image.
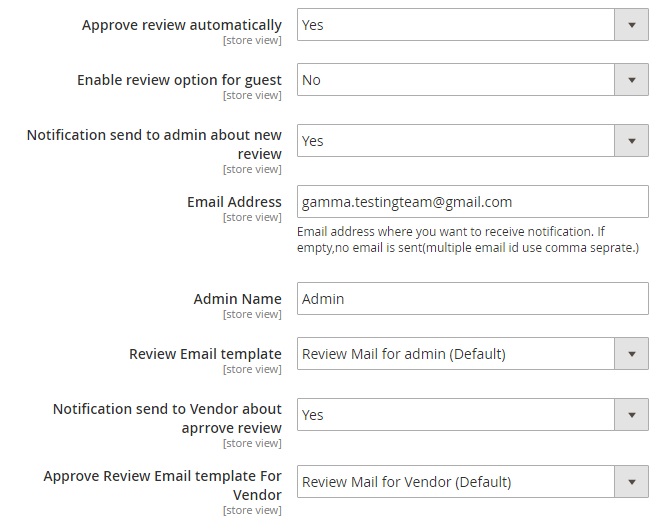
There is also a separate tab for ‘Seller Review’ settings. It allows to approve reviews automatically, enable/disable reviews for guest customers, and configure email notifications for both admins and customers.
Now, the MageArray Magento 2 Multi Vendor Marketplace Extension is configured, so let’s proceed to other sections of the module.
Dashboard
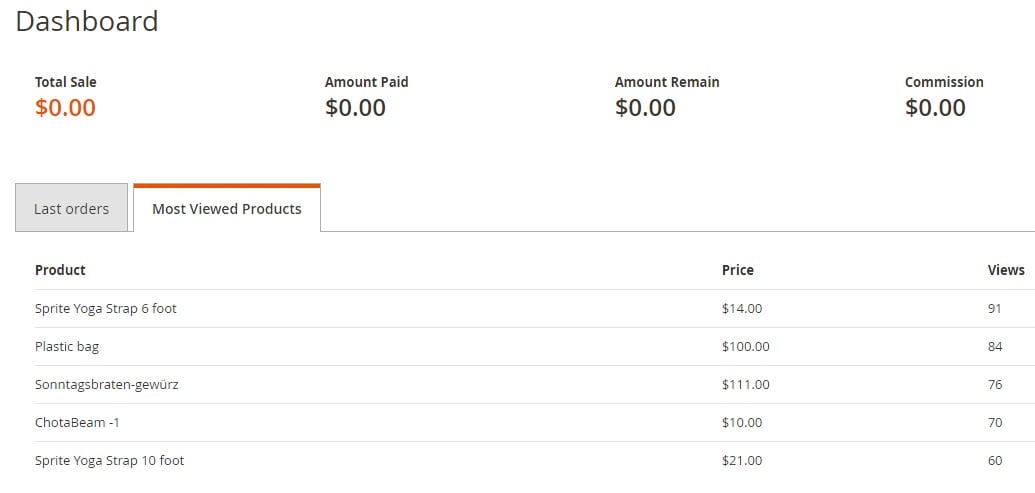
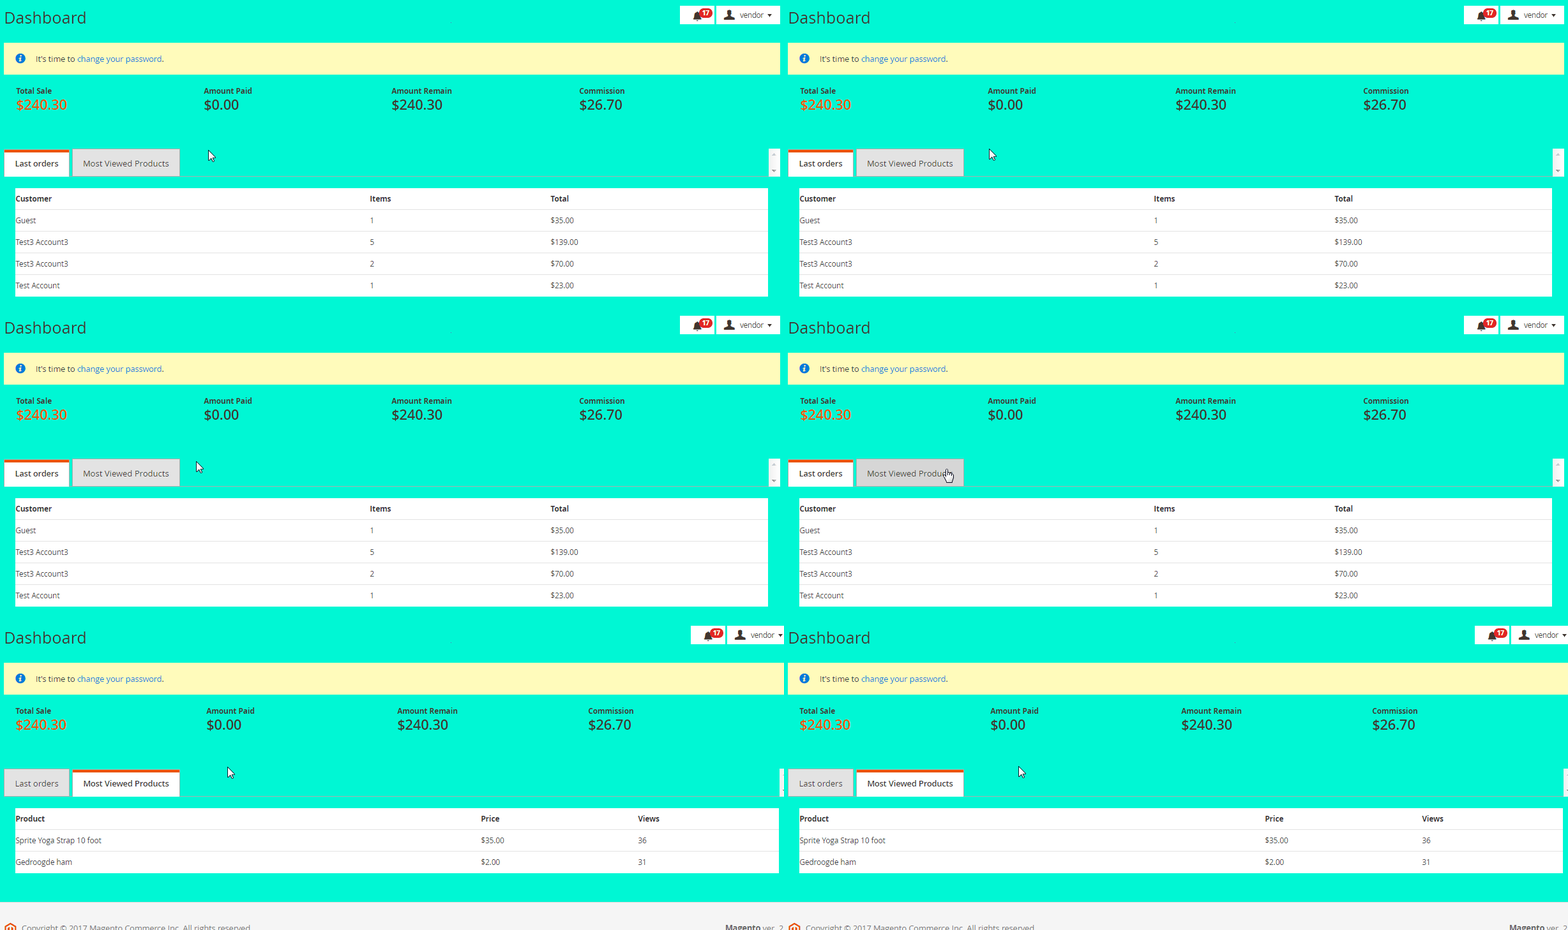
There is a dashboard for vendors under Marketplace -> Dashboard. It consists of two tabs: Last Orders and Most Viewed Products.
The first tab shows customers, items, and total sale for each customer. The second tab displays most viewed products along with their prices and views count. In case of both tabs, the dashboard page also shows such parameters as Total Sale, Amount Paid, Amount Remain, and Commission.
Manage Vendors
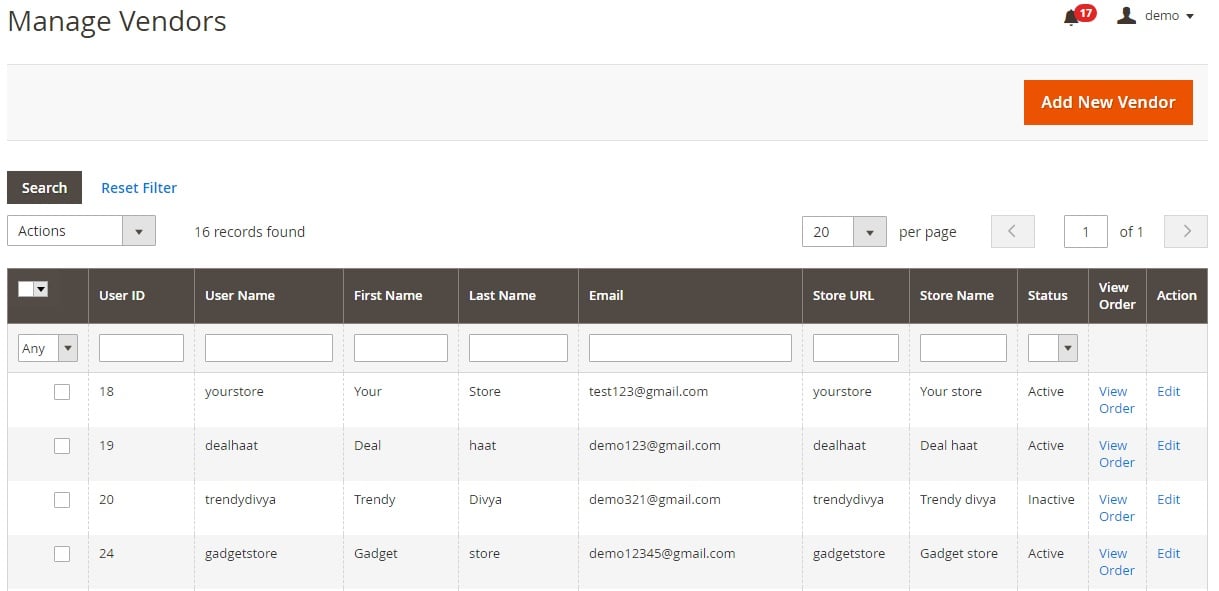
In the ‘Manage Vendors’ section, you can view and manage all existing vendors/sellers. The Magento 2 Multi Vendor Marketplace module by MageArray provides a grid that shows vendor ID, user name, first/last name, email, store URL and name, and status (active or inactive). Note that it is possible to view vendor related orders from the ‘View Order’ column – simply hit a link in a corresponding row. The same is about backend editing of vendor data. The appropriate link is available in the ‘Action’ column.
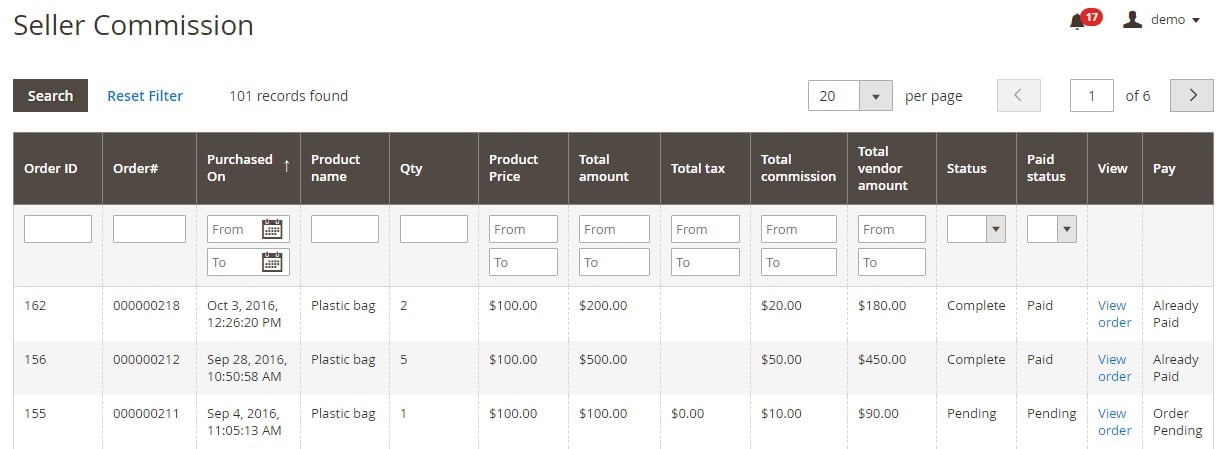
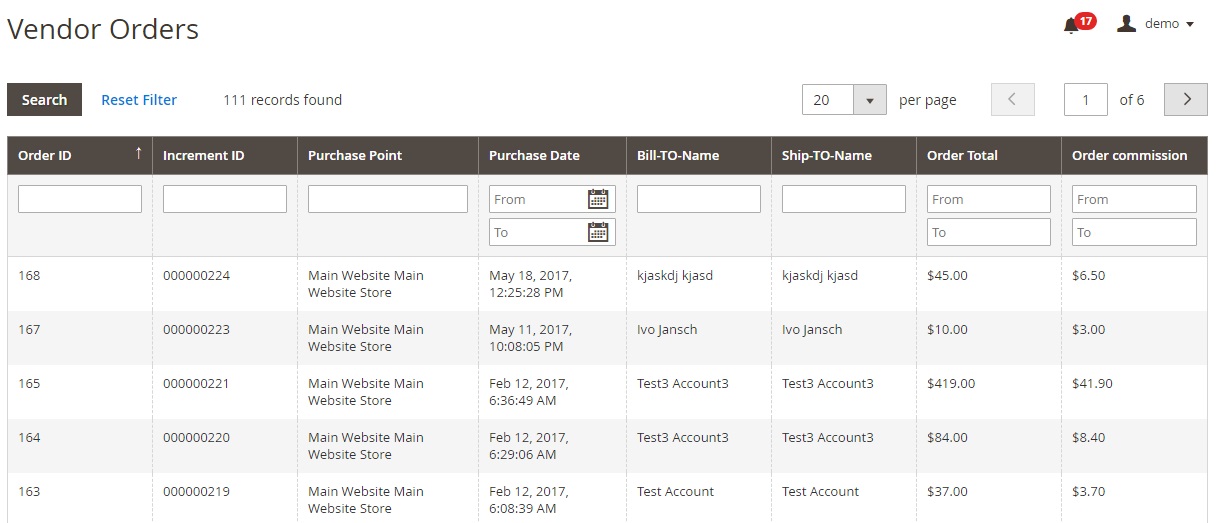
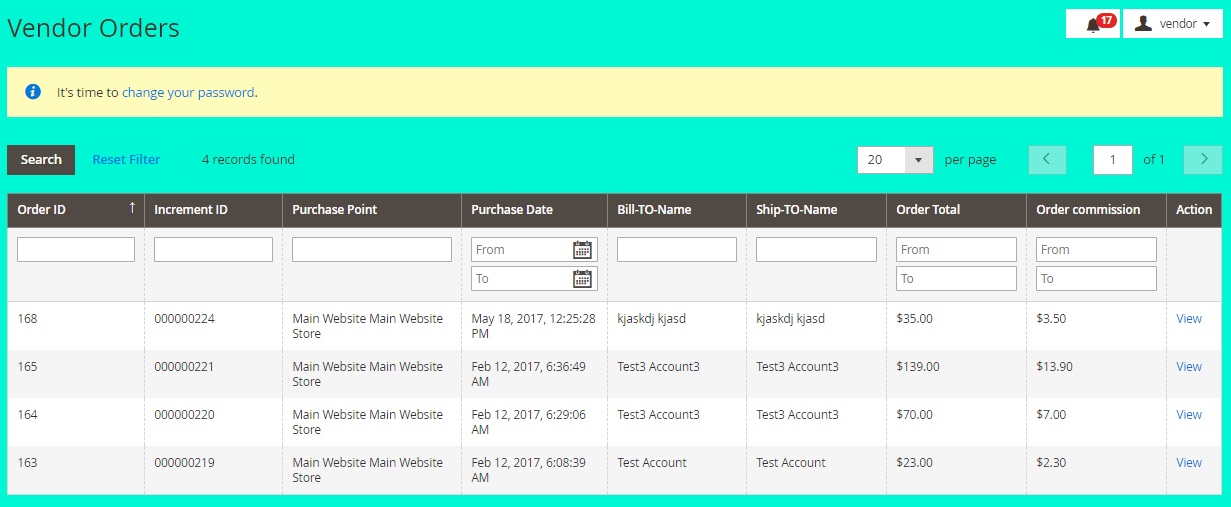
This is how a grid with vendor-related orders looks (you can view seller commission here):
And while editing a vendor account, you have to work with three tabs: Vendor Information, Bank Account Details, and Banner Images.
The first one allows to change store name and title, add a description, upload a company logo, and type a contact number. Other fields include username, password, first/last name, email, commission (can be set for each vendor individually), store URL, and status. Set ‘Status’ to ‘Active’ in order to approve vendor.
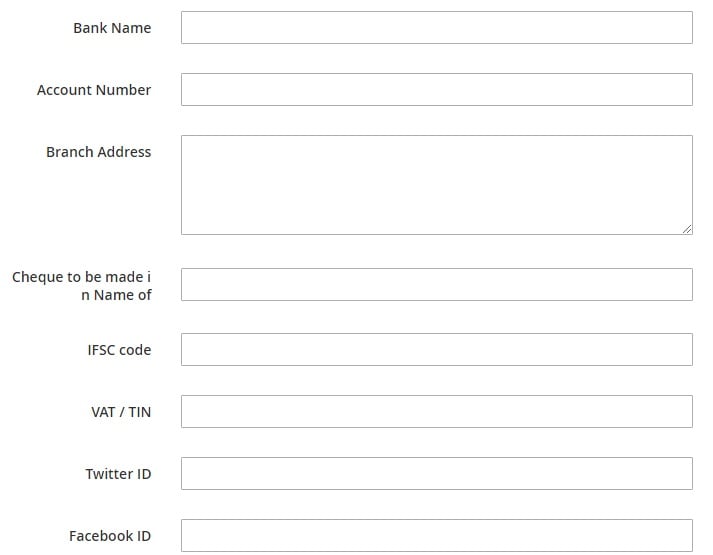
Bank account details include bank name, account number, branch address, cheque details, IFCS code, VAT/TIN, and Twitter and Facebook IDs.
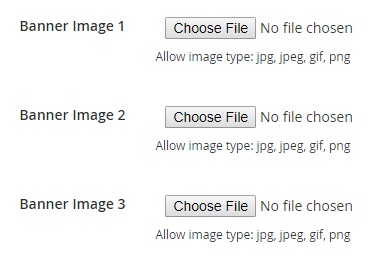
The ‘Banner Images’ tab allows you to upload up to three images of the following formats: jpg, jpeg, gif, and png.
Vendor Orders
The ‘Vendor Orders’ grid shows order ID, increment ID, purchase point and date, bill-to-name and ship-to-name, order total, and order commission.
Vendor Transactions
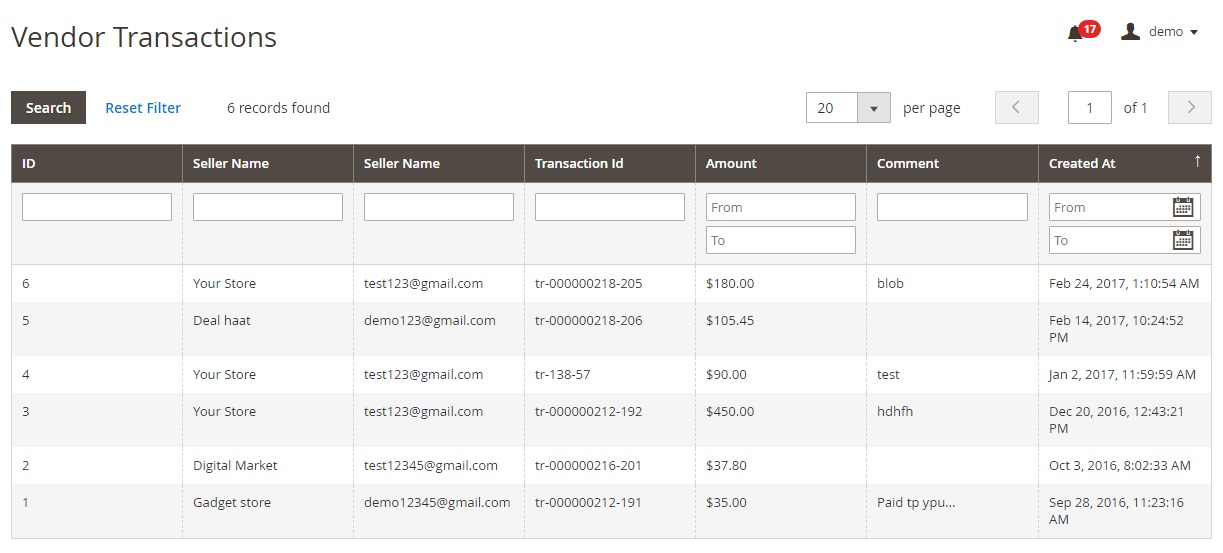
MageArray Multi Vendor Marketplace for Magento 2 has a grid that contains vendor transactions. As a backend administrator, you can view seller name and email, transaction ID, amount, comments, and time of creation.
Import Product Images
Multiple product images can be uploaded from the backend section simultaneously:

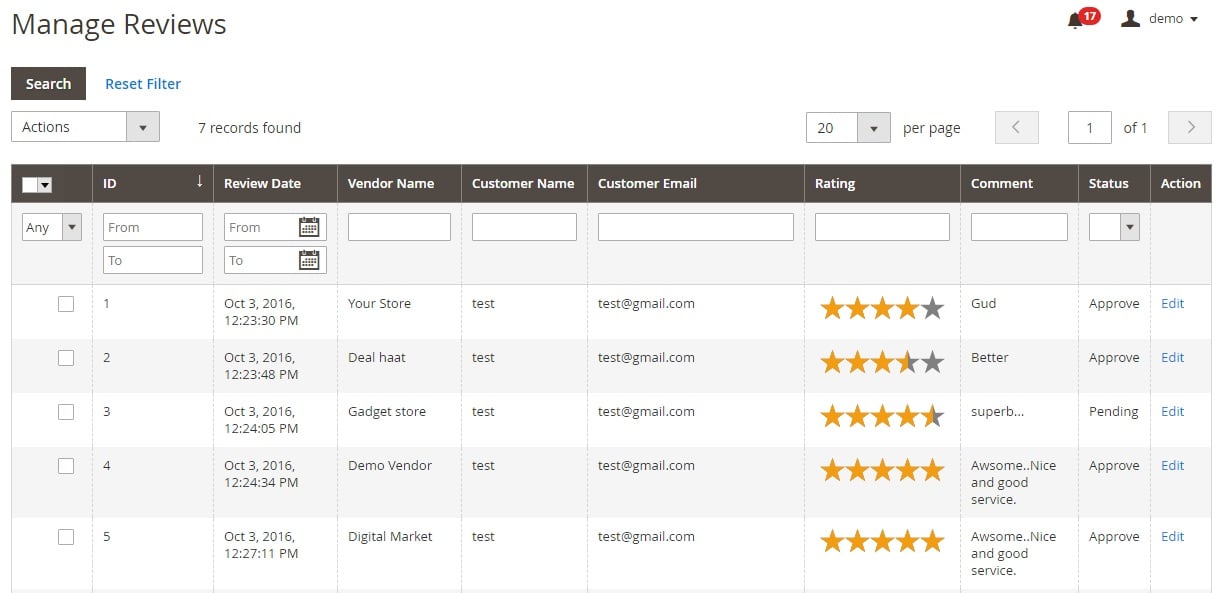
Manage Reviews
There is also a grid with reviews related to all customers. With MageArray Magento 2 Multi Vendor Marketplace extension, you can view the following information right from the grid: ID, review date, vendor name, customer name and email, rating, comment, and status (approved or pending). There is also the ‘Action’ column in the grid. It allows to edit each review manually from backend.
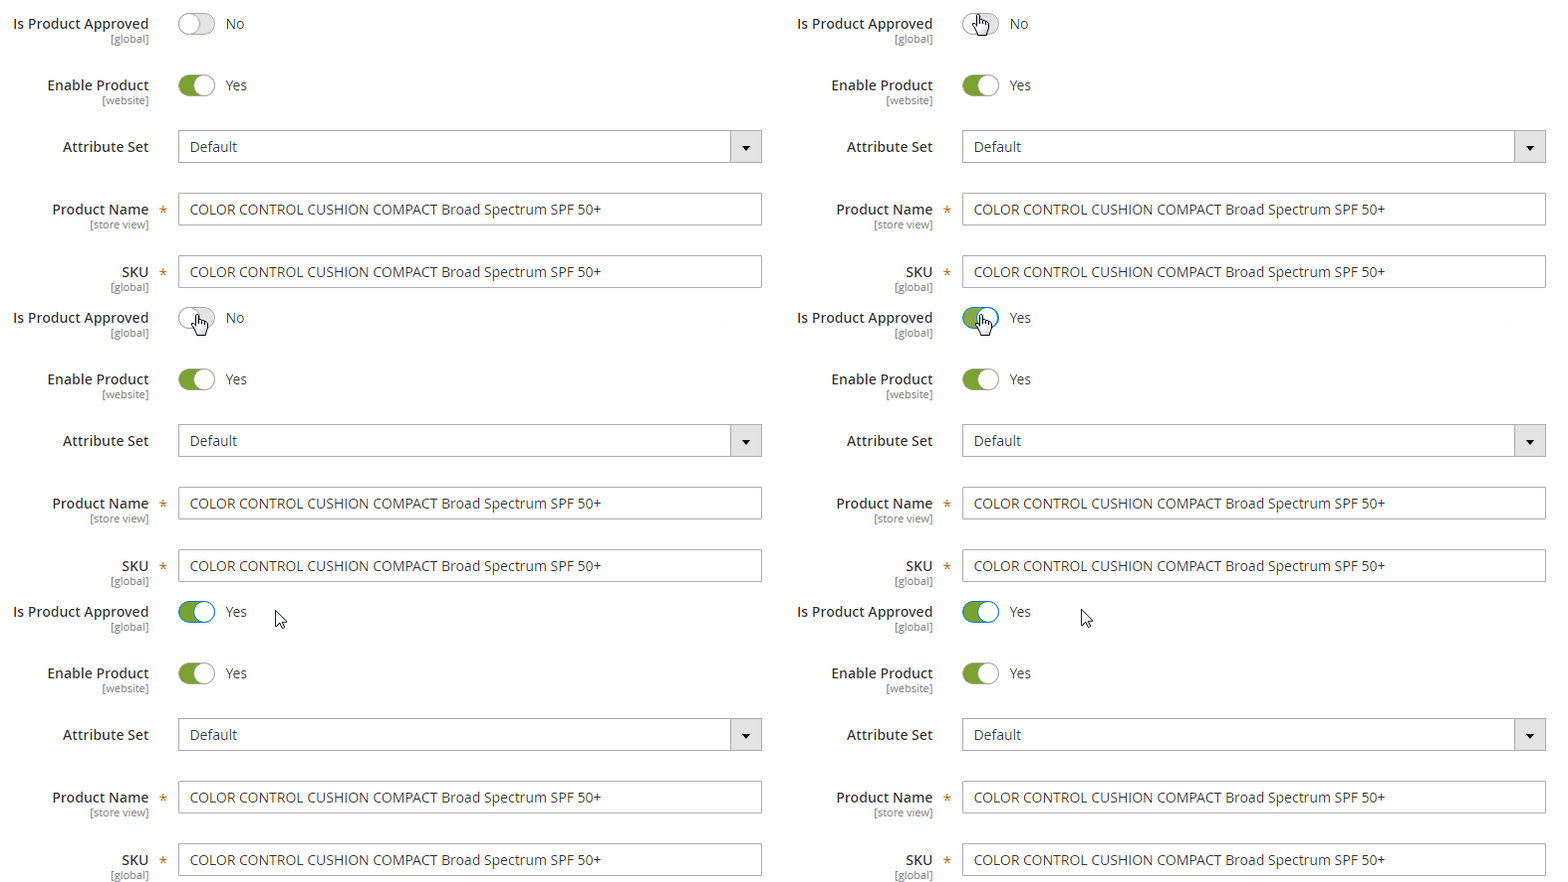
How to Approve a Product
To approve a product with the Magento 2 Multi Vendor Marketplace module by MageArray, go to Products -> Inventory -> Catalog, select a product that should be approved, and set ‘Is Product Approved’ to ‘Yes’. That’s all. You can also edit product details here.
Vendor Login
Product Import
Go to System -> Data Transfer -> Import. As a vendor, you can import product in bulk to your seller account here. Select entity type – it should be ‘Products’. Next, configure import behavior: add/update, replace, or delete. Next, you can stop the import process on errors or let it run skipping error entities. Besides, specify allowed error count and two separators: field and multiple values. Next, select a CSV file with product data and start import.
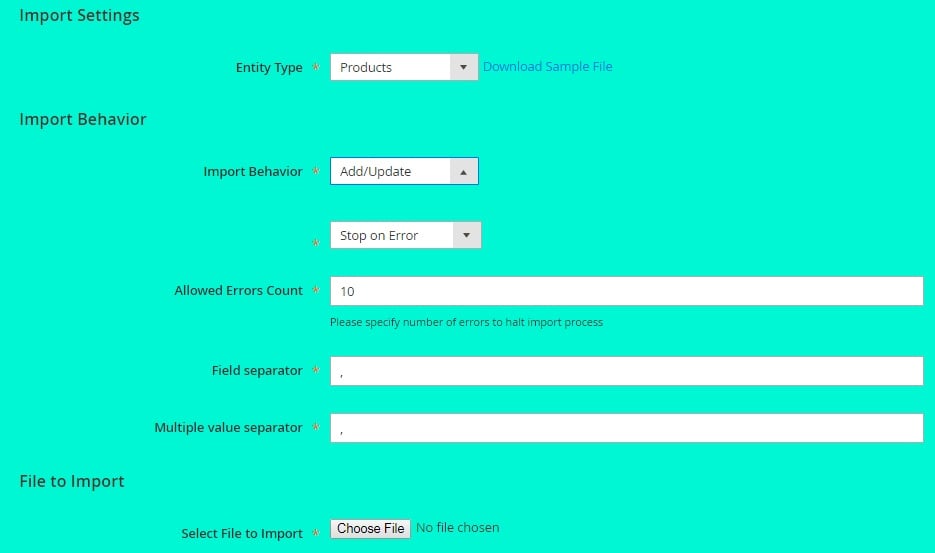
Image Import
Now, it is necessary to import images. Go to Marketplace -> Import product images. Here, it is possible to import multiple files in bulk. Supported formats are jpg, jpeg, gif, png.

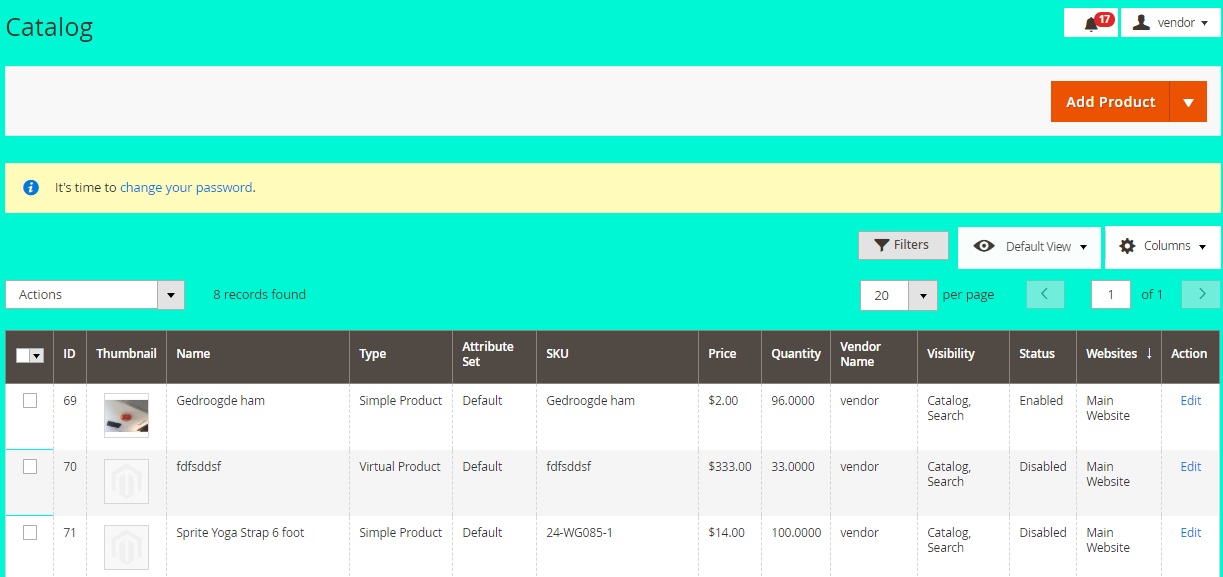
Alternatively, it is possible to add/edit products manually under Products -> Inventory -> Catalog -> Add Product:
Other Sections
Under Marketplace -> Dashboard, you can see the same dashboard as in the Admn section of this post. The data differs depending on the seller.
As for the ‘My Account’ section it is similar to ‘Manage Vendors’, but this time it contains only one seller. Here, a vendor can edit his/her personal data and view orders.

Besides, orders are available under Marketplace -> Vendor Orders.
All transactions are listed in a grid under Marketplace -> Vendor Transactions.

There is also a section with vendor-related customer reviews.

Now, when you know all backend nuances of the MageArray Multi Vendor Marketplace Magento 2 extension, we’d like to draw your attention to the frontend appearance of the module.
Frontend
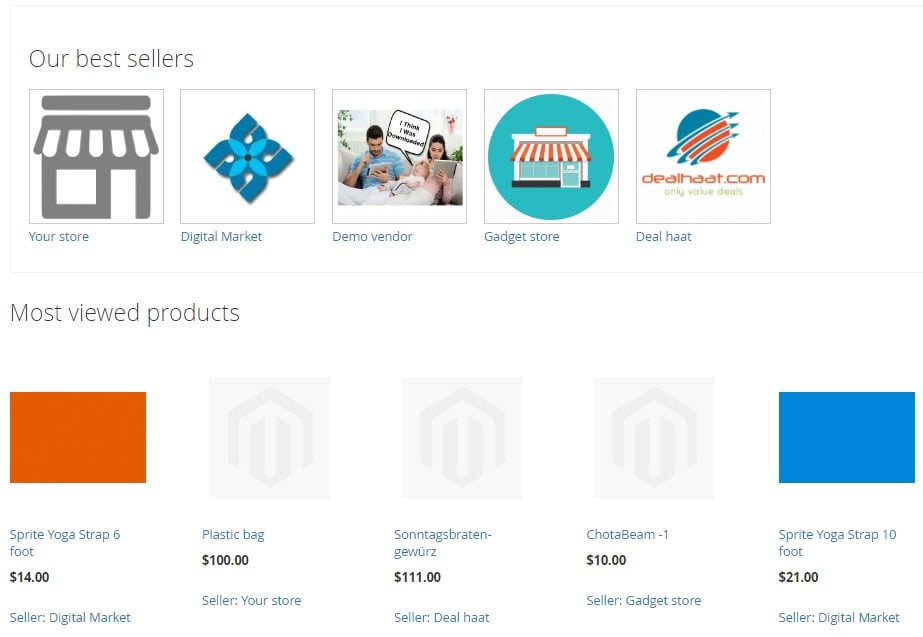
The homepage of the MageArray-based marketplace displays best selling vendors and most viewed products:
A vendor page has the following appearance:
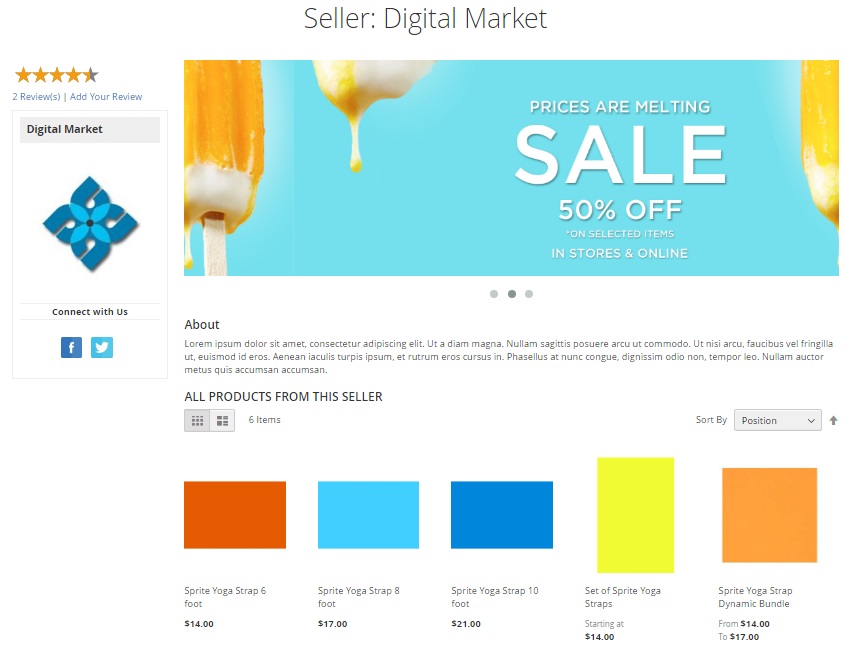
The page contains reviews and rating, seller’s logo and social media contacts on the left.

The major part of the page displays vendor name, banner-slider, and description.

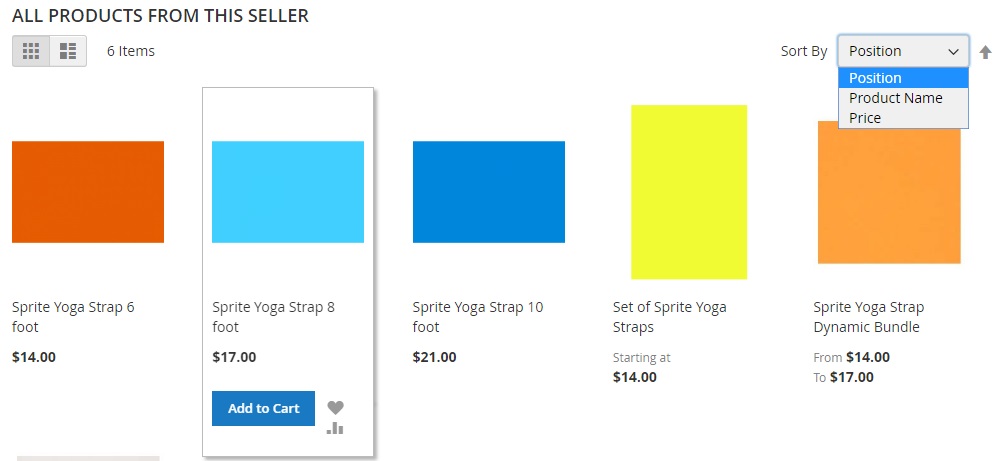
All products from the seller are situated below. You can sort them by position, name, or price as well as switch between grid and column layout. Hover over a product, and three additional buttons will be displayed: Add to cart/wish list/compare.
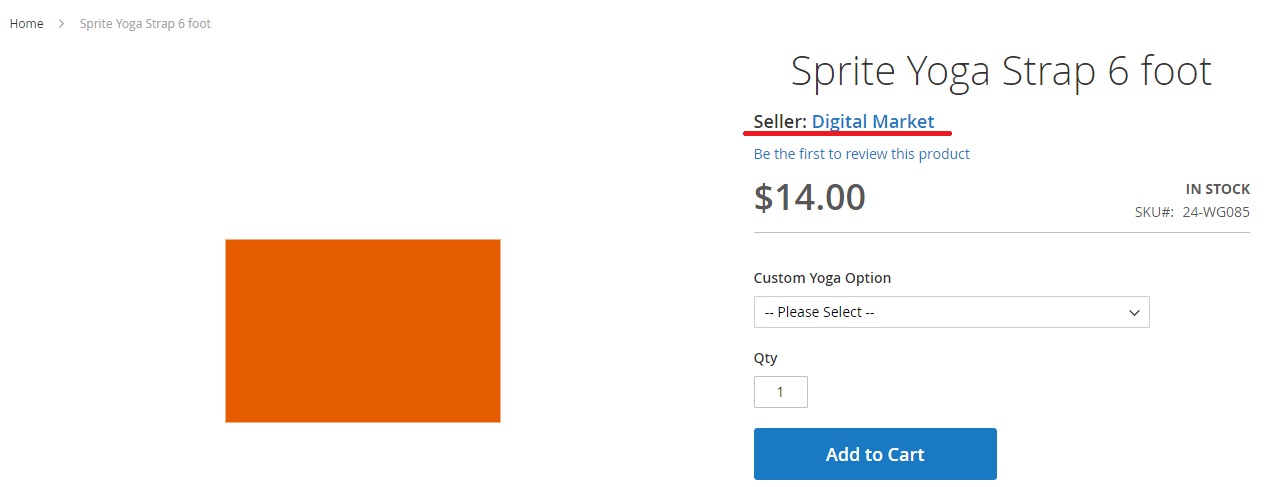
A product page always displays a seller name and a link to the appropriate page:
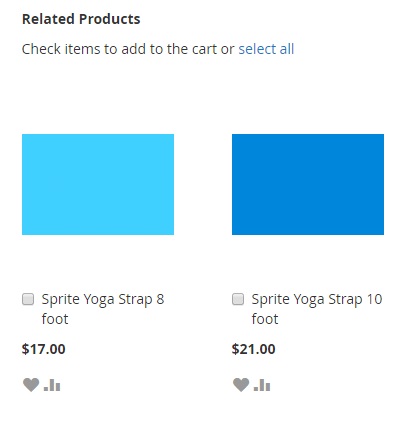
Besides, there is a section with related products. Note that it contains items from the same vendor whose product you are looking at.
As for customer reviews, their section looks as follows:

As a seller, you can leave your replies. If unregistered customers are not allowed to leave comments, the following message is displayed: ‘You have to login to review seller’.
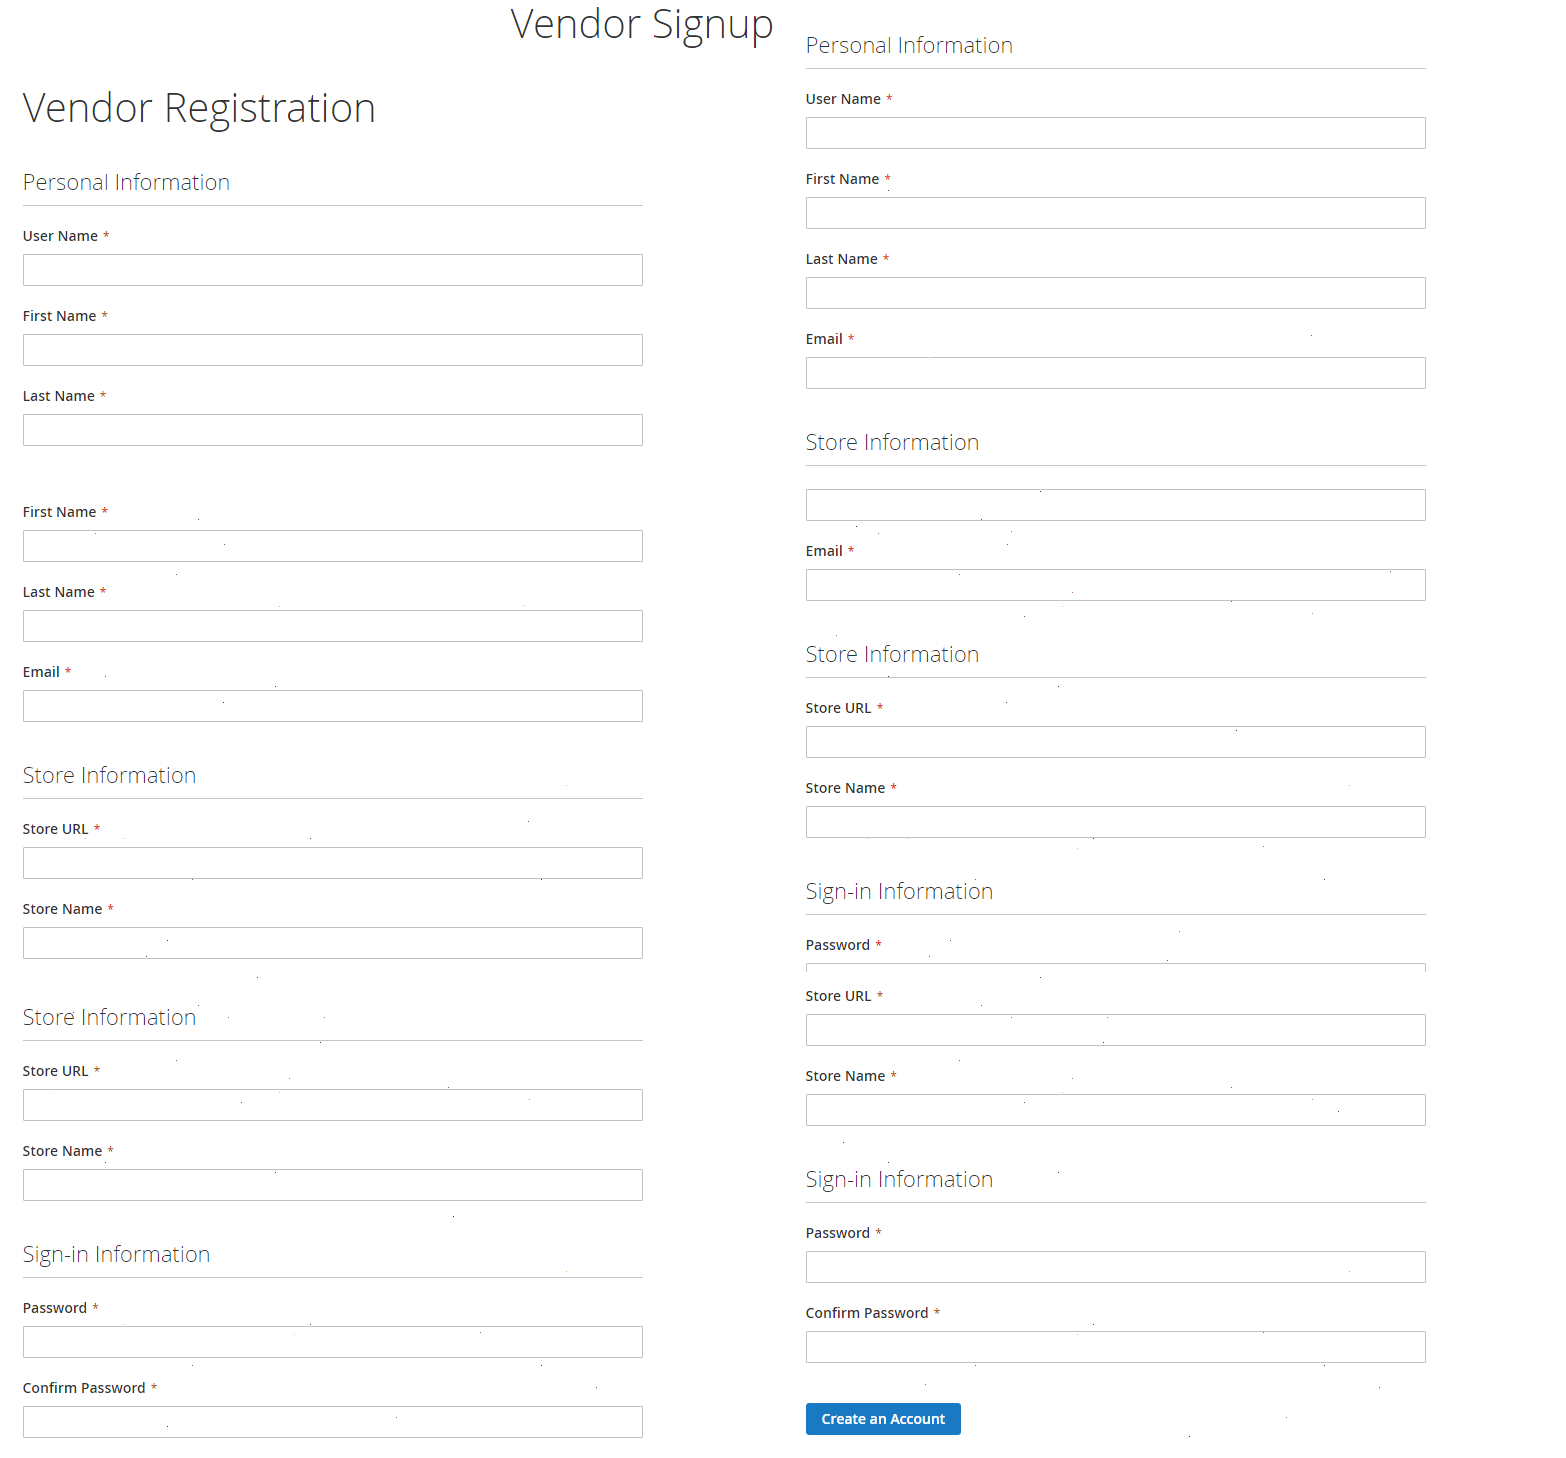
Pay attention to the header, since it includes one additional link: Vendor Signup. Buyers can easily register as customers on a multi vendor marketplace. At the same time, sellers get their own way to create an account.

And the vendor signup form:
Final Words
The MageArray Multi Vendor Marketplace Magento 2 extension is a robust tool with user-friendly setting and intuitive backend. With the help of the module, you can easily create a marketplace that will be highly appreciated by both vendors and buyers. The tool costs $799 which is a completely reasonable price for such a fully-featured solution. For further information, follow this link:


