
Magento 2 CMS Page Hierarchy: How to Manage Parent-Child Pages Like a Pro + Import & Export Guide
Need to structure static content in Magento 2? That’s where the Magento 2 CMS page hierarchy comes into play. Exclusive to Adobe Commerce, this feature allows you to organize CMS pages into a parent-child structure, improving both frontend navigation and backend content management. While Open Source users are limited to flat page lists, Commerce merchants can create nested page layouts, define pagination, and control how menus appear on the storefront — all through a visual hierarchy of nodes.
In the following guide, we explore the Magento 2 page hierarchy in detail. We start by introducing the concept and explaining how it fits into the overall CMS system. You’ll learn how the node-based structure works, how to create and assign pages to it, and how to control menu layouts and pagination behavior. From there, we shift to data management, showing you how to import and export the Magento 2 CMS page hierarchy using the Improved Import & Export extension. Since the default platform offers no native way to transfer this content type in bulk, we also outline the extension’s role in automating these tasks.
Whether you’re building a content-heavy site section or migrating page structures between stores, the Magento page hierarchy — combined with flexible import/export tools — gives you full control over how your content is organized and deployed.

Table of contents
- What Is Magento 2 CMS Page Hierarchy?
- How to Configure and Manage CMS Page Hierarchy in Magento 2
- Why Magento Doesn’t Support Hierarchy Import Out-of-the-Box
- How to Import & Export Magento 2 Page Hierarchy
- Final Words: Take Full Control of Magento 2 CMS Page Hierarchy
- Frequently Asked Questions about CMS Page Hierarchy in Magento 2
What Is Magento 2 CMS Page Hierarchy?
Magento 2 CMS page hierarchy is a Commerce-exclusive feature that helps merchants build a structured layout of content pages within the storefront. Instead of displaying static pages as a flat list, you can arrange them into a logical parent-child structure. This allows for the creation of nested CMS pages that enhance both frontend navigation and backend manageability.
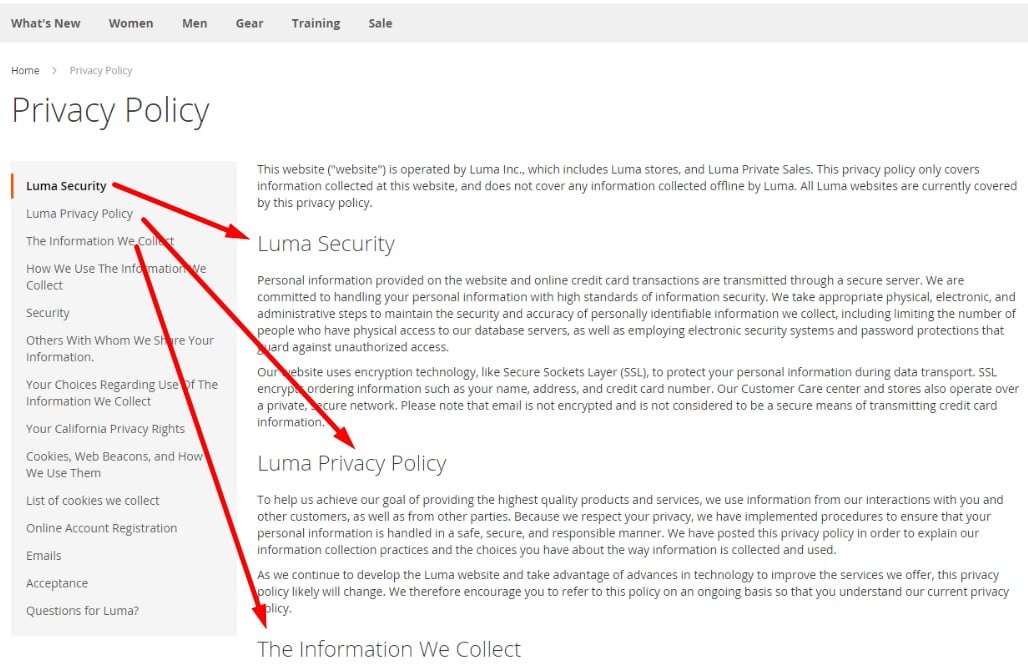
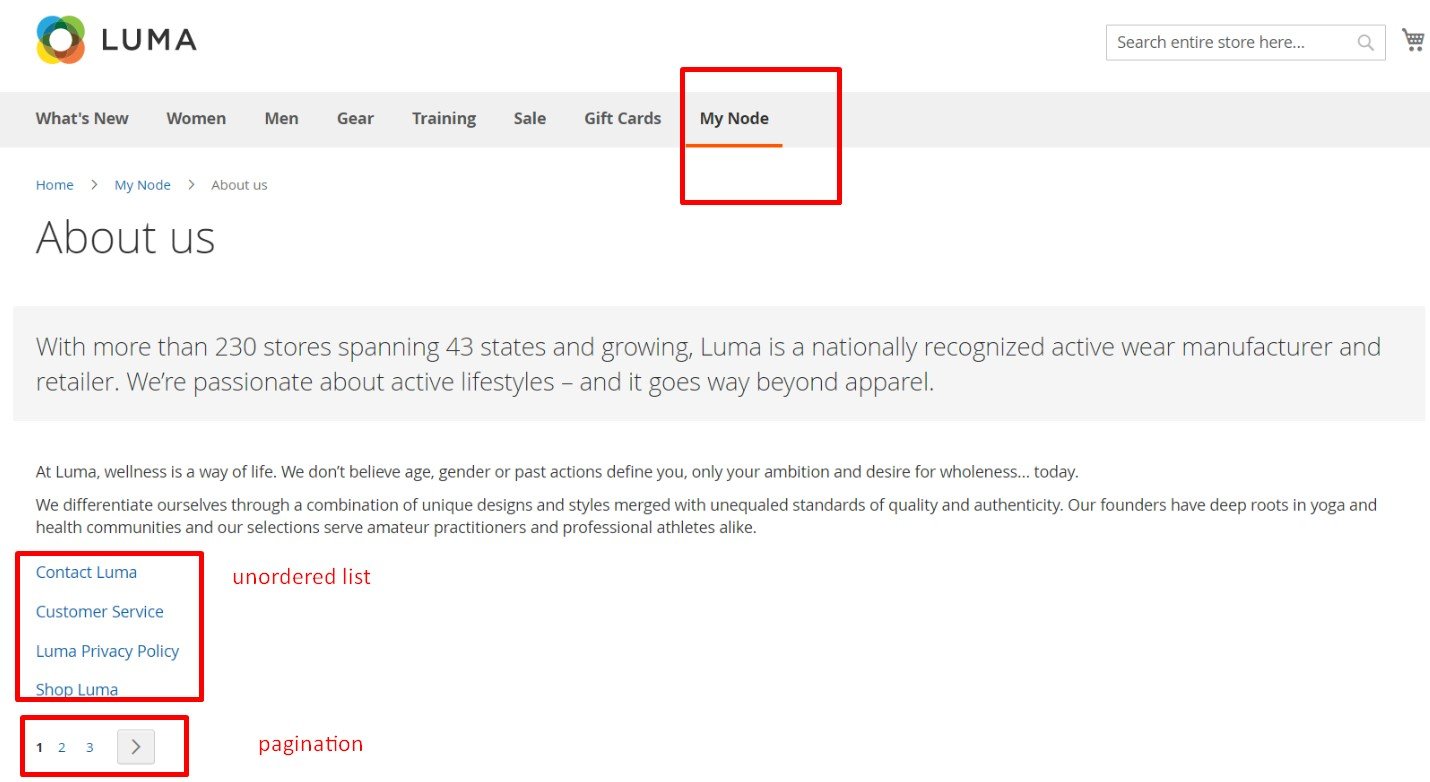
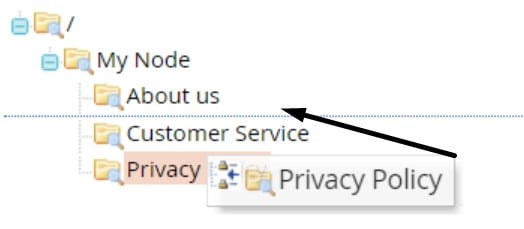
At its core, the Magento 2 page hierarchy improves how customers interact with your site. It introduces menu layouts, pagination options, and a multi-level page structure that makes it easier for visitors to explore related content. For example, a single “Privacy Policy” page can be transformed into a fully navigable section with subtopics arranged in a left-hand menu, creating a cleaner and more intuitive browsing experience.
This functionality isn’t just useful for customers. It also helps store administrators manage large volumes of content more efficiently. When you deal with complex catalogs, FAQ systems, multi-step landing pages, or brand storytelling hubs, a flat CMS system quickly becomes unmanageable. The Magento CMS page hierarchy addresses this by allowing you to group content into a well-defined structure that supports both navigation and SEO.
Behind the scenes, this system relies on a flexible node structure. Nodes act as containers that define relationships between content pages. Each node can represent a top-level section, a sub-page, or even an organizational label with no visible output on the frontend. Magento 2 uses this node-based logic to map the relationships between pages — including parent-child and neighbor connections — allowing for scalable content organization across store views.
In this way, the Magento 2 CMS page hierarchy acts as the backbone of structured content in Magento Commerce. It not only shapes how content is displayed but also how it’s managed and extended — making it a critical feature for stores with complex content needs or multi-page layouts that require more than a simple WYSIWYG editor can offer.
How to Configure and Manage CMS Page Hierarchy in Magento 2
Magento 2 CMS page hierarchy helps merchants build a structured navigation experience by grouping static pages into nested, organized relationships. Here’s how to enable the feature, create nodes, manage page structure, and control frontend layout with precision.
Enable Magento 2 CMS Page Hierarchy
Before working with nested CMS pages, you need to enable the hierarchy feature from your Magento 2 admin panel.
To activate Magento 2 CMS page hierarchy, follow these steps:
- Go to Stores → Settings → Configuration.
- Under the General section, select Content Management.
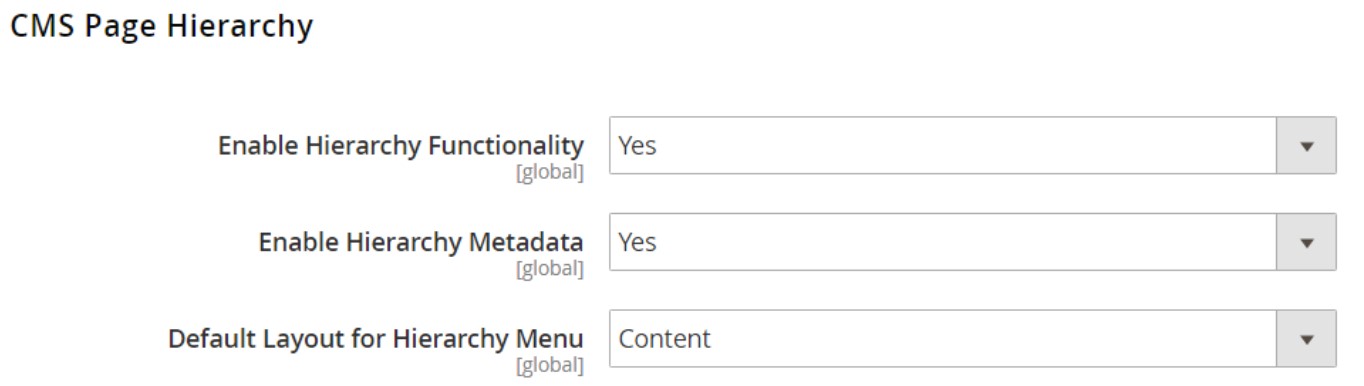
- Expand the CMS Page Hierarchy settings.
- Enable the following options:
- Enable Hierarchy Functionality
- Enable Hierarchy Metadata
- Default Layout for Hierarchy Menu
- Save the configuration.
Once enabled, you can begin organizing your CMS pages using the built-in hierarchy tools.
Create a New Node in the Magento 2 Page Hierarchy
A node in the Magento page hierarchy acts like a folder that organizes related CMS pages. While it doesn’t display content itself, each node has a URL key and defines the structure of your CMS page tree.
To create a hierarchy node in Magento 2, do the following:
- From the admin sidebar, go to Content → Elements → Hierarchy.
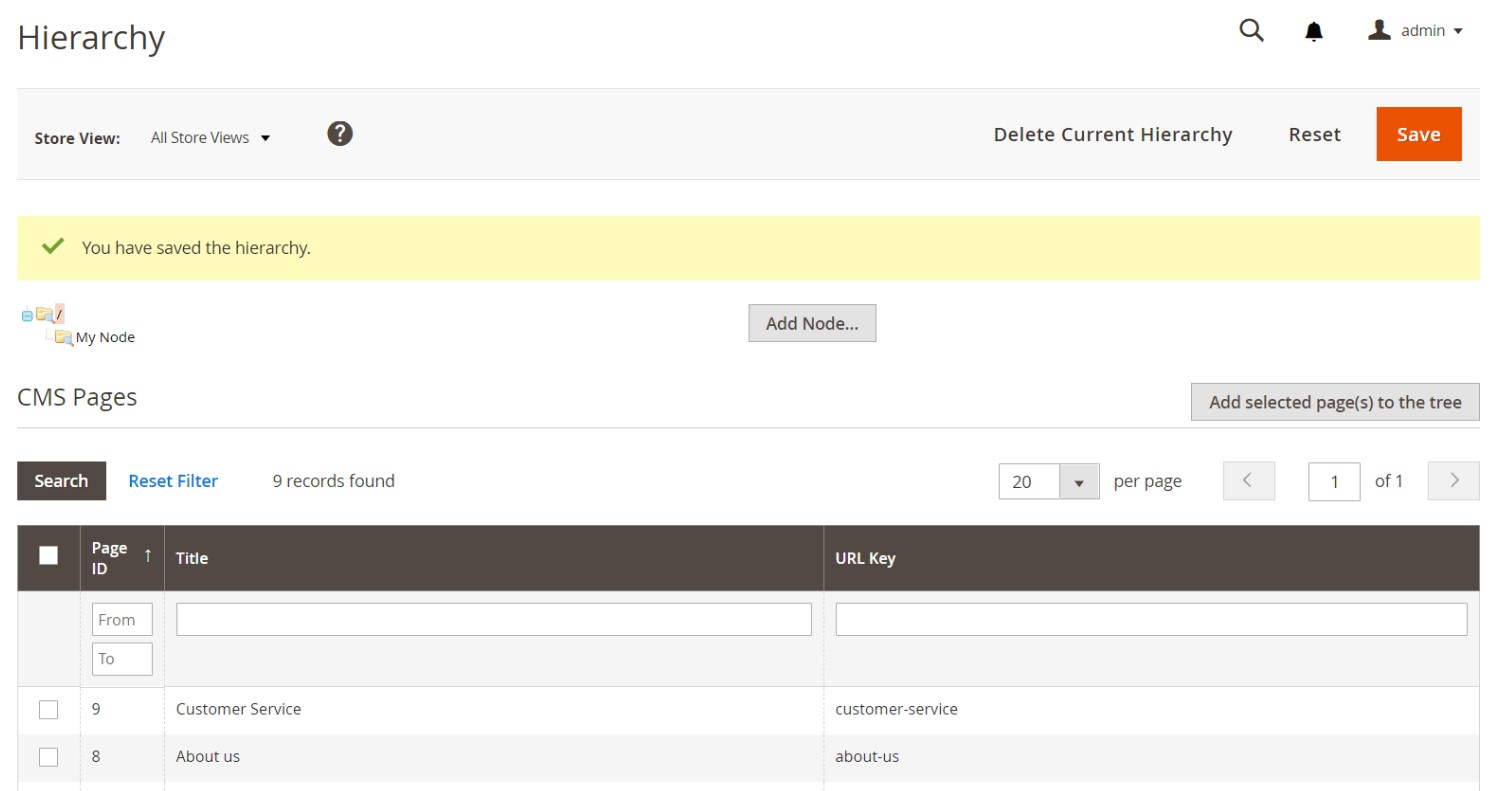
- Click Add Node above the CMS page grid.
- Under Page Properties, enter the node’s title.
- Specify a URL Key using lowercase characters and hyphens instead of spaces (e.g., press-releases).
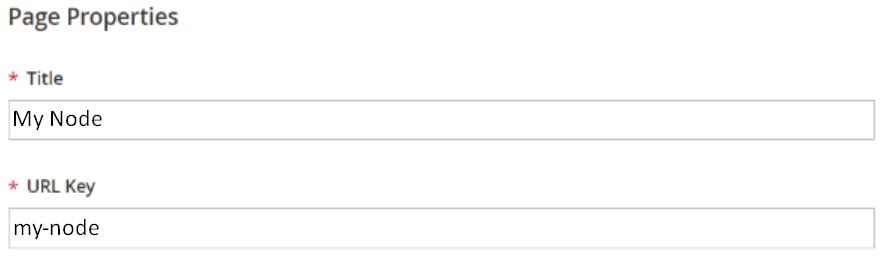
- Click Save.
The node will appear in the tree structure, ready to be populated with content. It can be used to create multi-level navigation menus or group pages under a unified section like “FAQs” or “Company Info.”
Link to the Node in Storefront Content
While nodes don’t display content directly, you can create links to them using Magento’s Widget tool.
To add a link to a hierarchy node:
- Create a new widget and assign it to a CMS block or page.
- Select the CMS Hierarchy Node Link option.
- Choose the target node and specify placement.
This is especially useful when linking a node (like “Press Releases”) from another page (like “About Us”), improving user navigation between related static content.
Add Pages to a Magento 2 CMS Hierarchy Node
Once a node is created, you can assign existing CMS pages to it — creating a structured and navigable layout.
Follow these steps to add pages to a node:
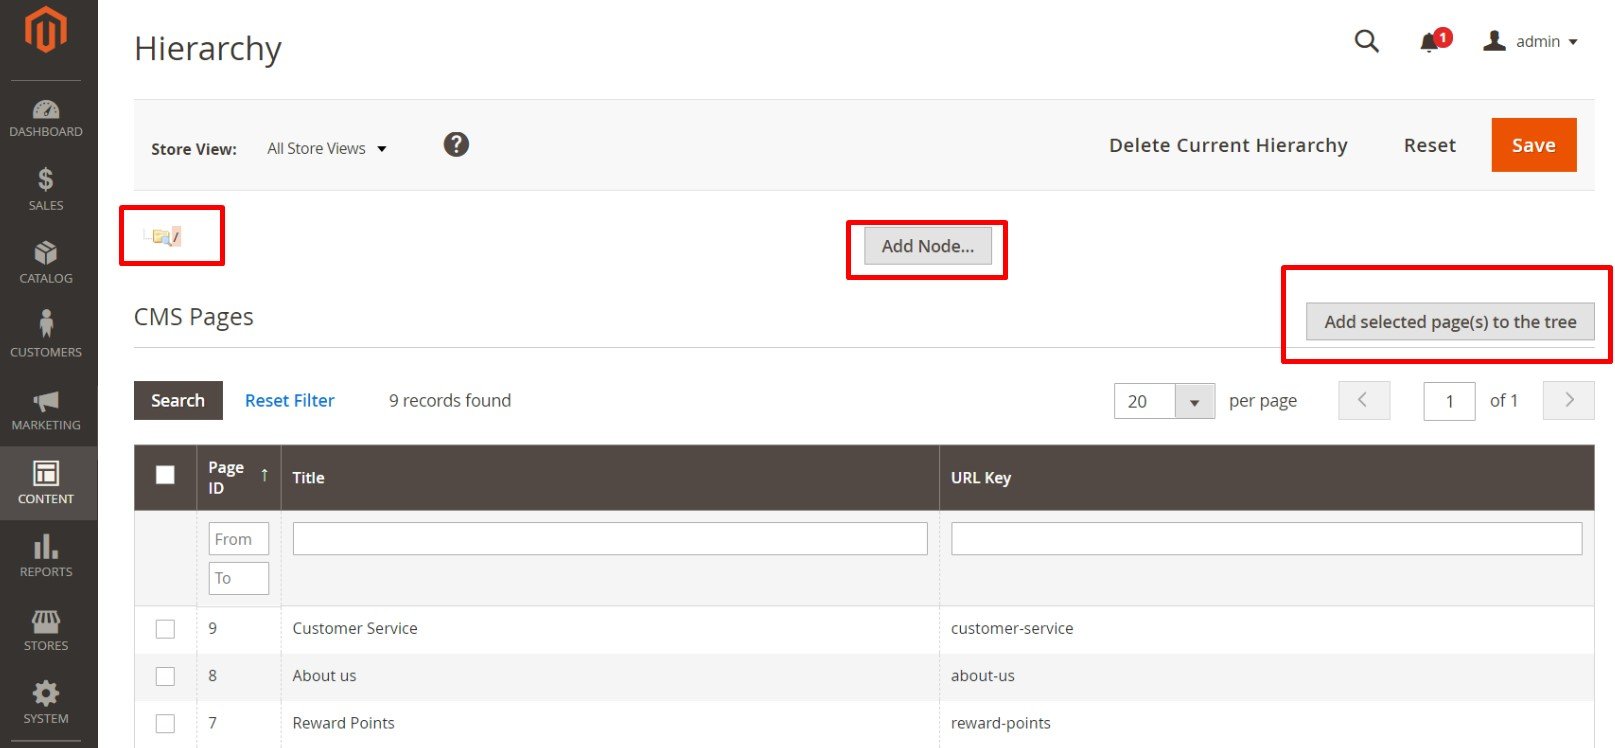
- In the hierarchy tree, click on the node to open its settings.
- Scroll down to the CMS Pages section.
- Check the boxes next to the pages you want to add.
- Click Add Selected Page(s) to Tree.
The selected pages will appear as child elements under the node. You can repeat this process for other nodes to build out your full page hierarchy.
Define the Page Hierarchy Structure
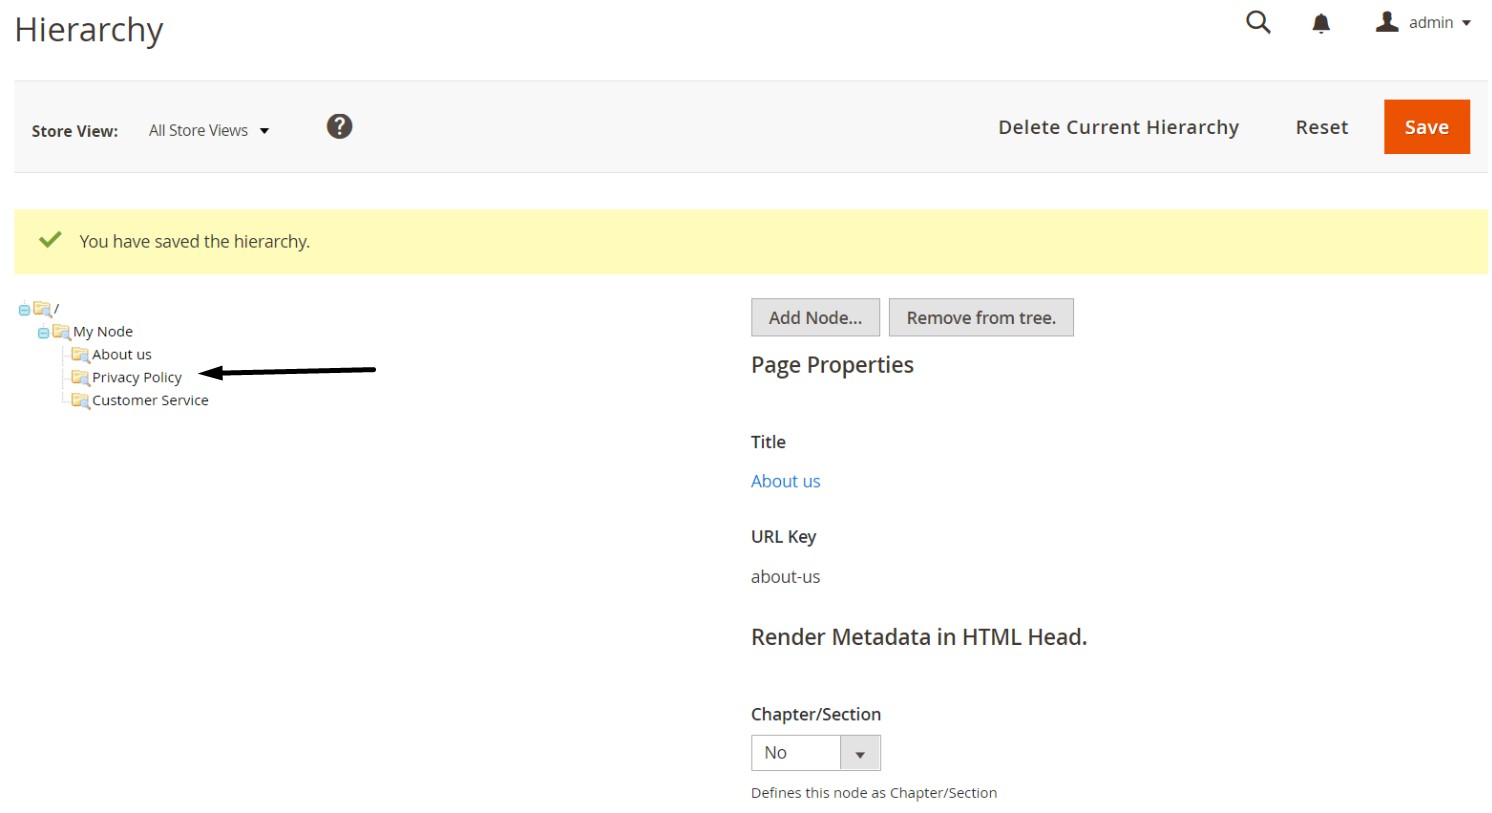
Magento 2 offers drag-and-drop functionality within the hierarchy tree. This makes it easy to reorder pages, assign child pages to different nodes, or restructure your CMS layout as needed.
To edit the structure:
- Use your mouse to move pages within the tree.
- Place pages under other pages to form parent-child relationships.
- Reorganize the tree to match your desired navigation layout.
This flexibility makes the magento 2 cms page hierarchy ideal for managing growing content libraries or replicating complex site structures.
Configure Node Properties and Hierarchy Metadata
Each node in your hierarchy can be customized to control how it behaves and appears in the storefront.
To adjust node behavior:
- Click the node at the top of the tree.
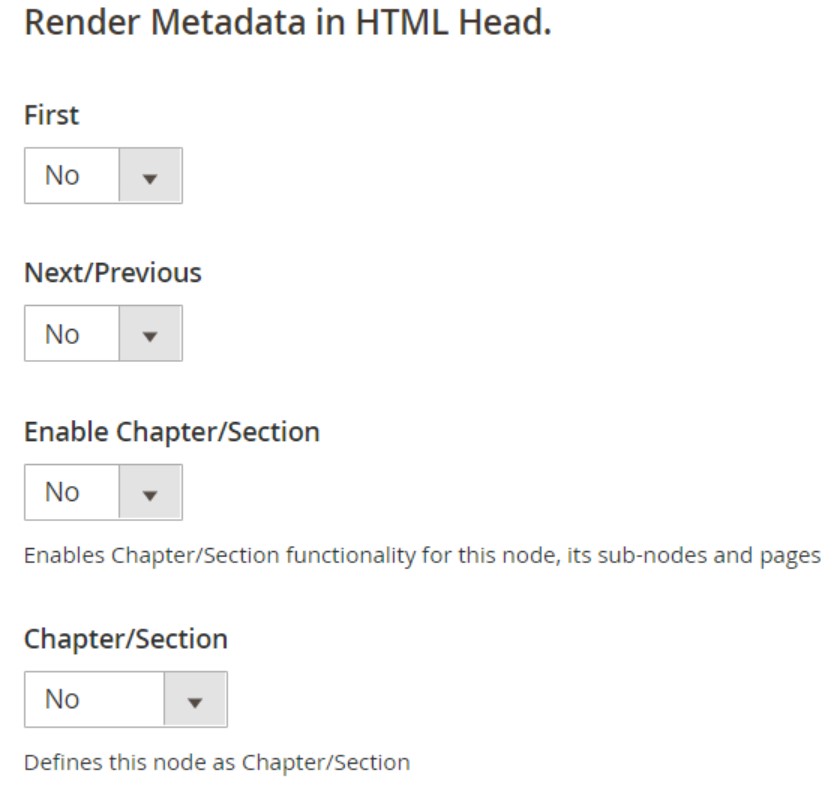
- In the Render Metadata in HTML Head section, you can:
- Mark the node as the first in the hierarchy.
- Enable Next/Previous pagination controls.
- Treat the node as part of a chapter/section layout.
- Assign a role (Chapter, Section, Both, or None) for structured presentation.
These settings influence how Magento displays the content in navigation blocks and breadcrumbs, especially useful for eBooks, documentation pages, or brand storytelling.
Add Pagination Controls for Nested CMS Pages
For sections with many subpages, Magento 2 supports pagination within the CMS hierarchy.
To enable and configure pagination:
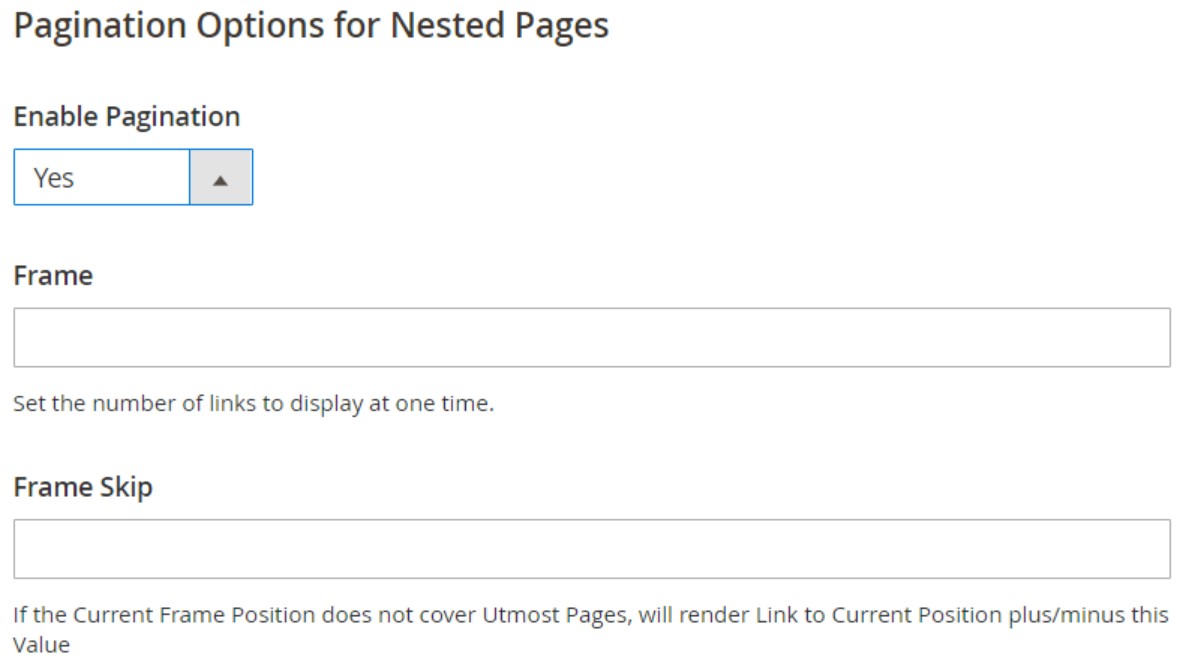
- Open the Pagination Options for Nested Pages section.
- Set Enable Pagination to “Yes.”
- Define how many links appear using the Frame field.
- Use Frame Skip to allow users to jump ahead by multiple pages.
Pagination improves usability and makes it easier for visitors to explore long content sequences.
Enable Menu Layout for Page Hierarchy Nodes
You can also control how each node appears in your storefront menus, both in layout and level of detail.
To enable the node in the menu:
- Go to Page Navigation Menu Options within the node settings.
- Set Show in Navigation Menu to “Yes.”
- Choose your Menu Layout (e.g., Content, Left Column, Right Column).
- Set Menu Detalization:
- “Only Children” will show only subpages.
- “Neighbours and Children” will show sibling pages as well.
- Configure the Maximal Depth to define how many hierarchy levels appear.
- Choose List Type (Ordered or Unordered) and preferred List Style.

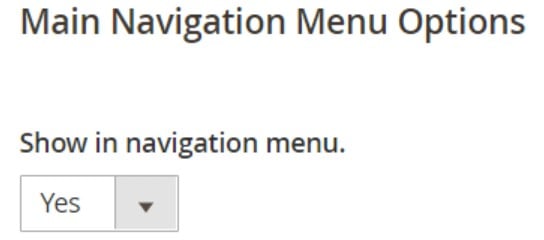
To make the node visible in your main navigation:
- Scroll to Main Navigation Menu Options and set Show in Navigation Menu to “Yes.”
Once configured and saved, the CMS page structure becomes fully functional in the frontend, complete with hierarchical menus, pagination, and customizable layout options.
Why Magento Doesn’t Support Hierarchy Import Out-of-the-Box
Magento 2 offers powerful tools for building a structured CMS page layout, but when it comes to data import — especially for hierarchical relationships — the platform falls short. There is no native mechanism to import child-parent page structures or define hierarchy trees through CSV or XML. This means that if you’re managing dozens or hundreds of static pages, each with its own position in a complex content structure, you’ll need to recreate that hierarchy manually, one node at a time.
These Magento 2 CMS import limitations become a serious bottleneck for growing stores. Whether you’re migrating from another platform, replicating a staging environment, or rolling out a new set of nested CMS pages, default Magento tools offer no way to import hierarchy logic in bulk. Page nesting, menu structure, metadata placement — everything must be configured through the admin panel, consuming time and increasing the risk of inconsistencies.
That’s where the Improved Import & Export extension comes in. With this tool, you can bypass the manual effort entirely and define your Magento 2 CMS hierarchy import through a structured file. Using a CSV or Excel sheet, it becomes possible to describe the full page tree — including parent-child relationships, node metadata, menu options, and pagination controls — and import it all in one job.
This level of flexibility unlocks new workflows that default Magento simply can’t handle. You can build your entire Magento CMS import strategy around scalable, repeatable logic: use templates, version your CMS structures in Git, and automate deployment between store views or environments. Whether you’re updating an existing hierarchy or creating a new one from scratch, the Improved Import & Export extension gives you the control Magento itself lacks — all from a single, centralized place in the admin. Let’s dive in.
How to Import & Export Magento 2 Page Hierarchy
Magento doesn’t support CMS hierarchy import or export out of the box. That means if you need to migrate or replicate your CMS page structure — including parent-child relationships, node metadata, and layout settings — you’ll need a third-party solution. The Improved Import & Export extension unlocks this missing functionality, allowing you to perform magento 2 cms hierarchy import and export operations using structured files like CSV, XLSX, or even Google Sheets.
With this tool, you can transfer complete CMS page trees between Magento 2 instances, streamline content updates, and scale your magento cms import workflows without manual page-by-page edits. Before importing, you’ll need a properly formatted CSV file that defines the CMS hierarchy structure.
Magento CMS Page Hierarchy Sample CSV Explained
To import or export CMS page hierarchy data, you must follow a strict format. Below is a table describing every attribute used in the hierarchy structure. You can get fully prepared sample files with all necessary values already filled out from the following sources:
- GitHub Sample Files: — includes CSV, XML, JSON, XLSX, and ODS formats for Magento 2 CMS page hierarchy
- Google Sheet Master Table: — contains column descriptions, sample values, and formatting rules
These templates help you avoid common magento 2 cms import limitations and ensure smooth data transfer.
Magento 2 CMS Page Hierarchy Attributes Table
| Attribute Name | Reference | Values | Value Example |
| node_id | The ID of the node | Can only contain numerals | 1 |
| parent_node_id | ID of the parent node | Can only contain numerals. Leave empty if the node is of the highest level. | 1 |
| page_id | The ID of the CMS page if used as a node. Must be a valid ID of the CMS page. Else, leave the field blank. | Can only contain numerals | 2 |
| identifier | URL Key of the node | Cannot contain spaces | first_node |
| label | Title of the node | Can contain any symbols | First Node |
| level | Level of the node | Can only contain numerals | 1 |
| sort_order | The sort order of the nodes inside the parent node. Defines the position of the node in the list, the lower the sort order, the higher the position | Can only contain numerals | 15 |
| request_url | Full URL path of the node, including the identifiers (URLs) of the parent nodes | Cannot contain spaces | first_node/second_node |
| scope | The store view the node belongs to and is displayed at. Store View Code can be found under Stores > All Stores > next, click required store view and check the “Code” column. For example: Store View 1,Store View 2,German Store | default | |
| meta_first_last | Render Metadata in HTML Head – First. Defines if the first metadata is enabled for this node. | 1 – is enabled 0 – disabled | 0 |
| meta_next_previous | Render Metadata in HTML Head – Next/Previous. Defines if the first metadata is enabled for this node. | 1 – is enabled 0 – disabled | 0 |
| meta_chapter | Render Metadata in HTML Head – Chapter/Section. Works in conjunction with meta_section. Defines the value selected in the Chapter/Section field. meta_chapter=1, meta_section=1 – BOTH meta_chapter=1, meta_section=0 – Chapter meta_chapter=1, meta_section=0 – Section | 1 | |
| meta_section | Render Metadata in HTML Head – Chapter/Section. Works in conjunction with meta_chapter. Defines the value selected in the Chapter/Section field. meta_chapter=1, meta_section=1 – BOTH meta_chapter=1, meta_section=0 – Chapter meta_chapter=1, meta_section=0 – Section | 1 | |
| meta_cs_enabled | Render Metadata in HTML Head – Enable Chapter/Section. Defines if Chapter/Section functionality is enabled for this node, its sub-nodes, and pages. | 1 – is enabled 0 – disabled | 0 |
| pager_visibility | Enable Pagination. Defines if the pagination is enabled for the node. | 1 – is enabled 0 – disabled | 1 |
| pager_frame | Frame. Maximum number of links displayed at the time | Can only contain numerals | 3 |
| pager_jump | Frame skip. If the Current Frame Position does not cover Utmost Pages, will render the Link to the Current Position plus/minus this Value. | Can only contain numerals | 2 |
| menu_visibility | Show in the navigation menu. Defines if the node is displayed in the PAGE navigation menu | 1 – is displayed 0 – not displayed | 0 |
| menu_excluded | Exclude from PAGE Navigation Menu | 1 – exclude 0 – include | 1 |
| menu_layout | PAGE Menu Layout. Defines the layout of the PAGE menu content – Content left_column – Left Column right_column – Right Column If you want to use default settings, leave the column empty. | content | |
| menu_brief | PAGE Menu Detalization. Defines which nodes should be displayed in the PAGE menu 0 – Neighbours and Children 1 – Only Children | 1 | |
| menu_levels_down | Maximal Depth of the PAGE menu. Defines how many levels of the nodes should be displayed in the PAGE menu. | Can only contain numerals | 12 |
| menu_ordered | PAGE menu list type. Defines the order of the nodes displayed in the page menu. 0 – Unordered 1 – Ordered | 0 | |
| menu_list_type | PAGE menu list style. Defines how the node is displayed in the PAGE menu. 0 – default 1 – numbers a – lower alpha A – upper alpha i – lower roman I – upper roman | a | |
| top_menu_visibility | Show in the navigation menu. Defines if the node is displayed in the MAIN navigation menu. | 1 – is displayed 0 – not displayed | 1 |
| top_menu_excluded | Exclude from MAIN Navigation Menu | 1 – exclude 0 – include | 1 |
NOTE: The meta_chapter and meta_section attributes are used together to define a single CMS hierarchy setting. Be sure to follow the format precisely to avoid import errors.
Magento 2 CMS Page Hierarchy Import
To import the CMS page hierarchy structure into Magento 2, follow these steps:
- Go to System → Improved Import / Export → Import Jobs and click Add New Job.
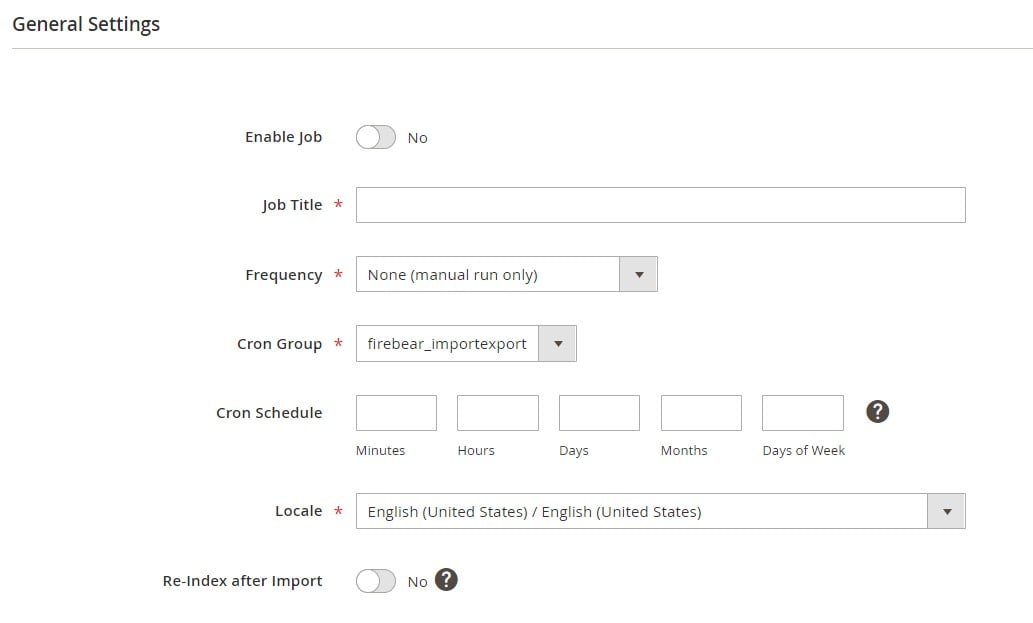
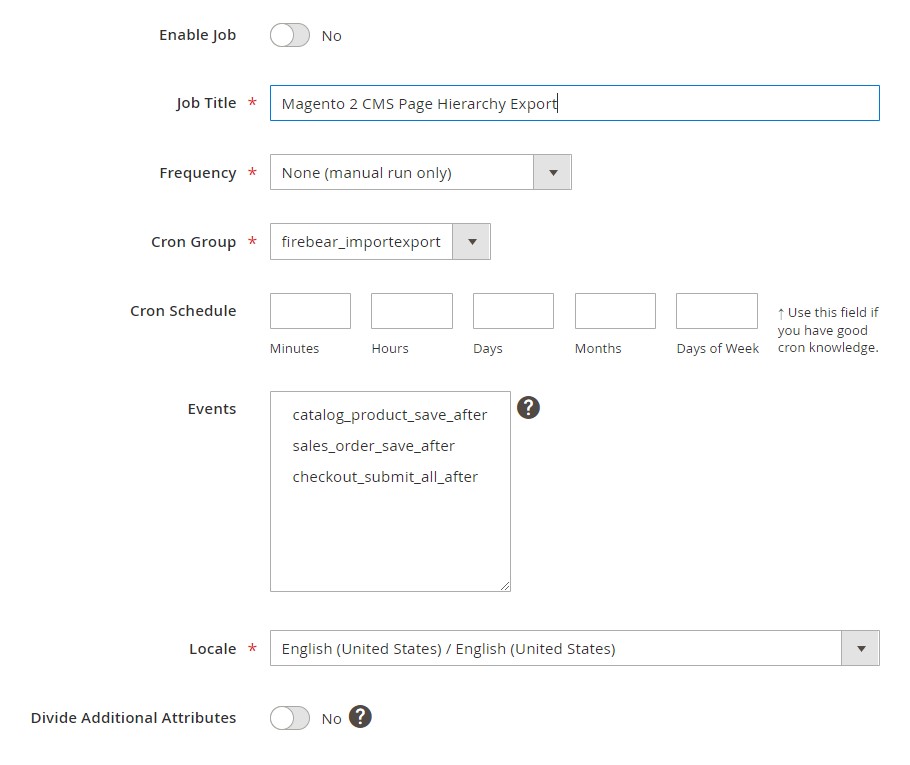
- In the General Settings, name your job and configure the schedule if needed.
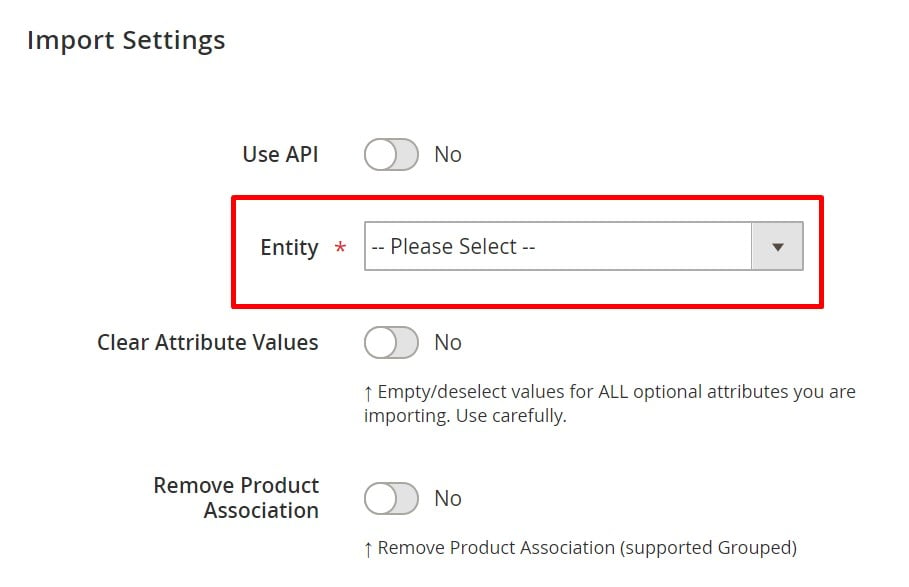
- Under Import Settings, select CMS Page Hierarchy as the entity.
- Choose the import behavior (e.g., Add/Update), file format (CSV, XML, etc.), and data source (Google Sheets, FTP, direct upload).
- Save the job and click Run to start the import.
You can find additional import options and advanced features in the Improved Import & Export Extension Manual. For custom use cases or troubleshooting, feel free to contact our support team.
Magento CMS Page Hierarchy Export
Exporting your Magento 2 CMS page hierarchy works much the same way:
- Go to System → Improved Import / Export → Export Jobs.
- Click Add New Job and configure your export profile.
- Select CMS Page Hierarchy as the entity and choose your desired file format and destination.
- Save and run the job.
For more details and examples, refer to the Improved Import & Export Extension Manual or contact us for assistance with the magento 2 cms hierarchy export process.
Final Words: Take Full Control of Magento 2 CMS Page Hierarchy
The Magento 2 CMS page hierarchy is a powerful feature exclusive to the Commerce edition, offering merchants a flexible way to organize content and guide users through complex site structures. With nested CMS pages, structured menus, and metadata controls, it transforms static pages into dynamic, navigable content clusters, improving both user experience and SEO.
For store administrators, the benefits go beyond frontend usability. Magento’s page hierarchy system is easy to configure, scales with your catalog, and allows precise control over how information is presented across different store views. And with the Improved Import & Export extension, you’re no longer limited to manual setup. You can seamlessly import and export your Magento 2 page hierarchy between environments, automate content deployment, and maintain consistency across all your storefronts.
Ready to streamline your CMS structure and unlock full control over content management?
👉 Download the Improved Import & Export Magento 2 Extension
👉 Contact Firebear Support for Personalized Assistance
Take your Magento CMS management to the next level — with clean hierarchy, scalable automation, and full compatibility across stores.
Want to master Magento 2 import from A to Z? Explore our complete guide and unlock step-by-step tutorials, tips, and expert tools.
👉 Go to the Full Magento 2 Import & Export Guide
Frequently Asked Questions about CMS Page Hierarchy in Magento 2
What is the CMS page hierarchy in Magento 2?
The CMS page hierarchy in Magento 2 is a feature available in the Commerce edition that lets you organize static content pages into a tree-like structure with parent-child relationships. It improves navigation, supports metadata, and allows merchants to group pages logically for a better user experience.
How does the Magento 2 page hierarchy improve storefront navigation?
By structuring pages into a hierarchy, Magento enables clean, multi-level menus and logical content grouping. Customers can easily browse related topics using side navigation, pagination controls, or chapter-style layouts, especially in content-heavy sections like FAQs or policies.
Is Magento 2 CMS page hierarchy available in the Open Source edition?
No, the CMS page hierarchy is a Commerce-only feature. Magento Open Source does not support nested CMS pages or the hierarchy interface found in the admin panel of Commerce installations.
How do I import nested CMS pages in Magento 2?
Magento does not support importing CMS page hierarchy by default. To import nested CMS pages with parent-child structure and menu settings, you need the Improved Import & Export extension. It allows you to define the full hierarchy in a CSV or spreadsheet and import it directly into your store.
What attributes are required to import the Magento 2 CMS page hierarchy?
When importing CMS hierarchy data, you must include attributes like node_id, parent_node_id, label, identifier, page_id, and layout-related fields. A full sample file with correct structure is available via Firebear’s GitHub and Google Sheets.
Can I export Magento 2 page hierarchy with parent-child structure?
Yes, using the Improved Import & Export extension, you can export your full CMS page hierarchy — including nesting relationships, node metadata, menu visibility settings, and pagination options — into a structured CSV or Excel file.
Can I manage Magento 2 CMS hierarchy import via Google Sheets?
Yes. With the Improved Import & Export extension, you can manage your Magento 2 CMS hierarchy import directly from a live Google Sheet. This is useful for collaboration, editing, and versioning before importing changes into your store.
How do I manually add CMS pages to a node in Magento 2?
To manually assign pages to a node, go to Content → Elements → Hierarchy, select a node, and use the CMS Pages grid to attach individual pages. You can also drag and drop pages within the tree to adjust the structure.
Can I control the visibility of the navigation menu for CMS hierarchy nodes?
Yes. Each node includes settings to show or hide it in both the main and side navigation menus. You can define layout position, depth of menu levels, and list styling, such as ordered or unordered lists.
What happens if I skip parent_node_id in the import file?
If you leave the parent_node_id field empty during import, Magento will treat the node as a top-level item in the hierarchy. This is useful when defining root-level sections like “Help Center” or “About Us.”