How to Import and Export Magento 2 Commerce Content Staging Data

- E-Commerce, Magento 2, Our extensions

Magento 2 Commerce Content Staging Import Export

With every new update, Magento 2 gets lots of user-friendly improvements. And now, it offers the ability to make every static store page vivid due to the Content Staging functionality. Below, we shed light on a new feature as well as describe how to import and export Magento 2 Content Staging data.

Magento 2 Commerce Content Staging Basics

With the Magento 2 Content Staging functionality, you can effortlessly create, preview, and schedule various content updates. The new instruments of control are available right in the Magento admin, where every static page can be turned into a dynamic one providing visitors with constantly changing experience on the basis of a schedule. And it is possible to alternate not only its visual appearance but also price rules and other similar aspects.

With Content Staging, you can easily turn a page into a collection of different elements that can be turned on or off whenever you need. And due to schedules, all the changes are applied automatically! It is a handy feature for stores that use different designs for various holidays such as Halloween or Black Friday or offer price changes depending on a season.

Magento 2 Commerce Content Staging Import Export

The key element behind Content Staging is “campaign.” The term describes a record of a scheduled change and a collection of changes. You can view them on a calendar or timeline. All further improvements are applied via Staging Dashboard which is an integral part of your Magento 2 admin. Other two important terms are “scheduled change” and “scheduled update”  – which are synonyms.

But how are changes applied? Let’s assume that you’ve scheduled a content change for a specific period. When the update expires, the original version of a page is displayed automatically. Thus, you can have the main design and lots of scheduled changes – Magento 2 lets you generate multiple versions of updates.

Note that all content versions are visible in the admin. Step back through the timeline to view them. As for drafts, you can save any update as them. It is only necessary to assign a far future date to it so that it will never go into production.

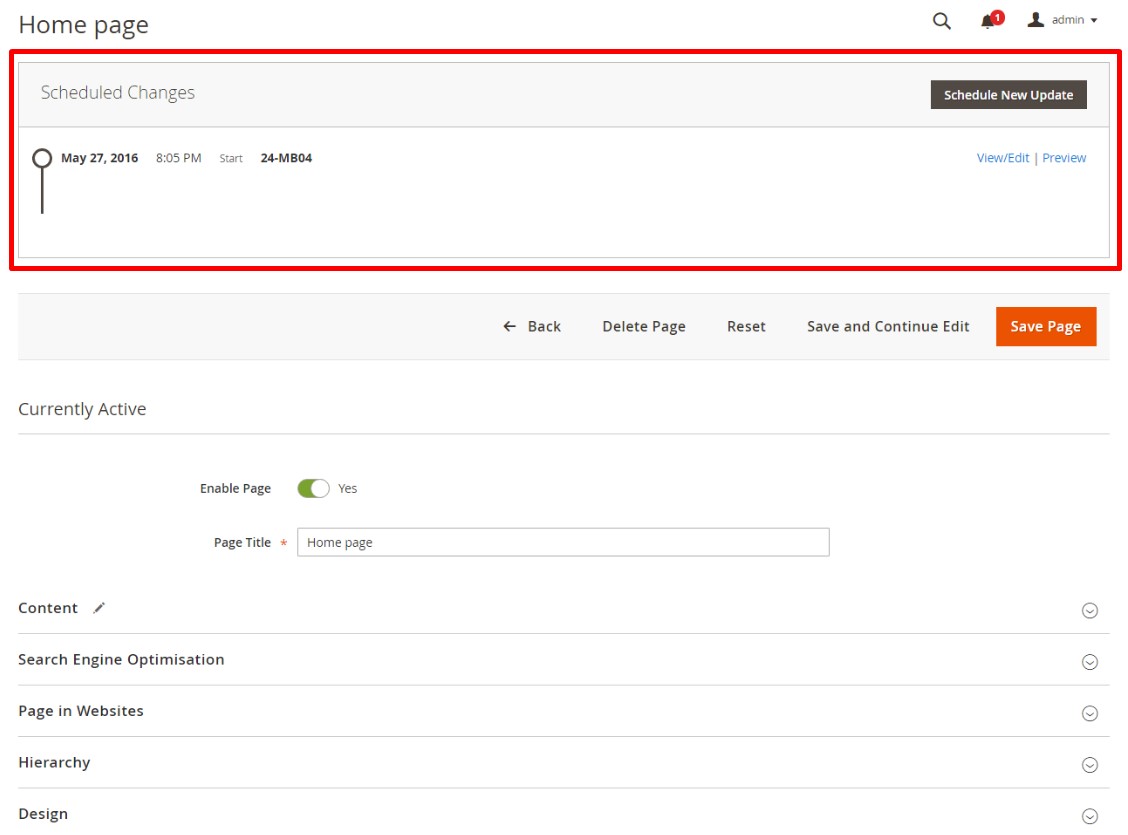
The algorithm behind Magento 2 Content Staging is quite simple: you create the necessary quantity of content assets, set up a corresponding campaign as a placeholder, and apply other changes via the Scheduled Changes box. Note that there is only a start date related to placeholder campaigns. Any update can be scheduled as a part of a campaign. Next, you can preview and apply them. Share changes by the following three parameters: date, time, store view.

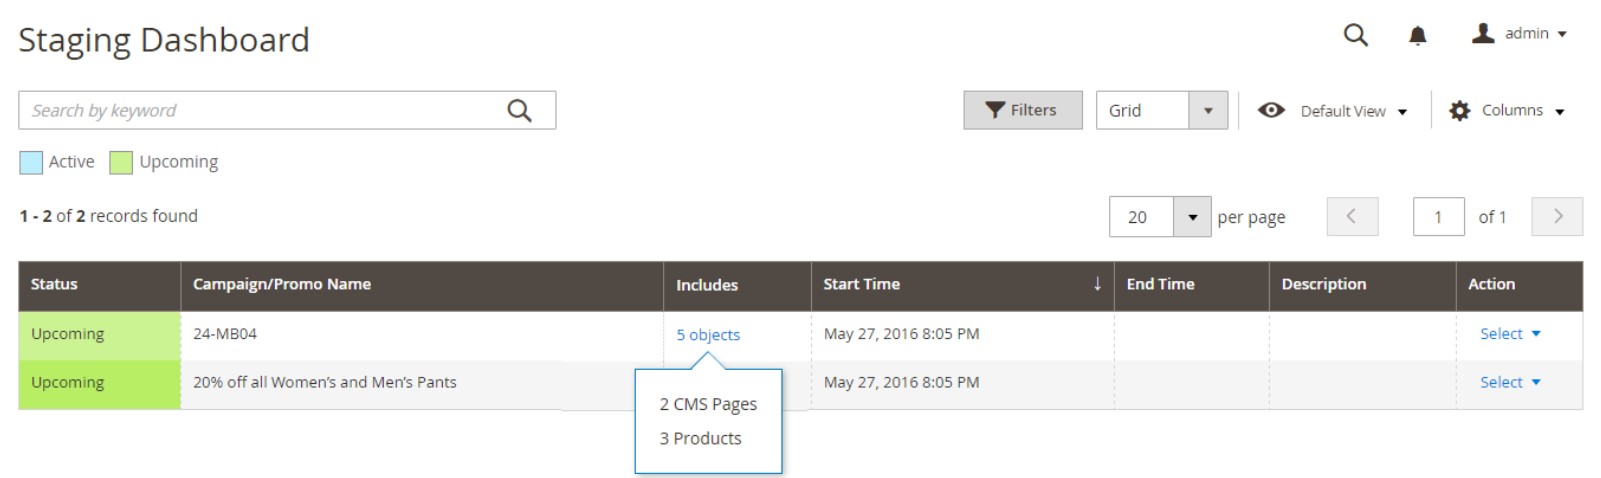
Another vital aspect of Staging Dashboard is the ability to provide visibility into all planned site changes and updates that can be easily shared between your team members.

And this is how the Content Staging dashboard looks:

Magento 2 Commerce Content Staging Import Export

Supported Content Types

Magento 2 Commerce Content Staging lets you apply changes to the following content types:

  • Products.  Use schedules to apply product updates. Groupe them with other content changes. Create new campaigns on the basis of scheduled product changes or edit existing campaigns.
  • Categories. The basics behind the content type are the same as we’ve just described.
  • Catalog Price Rules. Everything is similar to the previous types of content, but you can apply Priority settings to multiple price rules running in the same campaign
  • Cart Price Rules. Everything is just the same when it comes to cart price rules.
  • CMS Pages. Everything works as in case of products.
  • CMS Blocks. There is no need to write any code to create CMS blocks and assign them to a specific time and place in the layout. Blocks can include various content type. Note that they are heavily used on homepages.
  • Widgets. Create and schedule widgets with Content Staging. Display a wide range of content changing its appearance automatically.

Content Staging Workflow

Let’s explore how to work with Content Staging in more detail. First of all, you need to create the baseline content. It is your basic page look that is used every time between campaigns.

Next, you should create the first campaign. Specify its start and end dates or make the campaign open-ended. Leave the End Date field blank, and this particular campaign will be displayed forever. Otherwise, the original baseline content will be restored after the expiration.

As mentioned above, you can add an unlimited number of campaigns, so it is time to create the second one. Assign it to a different period and don’t forget that multiple campaigns for the same asset cannot overlap.

Note that the baseline content is restored whenever an active campaign ends, but it can be replaced with a new update automatically.

How to Schedule Product Page Update with Magento 2 Commerce Content Staging

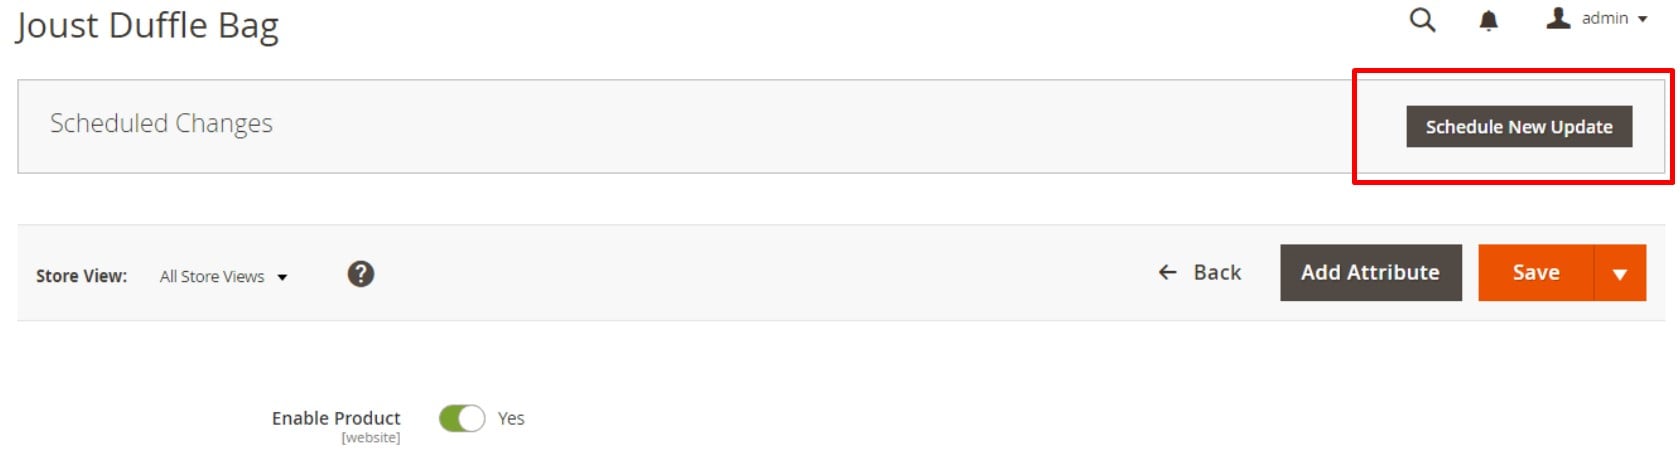
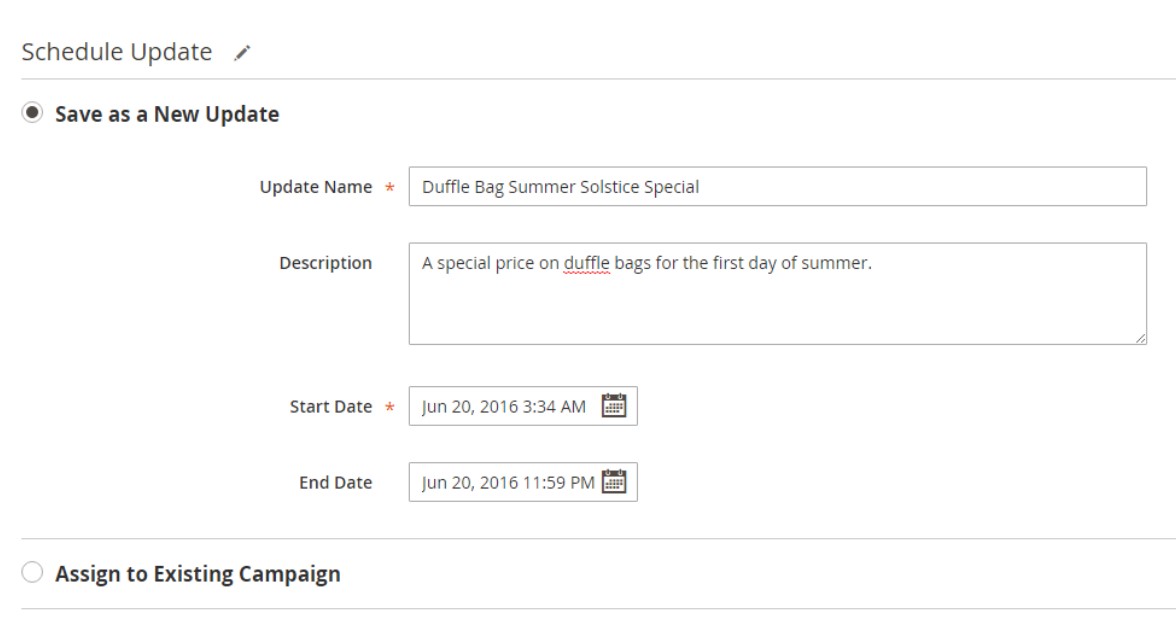
To schedule an update to a product you have to go to the Catalog grid and open a product in the edit mode. There is the Scheduled Changes box at the top of the page. Find the Schedule New Update option and tap it.

Magento 2 Commerce Content Staging Import Export

  • Add a new name for the content staging campaign;
  • Enter a brief description;
  • Use the Calendar to choose both Start and End dates.

Leave the End Date field blank to create an open-ended campaign, but note that an end date cannot be added to a price rule campaign later.

Next, apply changes you want to display with this campaign to the product page. You can save the update as new or assign it to an existing campaign.

Magento 2 Commerce Content Staging Import Export

To edit the scheduled change, use the View/Edit option in the Scheduled Changes. Apply changes and tap Save.

Magento 2 Commerce Content Staging Import Export

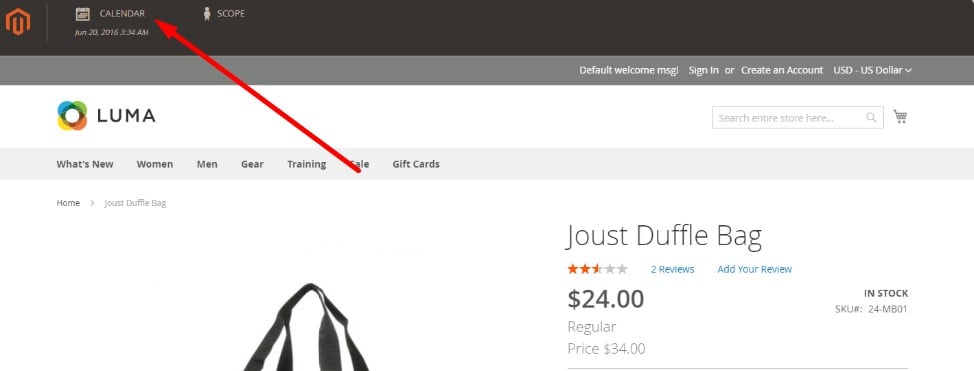
To preview the campaign use the appropriate option of the Scheduled Changes box. Note that the Preview opens a new browser tab.

Magento 2 Commerce Content Staging Import Export

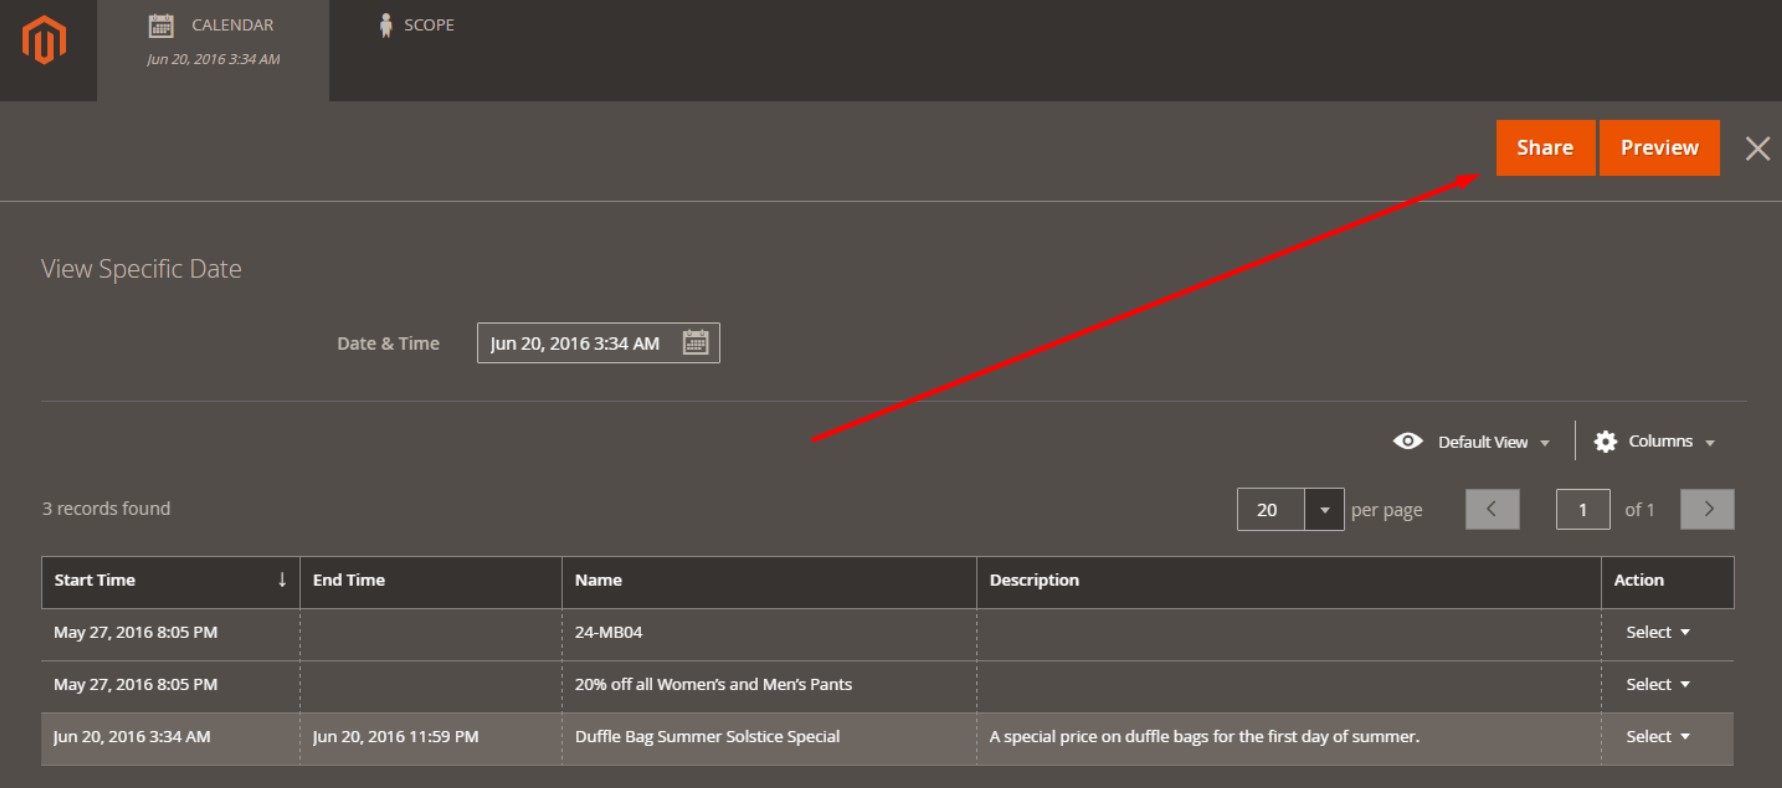
You can also use the Calendar option in the upper-left corner of the Preview window to see other campaigns that are scheduled for the same day.

Magento 2 Commerce Content Staging Import Export

Another essential aspect of Content Staging is the ability to share every scheduled update. To do so, tap Share and copy the link to the clipboard. Now, you can paste the link to your colleagues.

Magento 2 Commerce Content Staging Import Export

For further information, check this article in the Magento 2 User Guide: Scheduling an Update.

How to Import And Export Magento 2 Content Staging Data

Magento 2 mysql data import

Unfortunately, you cannot just import or export Content Staging data with the help of the default Magento tools, but there are lots of third-party modules that enhance the default platform functionality. Since it has always been challenging to find a reliable import/export extension that satisfies all business needs, we’ve done the research for you. Not only Magento prevents the Content Staging data import and export, but there are also other barriers that separate you from seamless integrations:

  • Most tools are limited to the import or export process correspondingly;
  • Some extensions can transfer a limited number of entities;
  • Many import and export modules lack such features as mapping or automation.

Considering all these and multiple other drawbacks we’ve decided to develop our solution that provides an enhanced experience. Meet the Improved Import & Export Magento 2 extension – your number one time-saver for all import and export tasks. The module allows moving most Magento 2 entities including Content Staging data.

To import Magento 2 Content Staging Data, follow these steps:

  • Go to System -> Improved Import / Export -> Import Jobs and hit the Add New Job button.

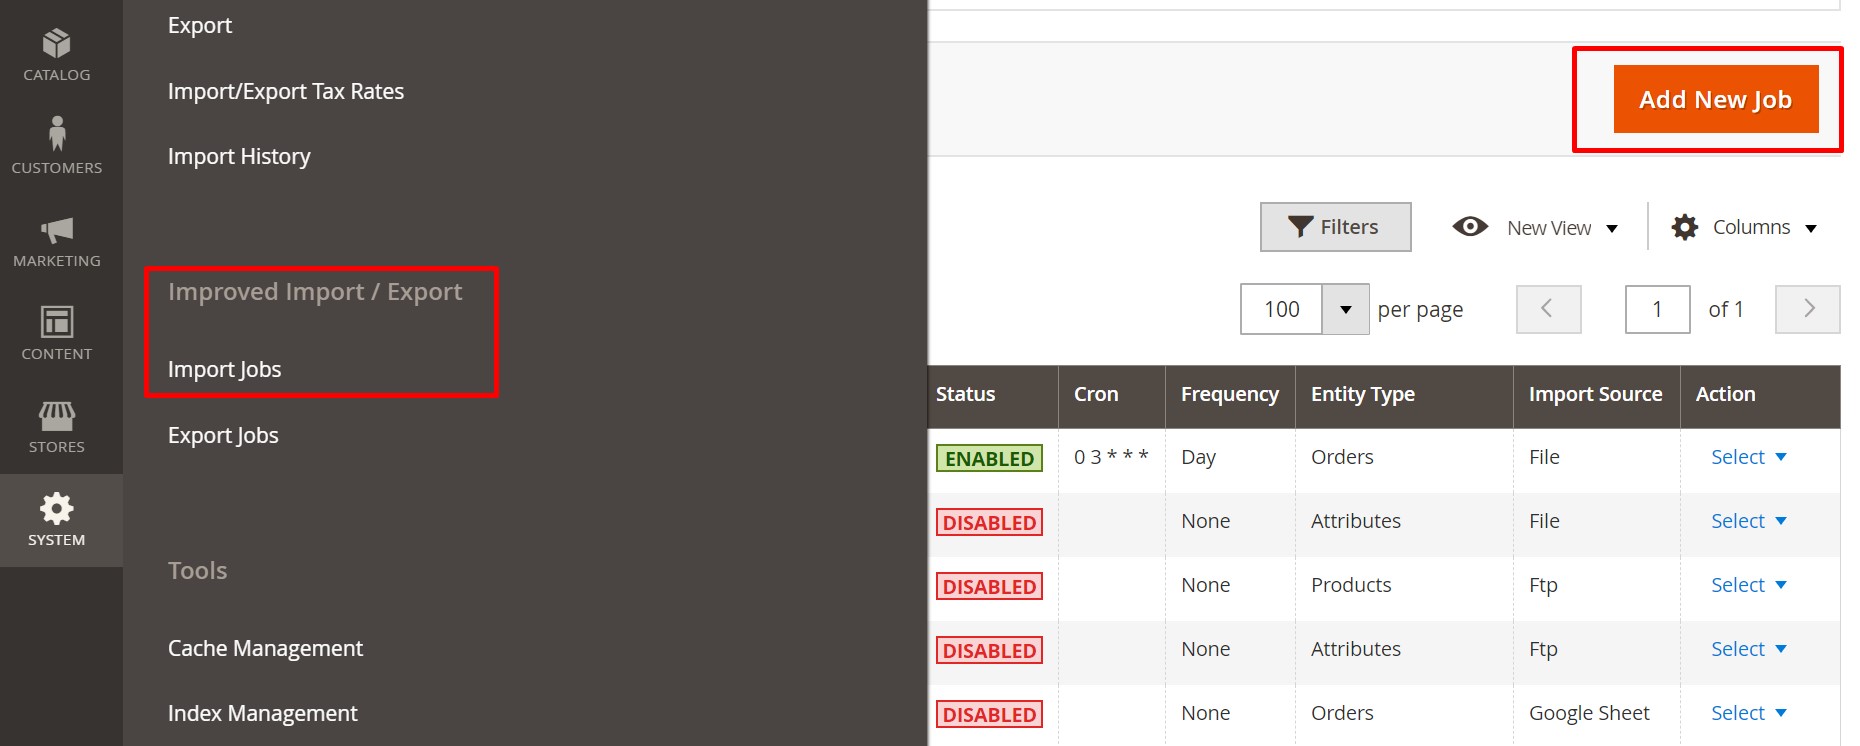
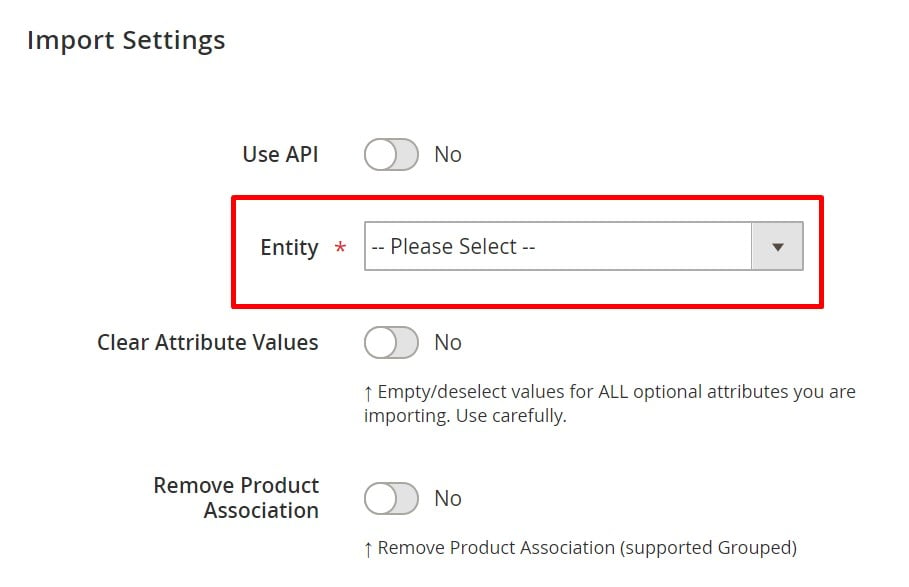
  • Configure General Settings and proceed to the Import Settings section. Here, you can select Content Staging Data among options of the Entity drop-down.
  • When the job is configured, save it and run the update.

As for the Magento 2 Content Staging data export, the process is entirely the same. You can configure it under  System -> Improved Import / Export -> Export Jobs.

Get Improved Import & Export Magento 2 Extension

Improved Import & Export Magento 2 Extension Features

Magento 2 oracle import

Improved Import & Export not only enables the transfers of Content Staging data but also improves multiple other aspects of all import and export processes that take place on your website. Below, we shed light on various enhancements that make your daily routine better.

The Improved Import & Export Magento 2 extension has already become a number one import/export tool for hundreds of merchants all over the world, and you can easily join them. If your e-commerce activities cover integrations, data transfers, and synchronizations with external systems, don’t hesitate to give it a try. Let’s see why the plugin is so useful.

Automated Import & Export Processes

The first significant improvement over the default import tools and most competitors is the ability to automate import and export processes. Our module provides two types of automated data transfers: schedules and event-based triggers.

Schedules

The Improved Import & Export Magento 2 extension lets you use cron to create update schedules. Thus, it is possible to generate any custom interval. Besides, you can select one of the predefined values which are fully customizable.

At the same time, the Improved Import & Export extension lets you simplify transfers of Magento 2 Content Staging Data using profiles that have no schedules. If you need to migrate from an external Magento 2 store transferring all planned content updates, there is no need to create a schedule. If some of your integrations are random or asynchronous, no schedule is necessary as well. Instead, run related data transfers manually. At the same time, you can launch every scheduled profile asynchronously whenever you want.

Configure a schedule as shown below:

Events

As mentioned above, event-based triggers represent another way of automating data transfers including Magento 2 Content Staging Data import and export processes. The alternative method offers improvements for real-time updates – you only need to specify a proper trigger.

Let’s explore a simple example. You need to transfer order data to an external platform in real time. Create a trigger on the basis of an event when a customer places an order. It will launch an export process that transfers order data to a selected third-party system. Thus, you enable instant export on the basis of the Improved Import & Export Magento 2 extension.

Note that it is possible to assign triggers to both system and custom events. After a trigger is defined, specify conditions to make your transfers more precise. For further information, read this article: How to Run Magento 2 Import or Export After Specific System Event or Process.

Advanced Mapping Features

Now, let’s discuss mapping opportunities provided by the Improved Import & Export Magento 2 extension. While you won’t probably need this feature transferring Content Staging data from one Magento 2 website to another, it dramatically improves integrations with external systems. Furthermore, you will need the corresponding tool to migrate from Magento 1.x to 2.x. Different attribute standards are a huge problem; and below, we shed light on how our module helps to solve it.

Mapping Presets

The Improved Import & Export extension provides the ability to reduce the influence of the problem as much as possible. Our module offers several handy tools in this area. First of all, you can leverage mapping presets designed to match external attributes to the corresponding internal ones in a matter of seconds.

Select and apply a preset related to your integration, and the module will do all the work for you. The Improved Import & Export extension will analyze the input data matching all third-party attributes to the internal ones used. If you deal with the default editing process, you have to edit data files manually spending tons of time before every update. Otherwise, the import process will be interrupted.

In its turn, our extension turns everything into a one-time procedure that takes a few seconds. You only have to do several clicks like shown below:

Matching Interface

If a preset is absent, you can map attributes manually. There is an appropriate section right in the admin. The Improved Import & Export Magento 2 extension provides an interface where you can select third-party designation and specify the corresponding internal ones in front of them:

But the example above doesn’t show what to do with the third column “Default Value.” It is designed to specify hardcoded values there which are provided to all items bound to a corresponding attribute.

For instance, you import products from different store views but need to send them to the same store view. Specify a corresponding store view as a hardcoded value for the “_store” attribute. That’s it.

Attribute Values Mapping

And if you don’t want to transfer third-party attribute values, it is also possible to map them with the Improved Import & Export Magento 2 extension. Our module reduces headaches related to external designations even regarding attribute values. They don’t prevent import processes as usual, but there are some exceptions, so it is a good idea to apply attribute values mapping. Especially if it is necessary to spend lots of time and effort editing third-party values after the update is made.

With the Improved Import & Export Magento 2 extension, you get a user-friendly interface where everything can be matched most efficiently. Choose a third-party attribute value and specify the internal one in front of it. Repeat the process until no third-party values are left. For further information, read this article: Attribute Values Mapping.

Attribute Values Editing

In addition to matching, our extension lets you edit attribute values in bulk. The Improved Import & Export module offers the following rules:

  • Add a prefix to multiple attribute values;
  • Add a suffix to multiple attribute values;
  • Split multiple attribute values;
  • Merge multiple attribute values.

Combine them and create conditions to increase the efficiency of bulk editing. Follow this link for more details: How to Modify Attribute Values During Import and Export in Magento 2.

Category Mapping

While moving products from other e-commerce websites, you may face a situation when all items are bound to categories that are not represented on your site. Online stores usually have a unique catalog structure, so you will have to adjust it before running the import process to organize products in correct order. Manual editing requires tons of time and effort, but the Improved Import & Export extension simplifies your routine dramatically. Match external product categories to ones used internally with our extension as shown below:

And you can create new categories on the fly if necessary. Select a parent category and specify a new one to add a missing part of your catalog right during the import process. Both features are described here: Category Mapping.

Attributes On The Fly

And if an update file lacks a complete spectrum of data, it can prevent the import process. But the Improved Import & Export Magento 2 extension lets you avoid errors thanks to the ability to create attributes on the fly. Specify all parameters necessary to generate attributes with the help of the following general form:

Attribute|attribute_property_name:attribute_property_value|…

For further information, read this article: Product attributes import.

Extended Connectivity Options

Extended connectivity options represent another vital import/export improvements introduced in our extension. By default, Magento offers only one way to synchronize data between your e-commerce store and external systems – via data files. As for the Improved Import & Export extension, it not only offers several more ways of creating a bridge between your e-commerce platform and third-party platforms but also provides an extended range of supported file formats.

Multiple File Standards

While Magento is bound to CSV files only, which is enough for some cases, the Improved Import & Export Magento 2 extension essentially increases the number of supported formats. With our module, you can run data transfers using XML, JSON, ODS, and Excel files applying all the module’s features to them. Thus, mapping and scheduling are equally supported with all file format.

Multiple File Sources

Multiple file sources are another way the Improved Import & Export Magento 2 extension increases the flexibility of data transfers. The module offers the following connection options:

  • FTP/SFTP. You can transfer files via a local or remote server.
  • Dropbox. Your Dropbox account can be used instead if necessary.
  • URL. For import processes only, it is enough to specify a file URL.

And if a new update is provided as an archive, you don’t need to extract it as in case of the default import tool. The Improved Import & Export Magento 2 extension will do that for you.

Alternative Ways of Import & Export

Now, let’s take a look at alternative ways of import and export. With the Improved Import & Export Magento 2 extension, you can exchange data not only with the help of files but also using API integrations and intermediary services.

The Improved Import & Export Magento 2 extension lets you connect your e-commerce store to an external system directly via REST, SOAP, and GraphQL APIs. Note that mapping and scheduling are fully supported!

As for intermediary services, they are represented by various online sheets. The Improved Import & Export Magento 2 extension lets you use Google Sheets, Office 365 Excel, or Zoho Sheet to exchange data between your website and external systems. The integration on the basis of Google Sheets looks as follows:

Magento 2 Google Sheet import

Watch the following video to see the extension in action:

Final Words

Magento 2 Commerce offers lots of user-oriented improvements including the Content Staging functionality which helps you turn every static page into a dynamic experience that changes according to your plan. But the platform doesn’t let you import and export the corresponding data. If you migrate from one store to another, you will never transfer Content Staging data using the default Magento 2 tools. Luckily, there is the Improved Import & Export Magento 2 Extension which allows moving the corresponding entity between Magento and external systems. For further information, follow the link below and contact our support:

Get Improved Import & Export Magento 2 Extension