MageDelight Authorize.net CIM Magento 2 Integration
In the following Magento payment gateway integration tutorial, we describe how to connect Magento 2 to the Authorize.net CIM payment gateway. Unfortunately, the default platform doesn’t provide secure transaction data transmission. Therefore, it is highly recommended to integrate your Magento 2 website with a reliable third-party platform. As for Authorize.net CIM, it is a community-proven platform that prevents various frauds and stops malefactors from committing digital crime. So, what does this Magento 2 payment gateway extension offer?

- The module makes all transactions secure against frauds;
- The checkout process is simple and user-friendly;
- Accept.js is fully supported;
- Automatic refunds are supported too;
- Customer payment methods are saved safely;
- SOAP and XML support;
- Payment reauthorization in partial invoices;
- Orders can be placed by admins with stored cards on behalf of customers;
- Saved cards can be deleted or edited;
- Magento 2 PCI compliance.
Check how this Magento 2 payment gateway module works and we will explore its core features in more details.
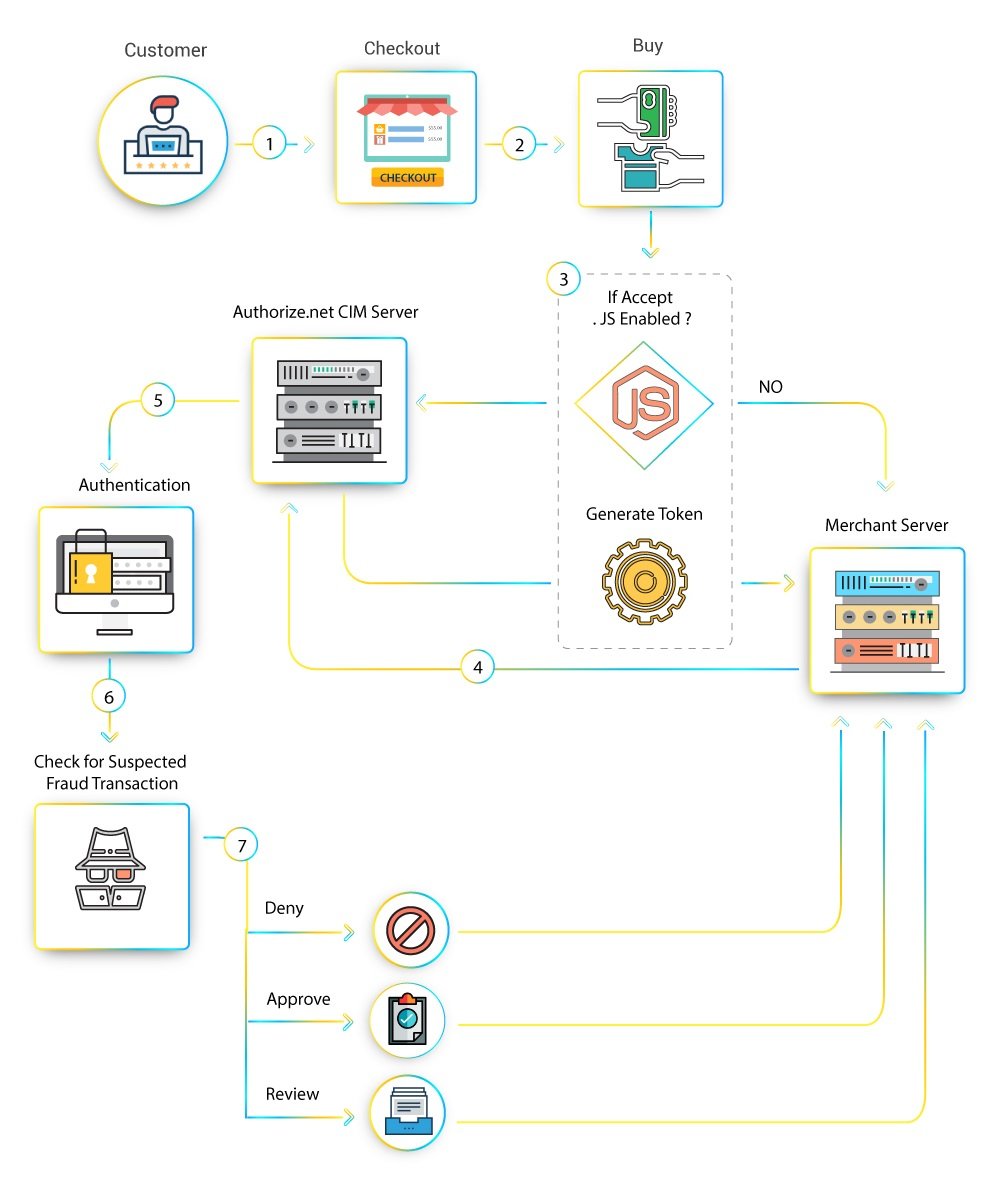
Due to various fraud detection rules, the MageDelight Authorize.net CIM Magento 2 integration extension allows to detect frauds and decline suspicious payments. Alternatively, you can verify the details before processing any payment. As a result, payment transactions become more secure.
Another security improvement allows to add a mediator in the form of Authorize.net CIM. As a result, your customers get an opportunity to provide payment details to one of the most secure and leading payment gateways. From the merchant side, you will seamlessly receive your payments without any troubles.
We’ve already mentioned that the MageDelight Authorize.net CIM Magento 2 extension allows to create partial invoices or multiple invoices for the same order. It is even possible to create credit memos online. And in case a partial refund is required, the MageDelight Authorize.net CIM Magento 2 module fully supports it.
CVV verification adds another security layer to your store. It helps to earn trust among customers and makes payments really safe. To make transactions even more secure, add a field for validating customer address – the feature is supported by the Magento 2 module.
Also note that this Magento 2 payment gateway extension works with all credit card types accepted by Magento. Therefore, you don’t have to be worried about services restricted due to the extension’s limitations.
Table of contents
Backend
Let’s configure the MageDelight Authorize.net CIM Magento 2 module first. You can find extension settings under Stores -> Settings -> Configuration -> Sales -> Payment Methods -> Authorize.net CIM (Customer Information Manager) By MageDelight. First of all, you should enable the extension and the Authorize.net CIM MAgento 2 payment gateway – set “Enabled” to “Yes”. Next, type a title of the gateway. You can replace or edit “Authorize.net CIM By MageDelight”. Then specify API Login ID and Transaction Key. Both fields are secure. As for “Test Mode”, it can be enabled or disabled depending on the environment of your web shop (Production or Development). Now, choose a payment action: “Authorize Only” or “Authorize and Capture”. The first one will only authorize the requested amount on the credit card on placing an order from frontend or backend. The second one will directly capture the requested amount.
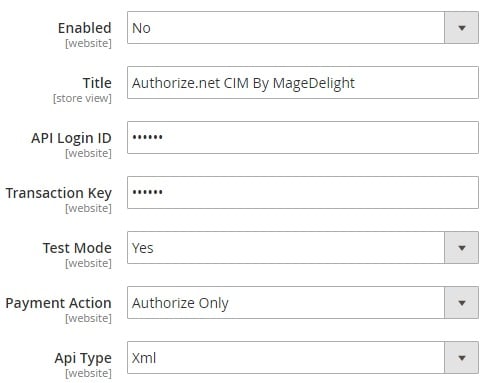
As for the “API Type” field, it allows to select either SOAP or XML. Choose Magento payment gateway API type depending on your ecommerce needs and requirements. In the “Gateway WSDL” field, specify “https://api.authorize.net/xml/v1/schema/AnetApiSchema.xsd” for XML and copy & paste “https://api.authorize.net/soap/v1/Service.asmx?WSDL” if SOAP is selected in the above field. As for gateway URLs for live and test modes, they also depends on the Magento payment gateway API type specified in the “API Type” field. Use “https://api.authorize.net/xml/v1/request.api” for XML and “https://api.authorize.net/soap/v1/Service.asmx” for SOAP.

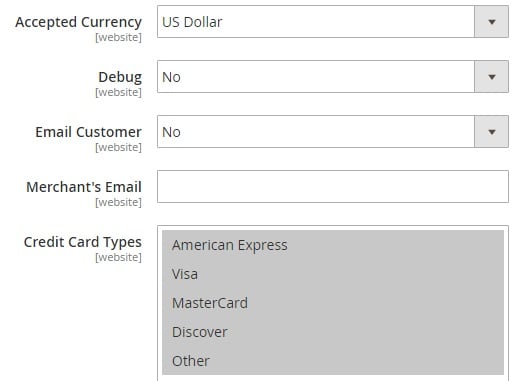
Next, define currency you want to accept via the authorize.net payment gateway. Usually, it is “US Dollar”. Depending on the Production / Development environment of your store turn on / off the debugging mode. Set “Email Customer” to “Yes” to notify buyers from the Authorize.net payment gateway when a transaction is successfully completed from your Magento 2 store. In “Merchant’s Email”, specify email address to get copies of notifications. Alternatively, you can leave the field blank to ignore this feature. In “Credit Card Types”, select what cards to accept via the Authorize.net Magento 2 payment gateway. Press and hold CTRL to select multiple card types.
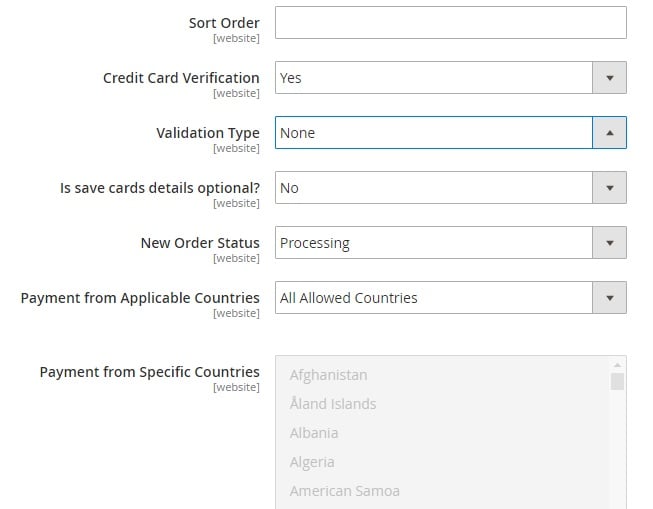
Besides, you can set a sort order for the gateway, enable/disable credit card verification, and select a validation type of Authorize.net Payment gateway when processing transactions:
- None – additional verification by Authorize.net is ignored;
- Test – only field validation is performed;
- Live – the gateway generates a small transaction ($0.01) to the processor to verify the card holder validity (choose this option for the for production environment).
Set “Is save cards details optional?” to “Yes” to allow customers to choose whether to save credit card details for further usage or not. If set to “No”, the information will be saved in any case. Next, select a status for all new orders: Processing or Suspected Fraud. The second one allows to verify orders before processing them. In “Payment from Applicable Countries”, select “All Allowed Countries” or “Specified Countries”. For the second option, specify countries you want to accept payments from.
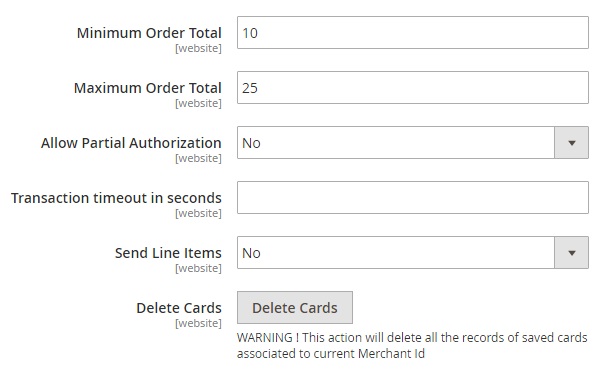
The settings section of the MageDelight Authorize.net CIM Magento 2 extension also allows to specify such parameters as minimum and maximum order total, enable partial authorization (the option defines whether a credit card without enough balance can be used to place an order), specify transaction timeout in seconds, and send line items – display order items in gateway generated emails and a transaction details page in admin. The last option allows you to delete stored credit card details.
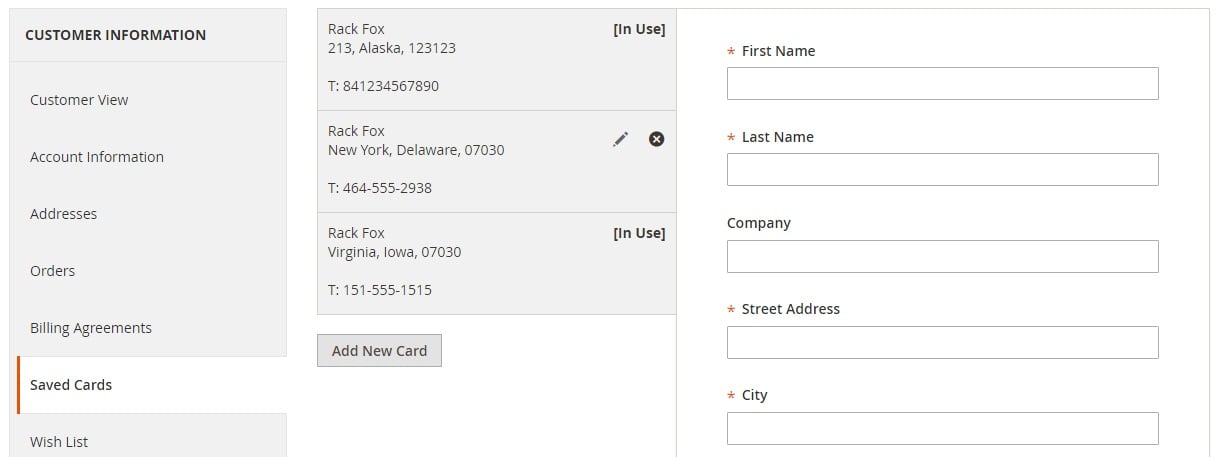
Now, go to Customers -> All Customers and click the “Edit” button in front of any customer. You are on a customer information page. Find the “Saved Cards” tab. Here, you can view, edit, or delete all credit cards saved by a customer. Furthermore, it is possible to add new cards.
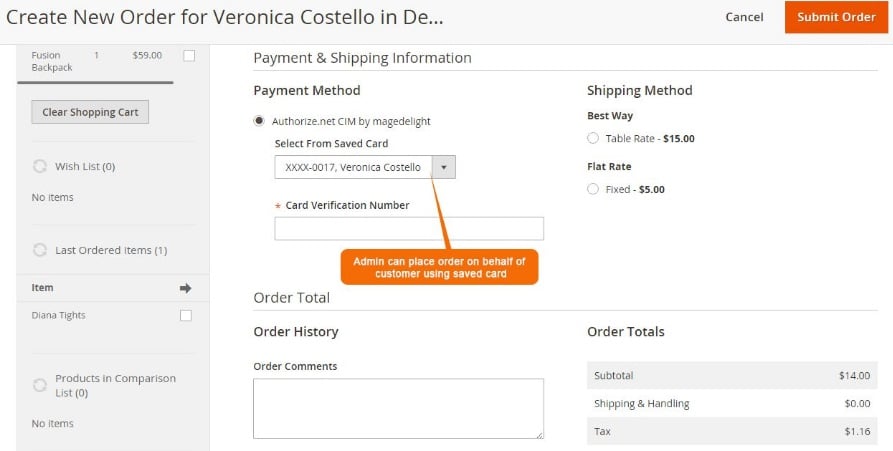
Another backend area enhanced by the MageDelight Authorize.net CIM Magento 2 Integration module is available under Sales -> Orders. Create a new order, and in the “Payment & Shipping Information”, select a saved credit card.
Frontend
Now, let’s discover how customers see the MageDelight Authorize.net CIM Magento 2 module. First of all, go to a customer account. Here under “My Saved Cards” tab, you can see a list of caved credit cards. You can edit or delete them.

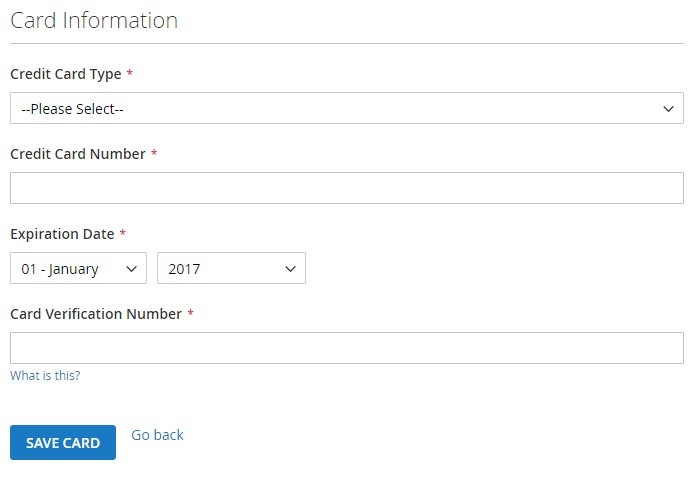
It is also possible to add a new card. Hit the “Add New Card” button and specify contact information. Next, specify credit card details. Note that you can select any of the credit card types supported by Magento. And there is the “Card Verification Number” field below.
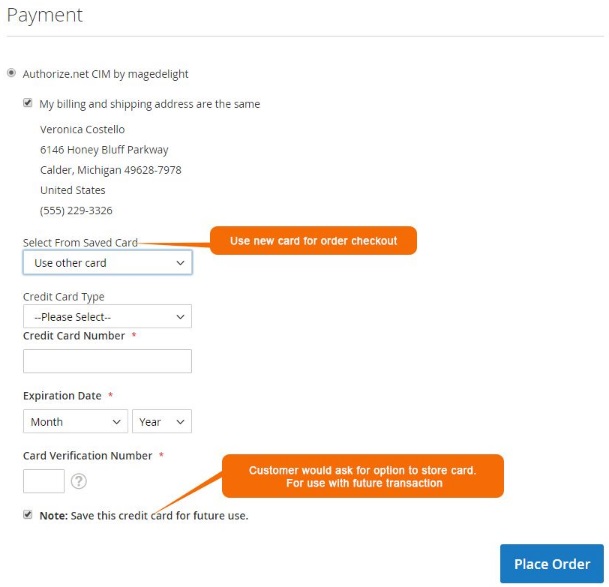
While on a checkout page, you can select a credit card from saved ones.
Final Words
Magento 2 Authorize.net CIM integration is no longer a problem du to the Magento 2 payment gateway module by MageDelight. As you can see, the extension provides all the necessary features to make payment transactions as much secure as possible. The tool costs $399 and you can purchase it here:


