
How to import CSV files from /var/import/ folder to Magento 2 automatically

Today, we explain how to import CSV files from the /var/import/ folder to Magento 2 automatically. As usual, you will need Improved Import & Export to overcome the default platform’s limitations, such as the inability to create update schedules. Configure the extension as we describe below, and it will do all the daily data transfer tasks for you. For more tips like this one, follow our Magento 2 Developer’s Cookbook.

Table of contents
Import Case
asks how to import the “price per customer” csv file from /var/import/price/ folder to Magento 2.4.1 automatically. The author uses the Price Per Customer Magento extension that provides an option to import manually. However, the Navision system that works along with Magento 2 generates price files in /var/import/price every 5 minutes. It is necessary to import these files to Magento 2 auto and then remove imported files from the dir. Let’s see how Improved Import & Export helps solve this problem.
How to import CSV files from /var/import/ folder to Magento 2 automatically
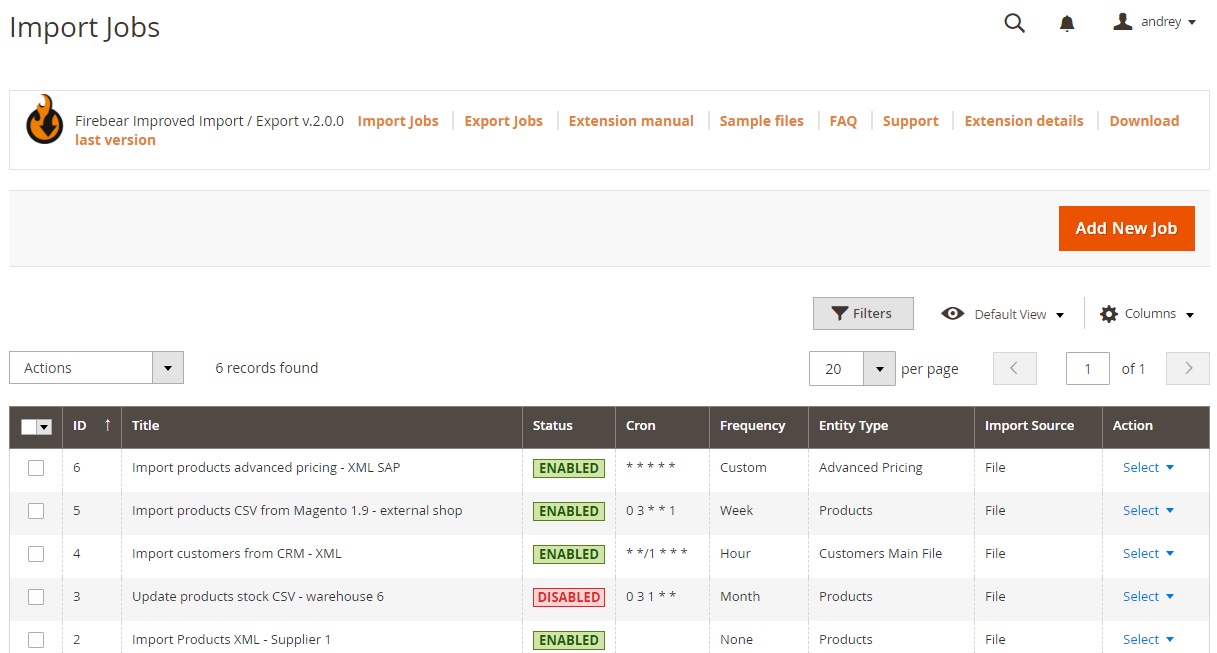
First of all, you need to create a new import job to import CSV files from the/var/import/ folder to Magento 2 automatically. You can do that under Admin -> System -> Import Jobs.
Hit the Add New Job button. Now, you have to configure the following sections of settings to import CSV files from the/var/import/ folder to Magento 2 automatically:
General Settings
Define the name of the job, create a schedule of updates, and choose general job behavior.
- Switch Enable Job to let it run according to the set schedule.
- Think about the expressive Job Title that describes the job best, such as Price per customer import for our import case.
- Configure the Frequency of the import job: select one of the predefined values or set up a “Custom” Frequency.
- Cron Schedule is where you configure your custom frequency – every 5 minutes.
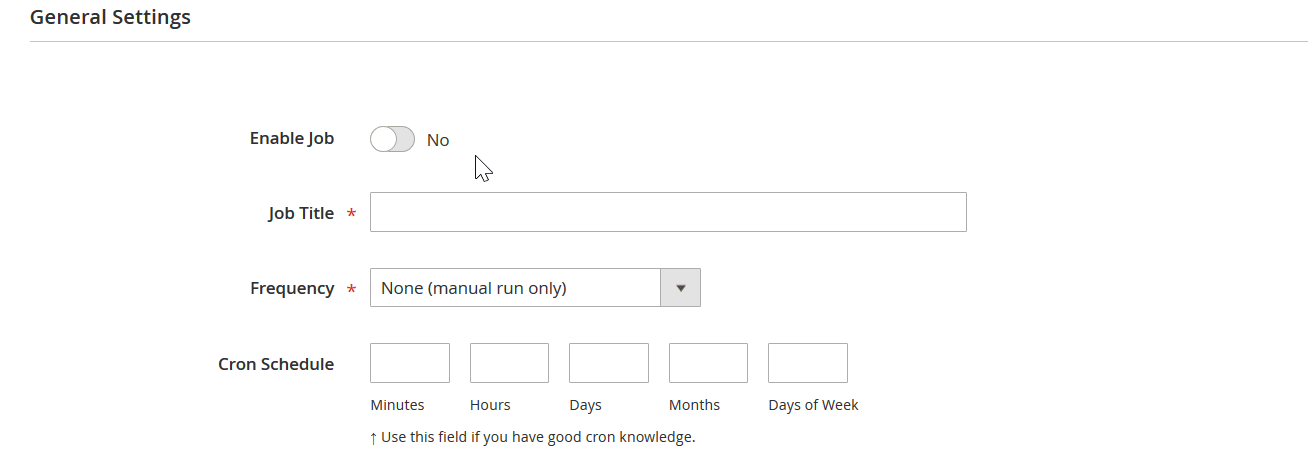
You can learn what other settings in this section mean in the extension manual.
Import Settings
In the Import Settings, you can select the entity that will be imported. In our case, it can be Advanced Pricing if prices per customer are tied to specific customer groups. You can also enable API import and decide whether you want to clear product attribute values upon import.
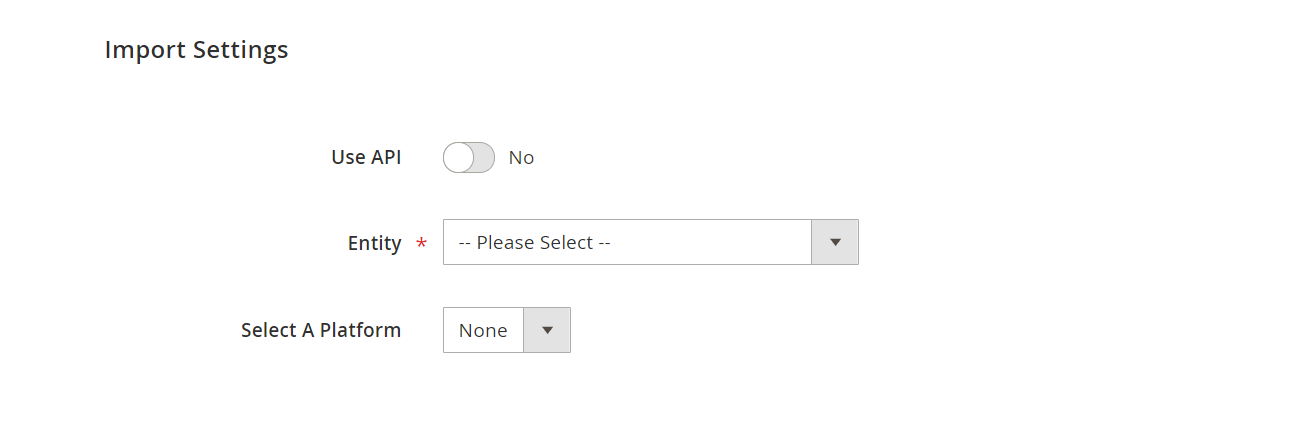
If you transfer data from another platform, the extension lets you enable automatic presets that edit the selected entity according to Magento 2 requirements.
Import Behavior
The Import Behavior section lets you choose whether you want to add/update, only add, only update, replace, or delete the items.
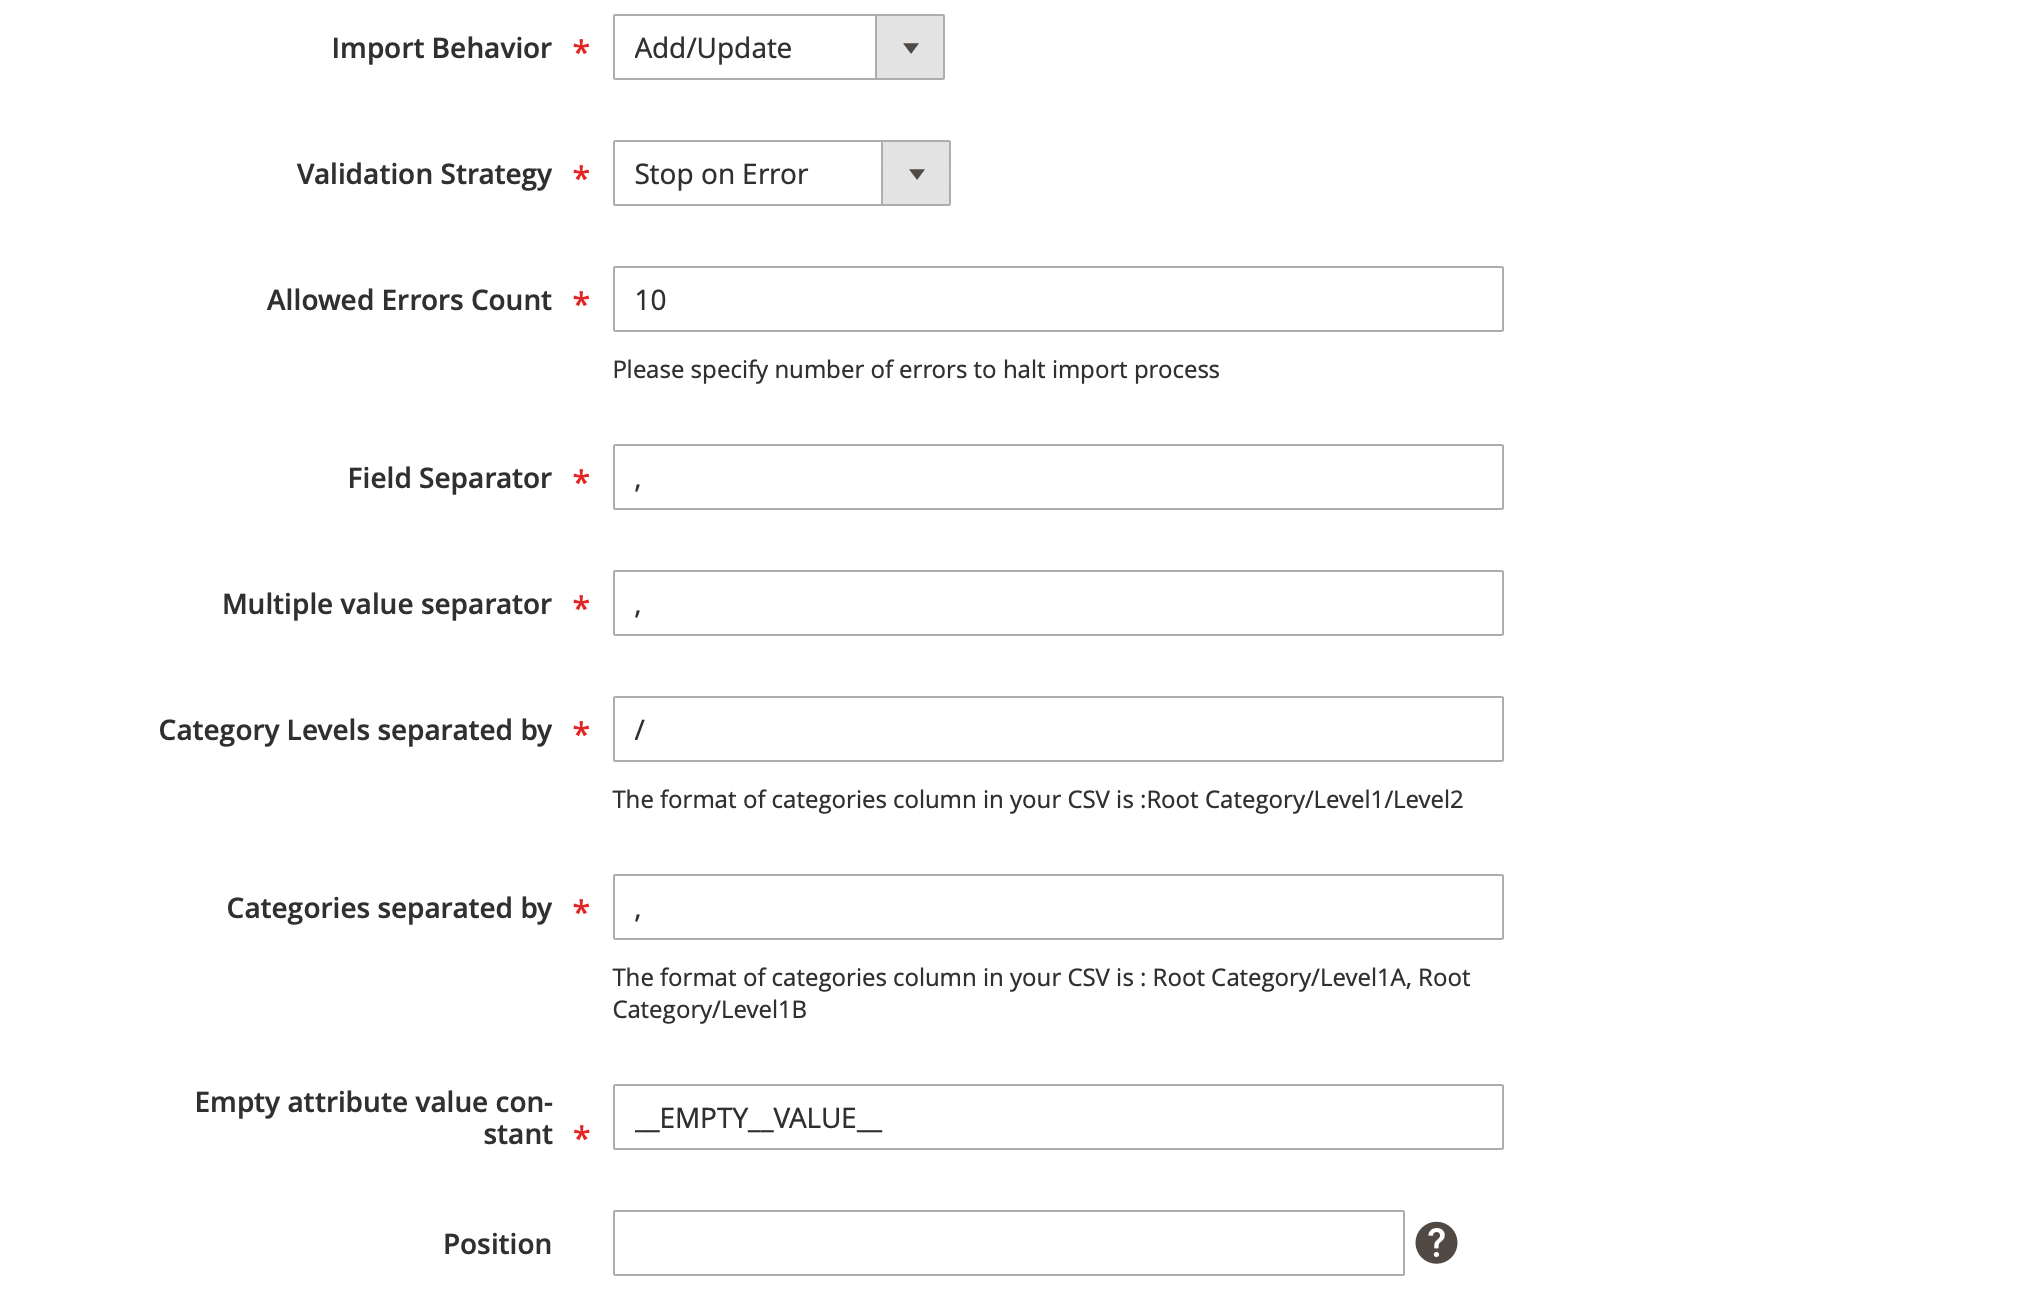
The Validation Strategy lets you either “Stop on Error” or “Skip error entries” during the import process.
Then, choose various separators in case your import file differs in formatting from the native Magento 2 CSV file.
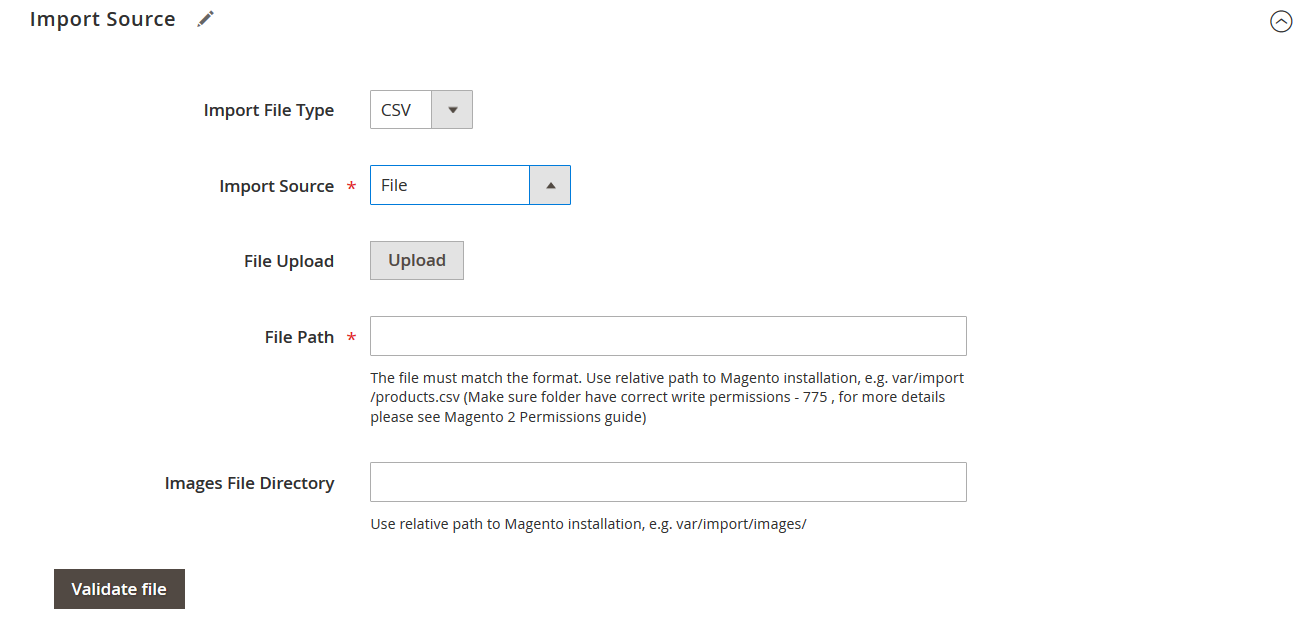
Import source
In the Import File Type section, you can discover lots of useful improvements in comparison to the default import procedure. Here, you can select such file types as CSV, XML, XLSX, ODS, and Json. Let’s specify CSV as required in our import case.
Next, choose your import source: File, FTP, SFTP, URL, Dropbox, Google Sheets, etc. In our situation, let’s select “File”. You can upload the file upload or specify its path for automated data transfers – /var/import/price.
That’s it. Now, you know how to import CSV files from the /var/import/ folder to Magento 2 automatically. Follow these links for more information about the extension:
Get Improved Import & Export Magento 2 Extension
Improved Import & Export Manual