
Advanced Content Manager for Magento 2

Ecommerce business is continuously evolving, creating tougher competition for merchants. For an online store owner, eye-catching design and diverse content of a website is a proven way to higher traffic and better search engine rankings. If a visitor can find engaging and useful information on a web store, it is more likely they will get interested in your products or services and make a purchase. This way, properly organized content management improves customer loyalty and increases conversion rates.
Today, we present you a solution that is built to reinforce your content marketing strategy – Advanced Content Manager for Magento 2 by Blackbird. ACM2 is a powerful CMS module that allows merchants to add various blocks with custom content to their websites and create a structured content layout. With the help of this Magento 2 module, you can create blogs, lookbooks, portfolio, testimonials, landing pages, and other content types in line with your marketing goals.
Below, we describe the functionality of the Advanced Content Manager extension in detail and explore its backend interface.

The Advanced Content Manager extension for Magento 2 by Blackbird provides comprehensive functionality for content management on an online store. The module enables merchants to create various content types, add contents to them, and generate content lists in the Magento Admin. This way, extension users can leverage multiple online marketing mechanisms. The Magento 2 module makes it easier to attract new customers and increase the loyalty of existing clients with high-quality articles, product descriptions and reviews, image galleries, and other content available on your website.
Advanced Content Manager is a one-for-all solution that provides necessary tools for effective content management for developers, admins, and marketing specialists. The module brings some time-saving features for developers and the possibility to customize and override default templates. The extension’s user-friendly backend interface allows admins to easily create and manage all contents and their lists and configure layouts without any coding skills. As for content marketers, they get a complete toolset for building an effective inbound marketing strategy and generating engaging content.
Table of contents
Features
- Wide range of content types;
- Various field input types;
- WYSIWYG editor;
- Repeater fields functionality;
- Layout manager with a drag-and-drop tool;
- Customization options with HTML;
- Content lists generation;
- Multi-store management;
- Support for multiple languages;
- SEO tools;
- Support for meta data tags;
- Google XML Sitemap generation;
- Import/export of content and content types.
With Advanced Content Manager for Magento 2, you can easily generate a wide variety of content types with custom elements. This way, you can create beautiful landing or home pages, image galleries and lookbooks, FAQ and news articles, presentations, custom blocks with testimonials and comments, store locator, and many more.
When creating your content, you can add multiple custom fields to it and choose different input types. Thus, you can use text fields and areas, files and images (including cropped pictures), selection menus, and date and time input. It is also possible to set relation of a content type to products and their attributes, categories, contents and their lists, and customers. For example, you can link “comment” and “blog” content types to each other. In the same way, you can bind your content with a particular country, currency, or locale (combination of language and country). With the ACM module, you also get access to the WYSIWYG editor, so you will not face any difficulties in writing and editing your texts. Besides, the Magento 2 CMS module provides repeater fields functionality, allowing users to create repeatable sets of fields.
Another advanced feature available with ACM for Magento 2 is a layout management tool that enables users to create custom layouts with various content elements. With the layout manager, you can quickly set the number of columns to display and place all required fields on a content page using the drag-and-drop tool. Thus, you will be able to use an intuitive constructor letting you organize various content blocks and get control over their frontend display. Besides, the module’s layout manager allows admin users to build content lists and include relevant contents there in a few clicks.
The Magento 2 CMS module simplifies management of multiple stores and allows translating content to different languages. With the extension, it is possible to create and modify content per each store view, including all fields and URLs. Besides, you can add flag icons to quickly identify each of your websites.
As for search engine optimization, Advanced Content Manager helps store owners to make all their content types more SEO friendly and improve visibility for search engines. The extension allows adding meta data (titles, description, keywords) and Facebook Open Graph data and generate Google Sitemap files.
Next, we dive deep into the backend interface of the Advanced Content Manager extension and show how the described above features work from the admin perspective.
Backend
Content Types
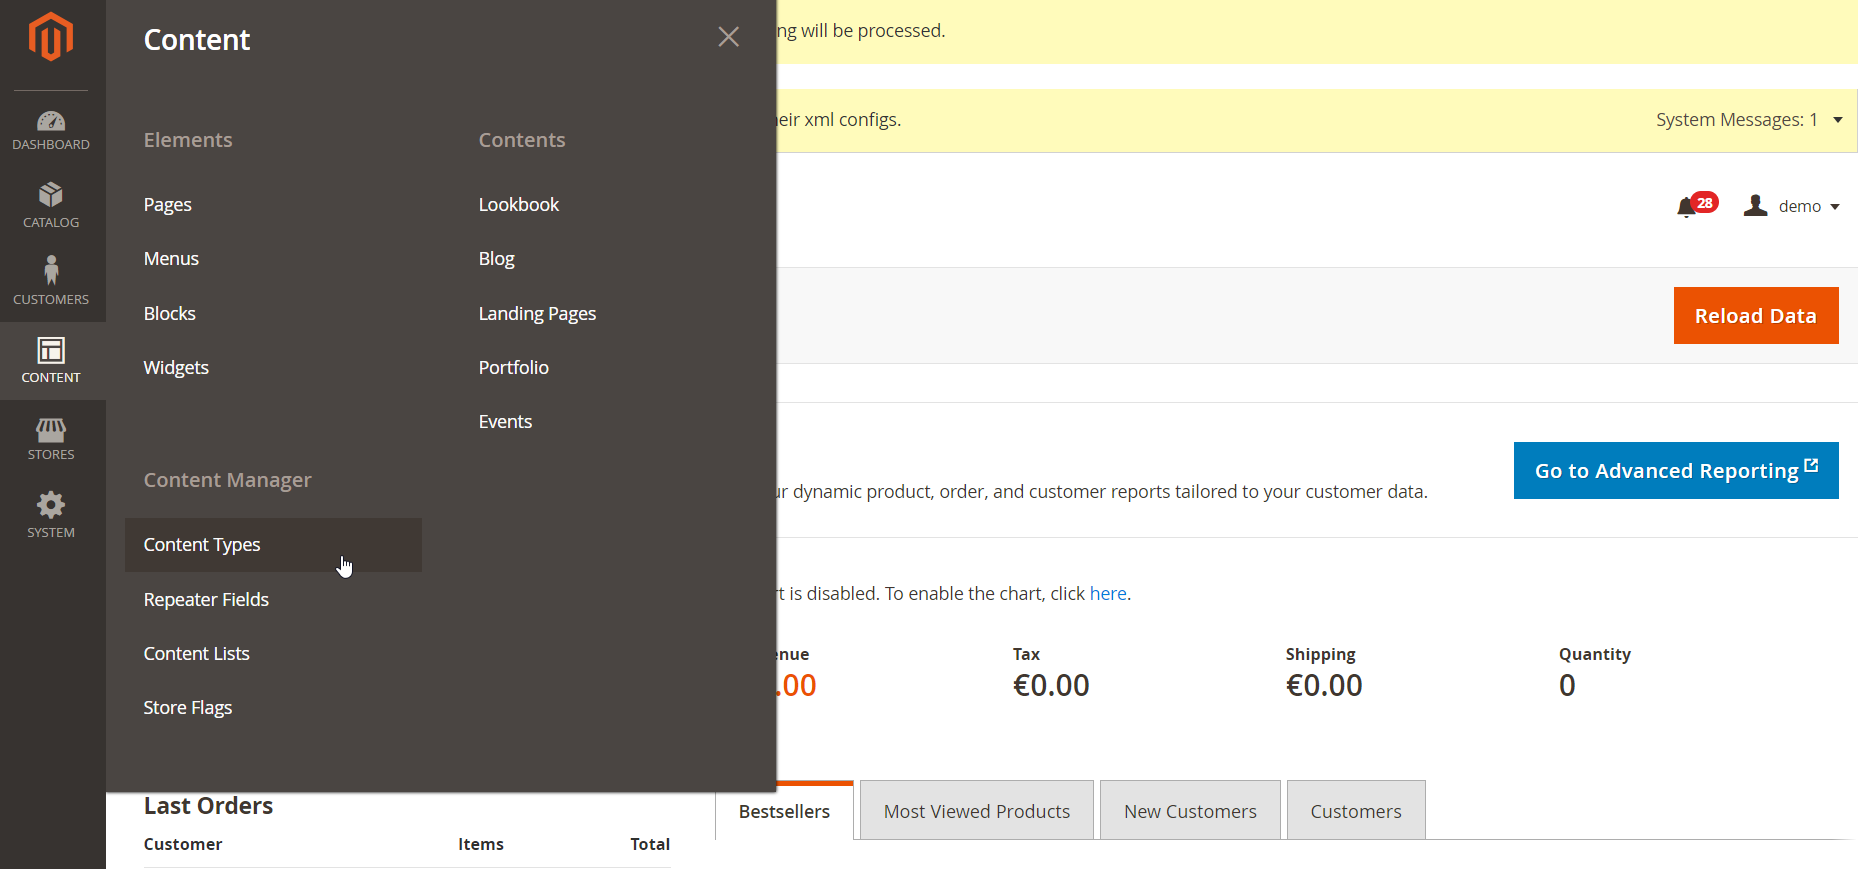
To view existing and add new content types, navigate to Content -> Content Manager -> Content Types.
All content types are displayed on the grid that shows their titles, identifier, description, date and time of creation and modification, and visibility. It is possible to apply filters to each column, edit or delete a selected content type from the Action column, as well as delete content types in bulk. At the right top corner of the page, there are 2 buttons: Import Content Types and Add New Content Type.
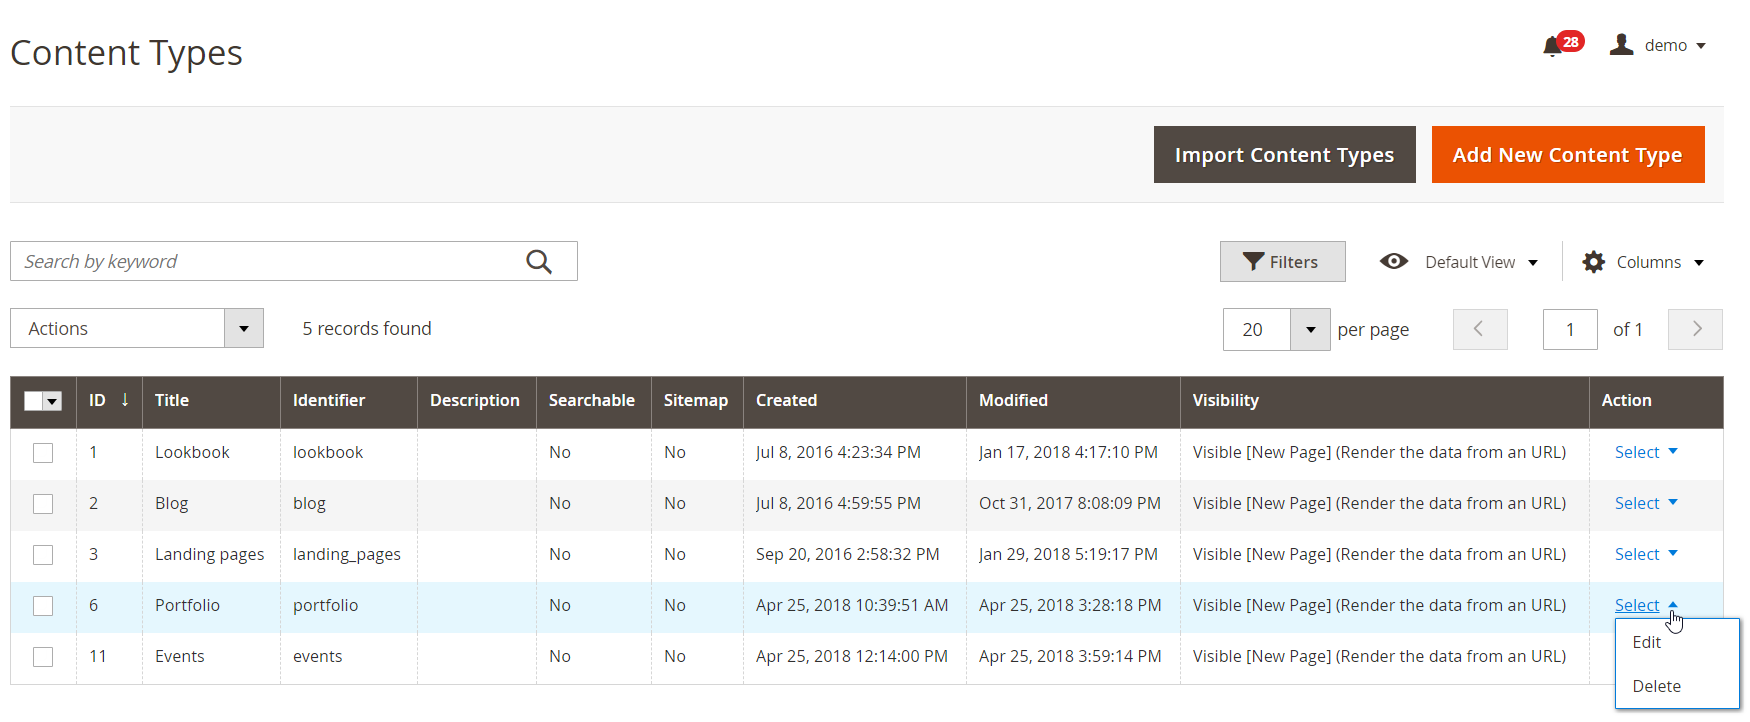
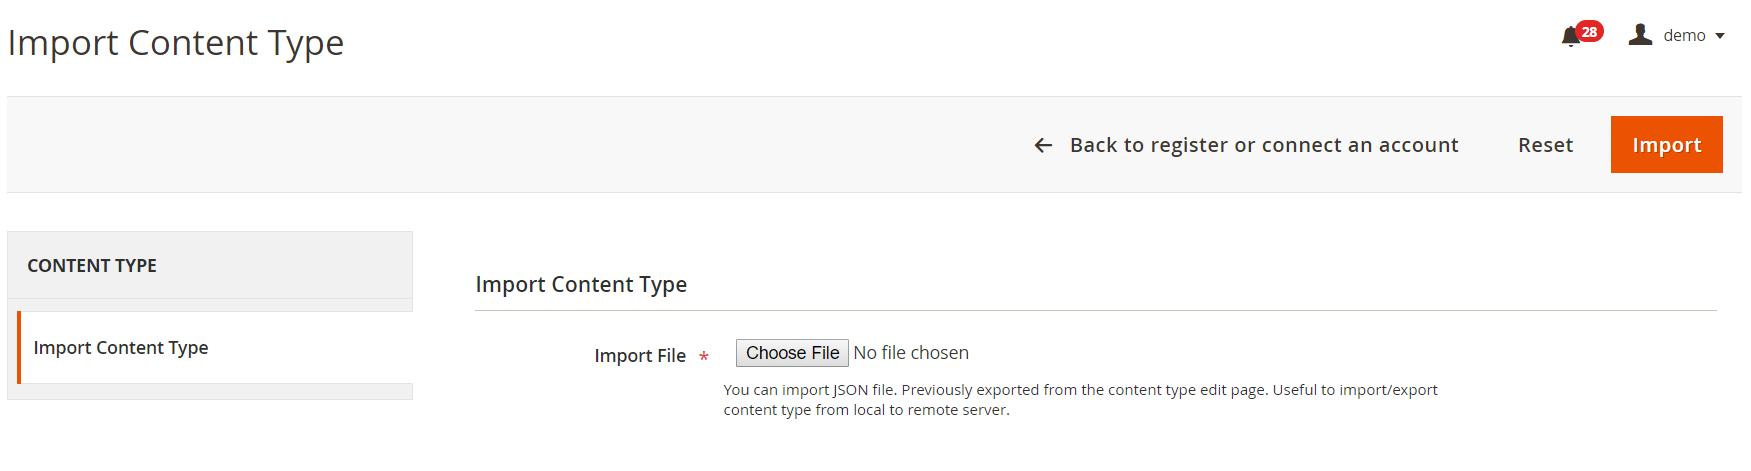
The first button opens a separate page where you can upload a file in the .json format.
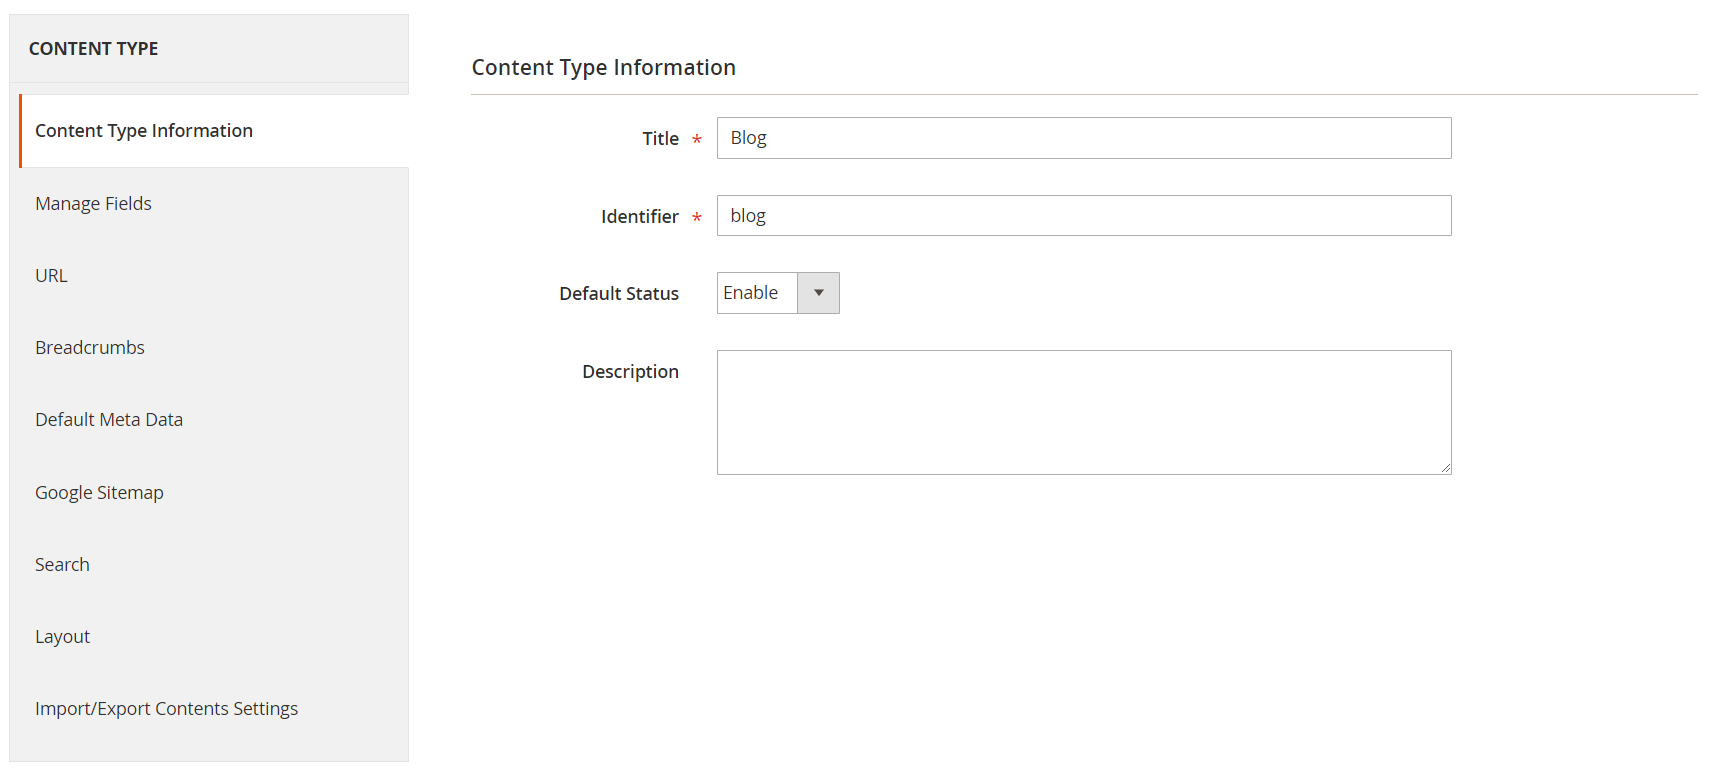
When adding a new content type, you will need to configure its options in 9 tabs: Content Type Information, Manage Fields, URL, Breadcrumbs, Default Meta Data, Google Sitemap, Search, Layout, and Import/Export Contents Settings.
In the first tab, create a title of this content type for admin purposes, assign its unique ID in the Identifier field, set default status (Enable/Disable), and add a description.
In the next tab, you can create a custom content form editor. Click the “Add New Fieldset” button to add a new fieldset to your form and enter its name.
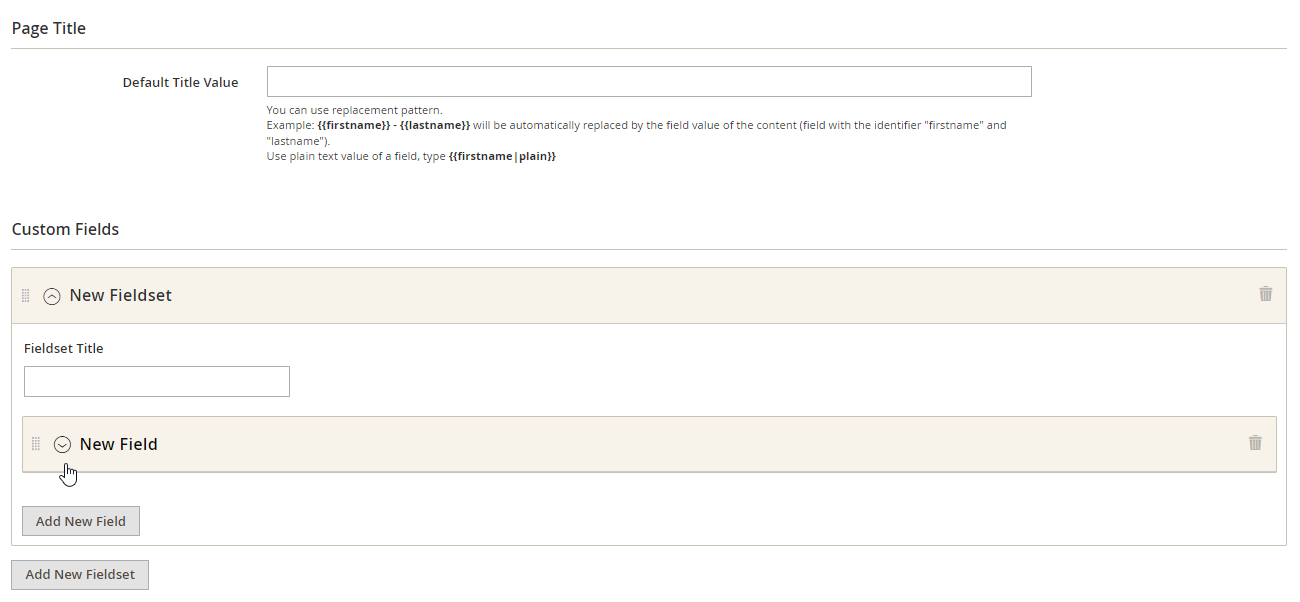
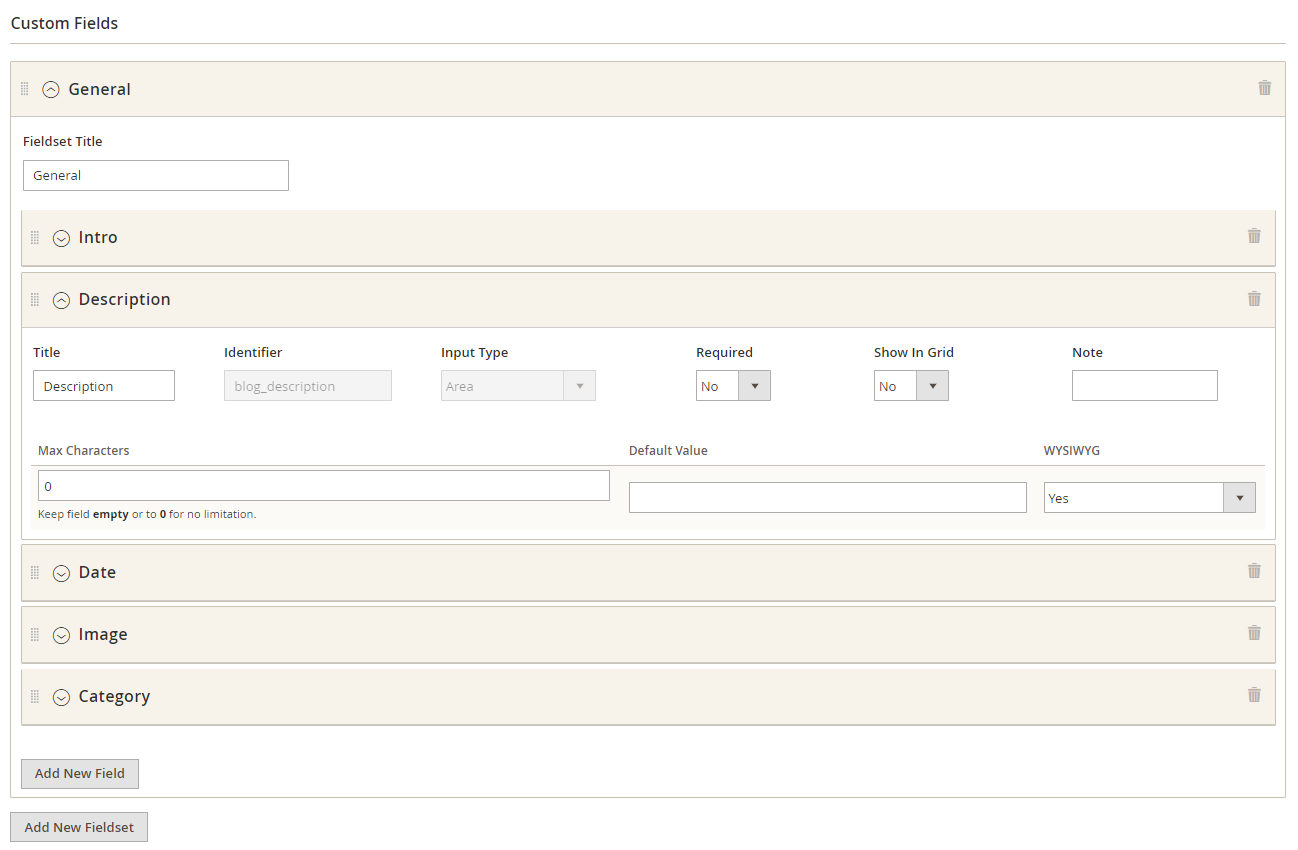
Next, you can create multiple fields in the fieldset by clicking “Add New Field”. When adding a custom field, specify its title, identifier (set by default, but you can change it), and its input type. Field type options include Text, File, Select, and Date variations; relation to product, category, content, content list, attribute, customer; Country, Currency, Locale; and Repeater Fields. In general field settings, you can also define a field as required or not, decide whether to include it in the content listing, and add an admin note. Other field settings vary depending on the input type. In the example below, selected field type is text area, for which you need to set a limit on the number of characters, specify a value entered by default, and enable/disable WYSIWYG editor.
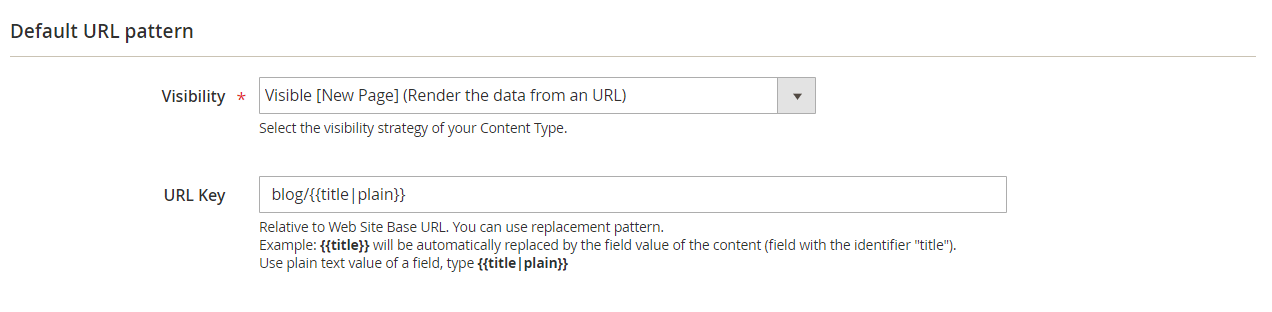
In the next tab, you can set the visibility of a default URL and specify a URL key.
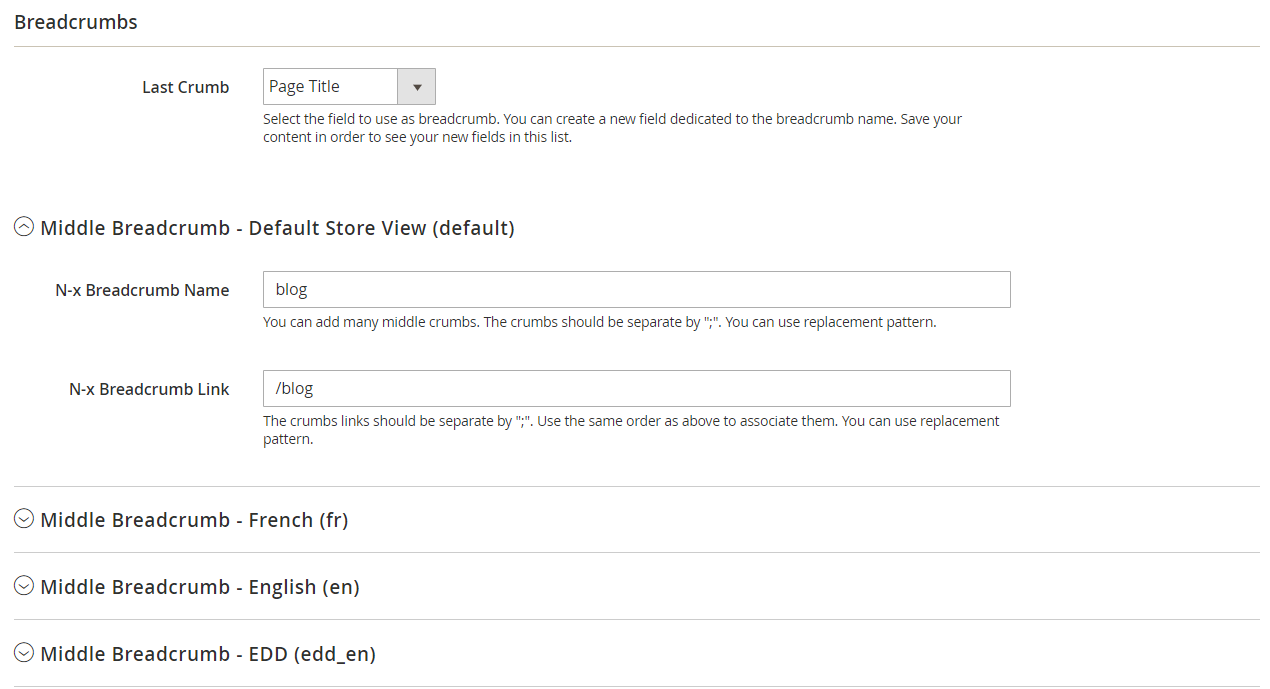
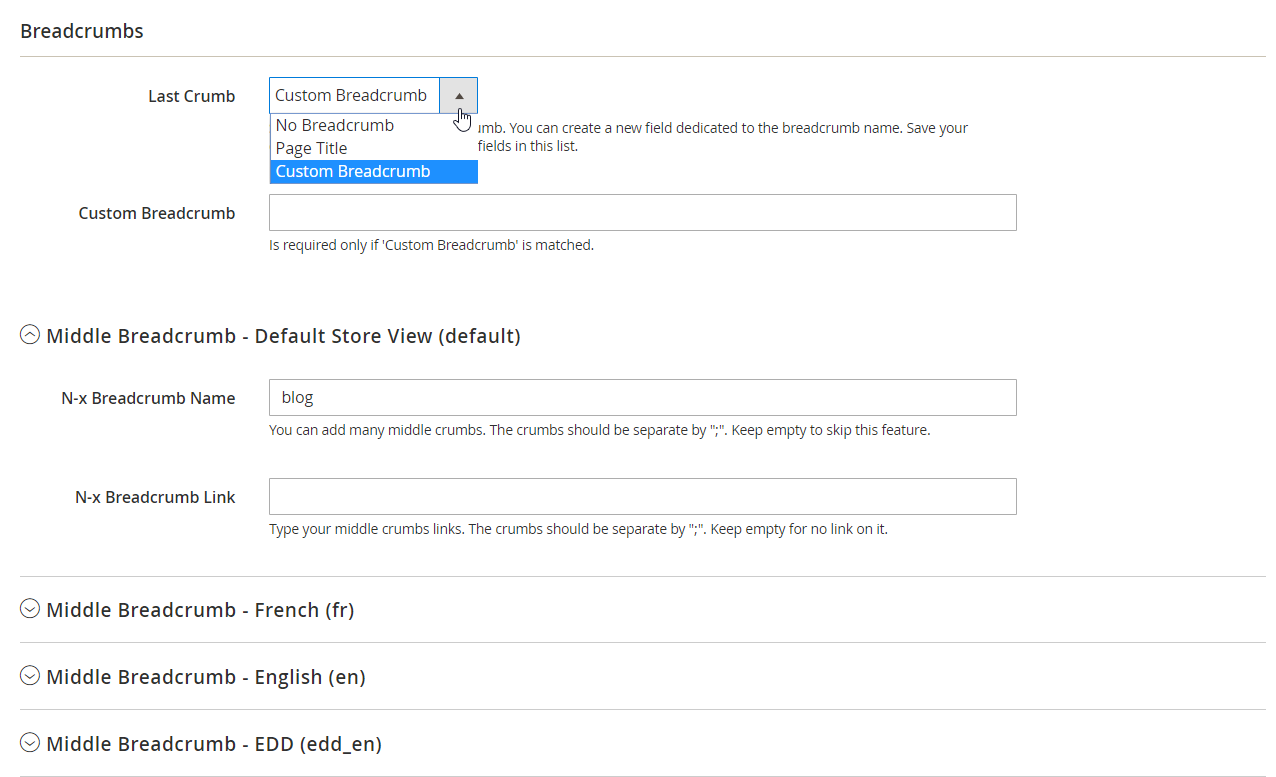
In the Breadcrumbs tab, select a field that will be used as a breadcrumb and enter middle breadcrumb names and crumbs links per each store view.
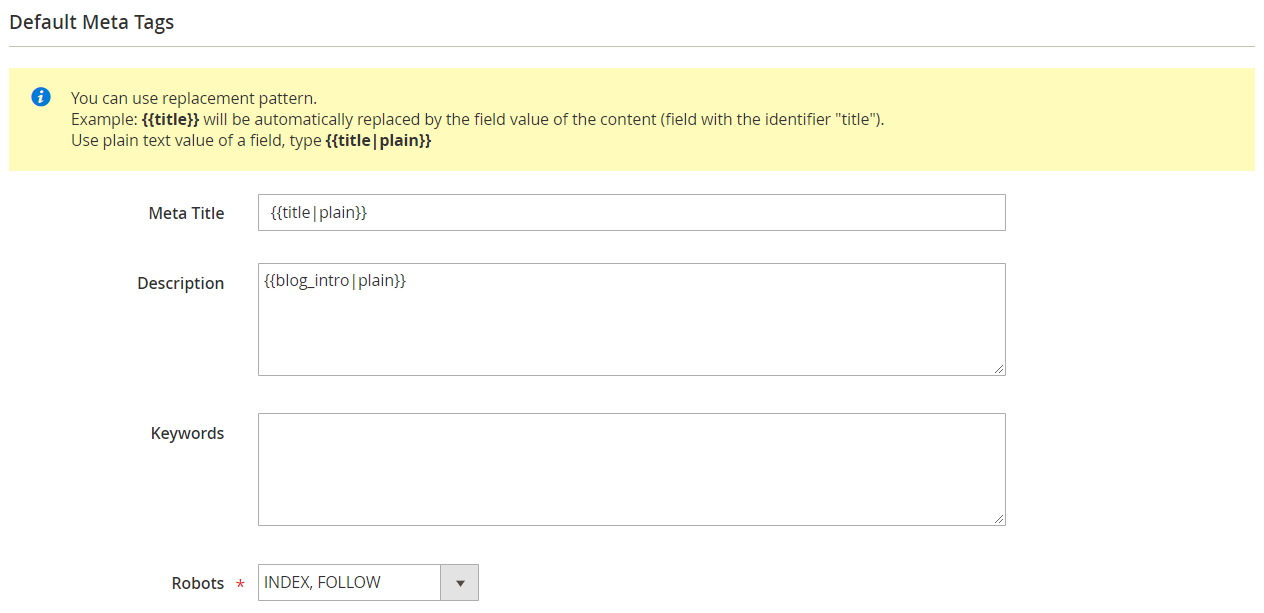
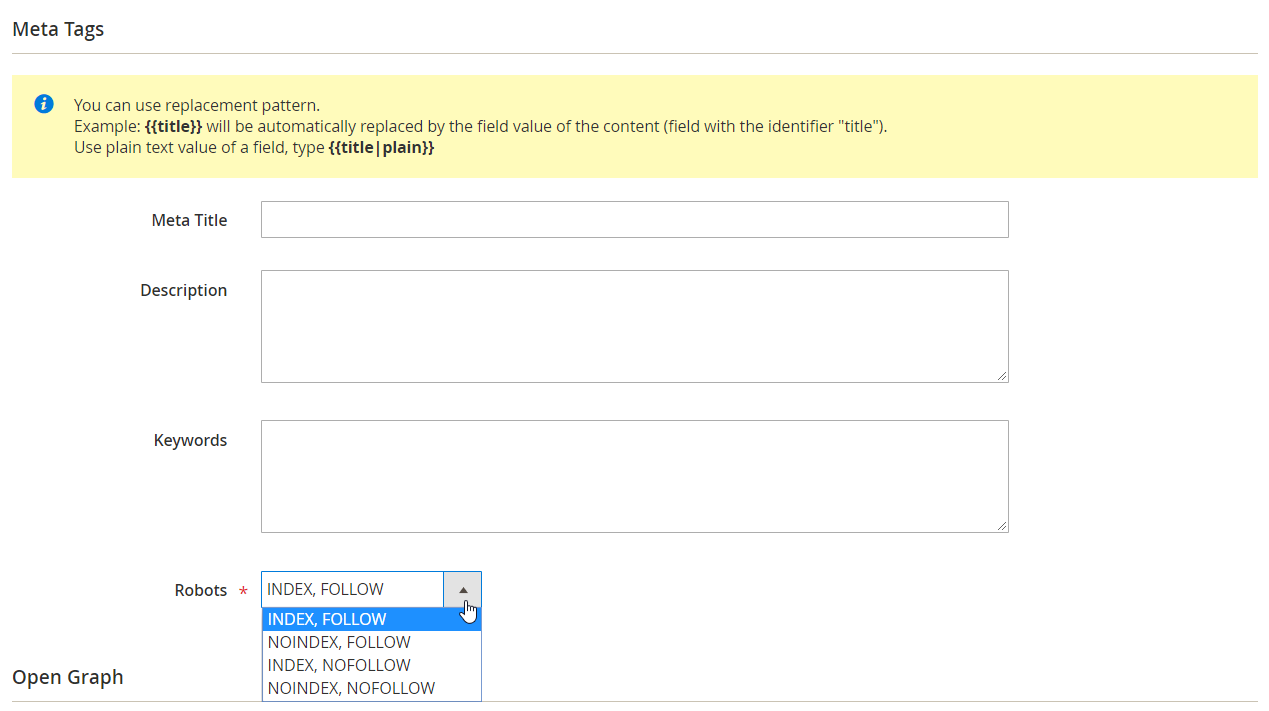
In Default Meta Data, specify meta title, description, and keywords and select which robots to use.
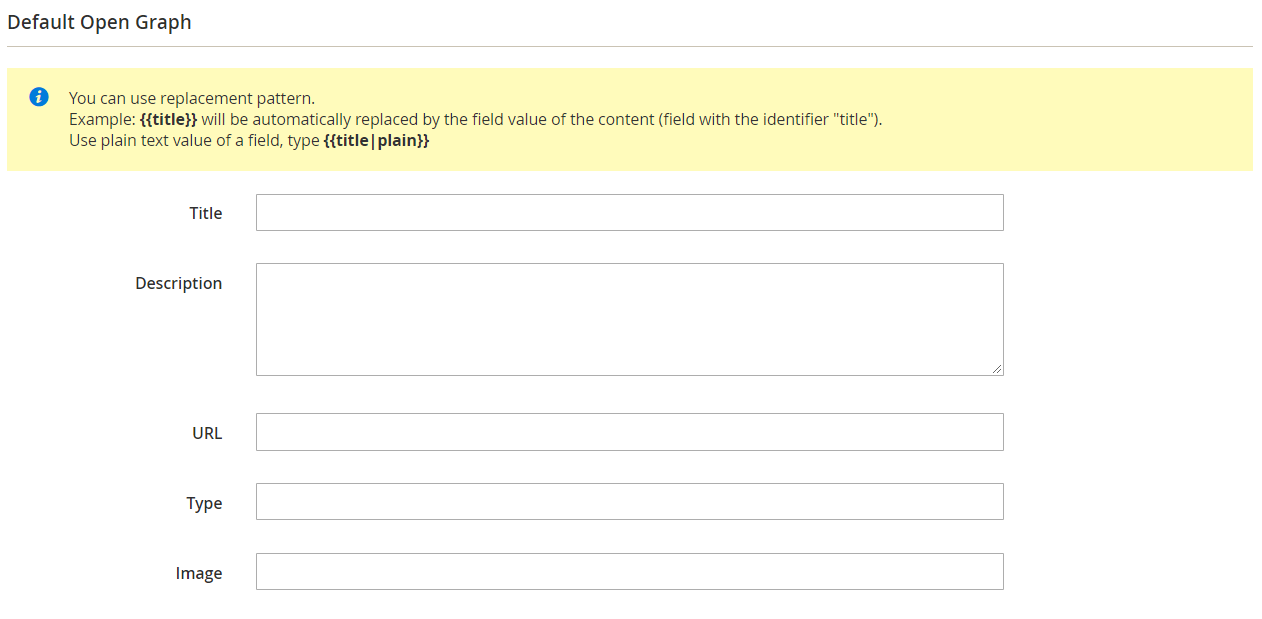
In the same tab, you can specify default meta data for Facebook Open Graph.
ACM for Magento 2 also provides Google Sitemap XML settings. In the relevant section, you can enable/disable the feature and set frequency and priority for data included in the XML file.

In the next tab, you can activate the search function for the created content type.

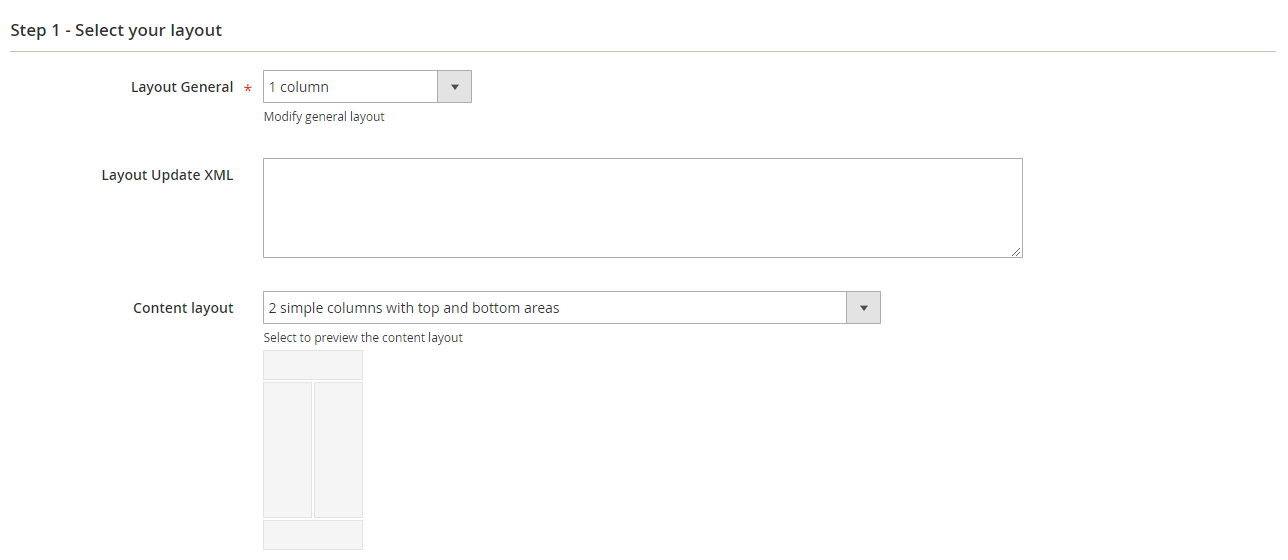
The Layout section is divided into 3 steps that will allow you to configure the display of your content type on the frontend. First, set a general layout that will be applied to all pages, as well as specific content type layout. On Step 1, there is also a Layout Update XML field where you can insert your XML code.
Step 2 offers a selection of elements that can be dragged and dropped to the layout manager area.

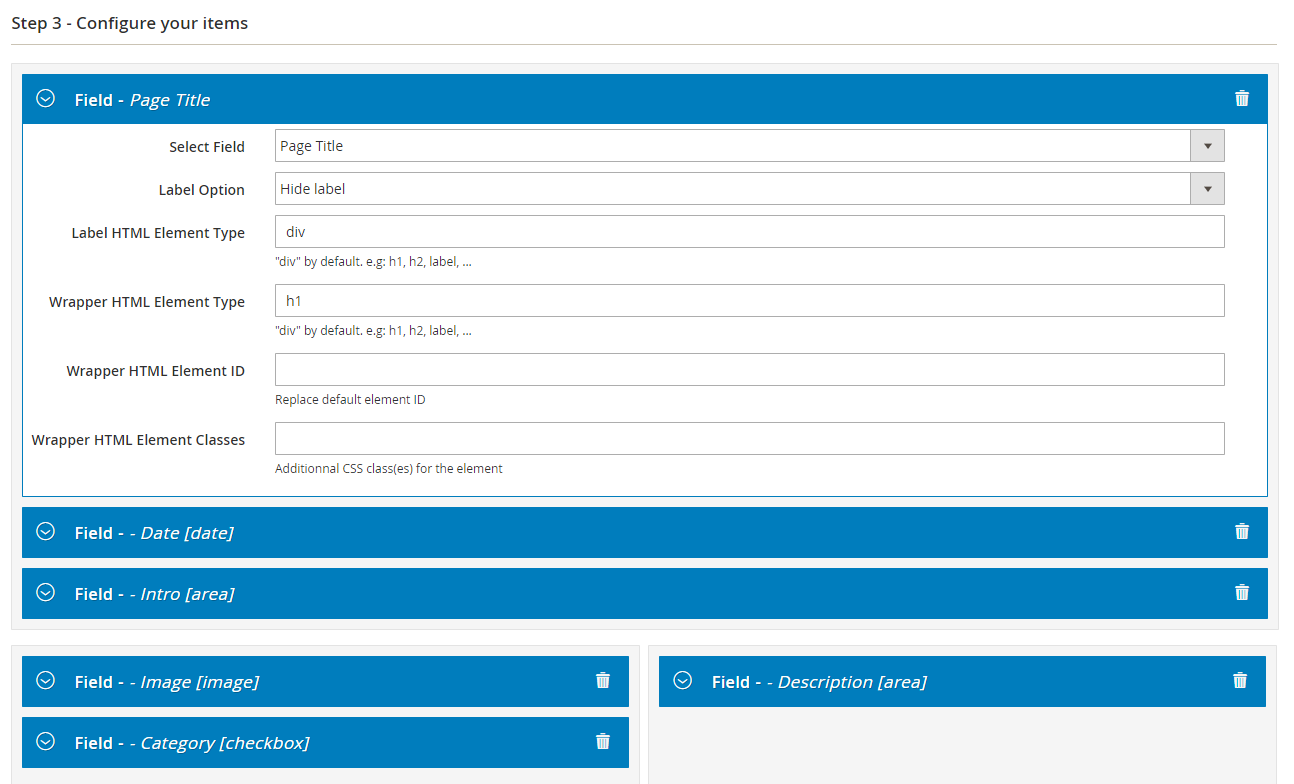
On the last step, select exact fields or CMS blocks you want to display, configure HTML settings, and put all elements in the order you wish.
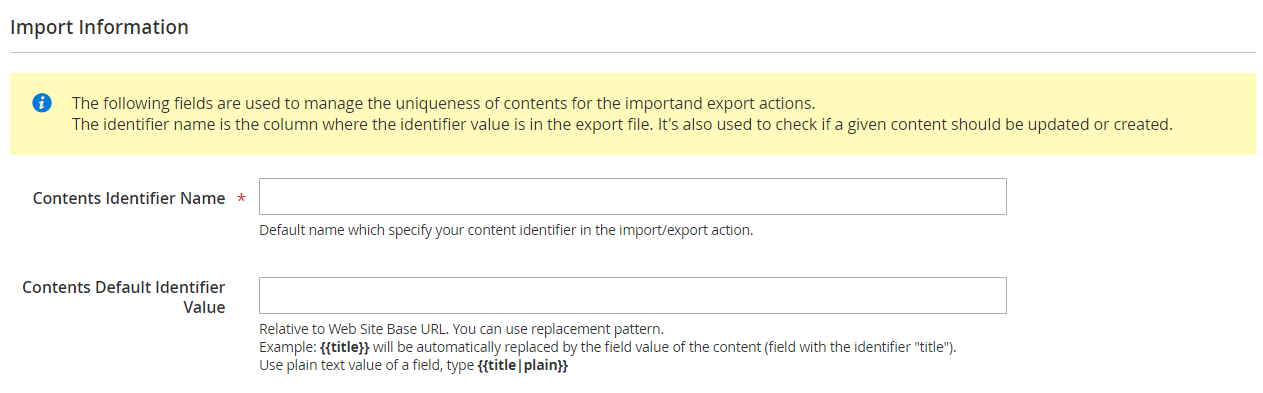
In the last section of the content type page, configure settings for contents import and export.
After creating a custom content type, you can proceed with adding content.
Contents
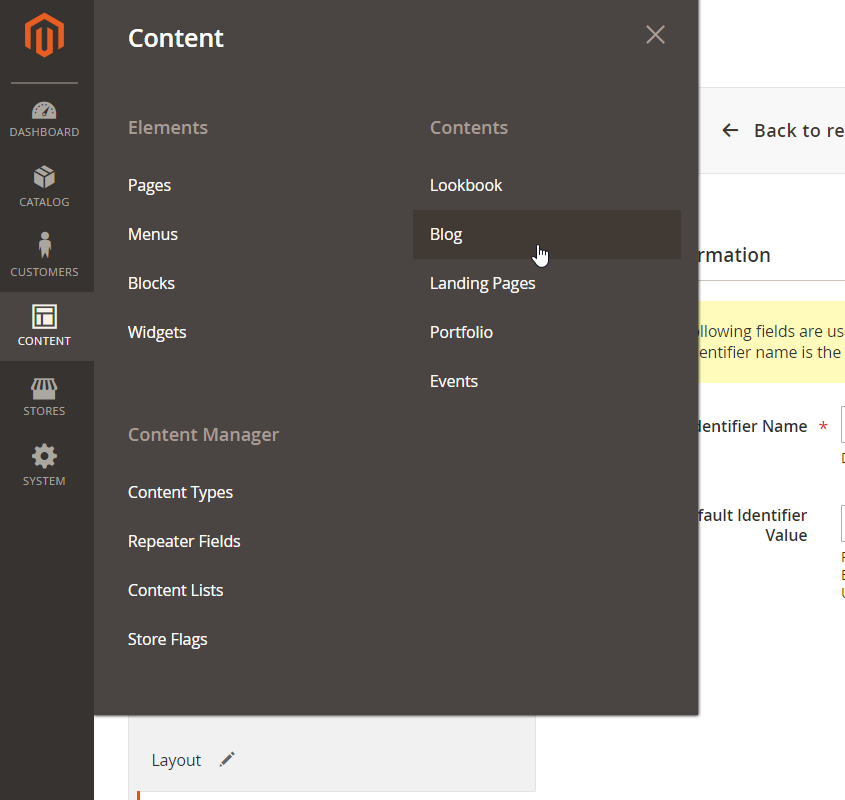
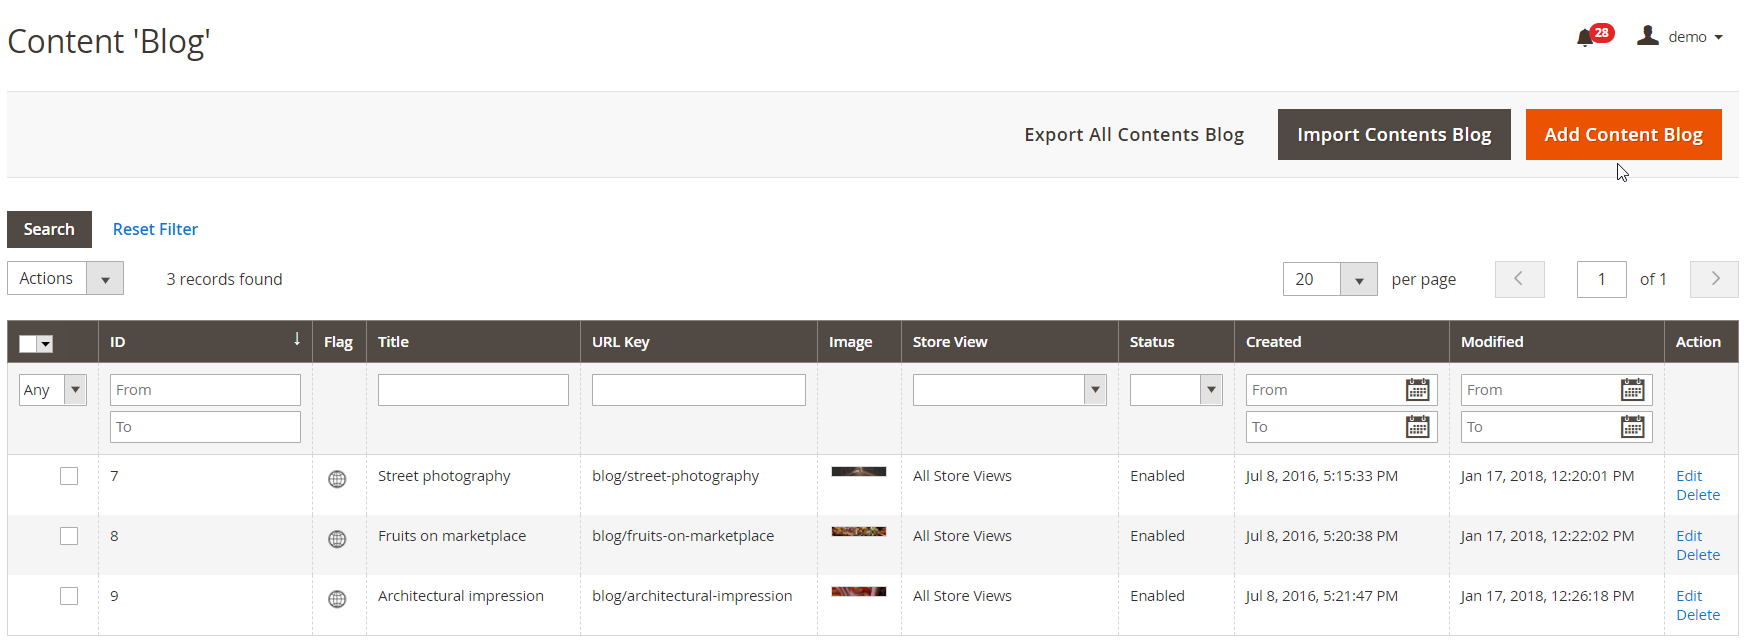
All created content types are available under Content -> Contents. Let’s see how to configure content for Blog.
To add new content, click on the “Add Content Blog” button.
The new content screen contains 4 tabs: Content Details, URL, Search Engine Optimization, and Import/Export Settings. In the first one, you should type in a page title and enable or disable the content.
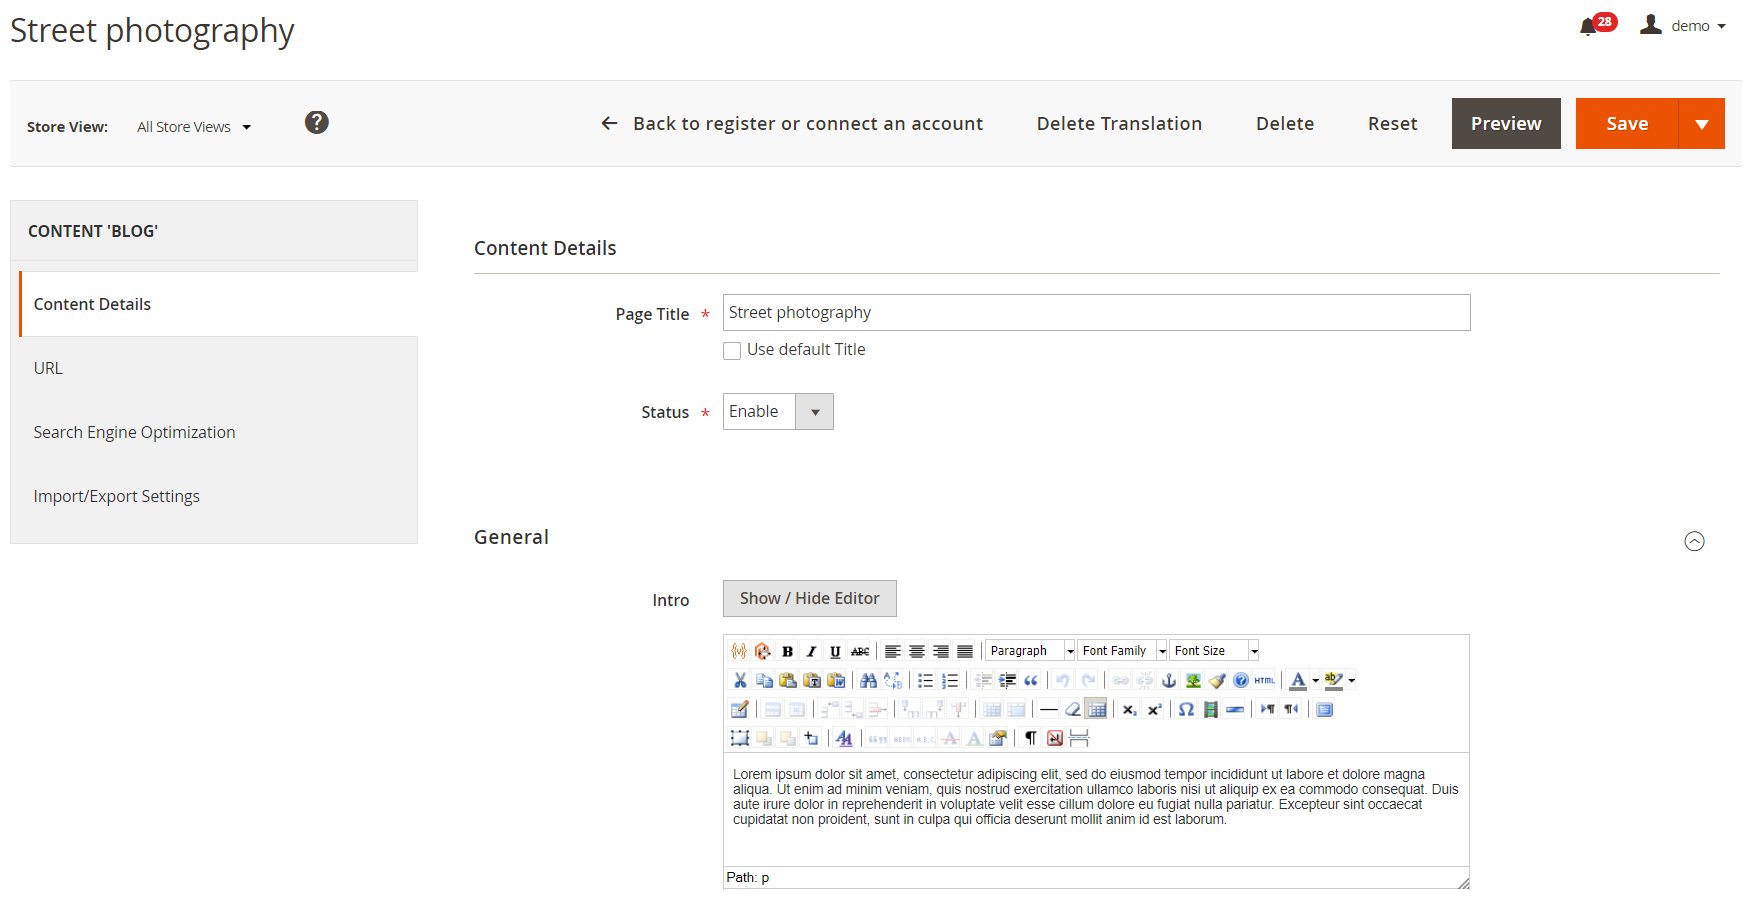
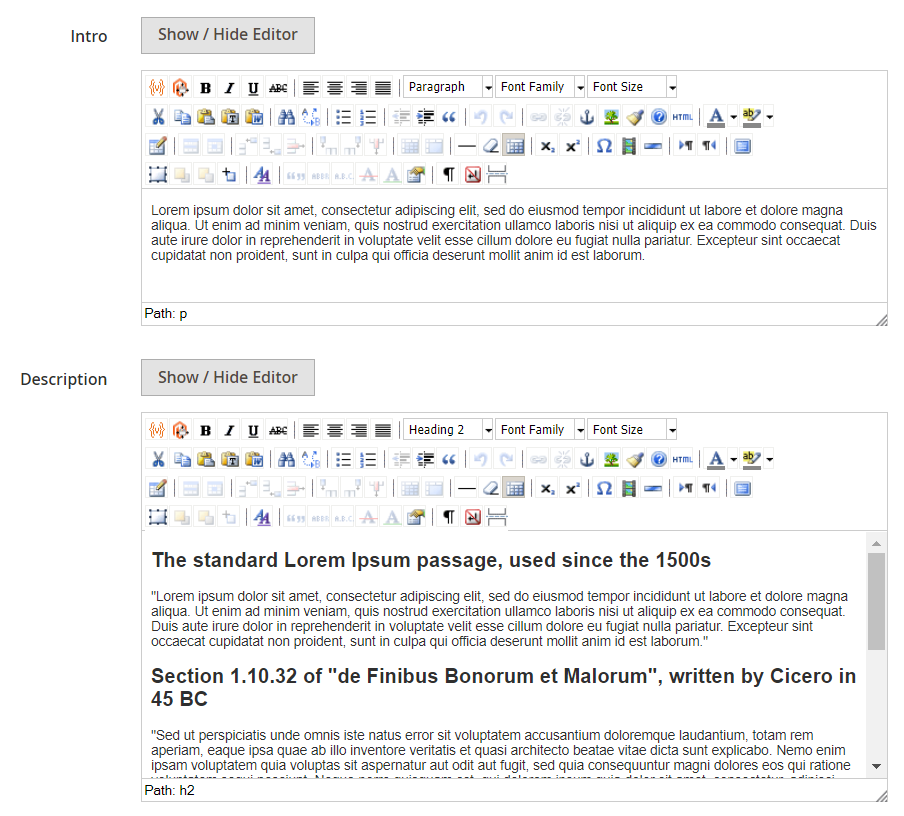
Next, you will see your custom fields in the General section of Content Details. In our example, created fields let you type in the text for Intro and Description in the WYSIWYG editor.
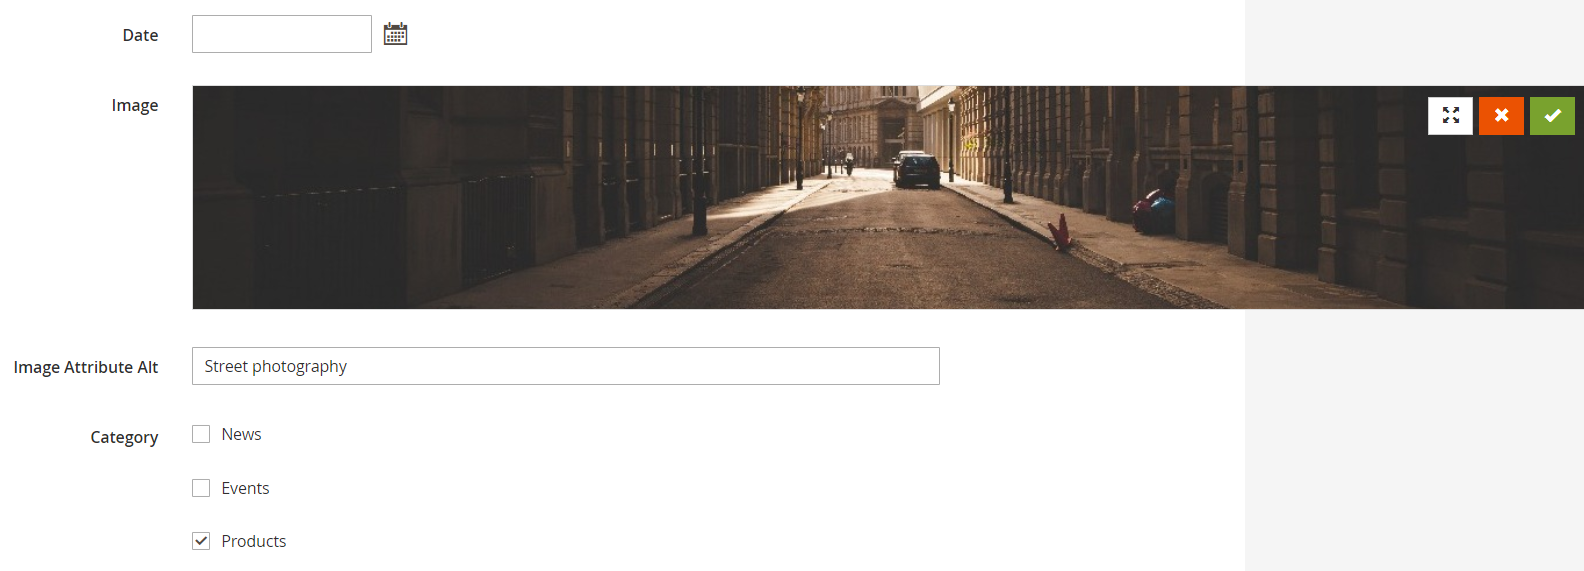
Other available fields here are Date, Image, Image Attribute Alt, and Category.
The URL tab shows an automatically created URL link based on the page title.

In Search Engine Optimization, you can specify meta data in the same way as in the content type configuration.

In Import/Export Settings, enter a custom content identifier that will be used for import or use a default value.

Content Lists
After adding some content, you can create content lists. The appropriate page is located under Content -> Content Manager -> Content Lists.

To add a new list, click “Add New Content List” at the top right corner of the page. New content list settings are divided into 7 tabs: Content List Information, Options, Conditions, Extra Content, Breadcrumbs, Search Engine Optimization, and Layout.
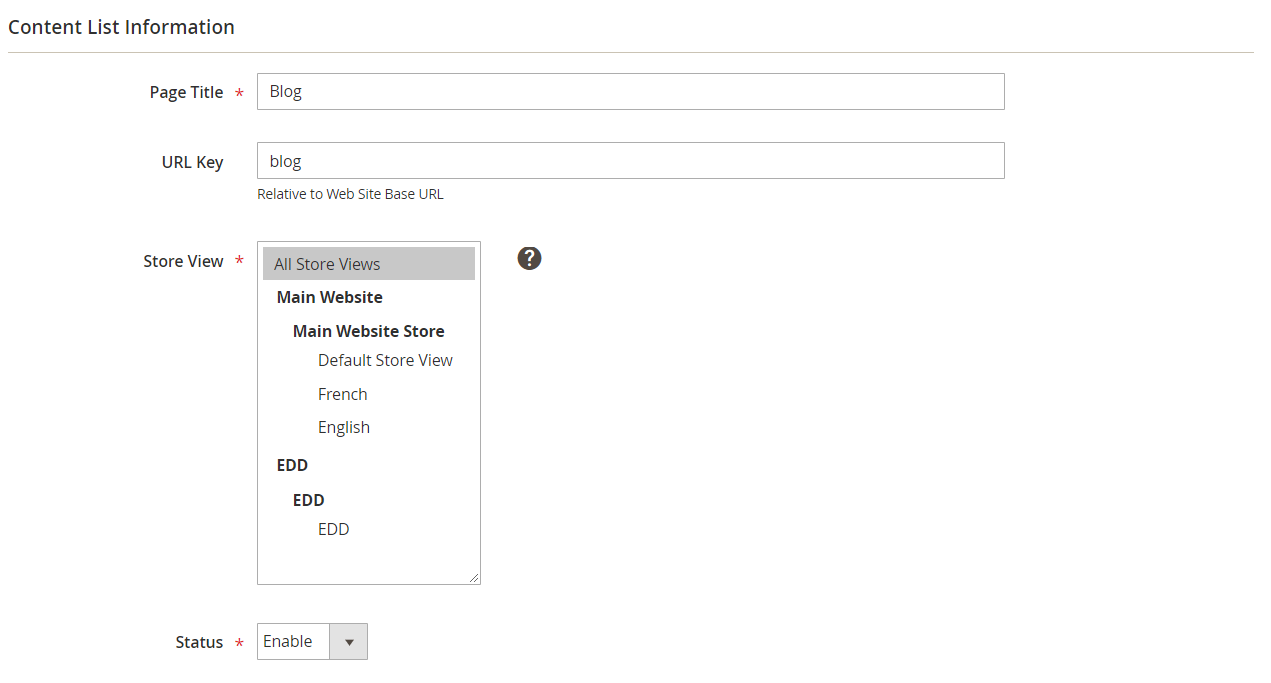
In the first tab, create a title for the page, specify a URL key if you don’t want to use the one generated by default, select applicable store views and languages, and enable/disable the list.
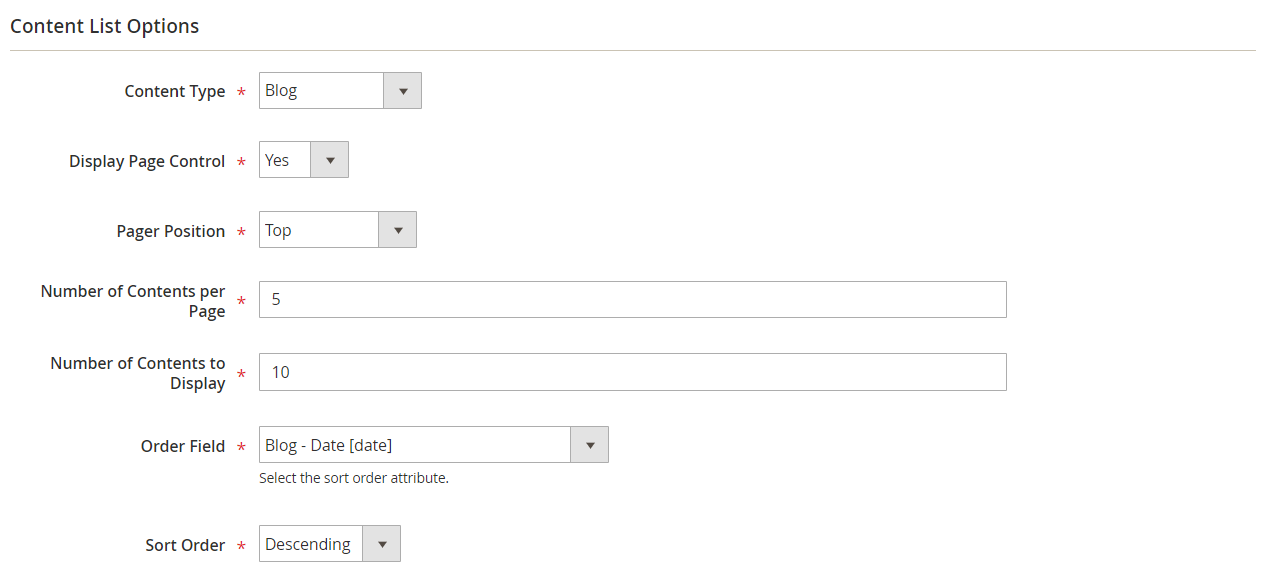
In Options, select one of your content types for the listing, enable/disable pagination, choose a pager position, specify the number of content elements in the list per page and number to display, and set the sort order and sorting attribute.
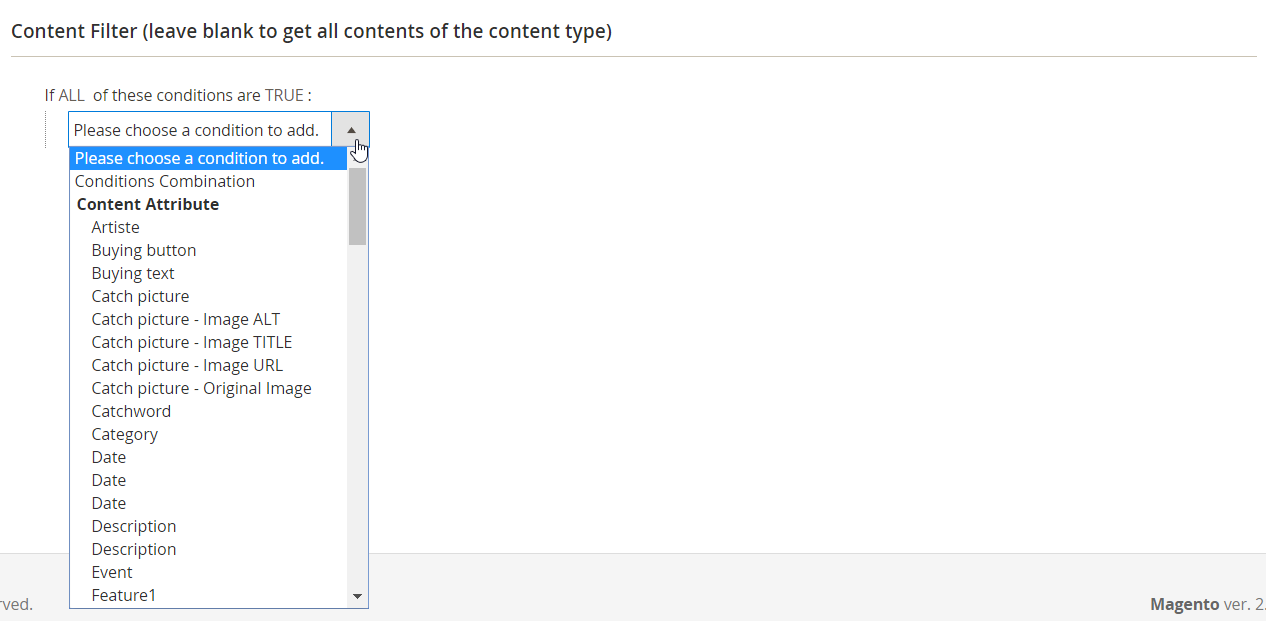
Next, you can set specific conditions or their combination for the content display based on content attributes.
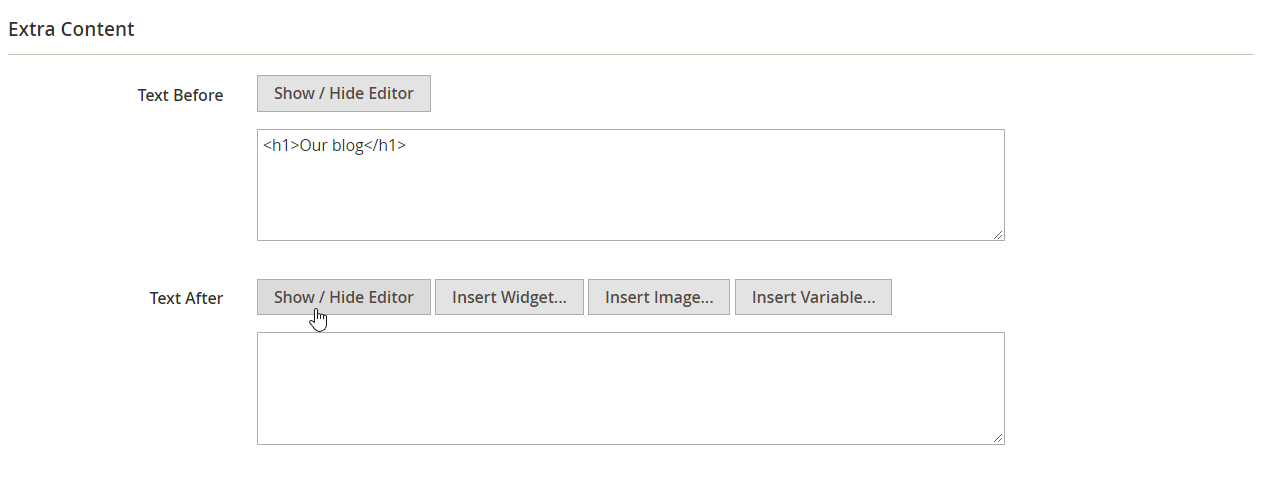
In Extra Content, you can type in text that will be shown before and after the list.
The configuration of breadcrumbs is exactly the same as for content type.
The same is about the Search Engine Optimization tab:
The next tab allows you to configure the structure of your list following the same steps as in the content type layout settings.
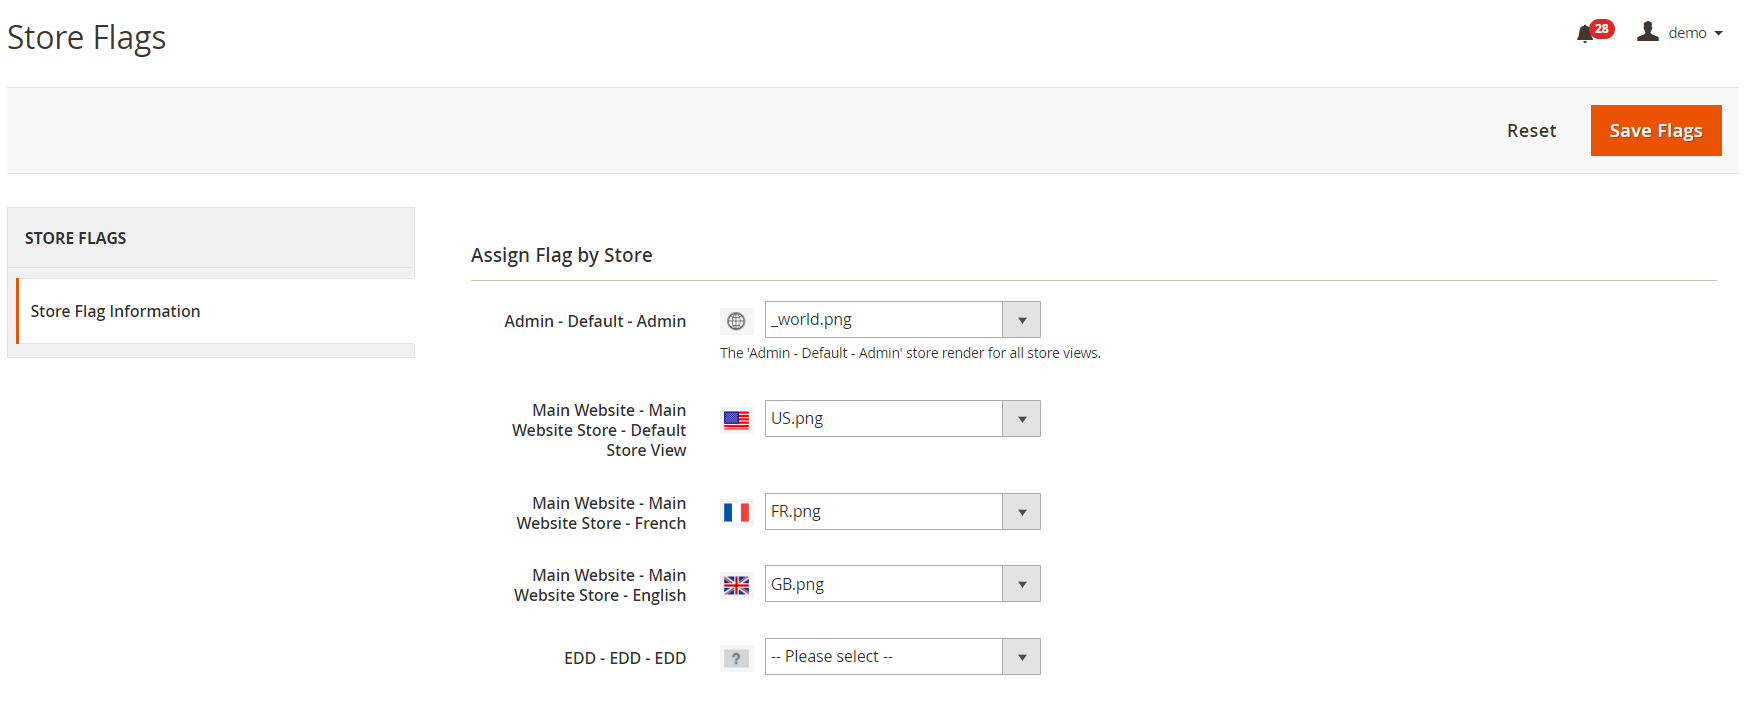
Store Flags
Now, let’s navigate to Content -> Content Manager -> Store Flags. Here, you can assign different flag icons to each store view.
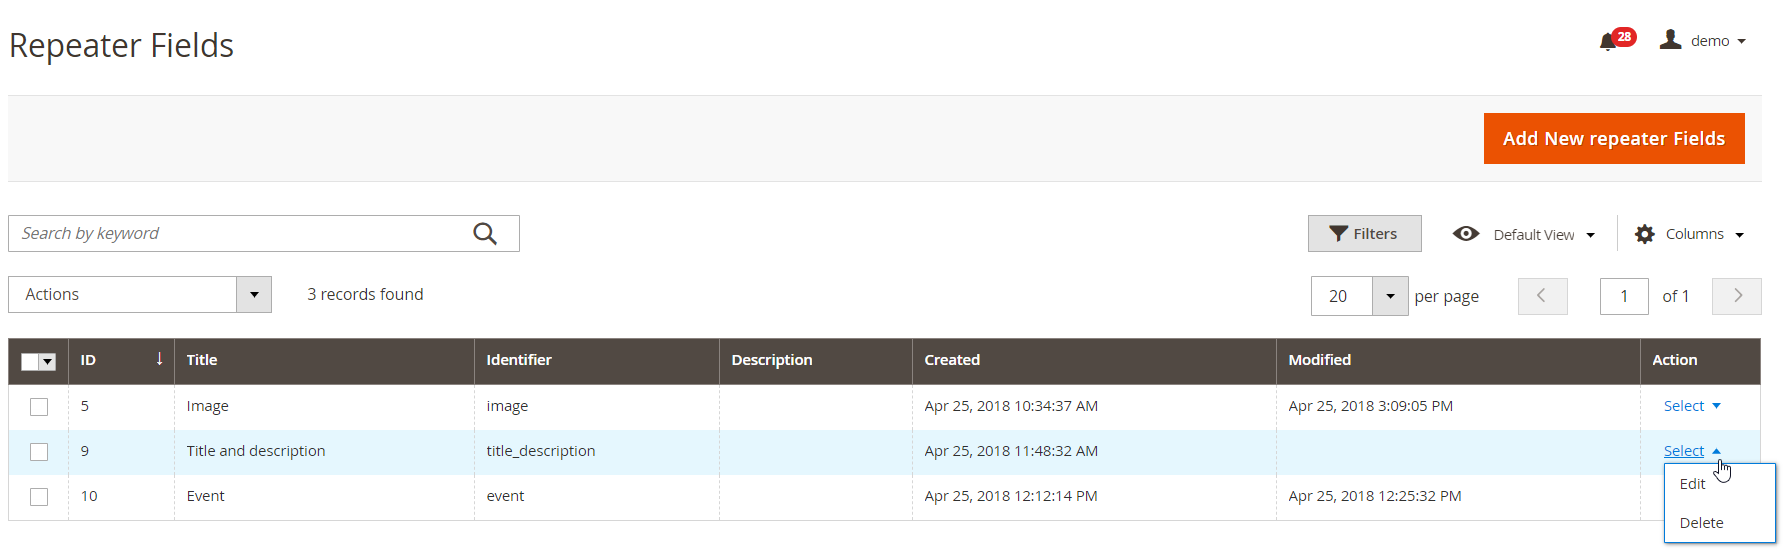
Repeater Fields
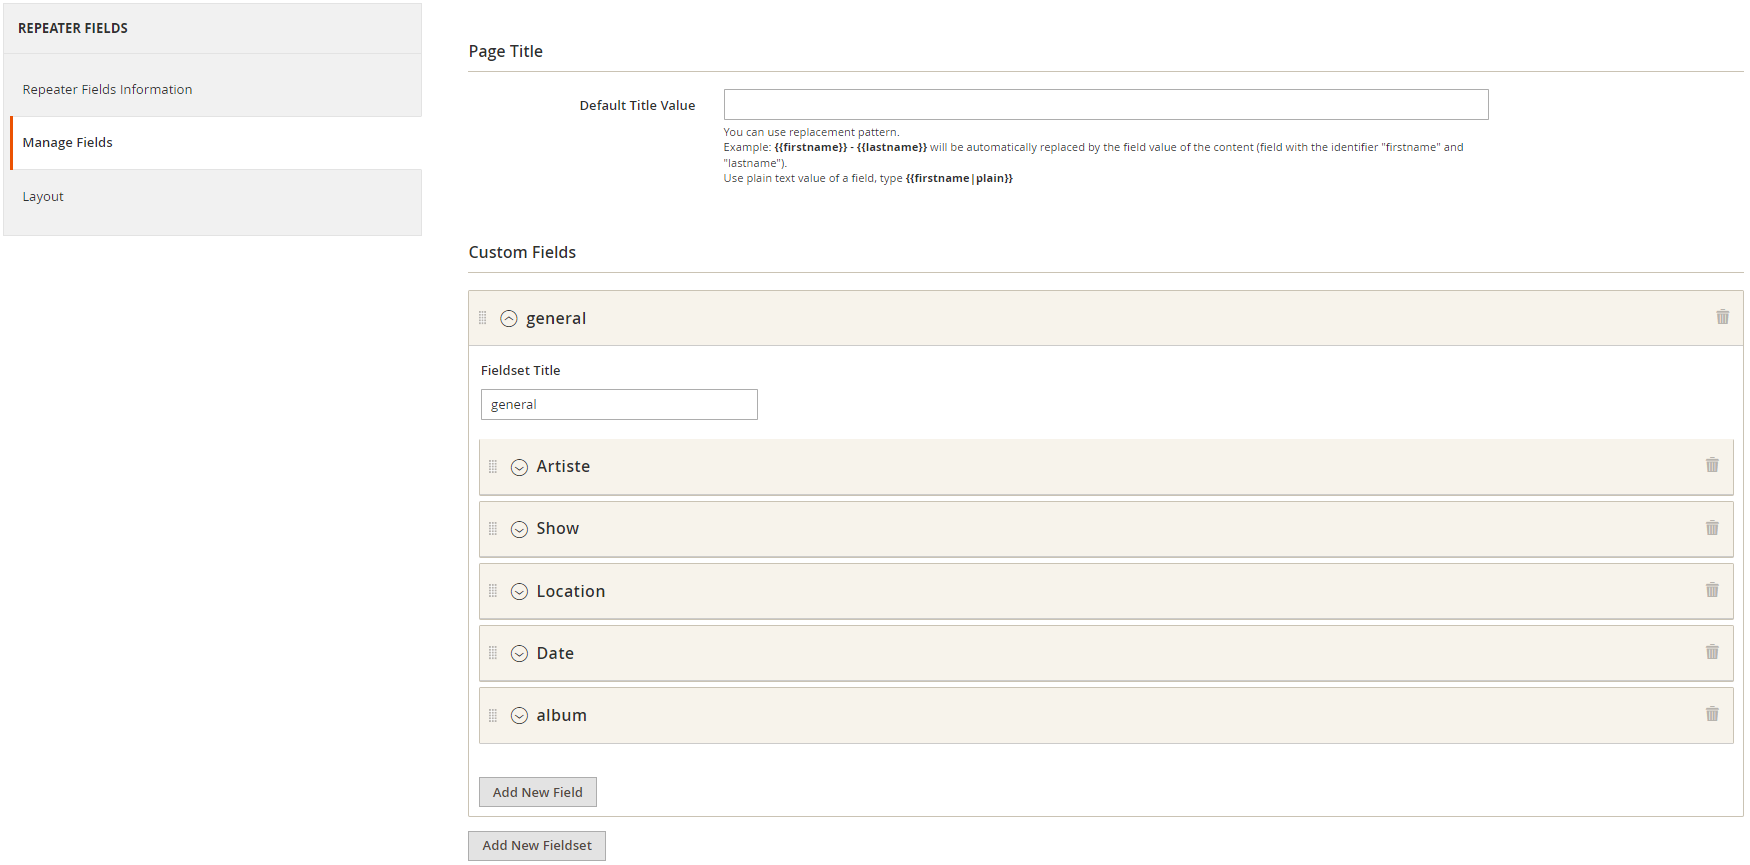
Advanced Content Manager for Magento 2 allows users to create repeater fields. To manage existing repeater field structure and add new ones, go to Content -> Content Manager -> Repeater Fields.
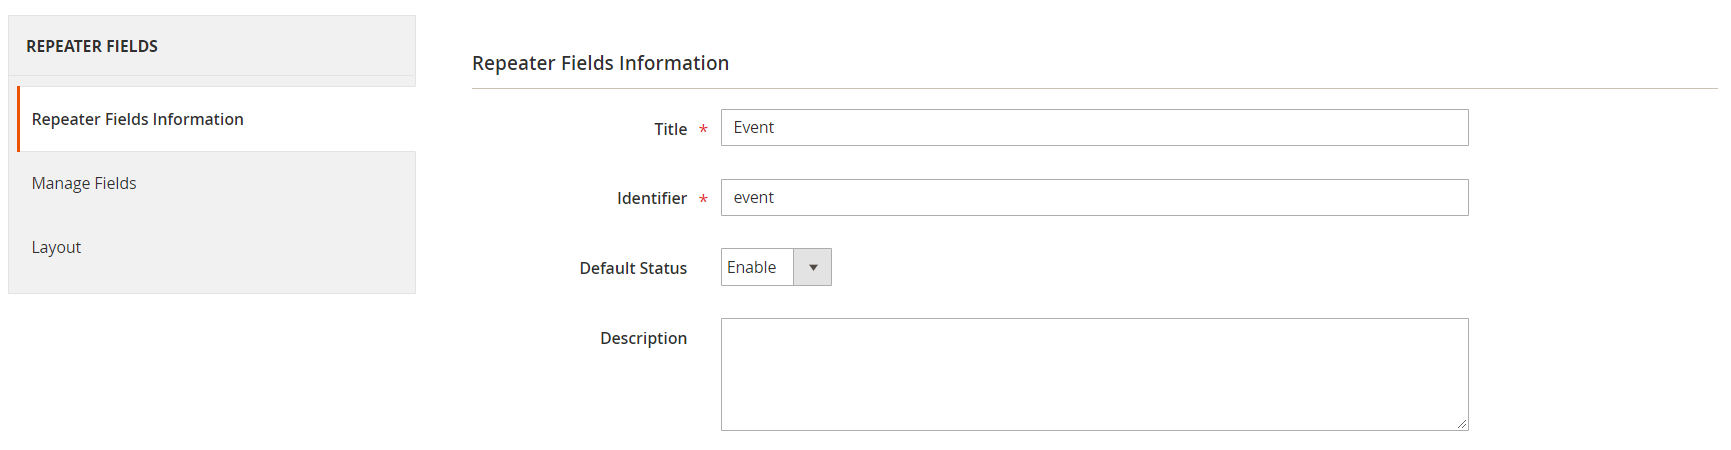
When adding new repeater fields, set a title for the fields set, specify a unique identifier, enable/disable it, and add a description for admin.
Next, you can add custom fields and configure their options (just like you did for content types).
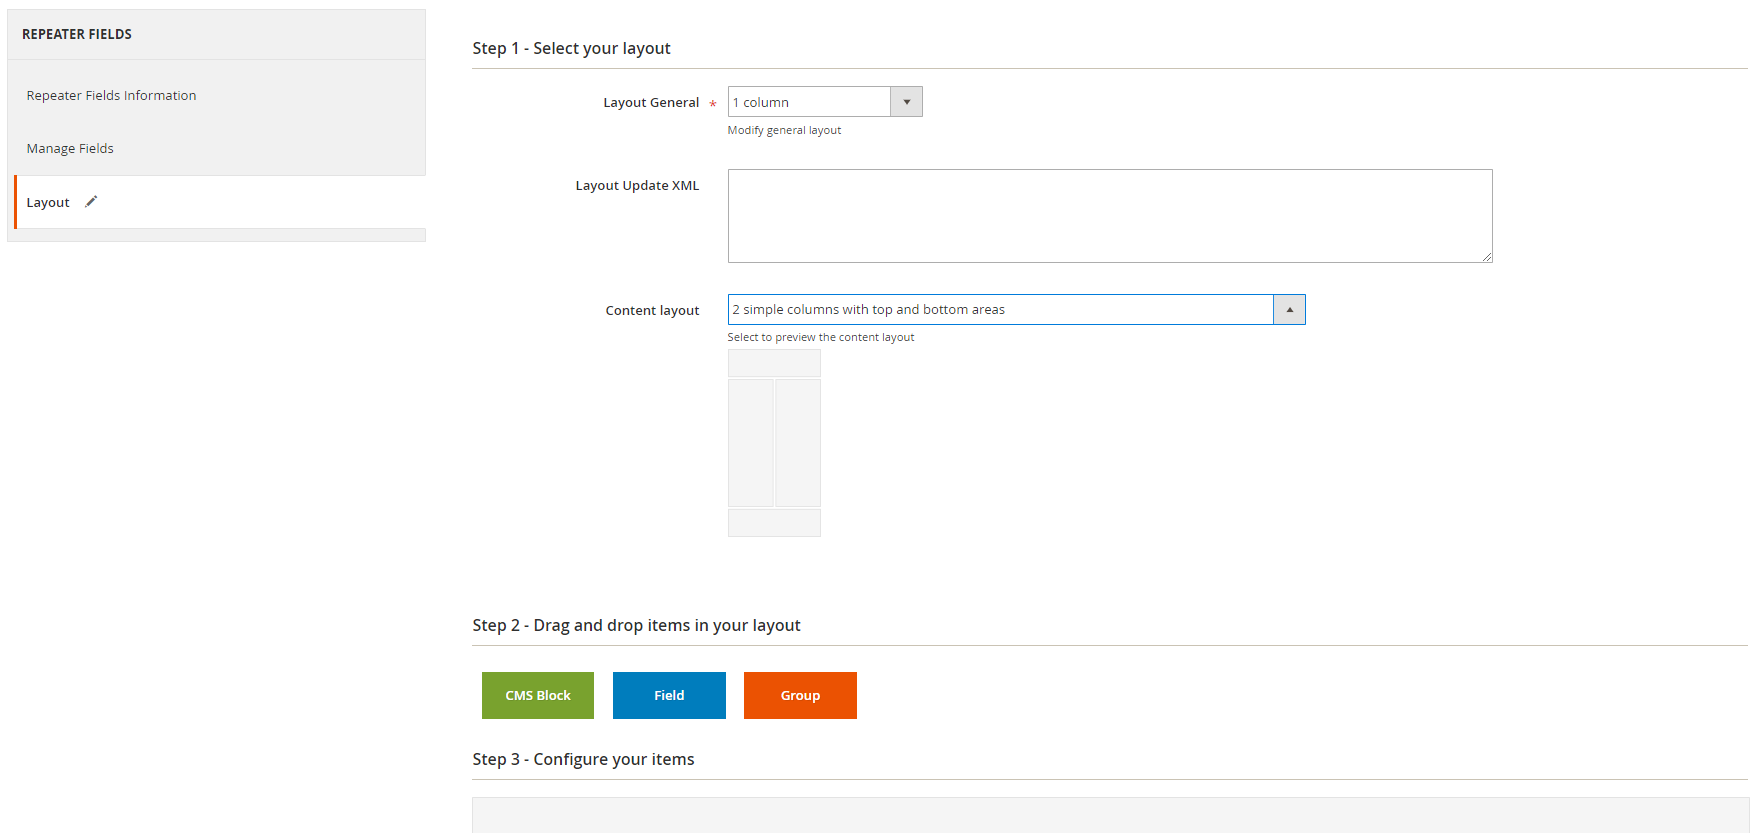
You can also use drag-and-drop manager here to configure the elements in the layout of the repeater fields structure.
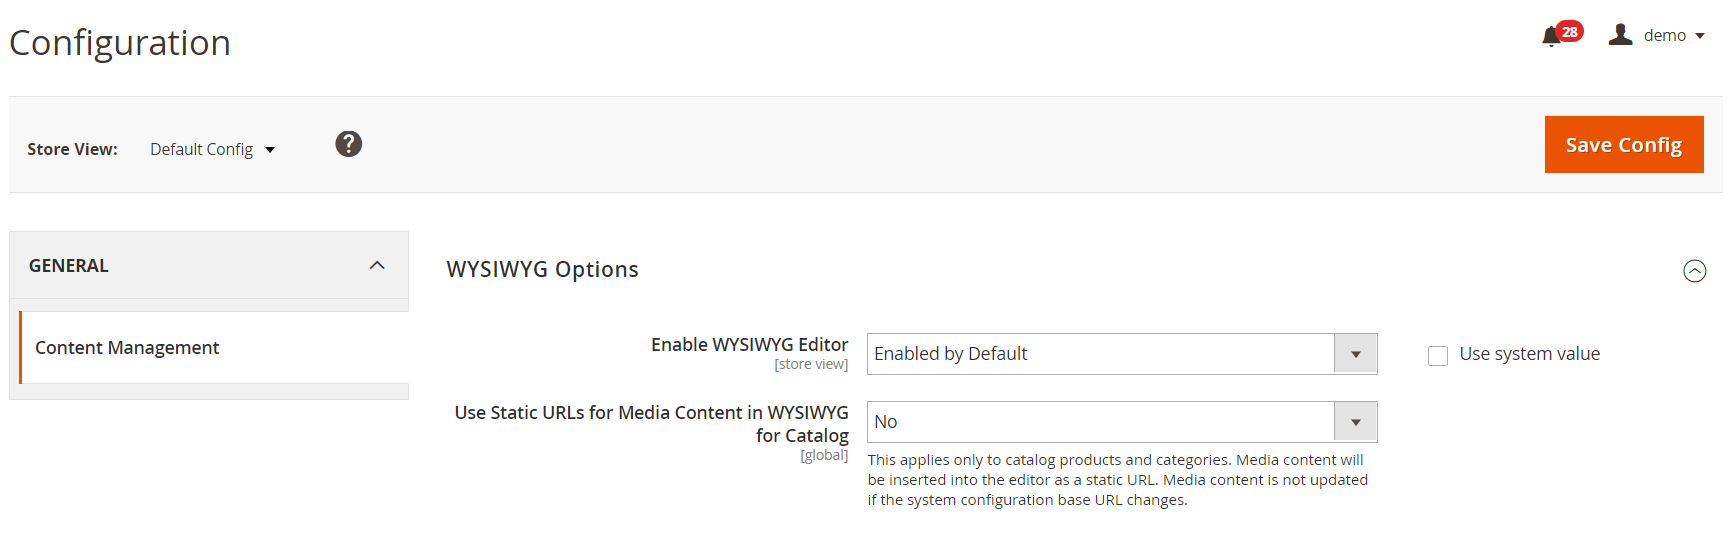
Configuration
The general settings related to the Advanced Content Manager extension are available under Stores -> Settings -> Configuration -> General -> Content Management. Here, you only need to configure WYSIWYG Options: enable/disable the WYSIWYG editor by default and decide whether to insert media content as static URLs in the editor for catalog products and categories.
Frontend
Below, you can see an example of the frontend display of the Blog content type.

Final Words
Advanced Content Manager for Magento 2 is a robust CMS module that adds vital improvements to default Magento functionality. By diversifying content on your website pages, you bring in entertaining and informative elements to the customers shopping experience. This way, you can easily attract potential clients to your store and drive more traffic. Along with advanced content management, ACM2 provides tools for SEO improvement of your web store. Thus, besides increasing customer retention, you can improve your search engine rankings.
At first sight, the admin configuration of the extension might seem a bit complicated. However, the backend interface is quite intuitive, so all necessary options can be set without spending much time and effort. Besides, the module has a flexible functionality, allowing you to configure all the settings according to your specific requirements. Rich customization options offered by Advanced Content Manager provide users with many possibilities for managing and structuring various content types.
The price of the Magento 2 extension is $349. Note that some advanced features will be added to the module’s functionality soon, including import/export options for content types, new custom fields, and rich snippets manager. To purchase ACM2, click the link below:
Related posts
 Amasty ChatGPT AI Content Generator for Magento 2
 CopyAI Review 2023
 Magento 2 Release Notes
 How to Import Customers & Customer Addresses to Magento 2
 Magento 2 B2B Company Guide: Revealing Company Structure & Import
 Adobe (Magento 2) Commerce and Cloud (Enterprise Edition) Specific Features
 Shopware 6 Advanced Pricing Guide + Import Tutorial
 Magento Open Source and Adobe Commerce 2.4.7 Release Notes