
eComBricks Multi-Vendor Marketplace Magento 2 Extension
The great news is that you can turn your Magento 2 store into a fully fledged marketplace with multiple vendors. There are different third-party extensions that will help you leverage the full potential of having different sellers on your ecommerce site, and today we are presenting you a new tool – Magento 2 Multi-Vendor Marketplace by eComBricks. Below, we shed light on the core features, as well as backend and frontend functionality of this multi vendor marketplace module for Magento 2.

Table of contents
Features
- Magento 2 marketplace with multiple vendors;
- Extended functionality for vendors;
- Vendor dashboard;
- Admin control over vendor activity;
- Intuitive backend for both admins and vendors;
- Customer-friendly frontend.
As we have mentioned above, the Multi-Vendor Marketplace extension allows merchants to convert an online store on the Magento 2 platform into a marketplace with multiple vendors. Thus, as a Magento admin, you can add vendor users in the backend of your website and enable them to create products of all types, orders, invoices, and credit memos, as well as manage shipping and payment methods, transactions, catalog and price rules, and other information related to their roles. Besides, sellers can directly communicate with customers via a contact form on a dedicated vendor page.
This way, you can have a wide selection of products from various sellers presented on your store. As for payments, vendors can decide whether to accept them directly from customers or through a platform owner. In the same way, shipments can be managed by sellers separately depending on the warehouses’ location or shopping policies. Note that the extension supports all standard shipping and payment methods, custom shipping and payment options can be added as well.
As for the admin panel appearance, the Magento 2 multi vendor marketplace module provides a vendor dashboard with essential details on the sales by vendors, including most viewed products and information on customers and their order value.
Multi-Vendor Marketplace provides your admin users with the tools to control vendors’ activity. All vendors can be managed on the grid where you can modify their details, as well as add new sellers. Also, Magento admins can create vendor user roles with specific privileges and assign them to particular vendor users. Besides, it is possible to configure the settings for each vendor on the global or store view basis.
Customers also get user-friendly functionality on your storefront. For instance, the shopping cart is split into mini-carts by vendors, allowing customers to switch between them and proceed to concurrent checkouts or view each vendor’s information. Besides, all vendors are listed in the separate tab, as well as have dedicated pages with their description, products, and contact info.
Now, let’s see how the features described above work in the backend of the eComBricks Magento 2 marketplace module.
Backend
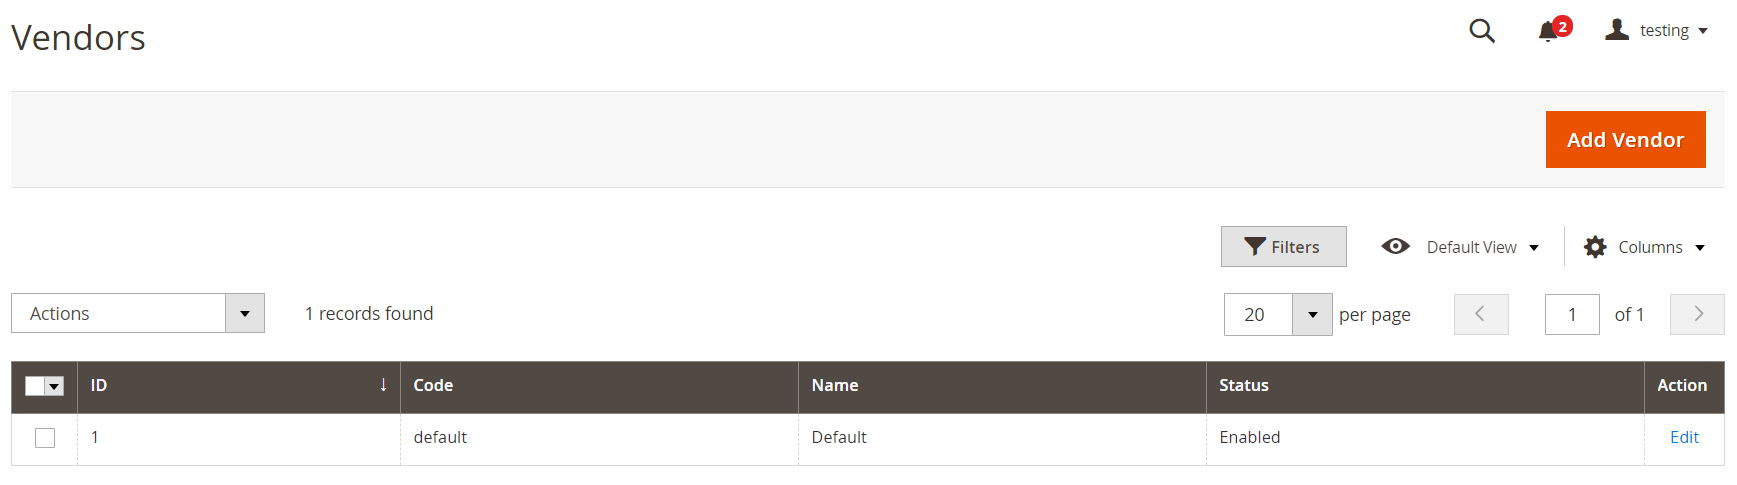
Vendors Grid
To view and manage all existing vendors, navigate to Stores → Other Settings → Vendors. There is a grid with 5 columns showing each vendor’s ID, code, name, and status (enabled/disabled). You can use mass actions to delete or edit selected vendors, as well as do this for each record from the Action column. Note that the pre-configured settings for the Default vendor are available right after installation of the module.
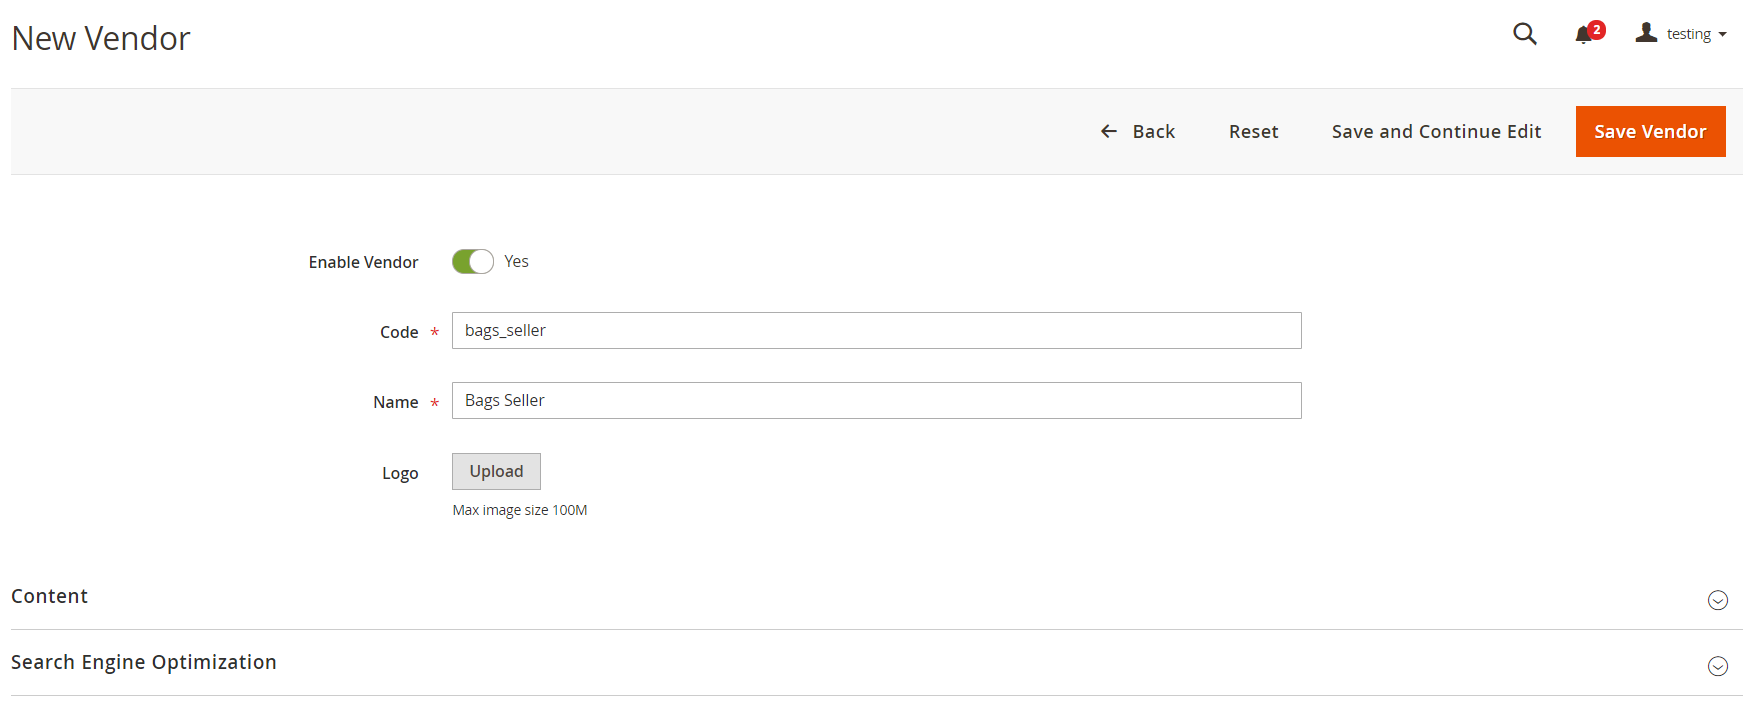
Let’s see how a new seller can be added to a web store using the Magento 2 multi vendor marketplace extension. To create a new vendor, you will need to configure options in 3 sections: General Info, Content, and Search Engine Optimization. In the first one, you should enable the vendor to make the relevant products visible on your storefront, specify a code and name, and upload an image for the logo.
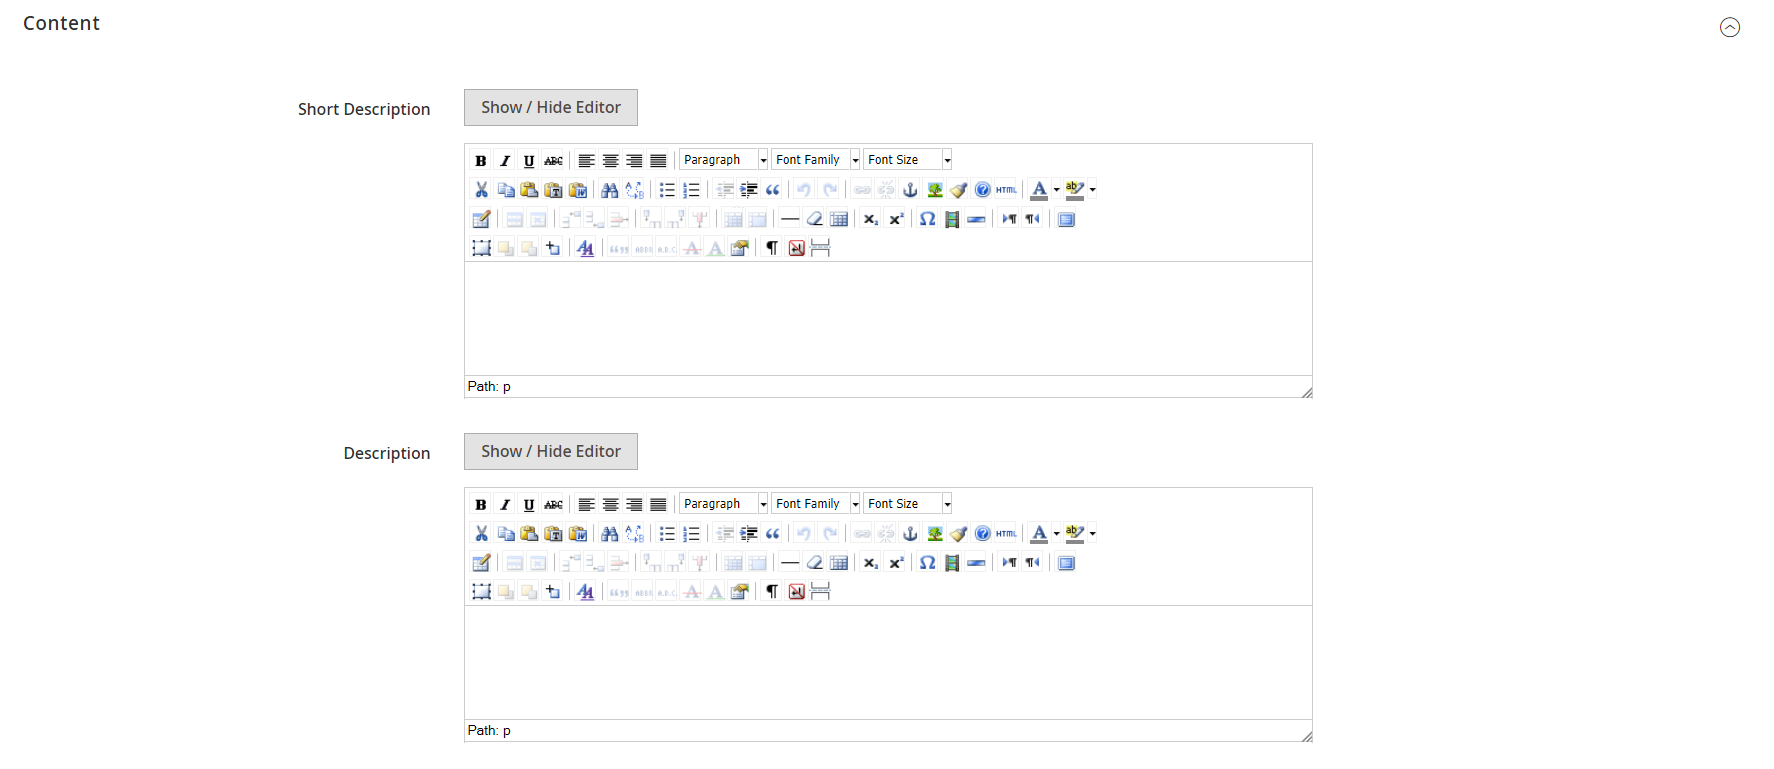
Next, create a short and full description for the vendor.
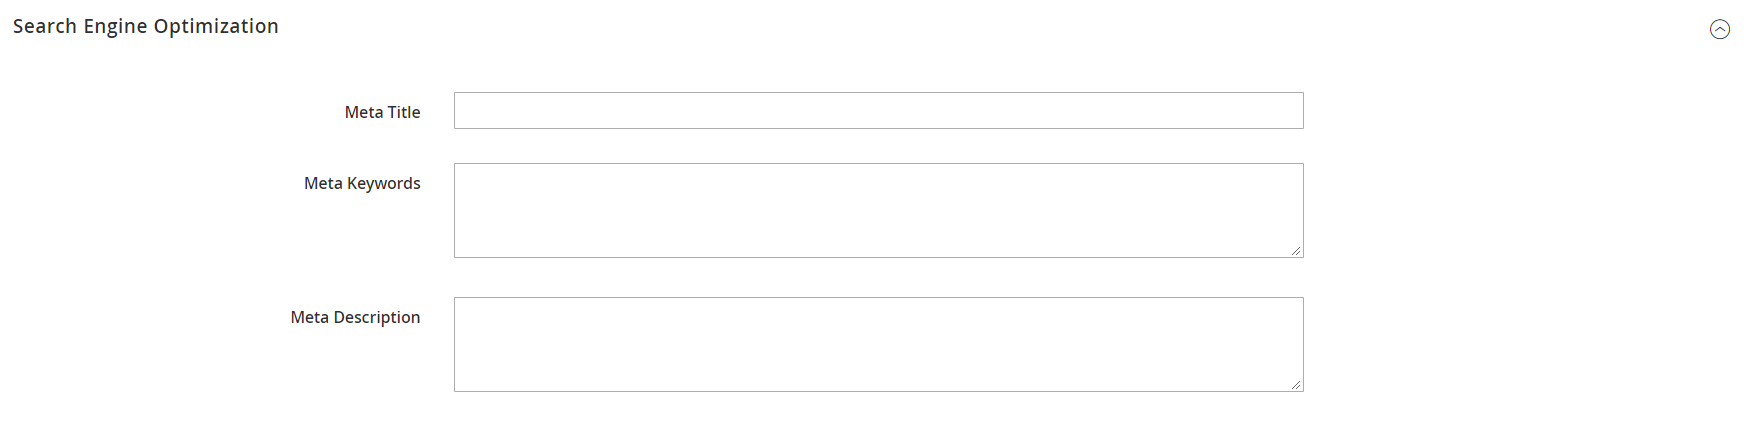
In the last section, specify the meta title, keywords, and description for SEO purposes.
Vendor User Roles
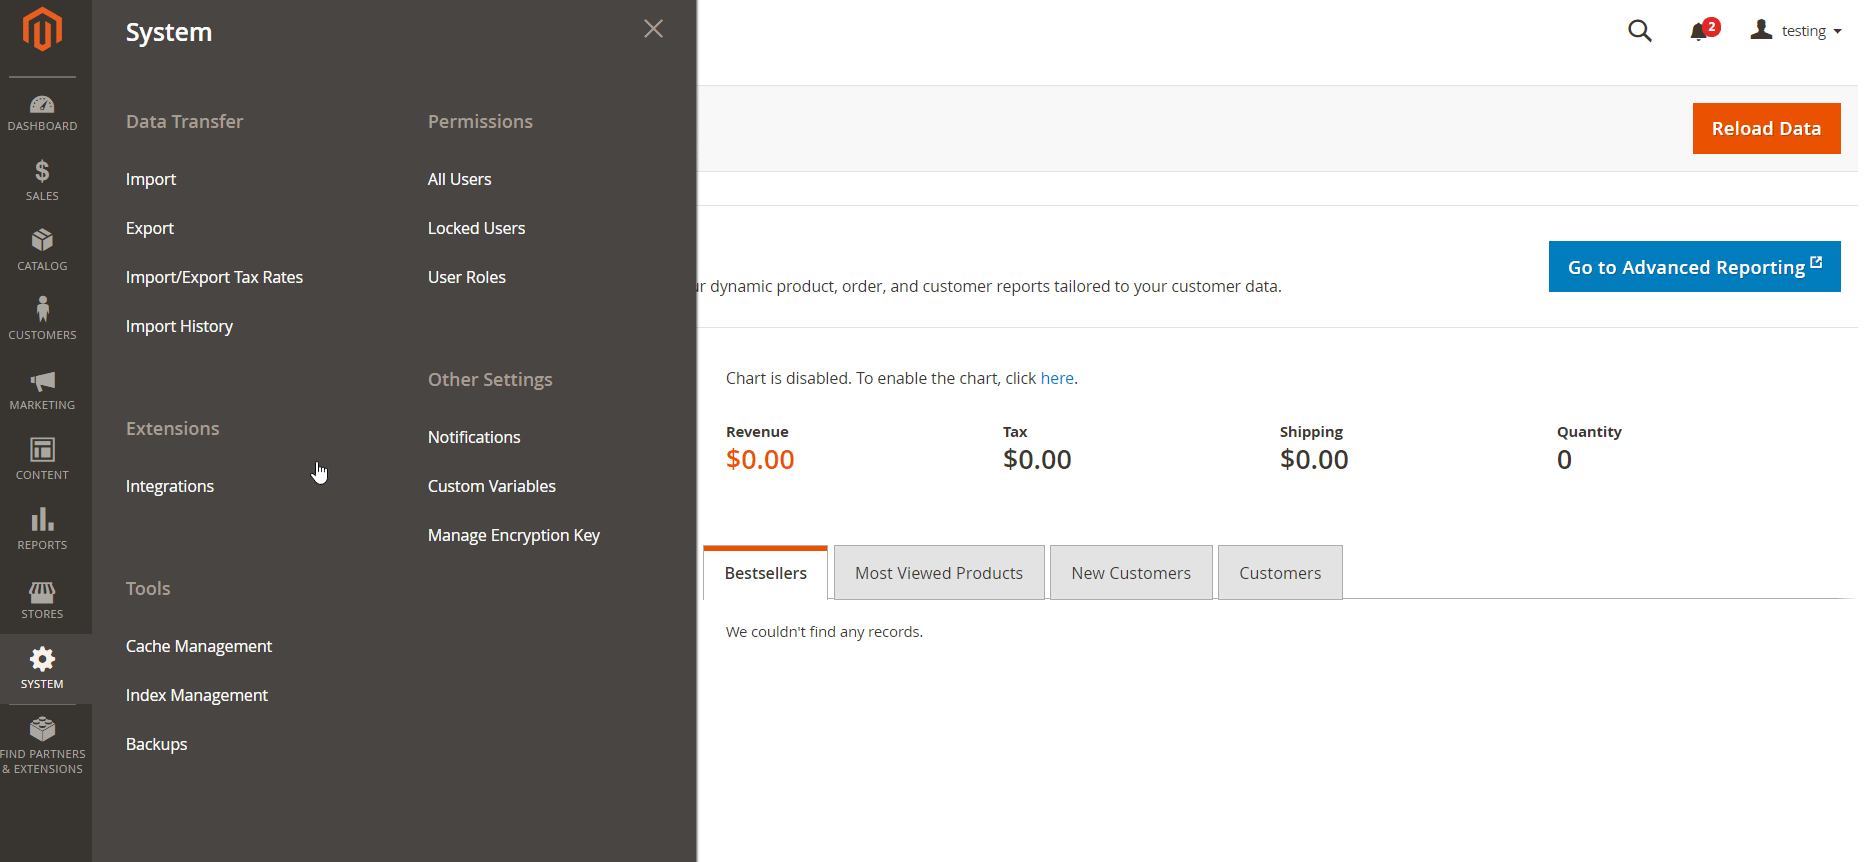
Using Multi-Vendor Marketplace for Magento 2, you can add vendor roles to the standard user roles. To do this, go to System → Permissions → User Roles and click the “Add New Role” button.
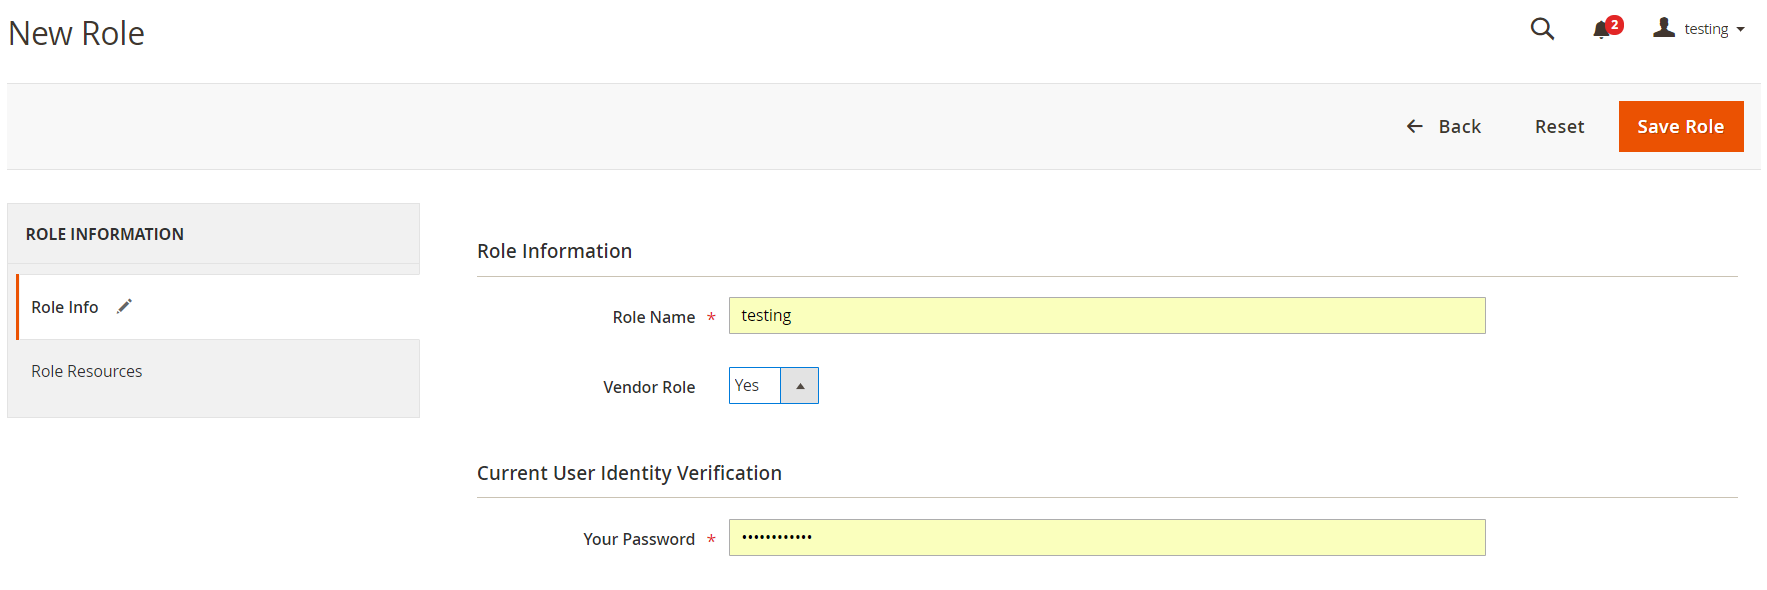
When creating a new role, you should specify a role name and password for identity verification and enable Vendor Role.
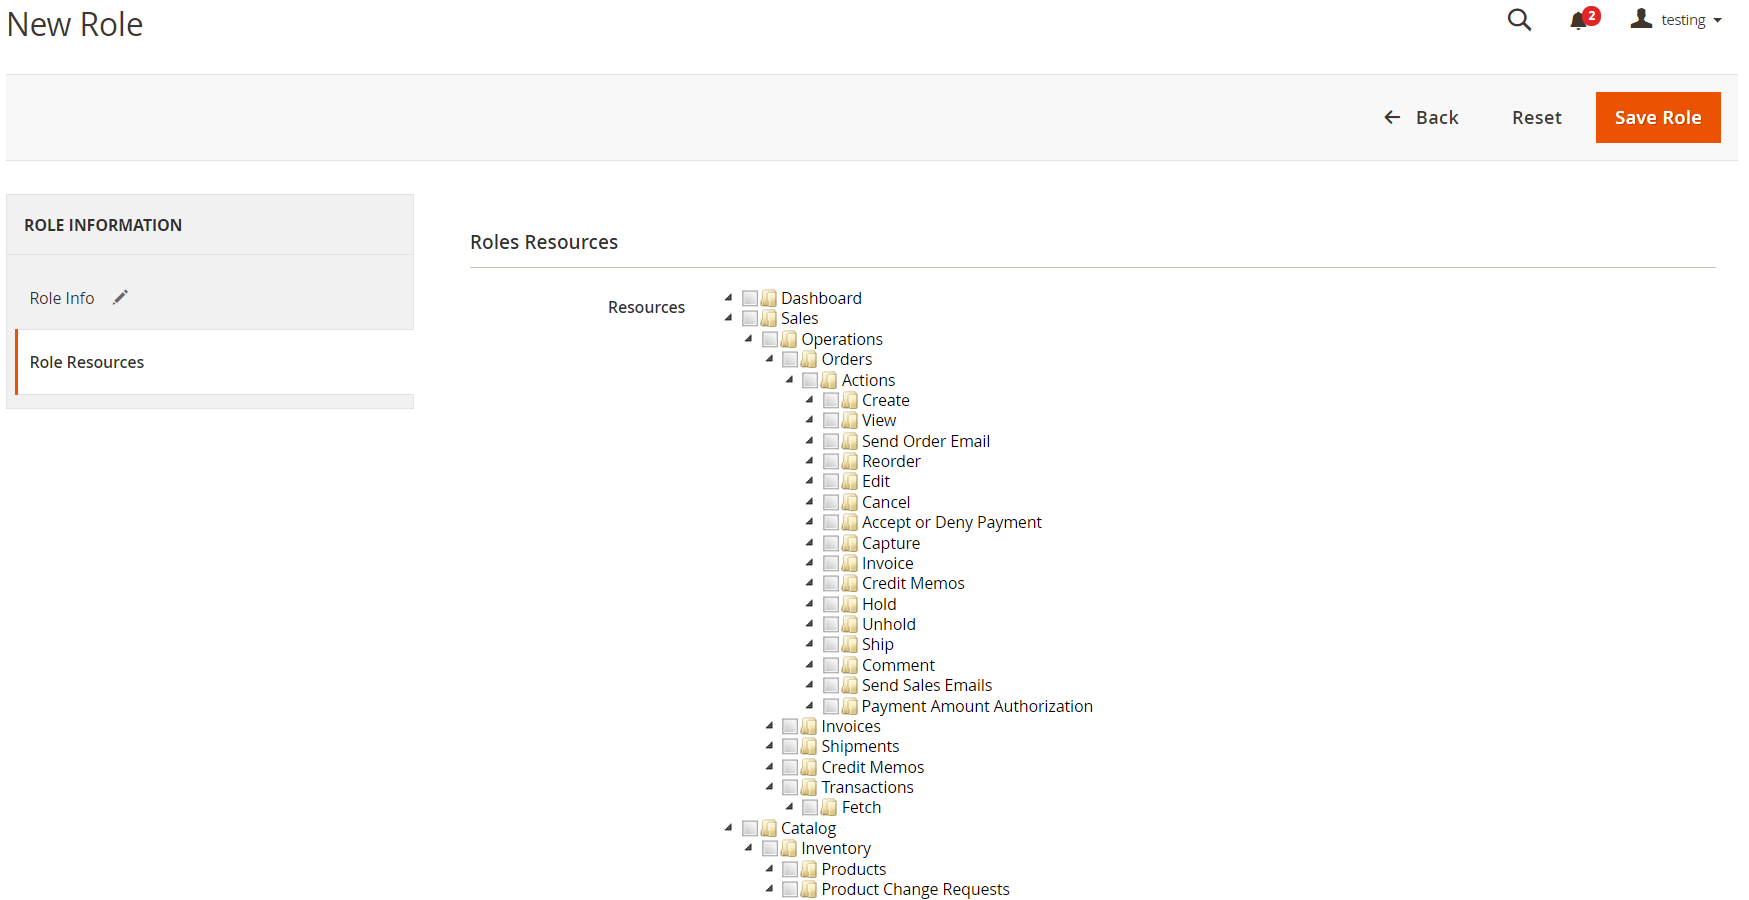
Then, select relevant vendor resources.
Vendor Users
The module adds vendor users in addition to admins. You can view the list of all users under System → Permissions → All Users.
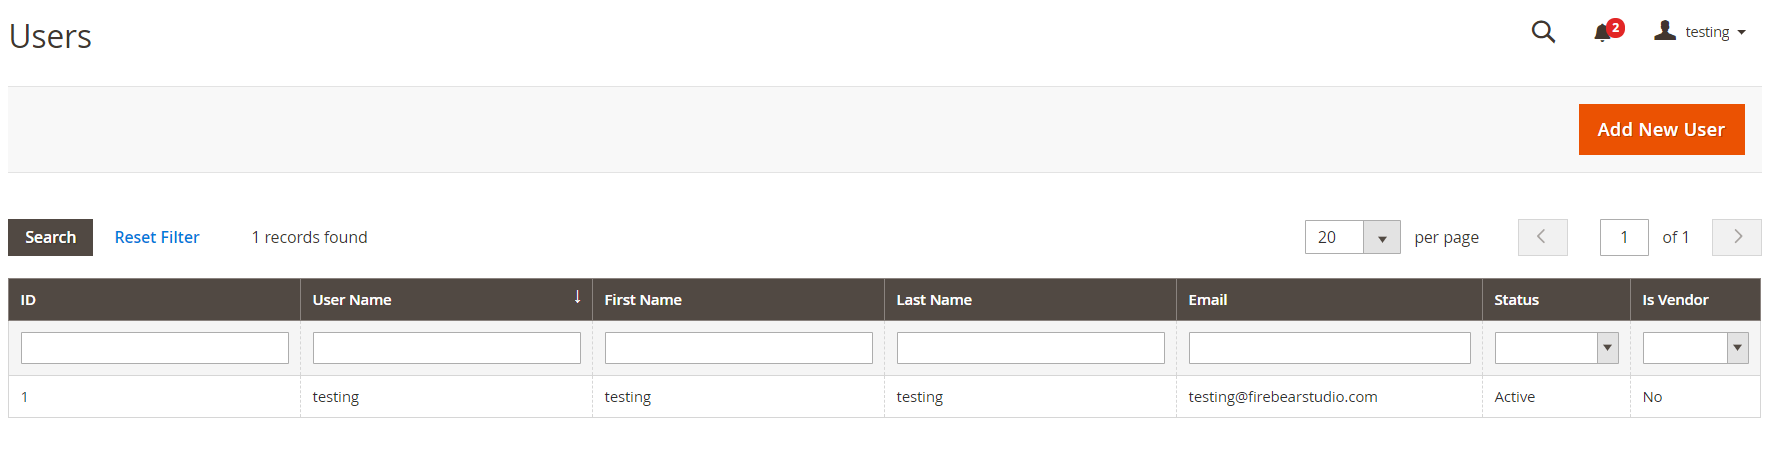
You can create a vendor user by clicking the “Add New User” button on the Users screen. You should specify the parameters in 2 tabs: User Info and User Role. In the first tab, specify the vendor’s account information. After selecting Yes for Vendor User, it will become possible to select created vendors with the assigned resources from the relevant field.
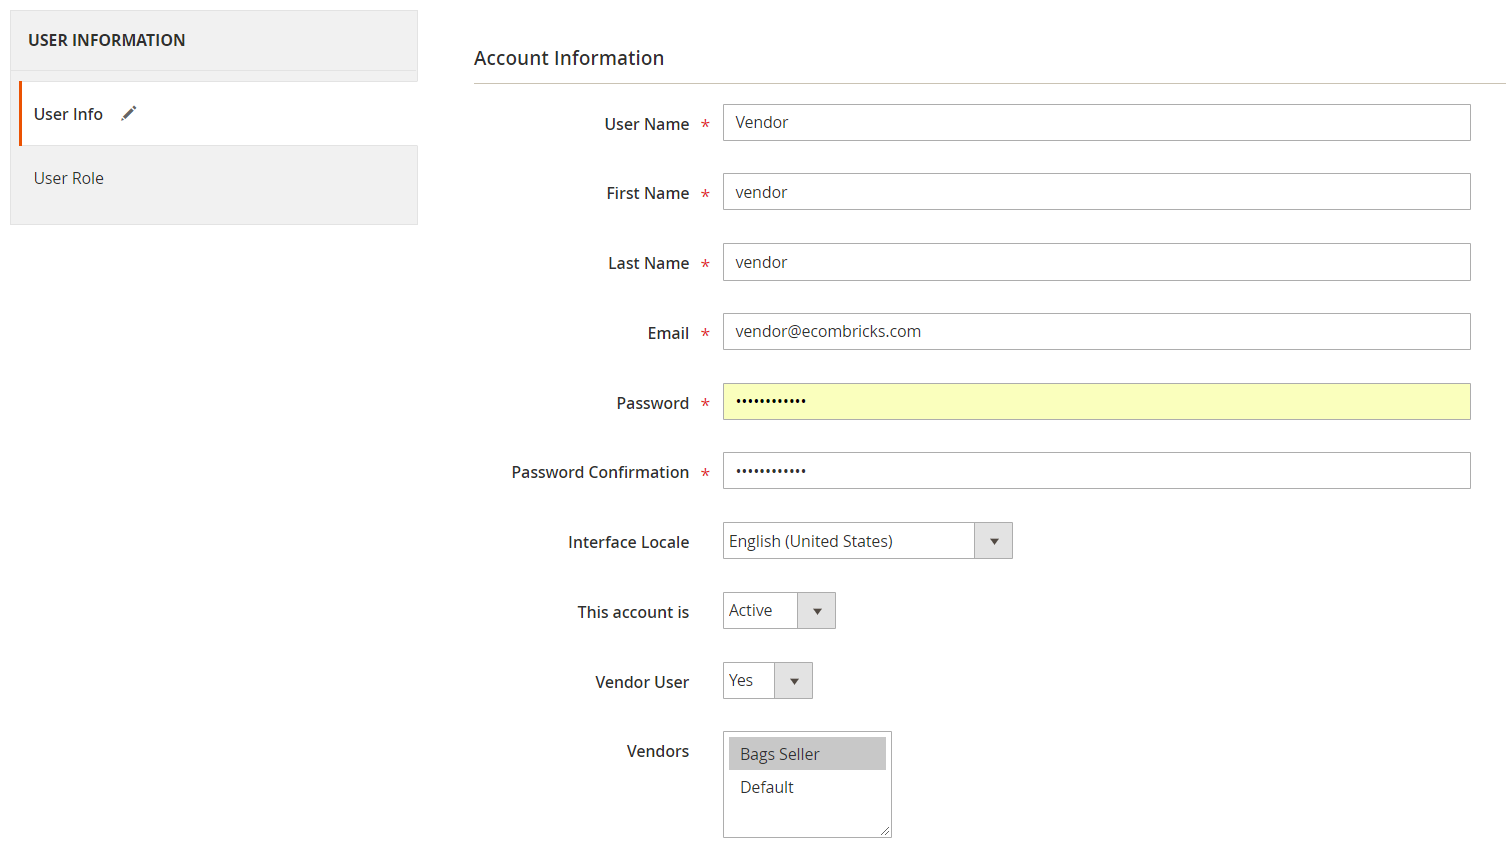
Then, select a vendor role for the user.

Vendor Products
As for the catalog, you can assign new vendors to existing products or select a required vendor when adding a new product.
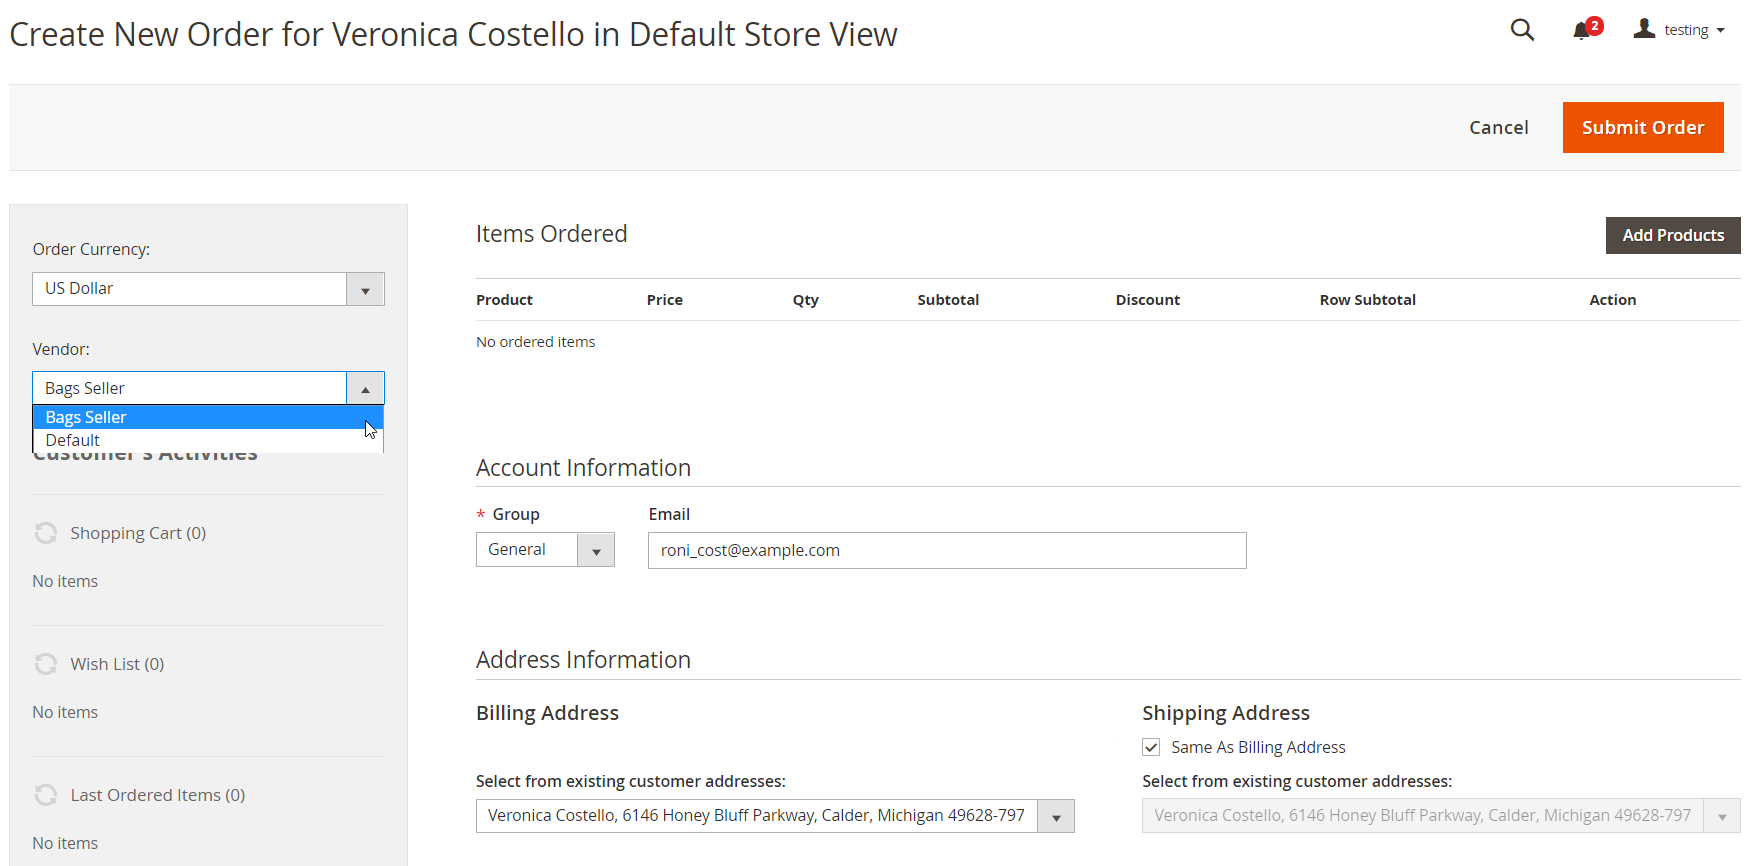
Vendor Orders
The Magento 2 multi vendor marketplace extension adds the Vendor column to the Orders grid. This way, you can see which orders are assigned to a particular vendor and filter them by a vendor.
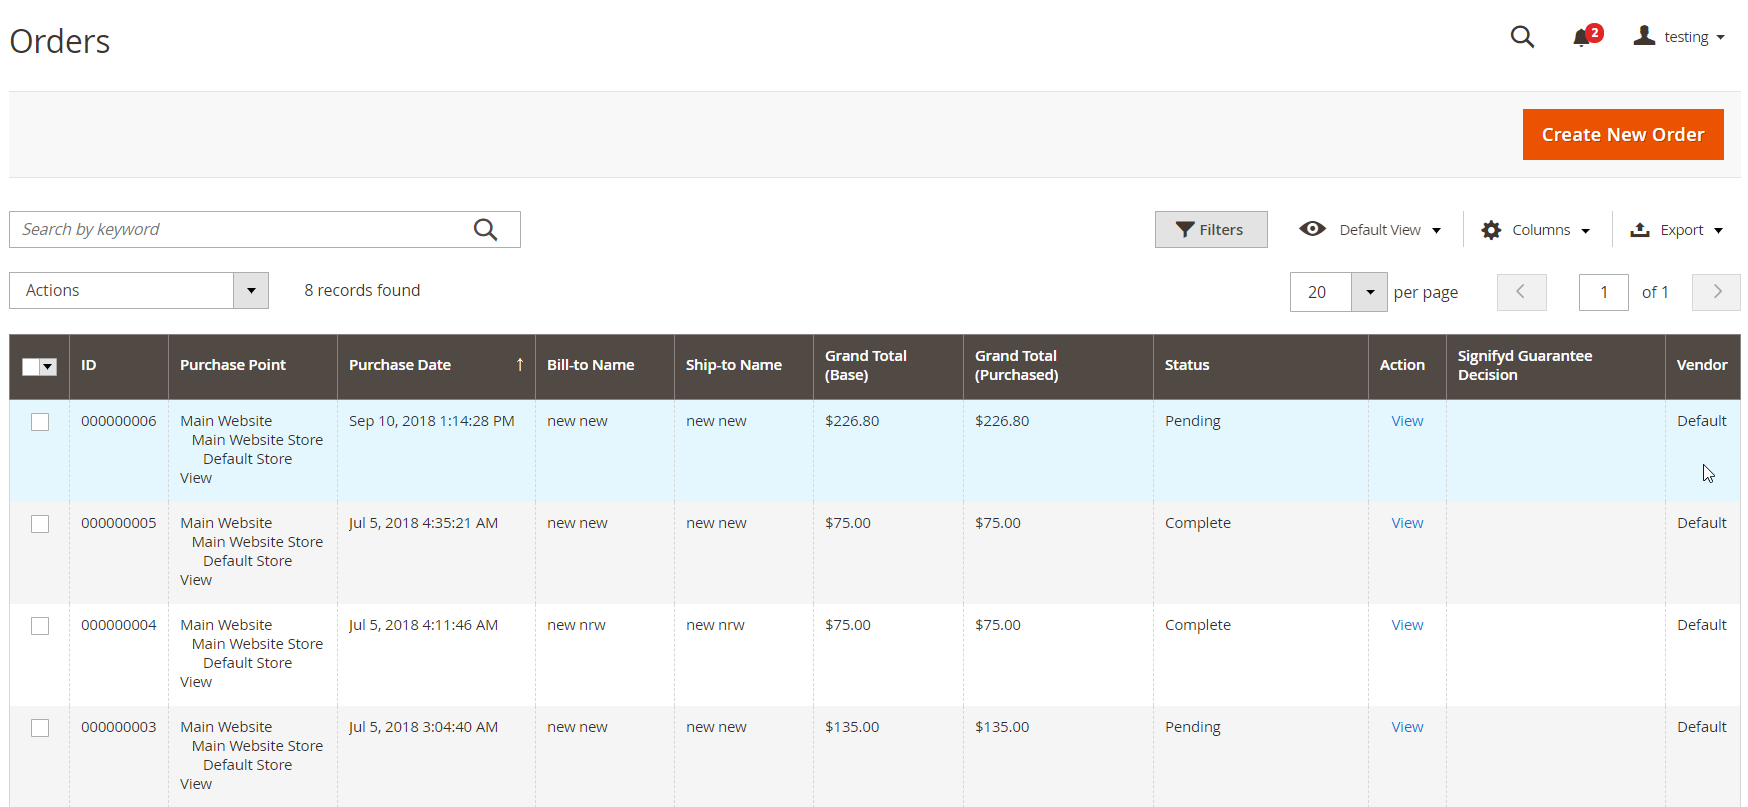
When creating a new order, you should select a relevant vendor in the drop-down menu on the left of the new order creation page. After choosing a vendor, the module will load relevant products and shipping and payment methods.
Vendor Transactions
On the Transactions screen, Magento admins can view all transactions and their details performed by a specific vendor.

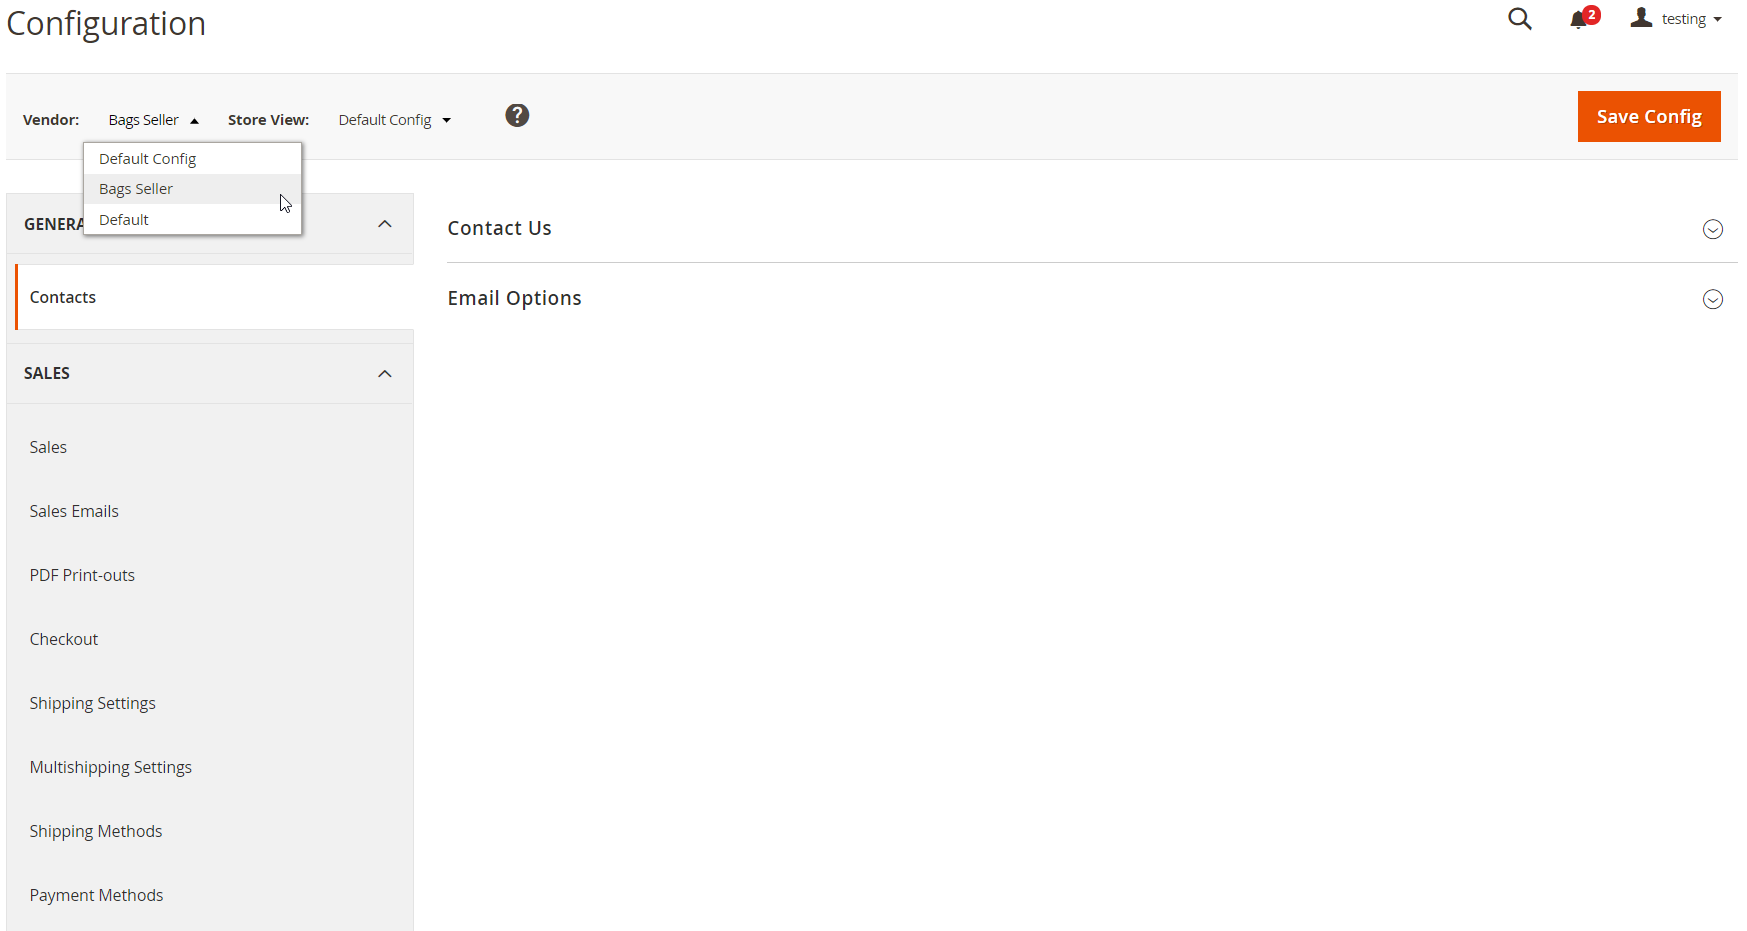
Configuration
As for the main settings of the Magento 2 marketplace module, in the Vendors tab of the Configuration page, you can allow guest visitors to leave reviews.
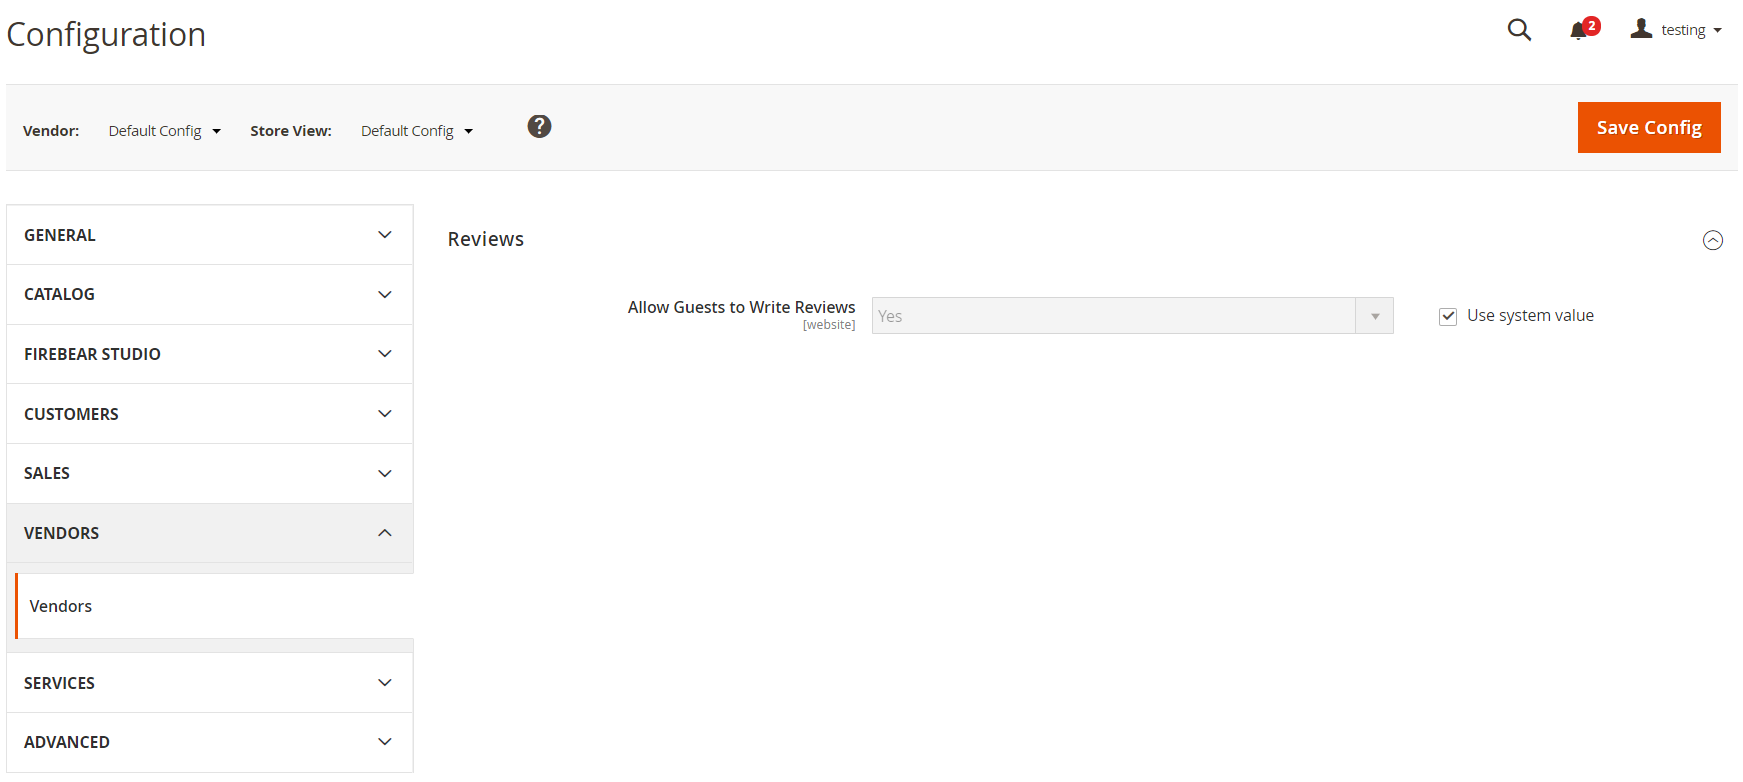
Besides, you can switch between vendors and configure all settings for each vendor separately.
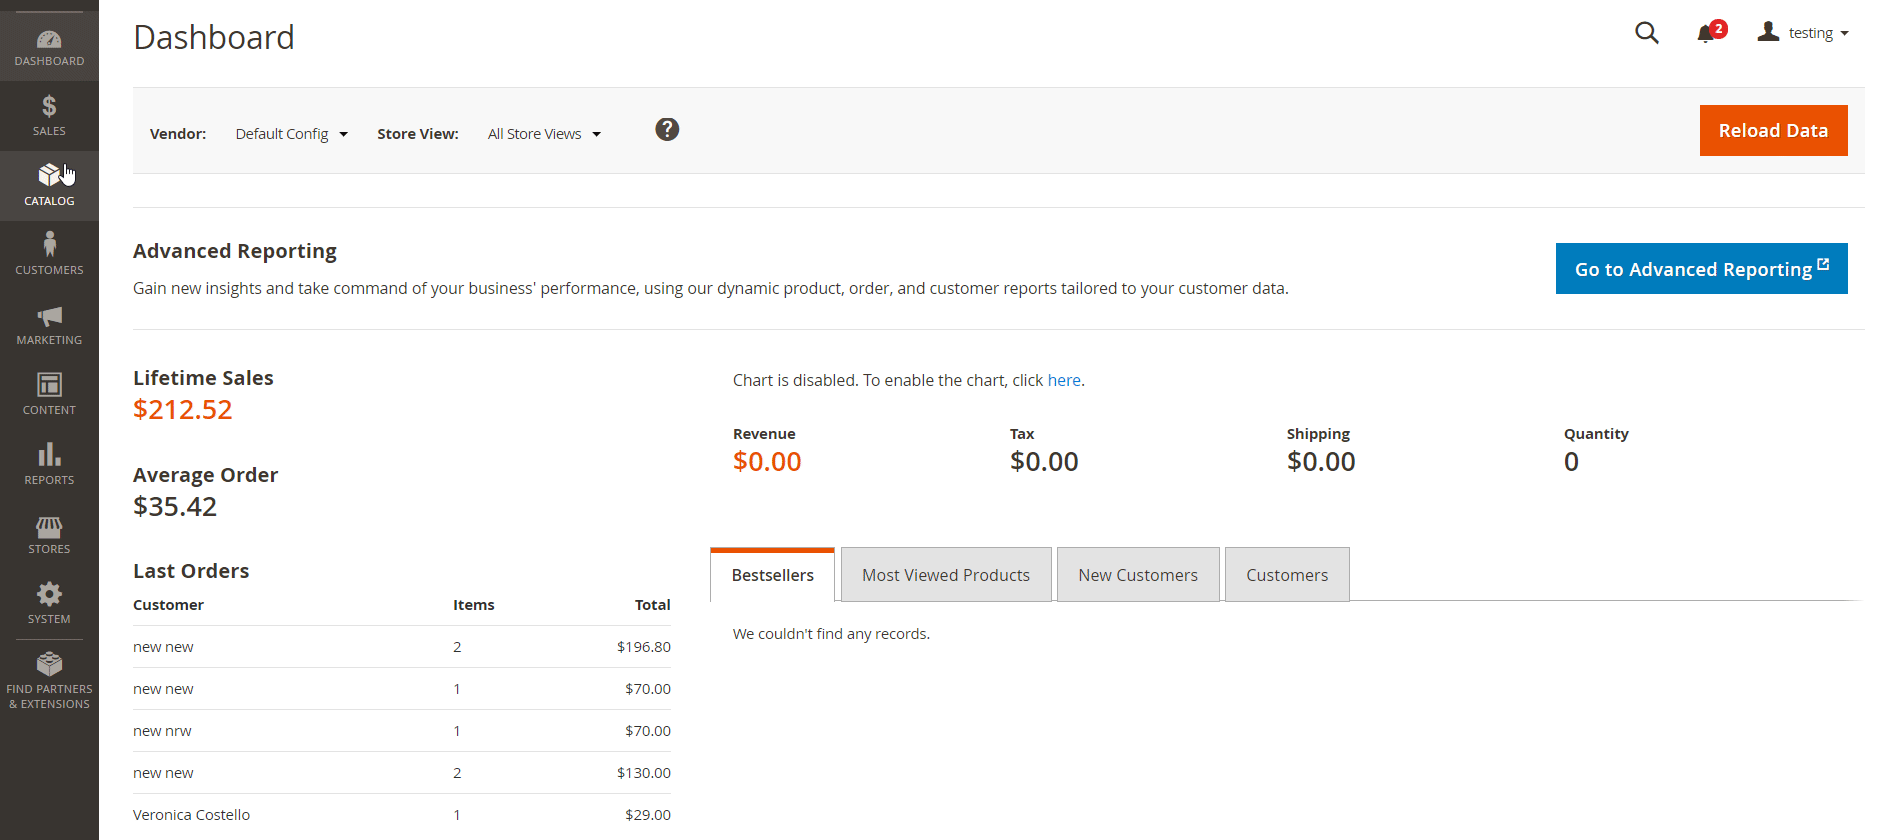
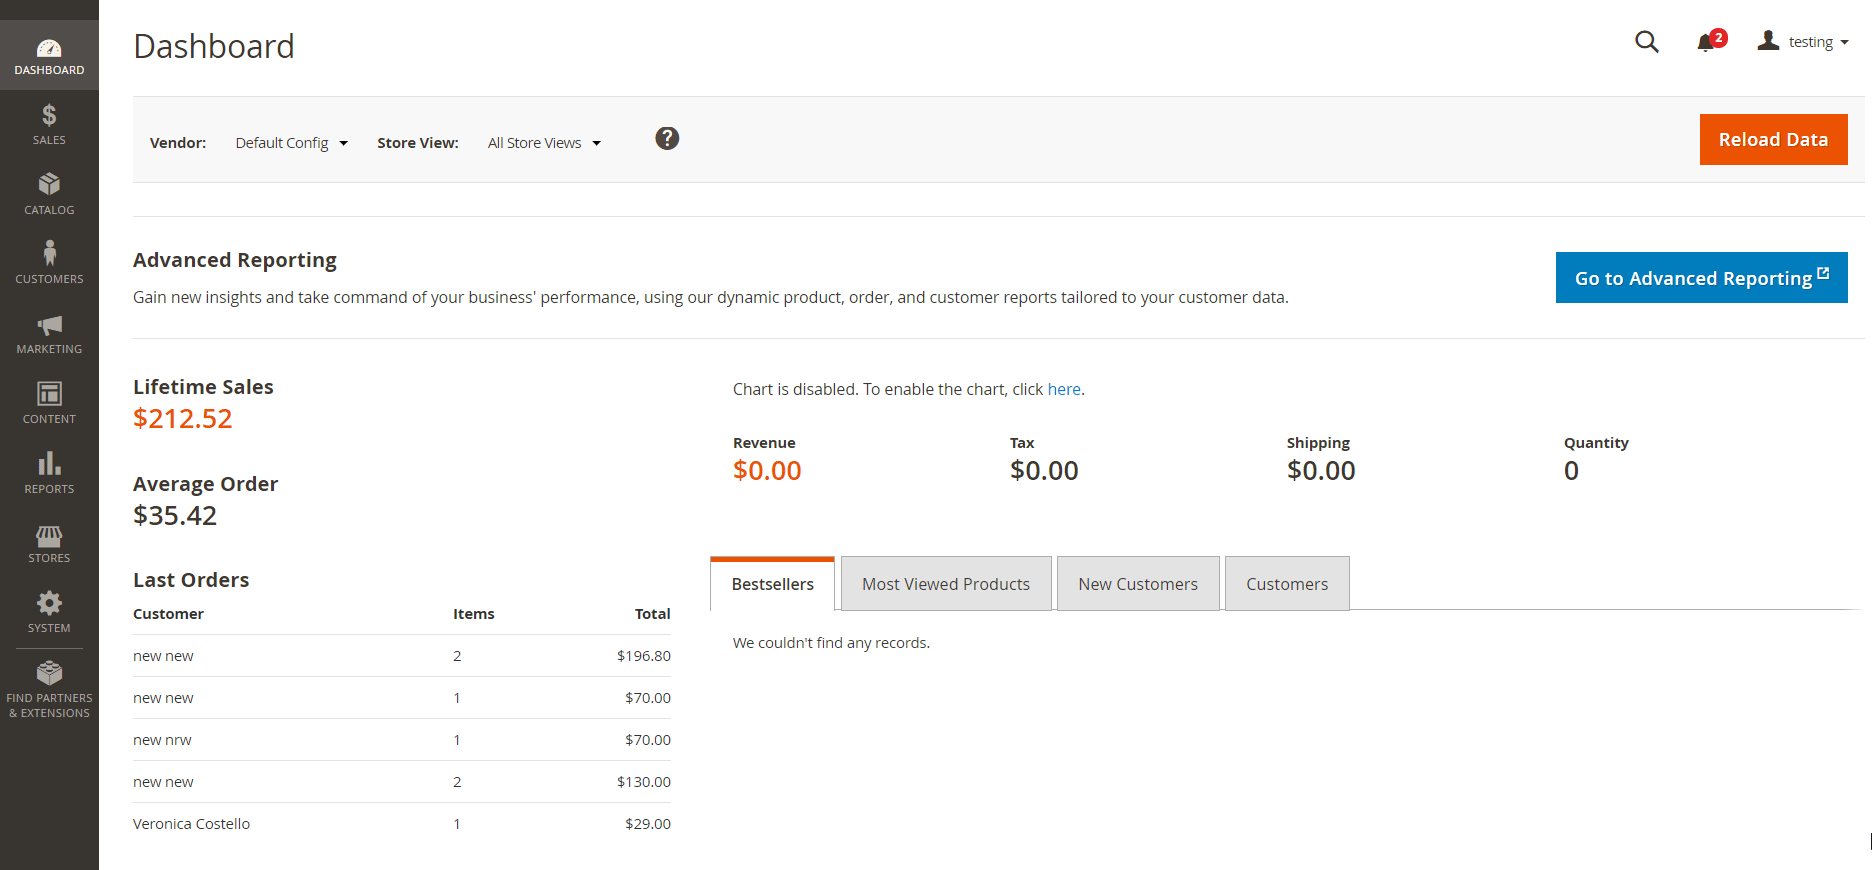
Dashboard
We also want you to pay attention to the Dashboard appearance with the Multi-Vendor Marketplace extension installed on a Magento 2 website. By selecting a specific Vendor in the menu next to Store View, you can view 3 tabs with the information related to a chosen vendor: Most Viewed Products, New Customers, and Customers. The first tab shows the most viewed products along with their prices and total views count. The New Customers and Customers tabs display customers names, orders quantity and average price, as well as total cost.
Now, when you understand how the tool works in the backend, let’s proceed to the frontend functionality of Multi-Vendor Marketplace for Magento 2.
Frontend
The module adds the Vendor layered navigation filter to the catalog.
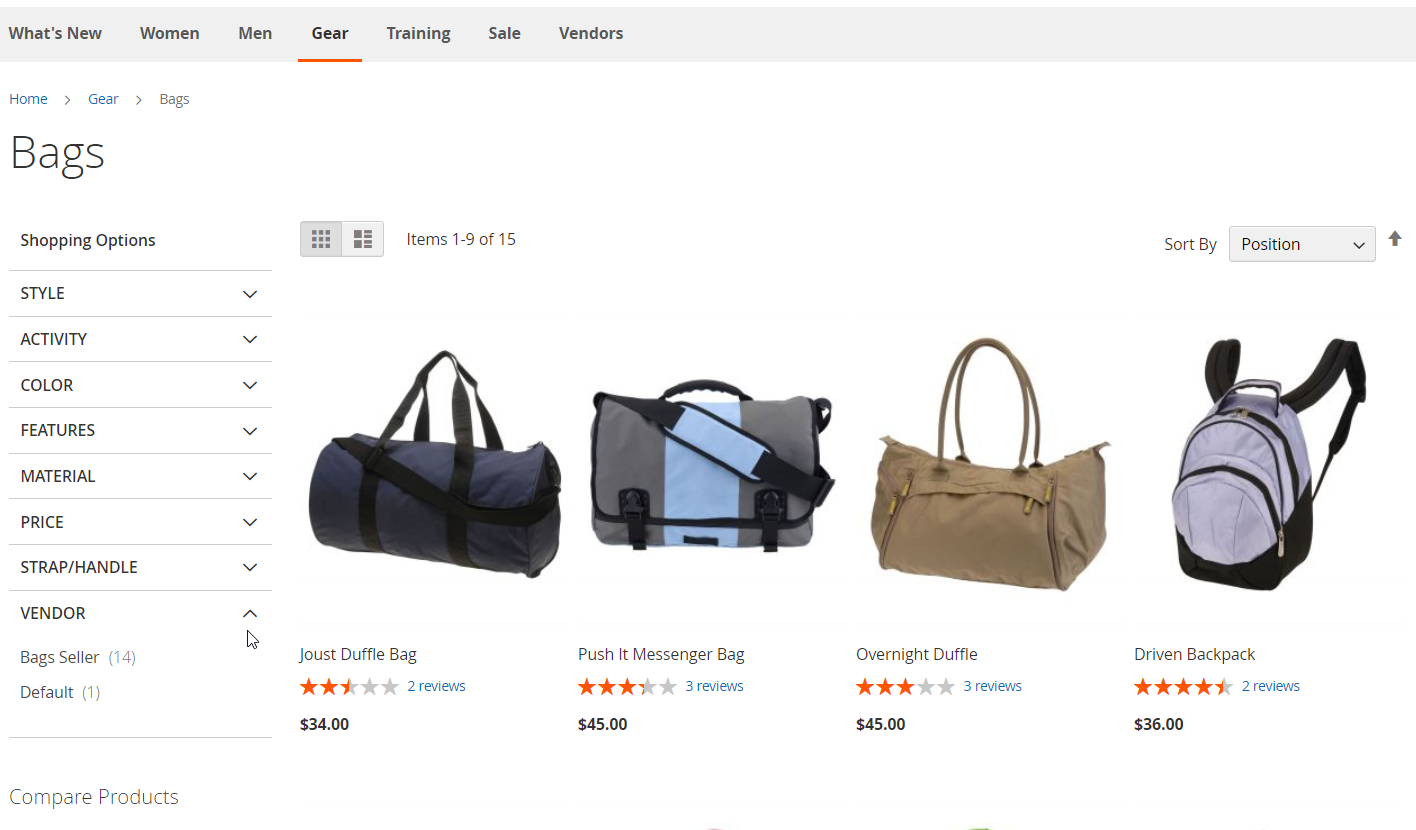
On a product page, there is information about the vendor’s name in “Sold by” under the product’s price.

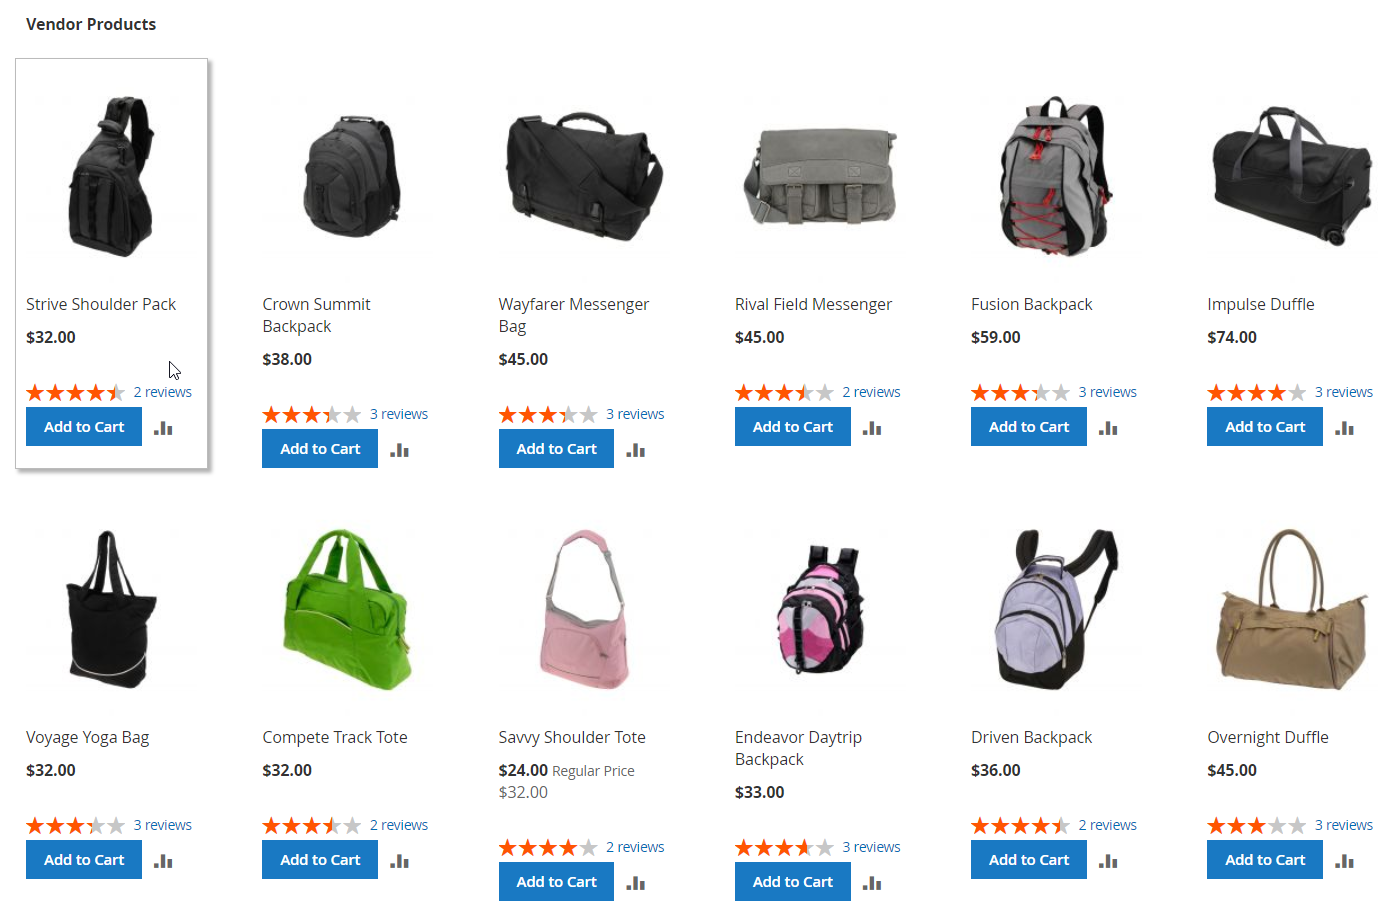
At the bottom of the product page, you can see the block with other products from the same vendor.
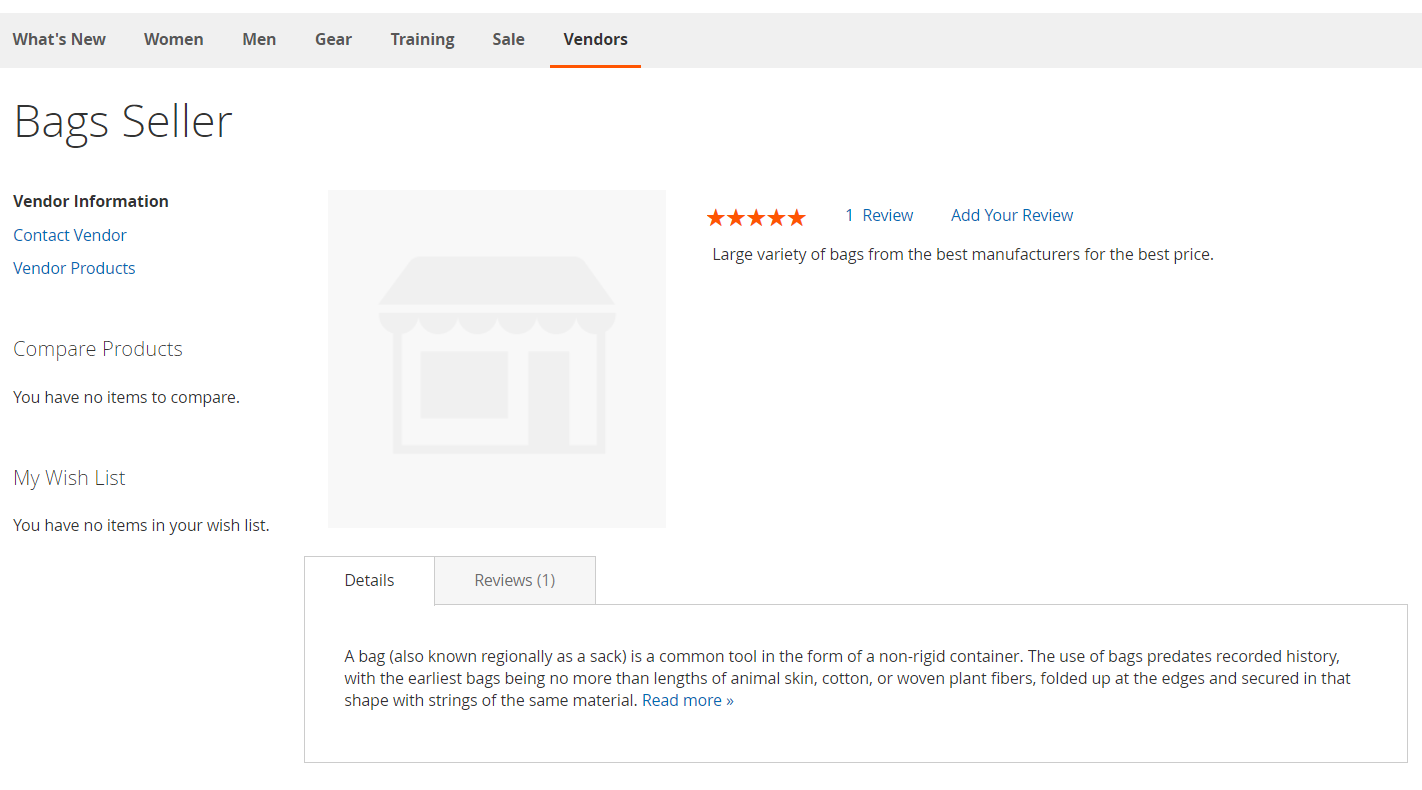
If you click on the “Sold by” link, you will open the vendor page divided into 3 tabs on the left: Vendor Information, Contact Vendor, and Vendor Products. Vendor Information shows the seller’s logo, rating, reviews, and description.
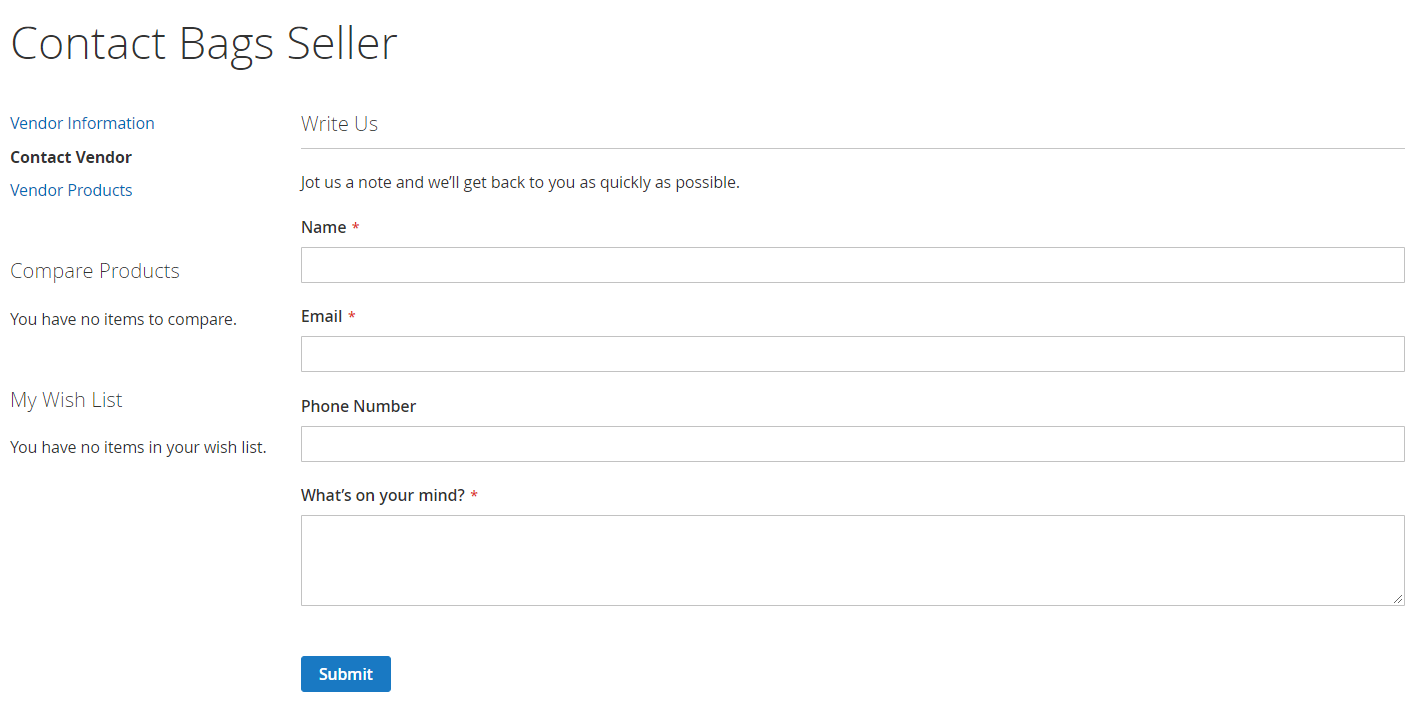
In the Contact Vendor tab, a customer can fill in the form to send a message directly to the vendor.
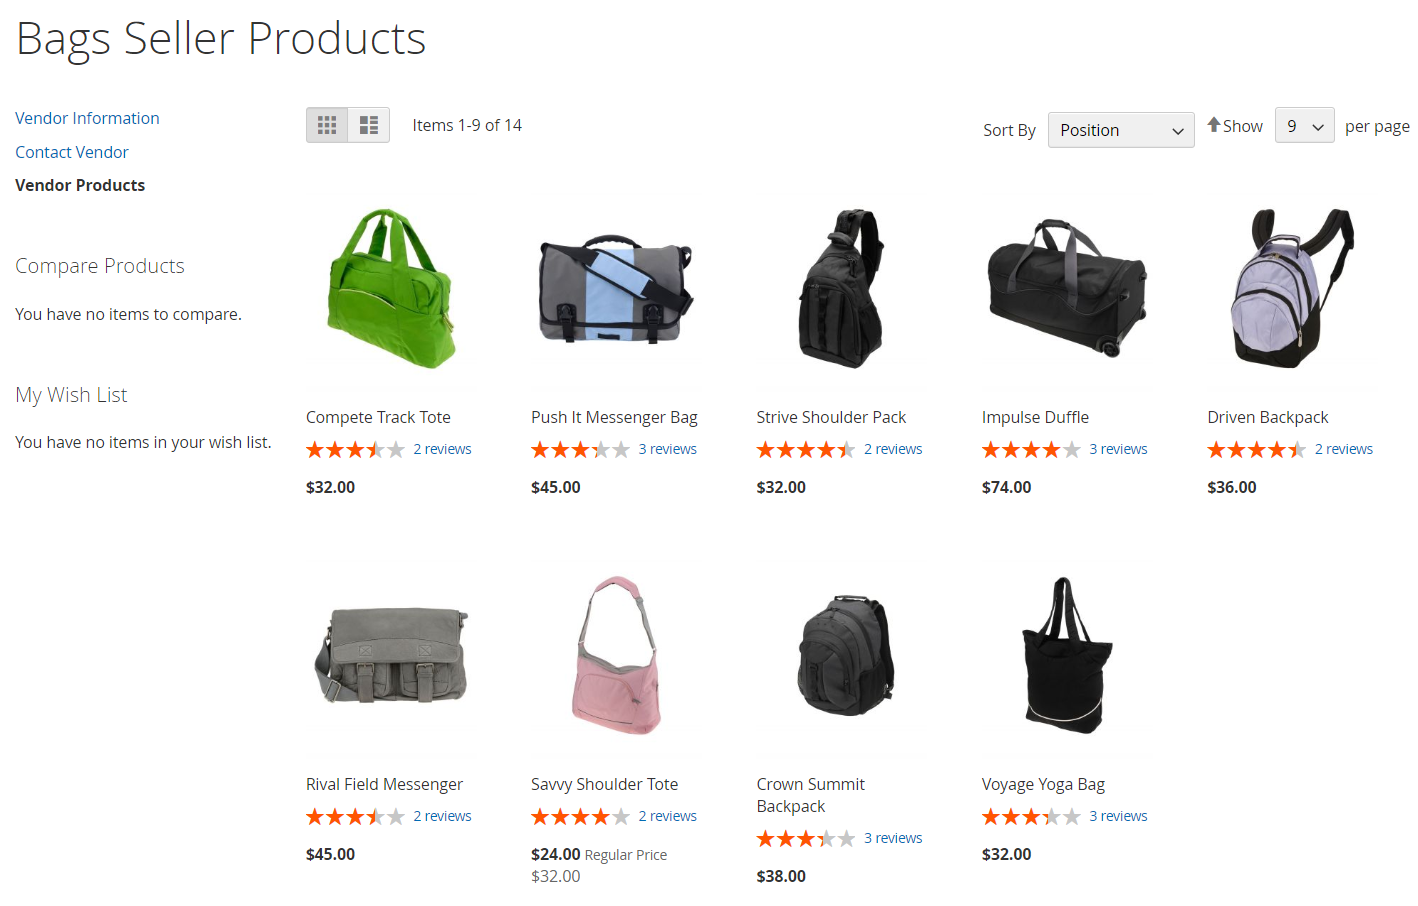
The Vendor Products tab lists all products from the seller.
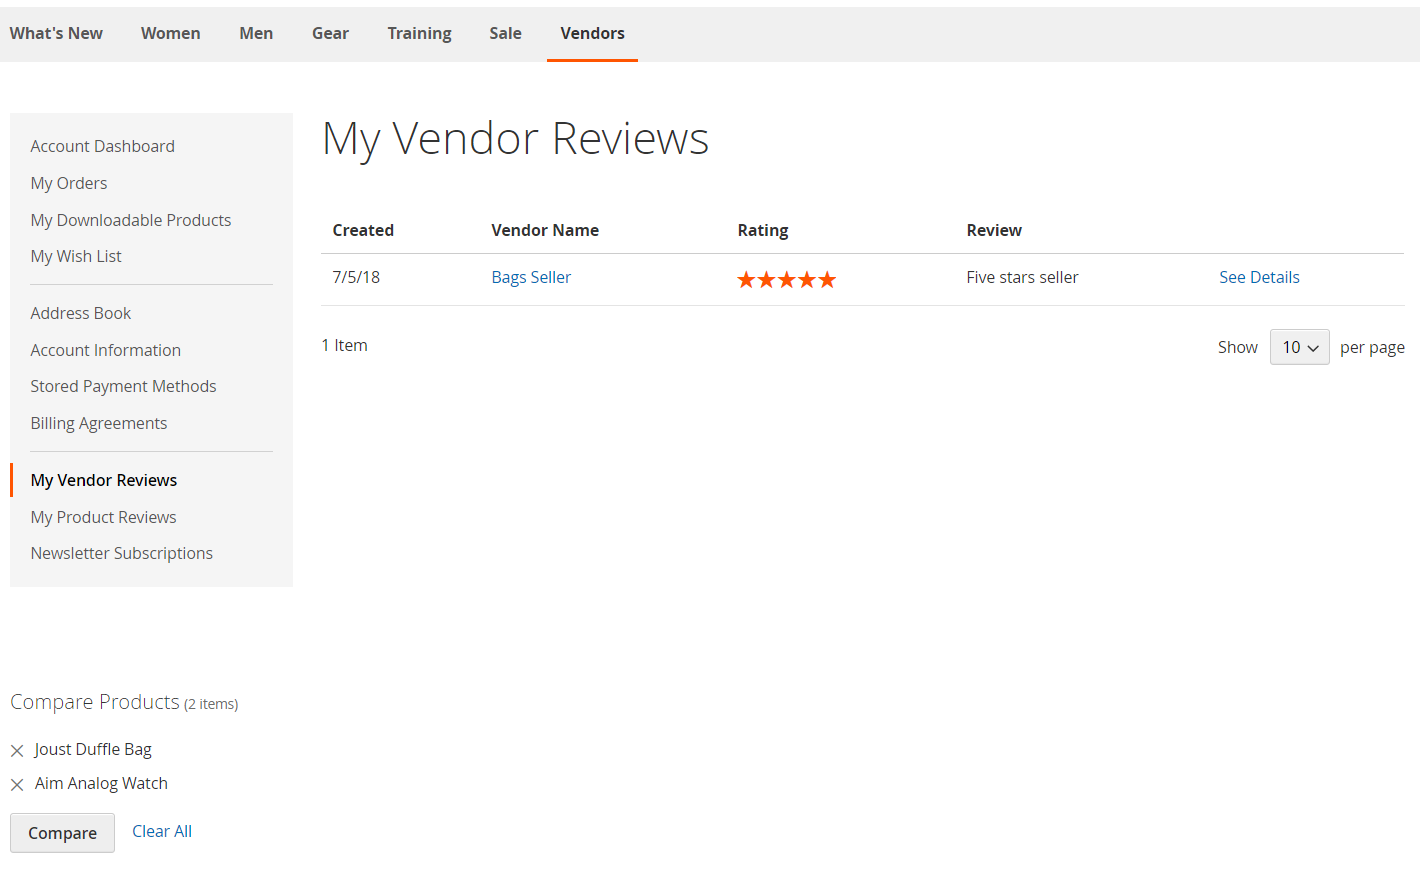
The Magento 2 multi vendor marketplace module also adds the My Vendor Reviews section to the customer account area.
Final Words
The eComBricks Multi-Vendor Marketplace Magento 2 extension is a robust tool with user-friendly settings and intuitive backend. With the module, you can easily create a marketplace convenient for usage by both sellers and customers. The Magento 2 extension costs $399, which is a reasonable price for the solution with a set of all necessary features that will save tons of your development time on building an efficient Magento 2 marketplace. For further information, follow the link below:
Related posts
 How to Import Customers & Customer Addresses to Magento 2
 Magento 2 B2B Company Guide: Revealing Company Structure & Import
 Amasty ChatGPT AI Content Generator for Magento 2
 Adobe (Magento 2) Commerce and Cloud (Enterprise Edition) Specific Features
 Magento 2 Release Notes
 Shopware 6 Advanced Pricing Guide + Import Tutorial
 CopyAI Review 2023
 Magento Open Source and Adobe Commerce 2.4.7 Release Notes