
How to Archive Files After Magento 2 CSV Import to Save Storage Space

Running frequent updates via Magento 2 CSV import is crucial for keeping your catalog, prices, and customer data current. However, every transfer has one disadvantage that you cannot eliminate. The problem is that every import leaves behind source files, quickly eating up server space. The more often you update your store, the more clutter these CSV files create, leading to wasted storage, slower performance, and messy backups.
That’s why efficient file management is just as important as the import itself. By archiving or compressing files automatically after each Magento CSV import, you not only free up storage but also keep your system organized and secure. Unfortunately, Magento doesn’t provide this functionality out of the box.
With the Improved Import & Export extension, however, you can automate archiving as part of your Magento 2 import CSV workflow. The module includes a dedicated “Archive file after import” feature that compresses processed files into ZIP archives and stores them in a structured way. This guide shows how to enable this functionality, why it matters for merchants handling bulk data updates, and how it fits into your broader Magento import CSV strategy.
👉 For more developer insights, check out our Magento 2 Developer’s Cookbook.

Table of contents
- Why Archiving Matters After Magento 2 CSV Import
- How the Improved Import & Export Extension Handles File Archiving
- How to Archive Files After Magento 2 CSV Import to Save Storage Space
- Other Advantages of Improved Import & Export Over Default Magento 2 CSV Import
- Final Words: Smarter Magento 2 CSV Import With Archiving
- FAQ: Magento 2 CSV Import and File Archiving
Why Archiving Matters After Magento 2 CSV Import
When running a Magento 2 CSV import, merchants often forget about the files that remain on the server once the job is done. Each time you upload a new CSV for products, customers, or orders, Magento processes the data but doesn’t manage the source file afterward. You may argue that one single file usually doesn’t have any considerable weight. Imagine, however, you need to run frequent updates over weeks or months.
Let’s suppose your Magento 2 website is synchronized with third-party marketplaces, ERP, CRM, and accounting systems, and so on. It becomes a central hub for updates and data sync over CSV. These files pile up, leading to bloated storage, slower performance, and even failed imports if the server runs out of space.
The problem is more than just clutter. Without proper archiving, file uploads become chaotic, with duplicate CSVs scattered across directories. This makes it harder to track which file corresponds to which update and increases the risk of overwriting critical data. For stores running frequent Magento imports via CSV, the issue escalates quickly, turning what should be a streamlined process into a maintenance headache.
Security is another overlooked risk. Old files often contain sensitive product, customer, or order information. Leaving them unprotected on the server exposes your store to unnecessary vulnerabilities. But implementing automatic file compression and archiving after each Magento CSV import not only lets you gain storage optimization and enable stronger data backup practices, but also achieve a more secure environment.
As you can see, archiving is not just about saving disk space. It’s about keeping your Magento 2 import CSV workflows efficient, safe, and fully aligned with best practices for modern e-commerce.
How the Improved Import & Export Extension Handles File Archiving
When Magento 2 doesn’t provide a specific import or export functionality, the Improved Import & Export extension enters the game. And the situation with archiving files after import is not nan exception. Our module solves this with a dedicated feature called “Archive file after import”. When it is enabled, the extension automatically compresses each processed file into a ZIP archive as soon as the import is complete. The original CSV is replaced with its compressed version, ensuring your server doesn’t fill up with bulky items while still preserving data for future reference.
What makes this even more powerful is flexibility. You can archive not only Magento import CSV files but also other file types that contain updates. Furthermore, it is possible to compress data that you upload manually or transfer from remote destinations like FTP/SFTP, Dropbox, or Google Drive. This kind of automated file management keeps your workflow clean and ensures backups are always organized and accessible.
Combined with scheduling, the extension turns archiving into a seamless part of your Magento 2 import automation. Now, you no longer need to keep in mind the necessity to clean up after each upload. Instead, rely on the module to handle everything in the background. For merchants managing large catalogs or frequent updates, this means fewer errors, faster performance, and peace of mind knowing that every Magento CSV import is followed by structured archiving.
In contrast, Magento’s default importer leaves files unmanaged, risking storage bloat and lost efficiency. With the Improved Import & Export extension, you gain compressed CSV storage and a fully automated workflow with a smarter way to archive Magento import files.
How to Archive Files After Magento 2 CSV Import to Save Storage Space
With the Improved Import & Export extension, the entire process of running a Magento 2 CSV import and archiving files afterward is reduced to just a few clicks. You only need to set up a basic import profile and enable the “Archive file after import” option. It lets the system handle file compression automatically.
Here’s how to configure it step by step:
- Create a new import job. Go to System → Improved Import/Export → Import Jobs and click Add New Job to start setting up your profile.
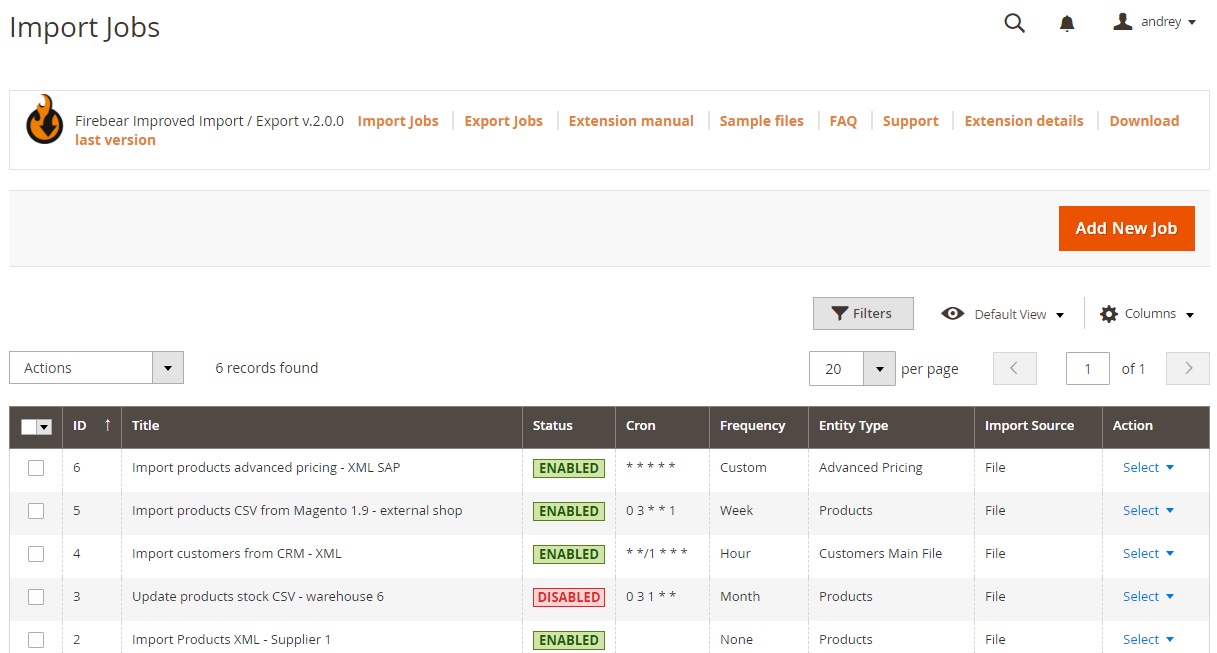
- Adjust General Settings. Enable the job, give it a descriptive title, and configure the update frequency. Scheduling is key if you regularly update product data or other entities, since archived files help keep your storage optimized.

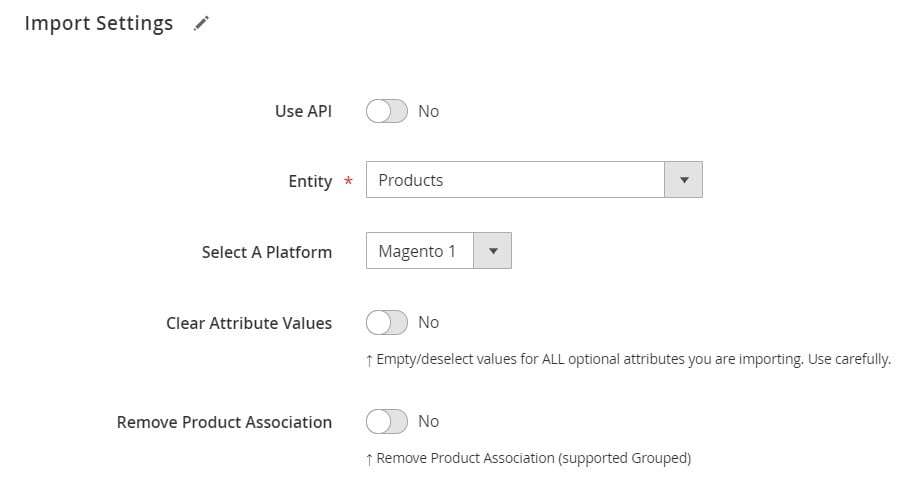
- Select the import entity. In the Import Settings tab, choose whether you’re importing products, customers, orders, or another entity. Configure additional settings depending on your workflow.
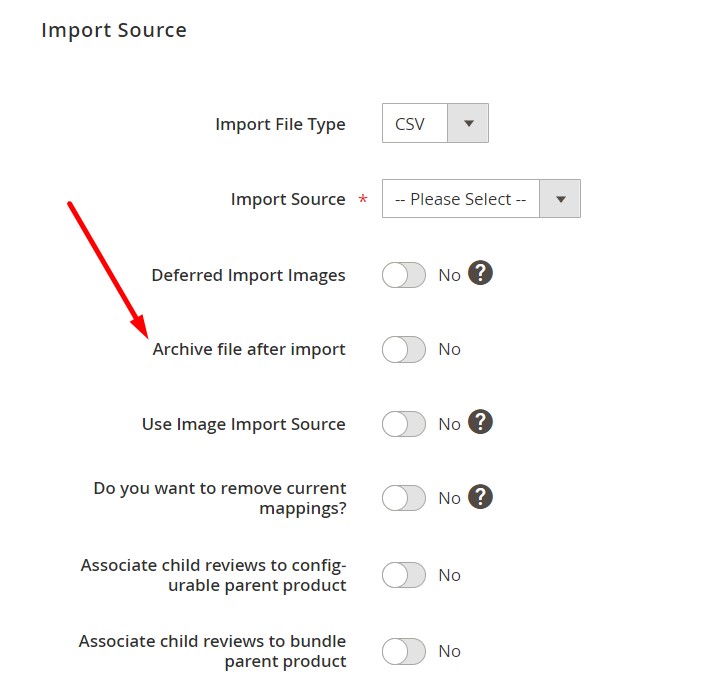
- Enable archiving. Switch to the Import Source tab. Locate the “Archive file after import” option and turn it on. This ensures every imported file will be compressed into a ZIP archive once processing is complete.
- Finalize and run the job. Configure the remaining parameters, save your import job, and run it. From now on, every Magento CSV import you execute with this job will automatically create an archived version of the processed file, keeping your system clean and organized.
For a deeper look into product imports, check out our full guide: The Complete Guide to Magento 2 Product Import.
Other Advantages of Improved Import & Export Over Default Magento 2 CSV Import
Post-import file compression is just one benefit of the Improved Import & Export extension. In fact, the module completely redefines how merchants handle data in Magento 2, going far beyond the limitations of the default importer. Let’s look at the key advantages.
Work With Multiple File Formats
By default, Magento 2 only supports CSV files. That means if your supplier provides data in XML, JSON, XLSX, or ODS, you need to manually convert it before uploading. With Improved Import & Export, you can skip this step entirely. The extension supports all major formats natively and can even process compressed archives. This makes every Magento 2 CSV import or alternative file type import faster and more flexible.
Access Files From Any Source
Magento’s built-in importer only works with direct uploads. In contrast, Improved Import & Export lets you pull files directly from multiple sources, including:
- Google Drive
- Dropbox
- Direct URLs
- FTP/SFTP servers
- Or even Google Sheets

The last option is particularly useful — instead of preparing a CSV file, you can use Google Sheets as a live data source for your Magento import CSV jobs.
API and System Integrations
Many merchants rely on third-party services to connect Magento 2 with ERP, CRM, or PIM systems. With Improved Import & Export, that extra layer isn’t needed. The extension offers direct API support, allowing you to set up real-time data transfers between Magento and external systems. This ensures smoother Magento CSV import workflows and less dependency on manual file handling.
Automated Scheduling
Every import and export profile can be scheduled to run automatically. Whether you’re updating products, customers, or orders, you can configure Magento 2 import CSV jobs to run daily, weekly, or at custom intervals. This automation eliminates repetitive manual uploads and ensures your store always stays in sync with supplier or internal data updates.
Final Words: Smarter Magento 2 CSV Import With Archiving
As we’ve already mentioned, efficient data management is critical for any Magento 2 store, and that extends beyond simply uploading files in a particular order. Every Magento 2 CSV import creates source files that, if left unmanaged, can waste storage, slow down performance, and complicate backups. However, everything may be different if you run updates with the help of the Improved Import & Export extension. Enable automatic file compression, and you will gain a cleaner, safer, and more efficient workflow.
Unlike Magento’s default tools, the extension not only archives and compresses files after each Magento CSV import but also enhances the entire import and export process. With support for multiple file formats, cloud storage integrations, direct API connections, and automated scheduling, it transforms how you can handle data at scale. Whether you’re running a simple Magento import job with a CSV or managing large, recurring updates, Improved Import & Export ensures your workflows remain streamlined and resource-efficient.
If you’re serious about optimizing your Magento 2 CSV import processes, saving storage space, and reducing manual work, this extension is the solution you need.
👉 Get Improved Import & Export Magento 2 Extension
👉 Contact Us for a personalized consultation
👉 Explore the Improved Import & Export Manual for detailed setup instructions
Take full control of your Magento 2 CSV imports today — and let automation handle the heavy lifting while you focus on growing your business.
FAQ: Magento 2 CSV Import and File Archiving
Can Magento 2 archive CSV files after import by default?
No, Magento 2 doesn’t provide built-in tools to archive CSV files after import. You need an extension like Improved Import & Export to automatically compress and store processed files.
Why should I archive files after a Magento 2 CSV import?
Archiving files reduces server storage usage, keeps backups organized, improves performance, and prevents duplicate uploads. It’s a best practice for efficient Magento import CSV workflows.
What formats are supported for Magento CSV import with Improved Import & Export?
In addition to CSV, the extension supports XML, JSON, XLSX, and ODS formats. You can also import compressed archives, eliminating the need for manual file conversions.
Can I schedule Magento 2 CSV import jobs with automatic archiving?
Yes. The Improved Import & Export extension lets you schedule recurring import jobs. Each job can automatically compress and archive files after execution, saving time and storage space.
Does Magento CSV import support Google Sheets as a source?
By default, Magento does not. But with Improved Import & Export, you can import data directly from Google Sheets and still enable file archiving for other sources like FTP or direct uploads.
Where can archived Magento import CSV files be stored?
Archived files remain on your local server.
Can I import products and product images separately with file archiving enabled?
Yes. You can import products and product images separately in Magento 2 with the “Deferred Import Images” setting enabled. The job can have the Archive file after import option enabled for compressed CSV storage.
How does archiving improve Magento 2 import automation?
Archiving ensures that every Magento 2 import CSV workflow ends with clean, compressed storage. This prevents clutter, secures sensitive data, and aligns with fully automated import processes.
What happens to the original CSV file after archiving?
When the Archive file after import option is enabled, the original CSV file is replaced by its compressed version (ZIP or TAR). This keeps storage optimized without losing access to data.
What is the best way to manage Magento 2 CSV import at scale?
Using Improved Import & Export is the most reliable method. It combines advanced features like archiving, multiple file format support, cloud integrations, API connections, and automation to streamline all Magento CSV import workflows.